Download Sample Images
description
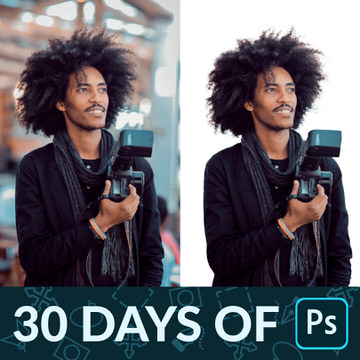
The Pen Tool is great at making clean selections and cutouts, but it can be tricky to learn. Follow along as we break down all of the essential features and keyboard shortcuts that will help you create perfect paths and beautiful Bézier curves in Photoshop!
Share


PERFECT SELECTIONS WITH THE PEN TOOL
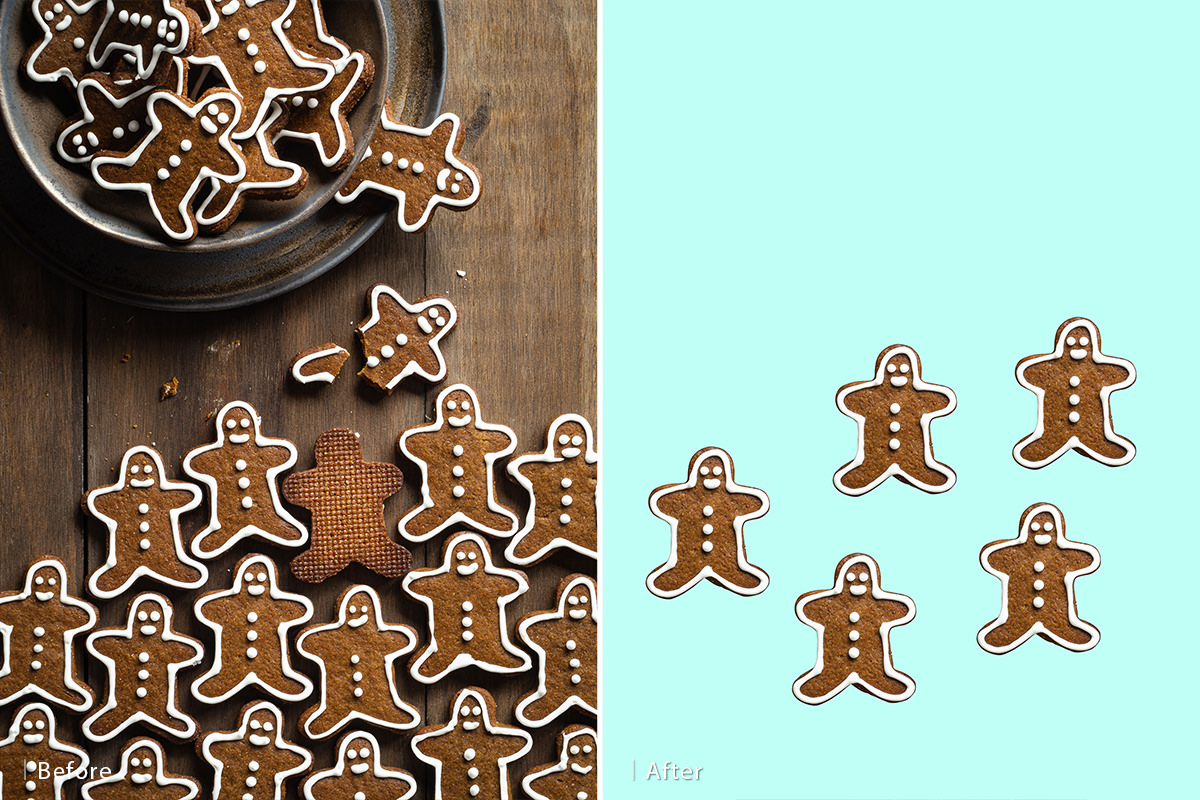
BEFORE
Pen Tool Keyboard Shortcuts
What is the Pen Tool?
The Pen Tool is hands-down the most accurate way to make selections in Photoshop. It’s ideal for any situation where you need to follow or recreate the contours of any object with a solid edge. From editing portraits, to product photography, to graphic design, the applications are limitless.
Any time you use the Pen Tool, it will save your points as a new Path which you can always return to to make any changes. This allows you to create a selection that can continue to refine as you edit.
Getting Started with the Pen Tool
You can select the Pen Tool by hitting the P key. We recommend adjusting a couple of settings to make the overall experience of using the Pen Tool a little bit smoother. With the Pen Tool active, click on the gear icon on the right side of the top toolbar.

You can customize the thickness and color of the paths you create. We suggest using a thickness of 3 pixels. This will make it much easier to see your path as you trace around objects in a photo.
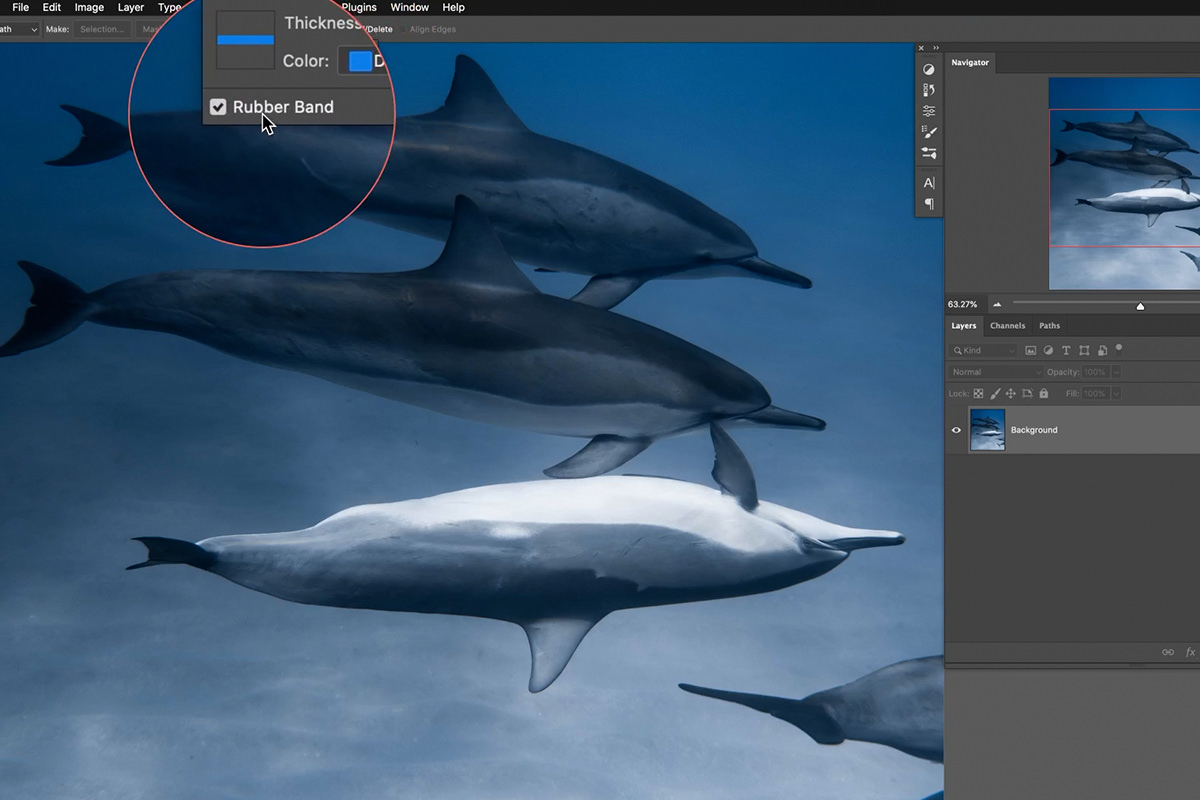
We also recommend checking the Rubber Band option. This will toggle a preview of any paths before you create them.
Pen Tool Shortcuts
Here’s a quick summary of the main Pen Tool keyboard shortcuts:
- P Use the Pen Tool
- CTRL / CMD Use the Direct Selection Tool.
- ALT / OPTN Use the Convert Anchor Point Tool.
- + Use the Add Anchor Point Tool.
- – Use the Remove Anchor Point Tool.
Now let’s look at how you can use these shortcuts to create an accurate path around an object in a photo.
Tracing Objects with the Pen Tool.
The basics of the Pen Tool are pretty easy to grasp. Simply click anywhere around the edge of the object you’re tracing to create the first point of the path. Then click along the edge a little further down to create a second point. Photoshop will automatically create a straight line connecting those two points.
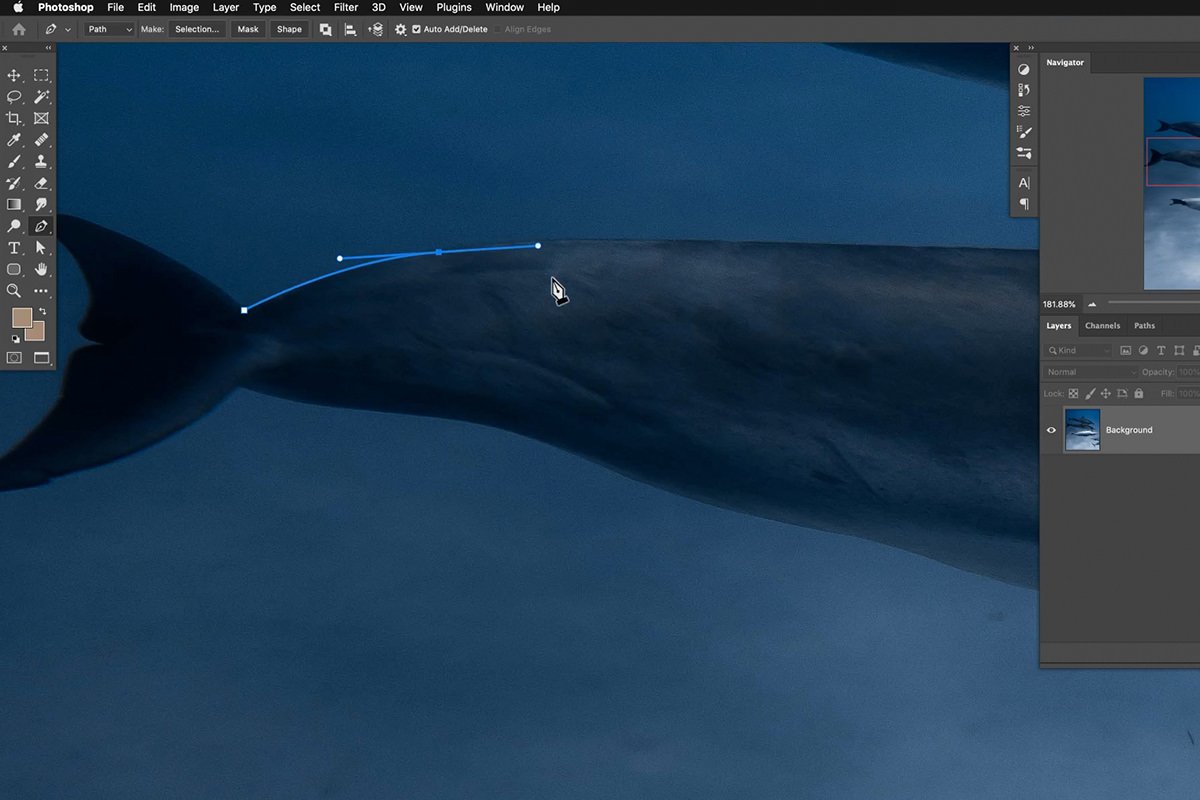
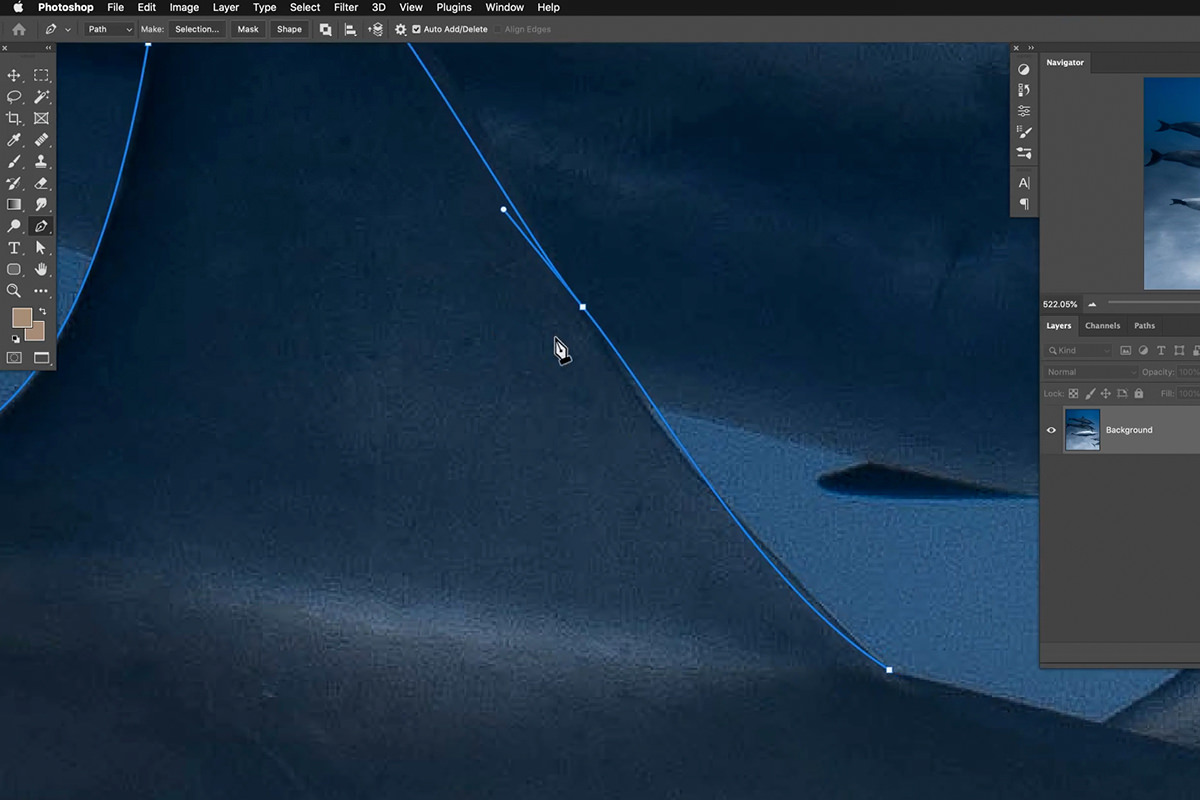
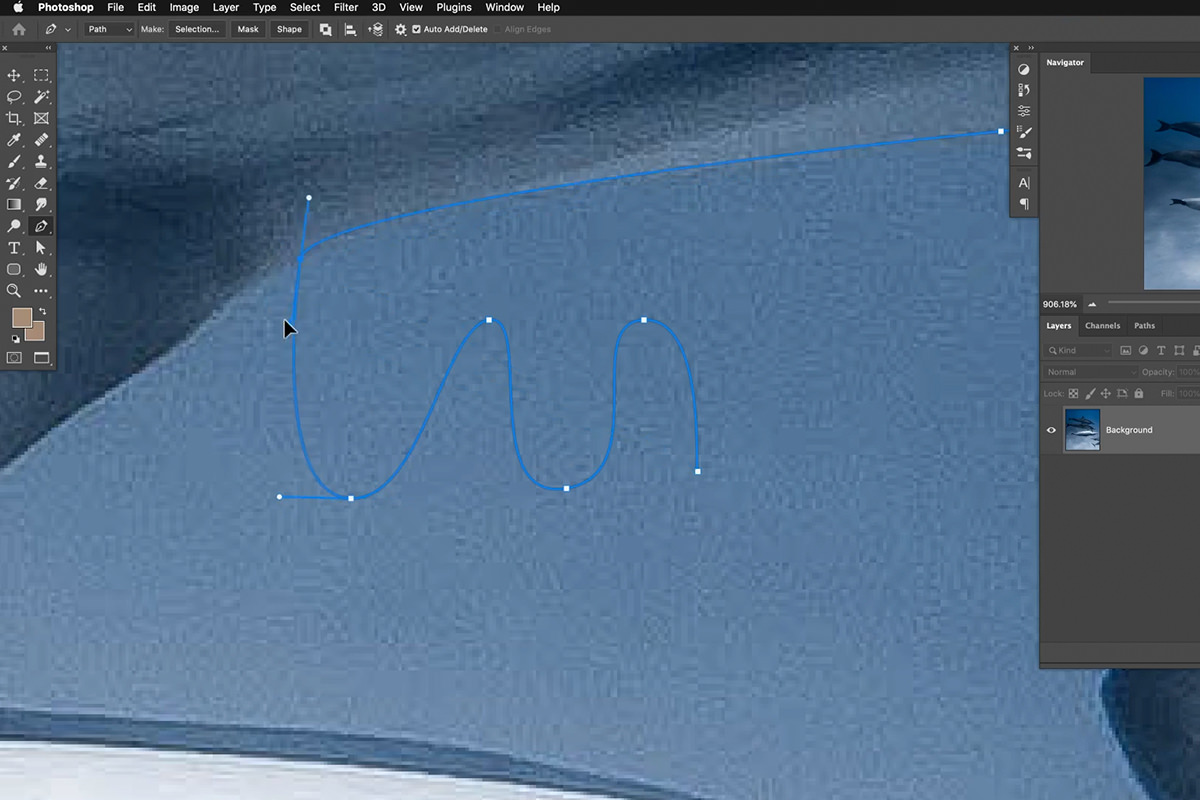
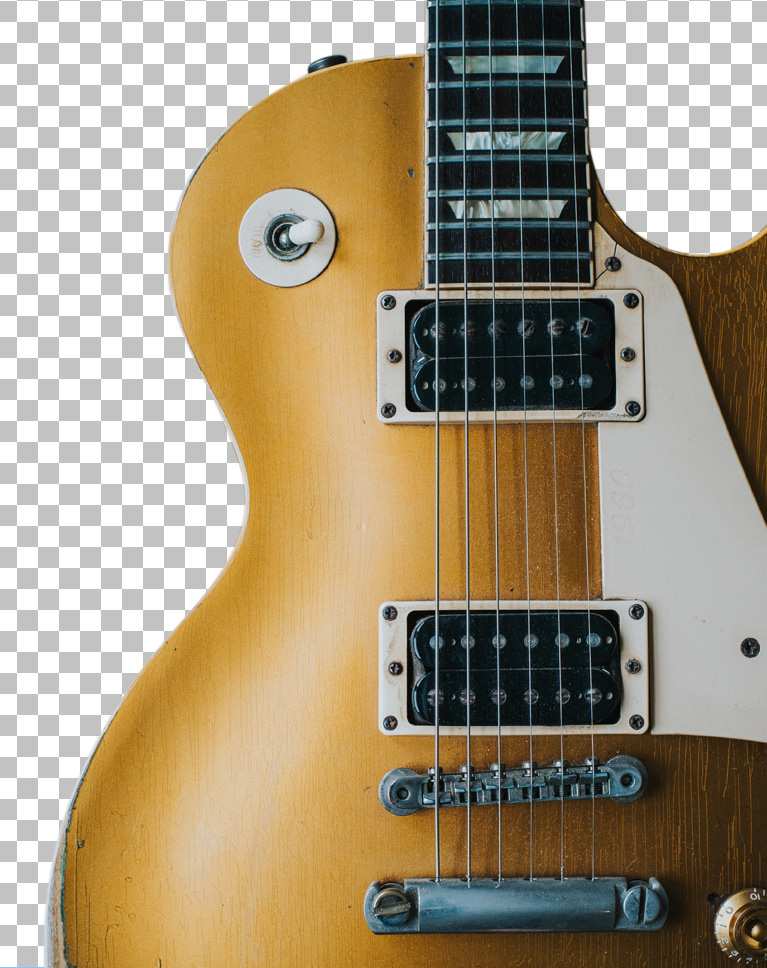
In our example image, there aren’t many straight lines around our subject, so we’ll be relying heavily on creating curves to get an accurate selection. So how do we get a curve instead of a straight line? Create the first point of the path again. Then, create the second point, but instead of just clicking, click and drag to create a curve and then adjust it until it fits the contours of the edge.
And that’s it! That’s the basics of the Pen Tool. But as you trace around the dolphin, you’ll likely run into situations where you missed the edge, or a curve isn’t perfectly smooth. That’s where our handy keyboard shortcuts come in!
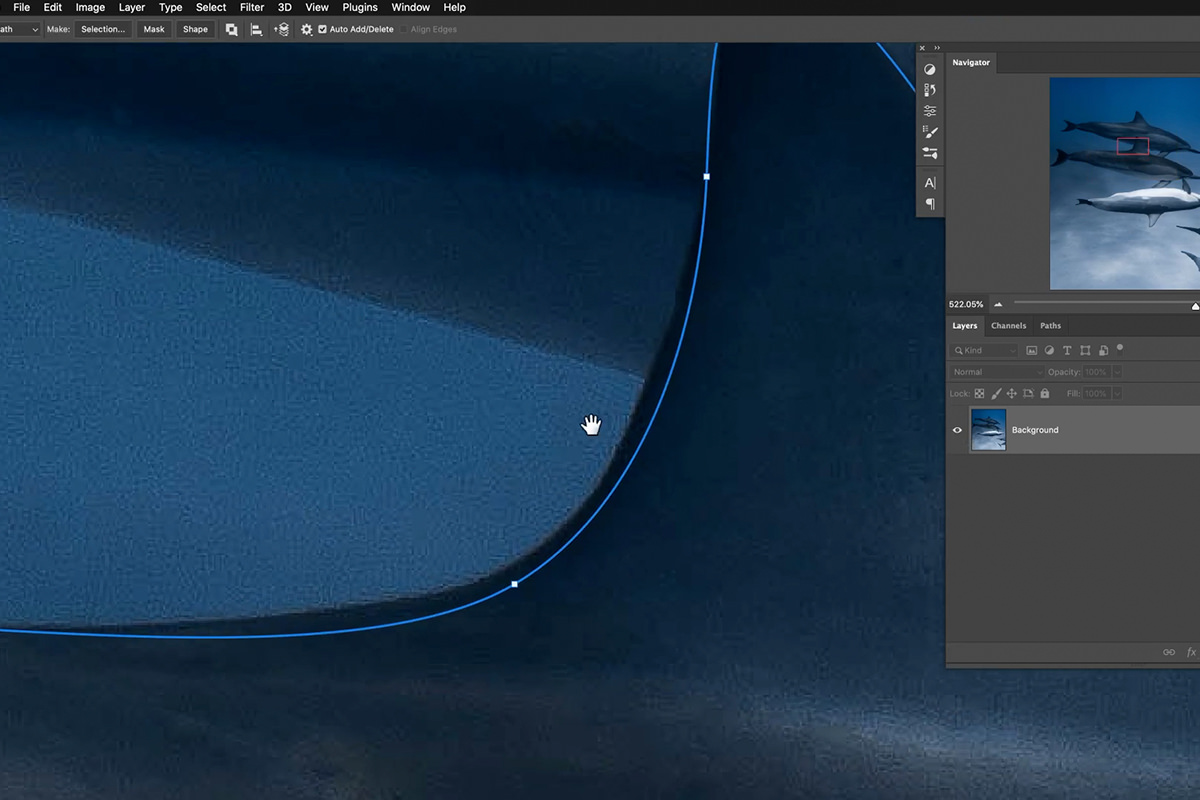
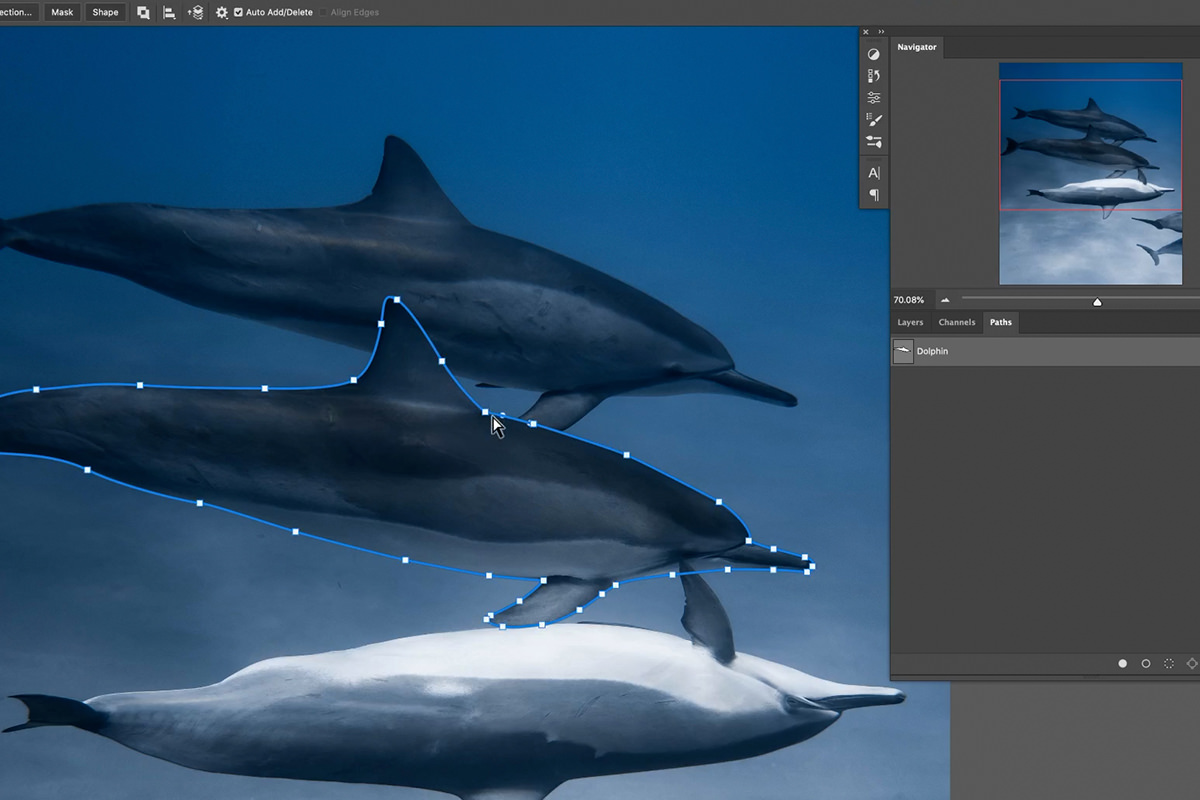
For example, take this portion of the path where we missed the edge of the dolphin. By holding CTRL or CMD and clicking on an anchor point, we can move that anchor point to adjust the position of the path.
Note that the cursor will change when the Direct Selection Tool is toggled.
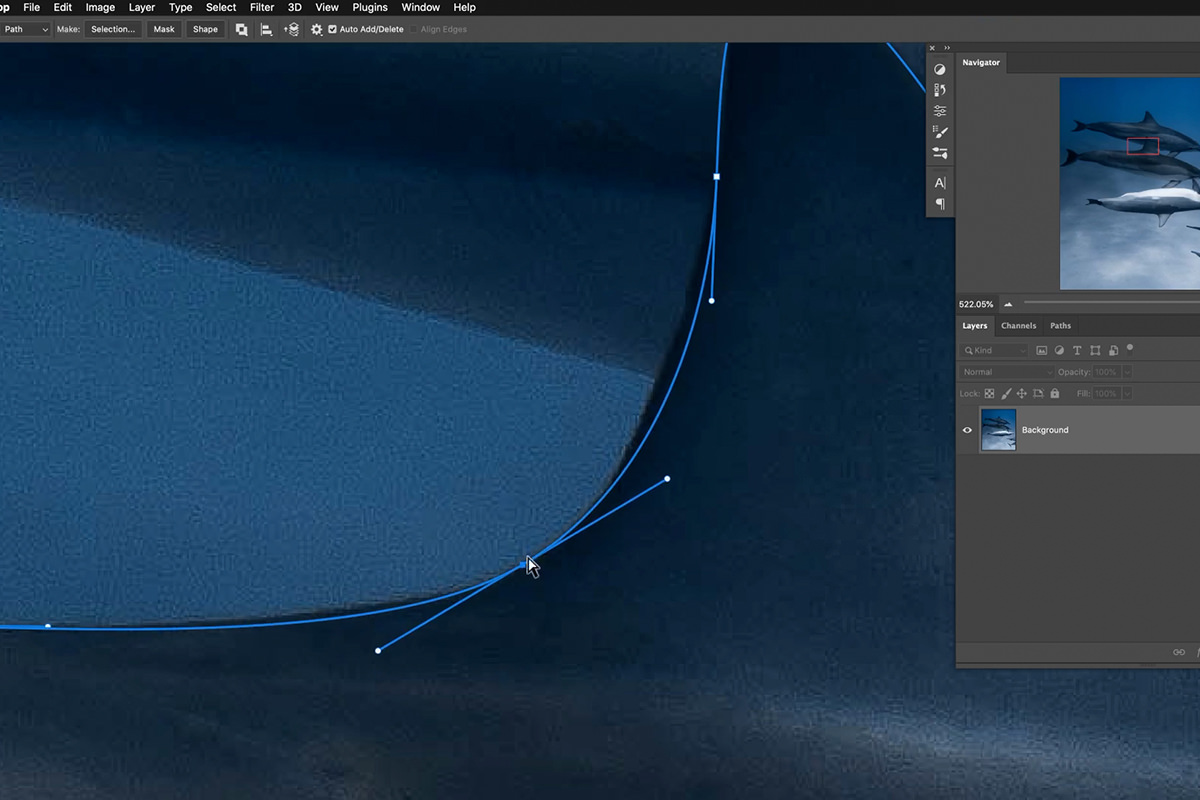
The Direct Selection Tool can also help us to further refine any curves that might be a little of target.
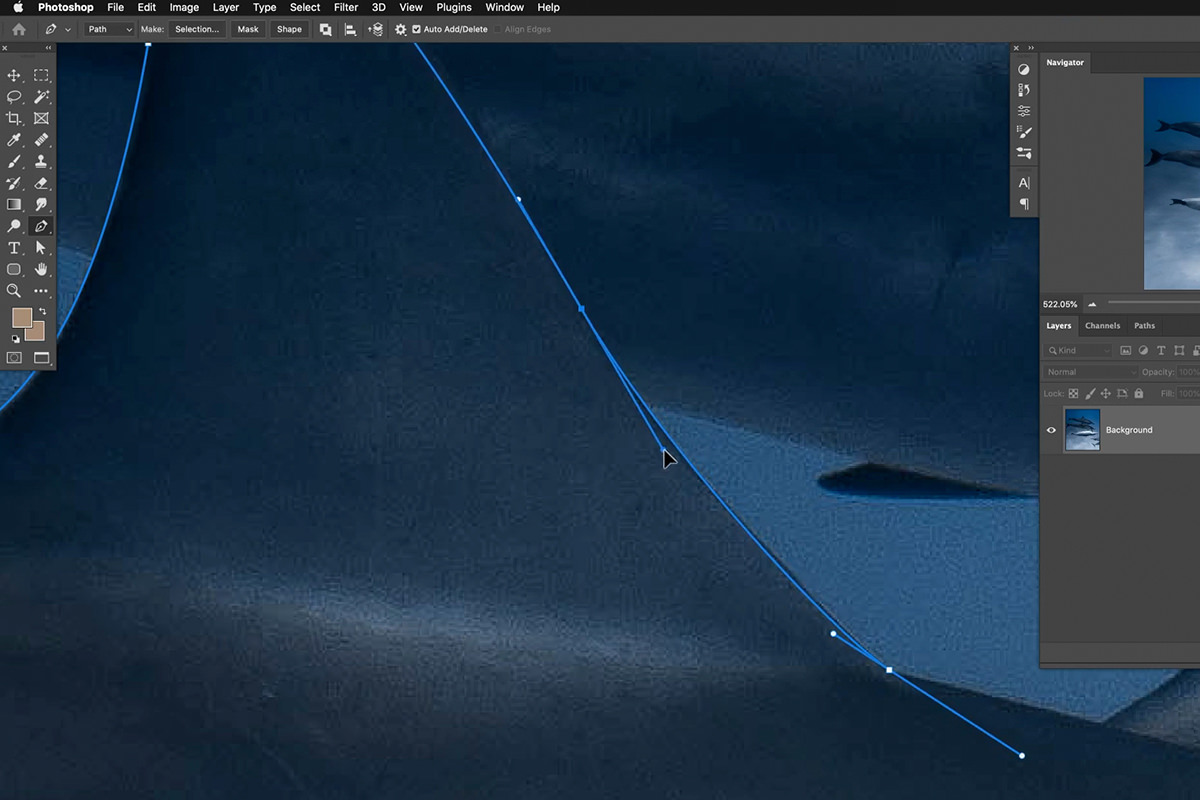
Hold CTRL or CMD and click and drag a point on any direction line. Moving these control points will adjust the shape of the connected paths and curves.
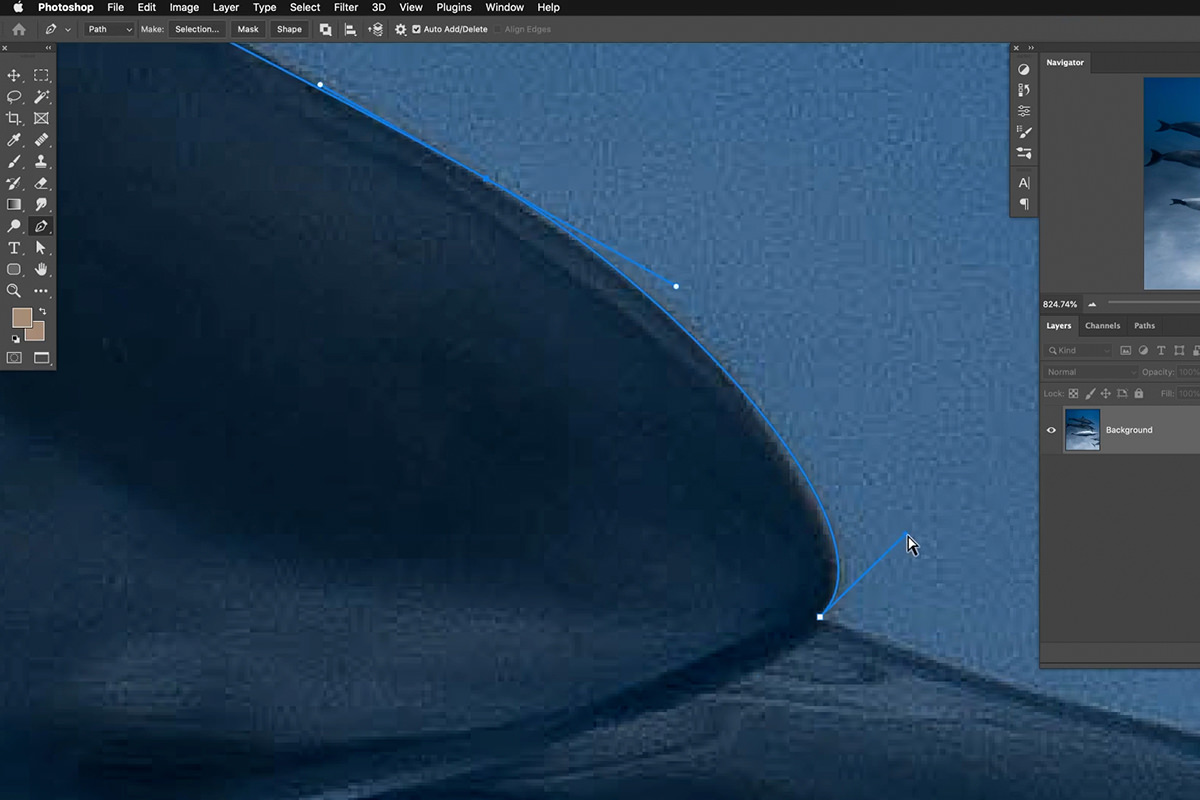
Now, it can be tedious to go through and redo all of your hard work if it wasn’t quite as accurate as you wanted it be. To get even more precision as you’re tracing objects and placing paths, use ALT or OPTN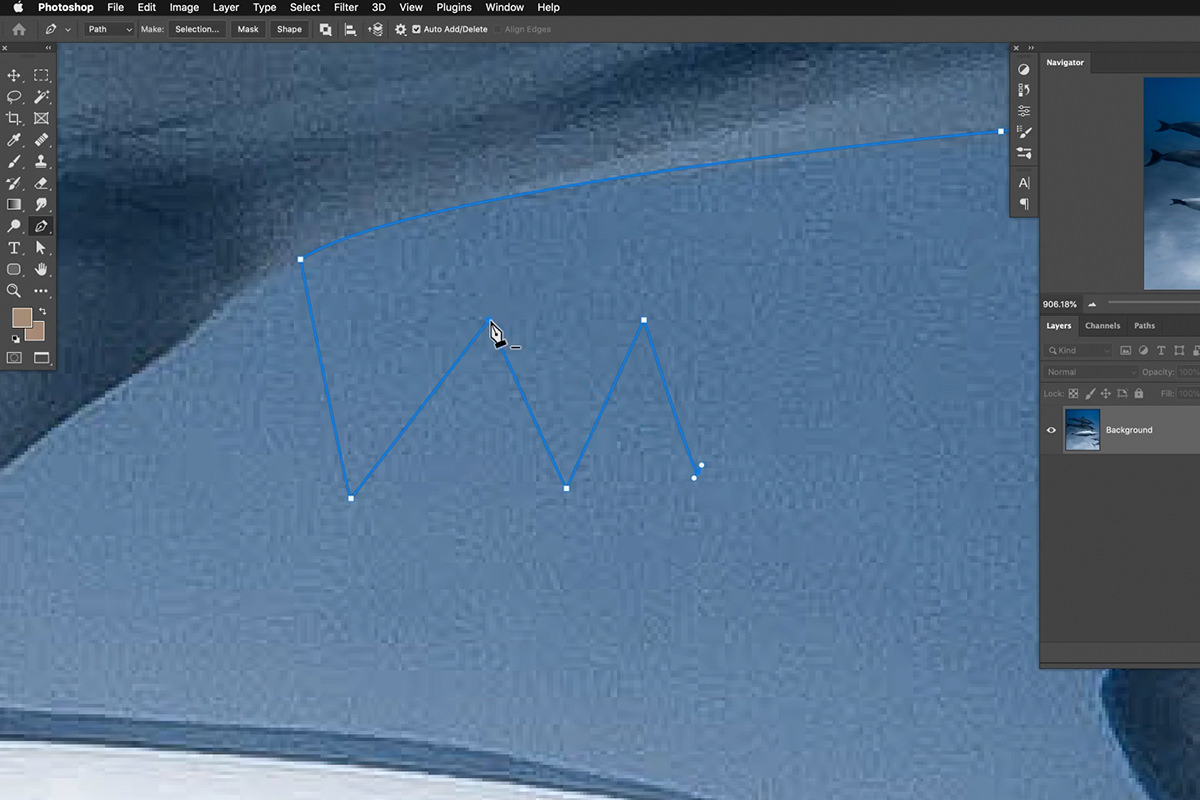
The Convert Anchor Point Tool allows you more precisely control the direction of paths you create as you create them. It also allows you to convert an sharp points or angles into curves when you need to smooth some areas out.
While the basics of the Pen Tool might seem easy, mastering these shortcuts and making them second nature as you work is the tricky part. But with enough practice you’ll creating perfect paths and precision cutouts.
We Made a Path… Now What?
So what good are paths anyway? Well, like we said, paths are the first step of creating ultra-accurate selections and masks. You can convert any path into a selection by right-clicking with the path active and choosing Make Selection. And better yet, any paths you make are saved under the Paths panel (Navigate to the Windows Menu and choose Paths if you don’t see the Paths panel by default.)
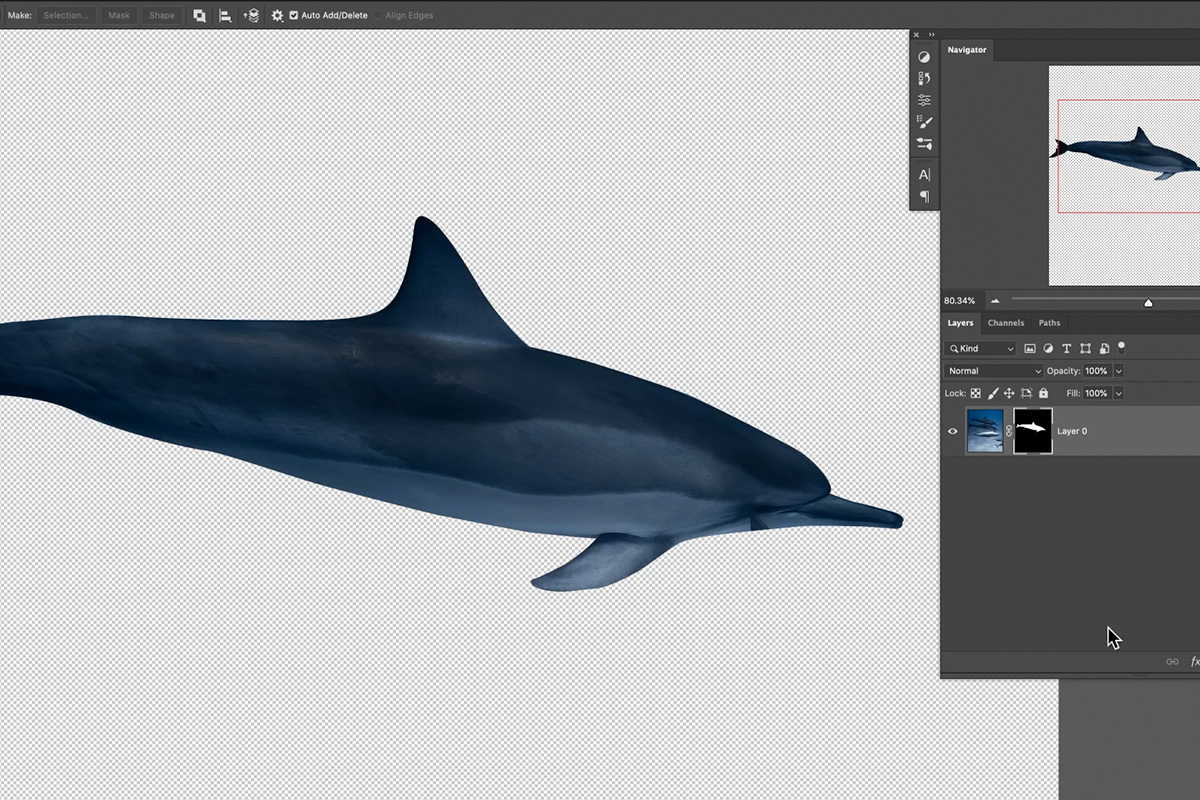
Now you can take any path, convert it to a selection, and then load the selection as a Layer Mask to get a perfect, non-destructive cutout of any subject or object in a photo!
Ready for some more Pen Tool practice? Check out How to Master the Pen Tool in Photoshop for our comprehensive course on this powerful tool.


Download the Sample Image
Description
If you need a selection with clean lines, smooth curves, and unmatched accuracy, look no further than the Pen Tool in Photoshop! Join us for a bézier ballet where we show you the ropes of this tricky, yet powerful, tool.
This is Day 26 of our 30 Days of Photoshop series. Follow along with all 30 episodes as we explore the magic of Photoshop together!
Watch Next
30 Days of Photoshop

Sign up to receive email updates to keep you going, sample images to follow along, and a printable calendar to keep track of your progress!
Share
Perfect Lines, Shapes & Curves
Why the Pen Tool?
Simply put, the Pen Tool is the most accurate way to make selections in Photoshop. It’s ideal for any situation in which you need to follow or recreate the contours of any object with a solid edge. From editing portraits, to product photography, to graphic design, the applications are limitless.
Additionally, any time you use the Pen Tool, it will save your points as a new Path which you can always return to to make any changes. This allows you to create a selection that can constantly evolve as you edit.
Understanding Curves and Angles
Any path you create using the Pen Tool will either be a straight line, a simple curve, a complex curve, or an angle. Knowing how to identify and create each will be key to understanding the process of making precision paths.

Simple Curve

Complex Curve

Angle
Shortcuts
There’s no shortcut to learning all the nuances of the Pen Tool. Well, except these.
Keyboard shortcuts make it easy to adjust a curve or alter the direction of a path.
To change a point into a curve or vice versa, use ALT or OPTN.
To move a point or a curve and change direction, use CTRL or CMD.
The Nuts and Bolts (or Points and Curves)
The basics of the Pen Tool are pretty easy to grasp. Click to create a point then click again to create the next. Photoshop will connect the two points with a straight line, which you can then adjust to become any sort of simple or complex curve. Click to create a new point and the process continues until you’ve completed your path.
Once you’re finished with the outline, you can convert the Path into a Selection. Simply open the Paths dialog, hold CTRL or CMD, then click on the thumbnail of the path you wish to load. This will create a selection in the shape of the path you created, which you can then use as you would any other selection in Photoshop.
These tips will help, but the key to mastering the Pen Tool is practice and patience! Once you’ve completed this tutorial, try it again with more complex shapes. Developing a thorough understanding of how to use this tool will help you work smarter and faster in Photoshop, no matter the job.
Key Shortcuts for the Pen Tool in Photoshop
-

-
Add to
favorites
-
DifficultyMedium
-
Length2.75 hours
-
Videos12
-
Software
description
If you’ve ever wondered how the pros are able to get create perfect selections or create beautiful logos that can scale to any size, look no further. The Pen Tool is powerful and versatile, allowing you to cut objects out of a photo, draw lines and shapes, trace an image, and create logos from scratch!
In this tutorial, we demystify the Pen Tool, teaching you everything you need to know from the most important keyboard shortcuts to making beautiful lines and curves. We walk you through the basics and then demonstrate how to use the Pen Tool to change a background color, change an entire background, and create a simple logo, all in Photoshop!
THIS COURSE INCLUDES
- 14 Sample Images
Share
Table of Contents
Master the Pen Tool, Chapter 02
-
01 - How to Make Accurate Selections with the Standard Pen Tool24:53m
-
02 - How to Make Quick Selections with the Curvature Pen Tool7:47m
-
03 - How to Make Jagged Selections with the Freeform Pen Tool8:38m
-
04 - Everything to Know About Vector Masks14:04m
-
05 - How to Create Selections and Paths10:12m
-
06 - The Difference Between Shapes and Paths10:57m
-
07 - How to Create Flourishes with Brush Stroke Paths31:33m
-
08 - How to Edit Type, Shapes and Paths with the Pen Tool9:22m
Course Downloads
Master the Pen Tool


CREATE TEXT FLOURISHES WITH THE PEN TOOL
ORIGINAL
Master the Pen Tool in Photoshop
We start with the basics. Learn to draw a line, a curve, and get an understanding of how paths and vectors work in Photoshop. The goal is to get you comfortable using the Pen Tool, whether you’re making shapes or tracing an image.
Remove a Background
The key to changing a background in Photoshop is to start with a great selection. The Pen Tool is the most precise way to make sure you you get every bit of your subject selected so that they look whole and natural when placed into a new environment.
Perfect Selections
Certain situations will call for making a perfect and clean selection around an object. If you’re working with product photos, the Pen Tool will help you trace any hard edges and smooth curves ensuring that your final images will look great.


REPLACE BACKGROUNDS
ORIGINAL
Make Shapes & Logos
Photo editing might often involve adding shapes, graphics, and logos to images. If you’ve ever wondered how to make a logo from scratch, we show you how to do it step-by-step in Photoshop!
Change a Background Color
Into product photography? Being able to change the background color of a product or object is a crucial skill. Follow along as we show you how to trace along the curves and lines of any object and use that selection to change the color behind it.
Vector Masks
Vector Masks are similar to Layer Masks. The only difference is that they take advantage of the power and precision of Paths! Learn to make perfectly accurate selections using the Pen Tool and control the visibility of those areas using Vector Masks.

CUT OUT OBJECTS WITH VECTOR MASKS
ORIGINAL
Create Type & Text Effects
The Pen Tool isn’t only about cutting things out and creating custom shapes. Using Paths, you can use the Pen Tool to edit type and add amazing text effects!
How to Make a Straight Line
Sometimes all you need is something simple, and when you need to make a perfectly straight line, the Pen Tool is your best bet. Make a straight line path and then apply a brush stroke to make it fit seamlessly into your image.
How to Make a Curved Line
Without the Pen Tool, making the exact curve you need would be tricky. Never worry about jagged edges or unrealistic looking cutouts ever again! We show you how to use the pen tool to make beautiful curves to create stunning text effects and create soft, natural selections of people.
Perfect Shapes, Lines & Curves

PERFECT CUTOUTS & SELECTIONS

CHANGE BACKGROUND COLORS IN PHOTOSHOP
ORIGINAL
Trace an Image
Whether you need to make a perfect cutout or accurately select an area of a photo, the Pen Tool is the best option to trace an image with precision. Copy a logo or shape in minutes to make it your own.
Cut Out any Object
Learn how to cut out an image! There are a ton of selection tools in Photoshop. Some are designed to help you work faster like the Magic Wand Tool. And some, like the Pen Tool, are designed to give you the precision and control you’ll need for professional looking results.
Learn About Paths
Paths are lines, curves, and shapes that you can create in Photoshop using the Pen Tool. Paths can be saved, edited, and used in combination with other tools to create elegant brush strokes or creative effects.


CUSTOMIZE FONTS & TEXT
ORIGINAL
The Curvature Pen Tool
If you’re just starting out, the Curvature Pen Tool is a great way to start learning. Where the standard Pen Tool is completely manual, the Curvature Pen Tool automates the process, intuitively creating curves as you create new anchor points.
The Freeform Pen Tool
Using the Freeform Pen Tool, you can freely draw along an edge or shape and Photoshops will create the anchor points and curves for you! Learn to use this smart tool to make creating paths faster and easier than ever!
Pen Tool Keyboard Shortcuts
Getting to know the Pen Tool means getting to know the keyboard shortcuts like the back of your hand. Create and remove anchor points, adjust curves and direction, and much more!
Course Instructor

Aaron Nace
PHLEARN Founder
Aaron Nace is a photographer, Photoshop artist and founder of PHLEARN. He is the #1 Photoshop instructor in the world with millions of YouTube subscribers.


Reviews
Catalog > Free Tutorials > Master the Pen Tool in Under 8 Minutes


BEFORE
AFTER
Download Sample Images
Click the link below to download the sample images and follow along with this tutorial.
DownloadMaster One of the Most Powerful Tools in Photoshop
The Pen Tool is a powerful and versatile tool that can be found in a variety of Adobe’s software products. In this tutorial, we break down the fundamentals, demonstrating how to use it to make elegant curves, perfect angles, and accurate selections. Whether you need to cut a subject out of a photo or create a precision shape or design, we’ve got you covered.
Why the Pen Tool?
Simply put, the Pen Tool is the most accurate way to make selections in Photoshop. It’s ideal for any situation in which you need to follow or recreate the contours of any object with a solid edge. From editing portraits, to product photography, to graphic design, the applications are limitless.
Additionally, any time you use the Pen Tool, it will save your points as a new Path which you can always return to to make any changes. This allows you to create a selection that can constantly evolve as you edit.
Understanding Curves and Angles
Any path you create using the Pen Tool will either be a straight line, a simple curve, a complex curve, or an angle. Knowing how to identify and create each will be key to understanding the process of making precision paths.
Simple Curve
Complex Curve
Angle
Shortcuts
There’s no shortcut to learning and practicing the Pen Tool. Except these.
These keyboard shortcuts will help you whenever you need to adjust a curve or alter the direction of the your path.
To change a point into a curve or vice versa, use ALT or OPTN.
To move a point or a curve and change direction, use CTRL or CMD.
The Nuts and Bolts (or Points and Curves)
The basics of the Pen Tool are pretty easy to grasp. Click to create a point then click again to create the next. Photoshop will connect the two points with a straight line, which you can then adjust to become any sort of simple or complex curve. Click to create a new point and the process continues until you’ve completed your path.
Once you’re finished with the outline, you can convert the Path into a Selection. Simply open the Paths dialog, hold CTRL or CMD, then click on the thumbnail of the path you wish to load. This will create a selection in the shape of the path you created, which you can then use as you would any other selection in Photoshop.
These tips will help but the key to mastering the Pen Tool is practice and patience! Once you’ve completed this tutorial, try it again using more complex shapes. Developing a thorough understanding of how to use this tool will help you work smarter and faster in Photoshop, no matter the job.
Catalog > Free Tutorials > How to Use the Pen Tool in Photoshop

Pen tool Photoshop Tutorial Description
The Photoshop Pen Tool is one of the most powerful tools available in Photoshop.
Use the Pen Tool to create custom shapes and accurately cut objects out of their backgrounds! If you’re looking for a Photoshop tutorial on the pen tool, read on!
How to Use the Pen Tool in Photoshop
The Pen Tool can be very intimidating at first, but all it takes is a little practice and a lot of selecting! In today’s episode, we walk you through the Pen Tool in Photoshop.
Starting with the Basics in the Pen Tool
To start from the very beginning, it’s best to practice basic shapes. Select the pen Tool from the toolbar (or press P). All you have to do is click to create the edges of your shape. After completing it, you will see a little O if you hover over the first point. You can then click on that first point to close the shape.
To turn this into a selection, right click and go to “Make Selection.”
Whenever you are working with the Pen Tool, it creates paths. This is why you don’t see your shape on a layer; it is stored in a different place. If you need to alter a selection, go to the paths tab and click on the Work Path. From here, you can hold down CMD and click on any point to move it around.
Magical tip: Hold ALT/OPT and click on a point to turn it from a Curve to a straight line, and vice versa.
The pen tool truly just takes some practice. Spend time playing around with shapes and anchor points!
Pen Tool Paths
If you think about it, the simple shapes you can create from scratch with the pen Tool are some of the same shapes that you might use to Outline a figure- just simple Curves and lines. When selecting an element in an image, apply the same basic pen Tool techniques we just went over. It tends to help if you select just inside the edge of the figure (you can always refine that edge later).
Don’t forget about the magical tip from before! If you need to create a sharp edge or change direction in your Curve, hold the ALT/OPT key and alter the point.
You can also hover over any point until you see a little minus symbol, and click to delete that point. The same works in the opposite direction if you need to add a point (you will see a little plus symbol). Once you are finished, be sure to close up your path by hovering over the first point and clicking it. Again, to create a selection from your path, right click and choose “Make Selection.”
Cutting Subjects Out with the Pen Tool
What happens if your subject is on a layer, but you can’t find your Pen path? Don’t fret! Just click on the path tab (to the right of the Channels tab). You can also go to Window —> Paths, and the dialogue you need will pop up right away. Once your path is turned into a selection (right click to Make Selection, or hold CMD and click on the path thumbnail), it will be active on your layers. If you go back into your layers, you should see marching ants around the subject.
Click on the Layer Mask icon and your selection will be cut out perfectly from the Background. Voila! Then, create a New Layer underneath your subject. You can fill it with any Color that you’d like.
Key Shortcuts for the Pen Tool in Photoshop
-
-
Add to
favorites
-
DifficultyEasy
-
Videos1
-
Software
Description
That photo is so sharp it will cut you!
In this tutorial, learn how to sharpen an image using the Sharpen Tool. Especially useful for eyes in a portrait.
THIS COURSE INCLUDES
- 1 Sample Image
Share
Course Downloads

What is the Sharpen Tool?
Adobe Photoshop includes a number of useful tools that allow you to accomplish a variety of effects in your images. One of those is the Sharpen tool, which enables you to tighten up a picture and make it clearer by making it sharper. However, when it is used, it’s important that you be careful because overusing it can make your images appear too grainy or noisy. The best way to use this tool is to take care and use a light hand.
Getting the Right Effect
The tool does exactly as its name implies: It sharpens up any image that is blurry or unclear. It helps to improve the contrast of your image by darkening the dark pixels and brightening up lighter ones. As a result, edges are better defined, making the object in the photo pop more and giving it more contrast. When you use this tool, it may make other objects in the image that you did not sharpen appear artistically blurred. Shadows beneath the objects you sharpen may also stand out more, giving off a cooler effect while the objects themselves stand out more.
Help Objects Stand Out
The tool is most commonly used to make a specific object or objects within a photo stand out more. Sometimes, the object you want to sharpen is a part of a person’s face in a portrait-style image. If the eyes seem a bit too soft, you would be able to use the tool to select the eyes and sharpen them. You can even play around with underlying layers of colors in the object to be sharpened.
Unlock Pressure-Sensitive Sharpening
With newer versions of Adobe Photoshop, this tool offers enhanced features. One of those is known as “Protect Detail.” This is a feature that allows the user to rely on pressure-sensitive sharpening with a brush-like touch without introducing additional negative artifacts into the photo. In other words, in previous versions of Photoshop, it was possible to have your sharpened image come out lower-quality thanks to the changes made by the effect. Thankfully, this doesn’t happen in CS5 and newer versions.
Sharpen Wisely
This tool is excellent for simply sharpening an object or feature within a photo where it is blurry or unclear. It’s also great when you want to create an added focus on a particular object. For example, if you took a picture of a flower while outdoors but it came out a bit blurred, the tool would work well to sharpen it and make it more focal to the image. However, if the focus of your image is already sharp and vibrant, it would not be a good idea to use the tool because it would just distort it. Also, if you sharpen it too much, it can take away from the quality of the picture.
If you want more helpful hints and tricks for using the Sharpen tool, check out our video.


Reviews
There are no reviews yet.
Key Shortcuts for the Pen Tool in Photoshop
-
-
Add to
favorites
-
DifficultyAdvanced
-
Videos1
-
Software
Description
The Pen Tool is one of the most powerful selection tools in Photoshop.
Learn how vectors work and how to accurately cut out any subject from their background in this Photoshop Pen Tool Tutorial.
Share
Course Downloads

Some of the Pen Tool Options
When you use the standard pen-tool, the following options are available in the options bar:
- Add or delete a line segment – You can have as few or as many anchor points along a straight or curved line as you want. Additional anchor points are typically used to refine the curvature of the line.
- Add or delete curved line segments – Curved sections are created by dragging the mouse out from an anchor point, creating handles and maneuvering the handles until the curve is the way you want it.
- Preview a path segment – To access this option, click the pop-up menu to the right of the Custom Shape icon.
- Make the line thicker – To use as an outline.
Create Straight-Line Geometric Shapes
By establishing anchor points with the pen-tool, you can create almost any straight-lined geometric shape imaginable. Once you close the points, you now have what is called a pen path. You can use pen paths to make selections. For example, you can select either what is inside or outside the pen path.
You can move any anchor point or any line of your pen path to change the shape of your figure.
Create Curved-Line Shapes
By clicking and dragging, you can create curved lines between the anchor points. By clicking on the anchor points or a curved line of the shape, you can change the shape by dragging the mouse outward from the anchor point and creating handles. As you lever the handles, the curved line affected will change its shape.
In the same way that you moved the points and straight lines in the geometric shape above, you can also move a curved line you created.
You can turn curved lines into straight lines by clicking on the anchor points. You can then turn them back into curved lines.
In short, you can make any shape you can imagine using the pen tool.
Cut Out (Crop) a Section of a Photo
With the pen-tool, you can segregate an area. This is known as a selection. The pen tool is the most advanced and accurate way to make a selection. It is the best Photoshop option for cutting someone out of a background. The technique may take a bit longer to use than some of the other tools, but it is, without question, the most accurate.
The pen-tool creates what is known as a pen path. Create anchor points by clicking on various spots on the canvas. For example, create anchor points all around, and slightly inside, a person or other object to be cropped in a photo. When the pen path is completed, you can separate the area inside the path (straight and curved lines) from the area outside the path.
Click and drag for following a curve. To change direction or angle, use alt or option.
Other Uses for the Pen Tool
You can create a vector, a tattoo design, a logo or a signature. You can ink in comics by selecting a section and then assigning black or any other color to that area. In a similar fashion, you can change a photo into artwork.
Becoming proficient with the pen-tool will help you tremendously when working with or creating images in Photoshop.


Reviews
-
It’s like golf. Practice Practice Practice. Keeping the tutorial easily accessible and noting the times where important points are shown helps, like placing a new background
-
Simple, to the point, and extremely useful.
-
Finally, I think I’m starting to understand the Pen Tool. Thanks!
-
Glad I watched this tutorial on the pen tool. It help me understand how to use the control and alt keys a lot better. In the past I would get frustrated trying to get the path going in the correct direction. This explains how to do that better than all the other tutorials I have seen. Thanks Aaron!
-
So simple and easy to follow for such a powerful tool
-
I have taken several other Pen Tool tutorials from other places, but this one lit up my lightbulb. I finally got it! It’s not nearly so hard as I was making it for myself. Great job, Aaron!
-
My first experience with the pen tool was very frustrating, but after watching this video and following along with the example I can use it without anxiety and stress. It’s an amazing tool!
-
Yay! Glad we were able to help you finally master the Pen Tool ?
-
-
I had to watch this tutorial twice but it was worth it, I have watched other non-Phlearn pen tool tutorials which left me confused and frustrated. It is worth the effort to learn how to use this tool Phlearn makes it as easy as possible.
-
Finally, I understand this tool… Having the really basic section at the beginning helped alot. I will definitely be using this tool in future, the results are so much cleaner than many other approaches.


Tutorial Description
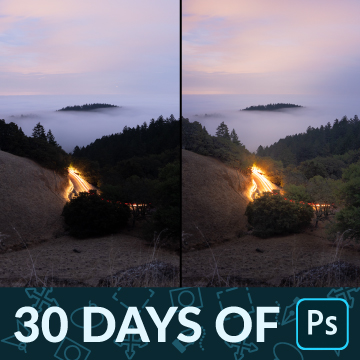
We noticed that this image by phamily member Quintino has a cool Light trail that resembles a heart monitor’s pulse. It made us think, how could we add more of these to the image? With a few Tools in Photoshop, the answer is more simple than you’d think.
The Quick Mask
We’re going to start by preparing the Background by stretching the right side of the photo. We want it to look like the Lights keep on going instead of turning around. To do this, we can create a selection around the right side and Stretch it to the right.
We don’t want a hard edge where the selection starts, so we’re going to blur the selection’s edge. We can do this by pulling up the Quick Mask. This shows us our selection by using the Color red outside of the selection. By running a Gaussian Blur on the Quick Mask, we can actually see how ti alters our selection.
You could use the feather command in the Selection Menu, but by using the quick mask method we’re able to actually see what we’re doing to our selection.
Using The Pen Tool
Now that we’ve got our Background cleared up and ready, we can start creating our shapes. We’re going to use the pen Tool to create a path. The Pen Tool is not scary to use! Click on the Pen Tool tag above this video for more episodes all about it.
Once we have our path created, we can click on the path and select Stroke path. This uses our current Brush settings to generate a Brush Stroke that follows the Pen path perfectly.
Layer Effects
Now that we have the shape in place, we’re going to add some effects to it. These will actually be really easy, since we’re going to use Layer Effects. Right click on the layer, select blending options, and check Outer Glow You can then alter the Color and Opacity to fit the rest of your image.
To add some artifacts, we’ll create a New Layer with the same Layer Effect and paint white onto the points of the pulse. This helps it to look more imperfect and less photoshopped. When creating something from scratch in Photoshop, it’s important to make it look realistic – anything overly perfect will look fake.
Final Image

Download Sample Images
description
Selections help us cut out people and objects from their backgrounds, combine multiple images together, and make careful edits to particular things an image. But it can be tricky to make an accurate selection without the right tools.
Learn how to use some of the most powerful selection tools in Photoshop like Select Color Range, the Pen Tool, Channels, and more!
Artist Credit
Videos sourced from Pexels.
Share

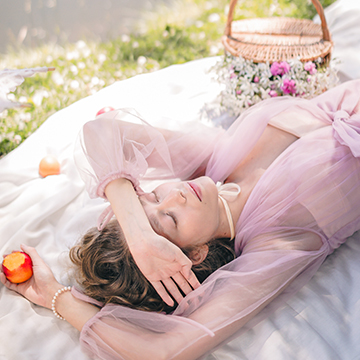
ACCURATE SELECTIONS IN PHOTOSHOP
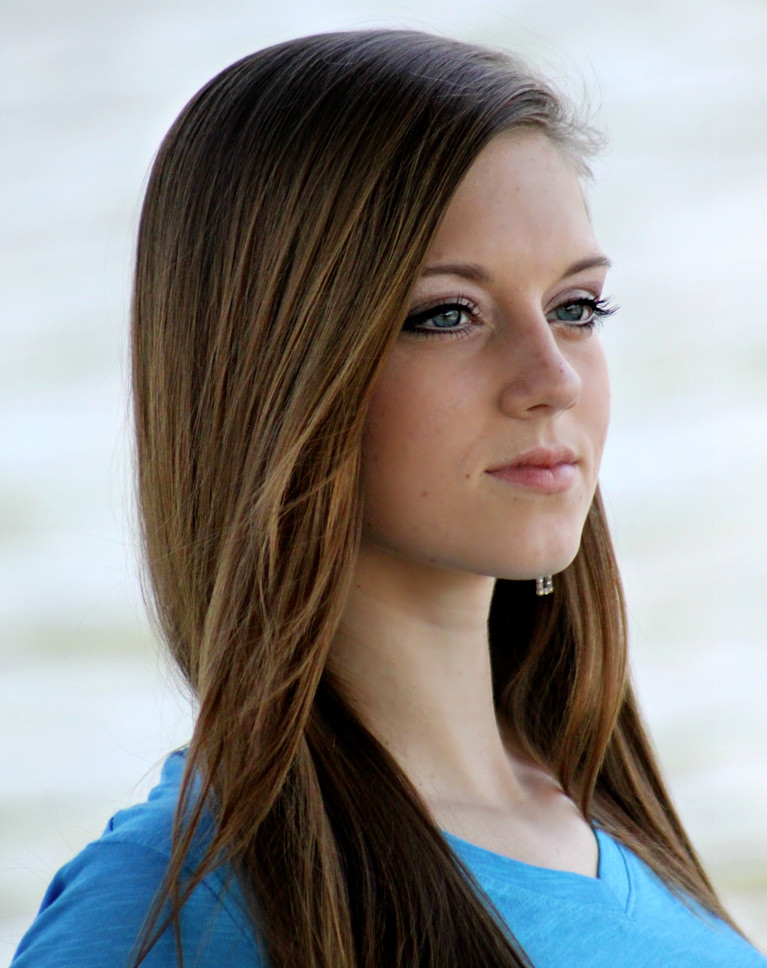
BEFORE
Accurate Selections, Every Time
What are Selections?
Before we start learning about the tools, let’s quickly talk about selections, what they are, how they work, and what they allow us to do as editors. Selections are a way for us to isolate certain parts of an image. That could mean isolating a person or object from the background, isolating a certain color, or isolating an element of the environment, like the sky or clouds.
By isolating these things, we can edit them independently of other elements in the scene. We can even move a selection from one image to another, like placing a person into a brand new background and environment. But as helpful as they are, selections come in a lot of different varieties with a wide range of complexity. It’s no surprise then that Photoshop has over a dozen different tools to create them.
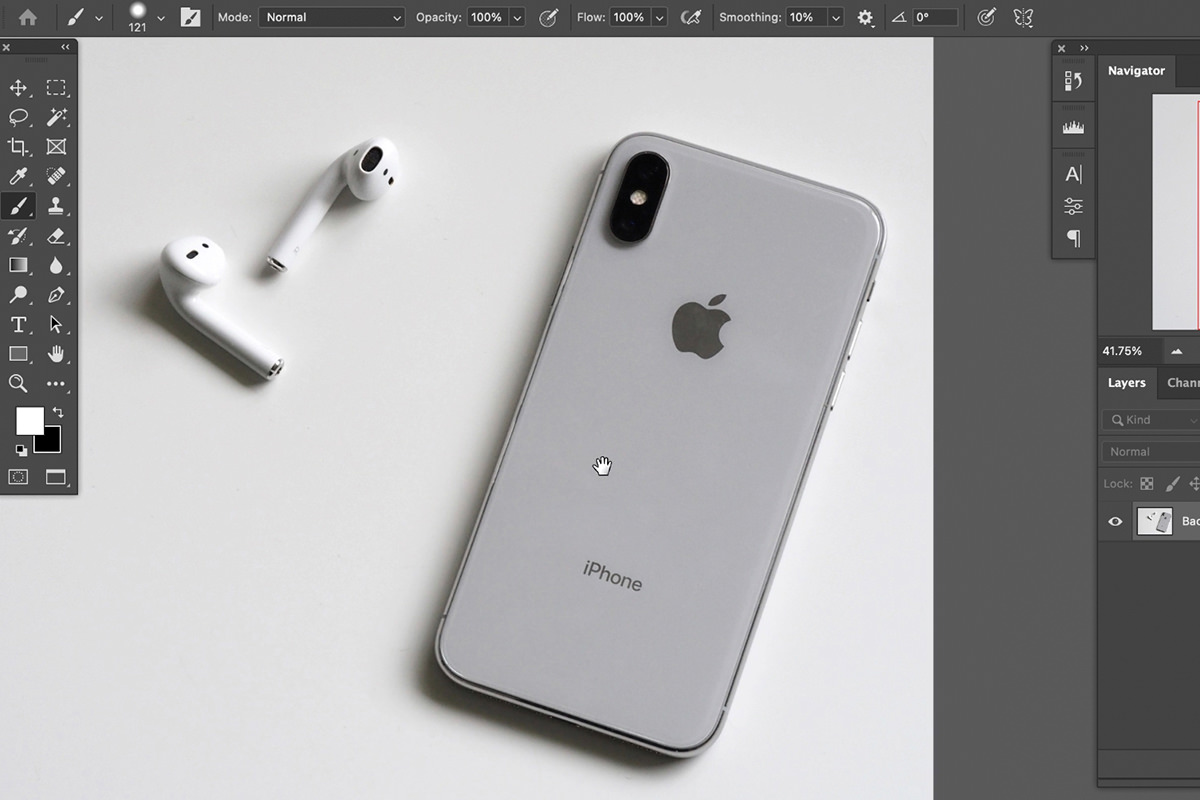
Basic Selection Tools
Most of you will be familiar with the basic selection tools in Photoshop. These are the tools that appear in the toolbar on the left side of the Photoshop interface. The Lasso Tool, Marquee Tools, and Magic Wand are all very commonly used and popular ways to make fast and easy selections. As easy as they are to use, they often fall short when asked to make selections of more complex things. For example, if you have a subject in front of a busy background, the Magic Wand will struggle to figure out what it is that you want selected.
For situations like this, we need some more advanced tools that can create accurate selections and deliver a clean, professional result.
Advanced Selection Tools
So what qualifies as an advanced selection tool? For starters, it doesn’t always mean that it’s a more difficult or complex tool to use. There are some automated tools that we’ll cover that are just as fast as the basic tools, using A.I. technology to make quick work of more complicated jobs.
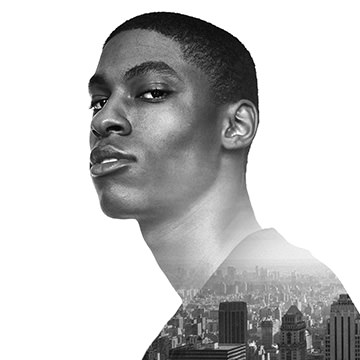
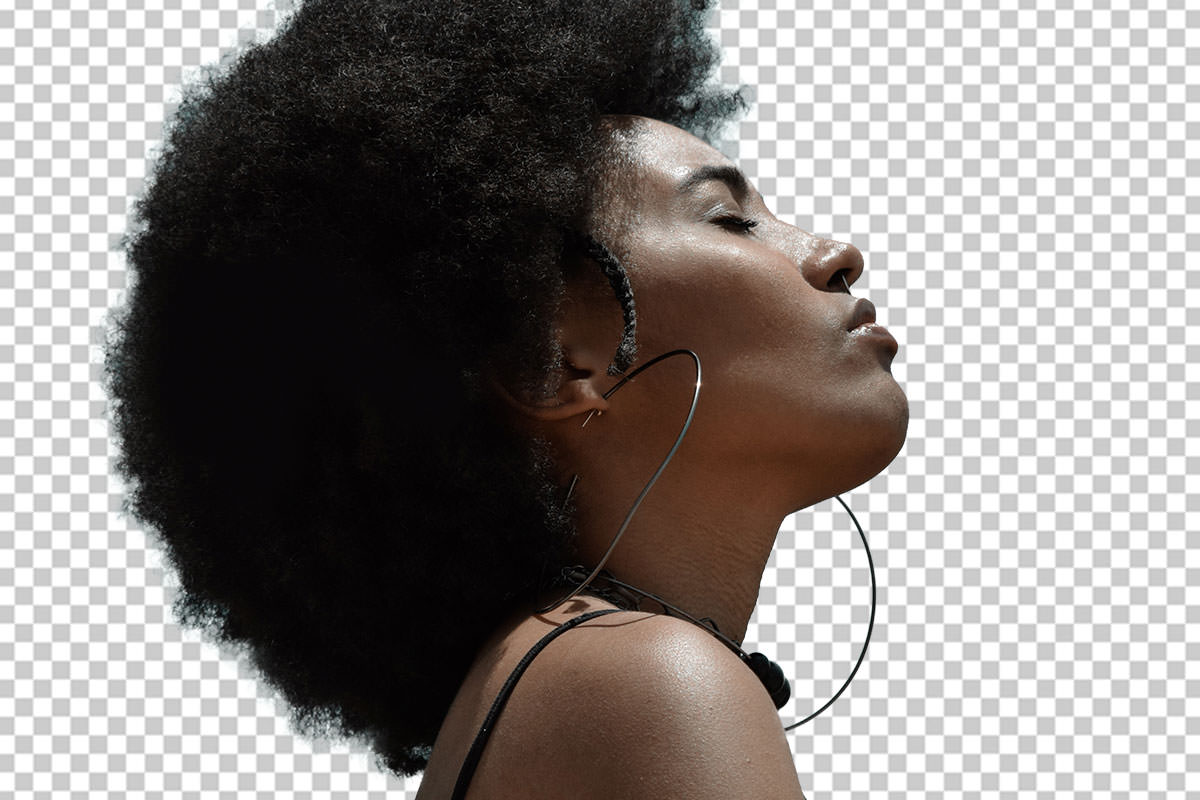
Hair is one of the most challenging things to make clean selections of in Photoshop. It’s a highly-detailed, soft edged element that can easily get lost if we use the wrong tool. It can also be a challenge to select something that is in front of a similarly colored and lit background. Advanced selection tools help us either automatically or manually select out the things we want with great precision and accuracy.
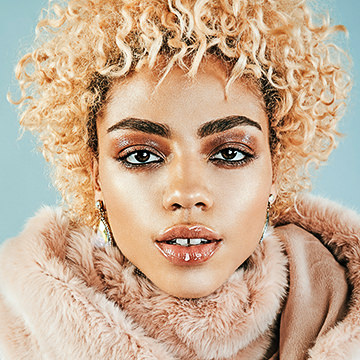
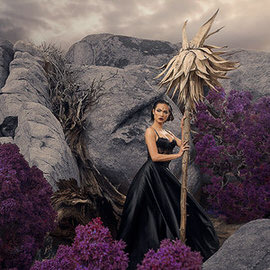
1. Select Subject
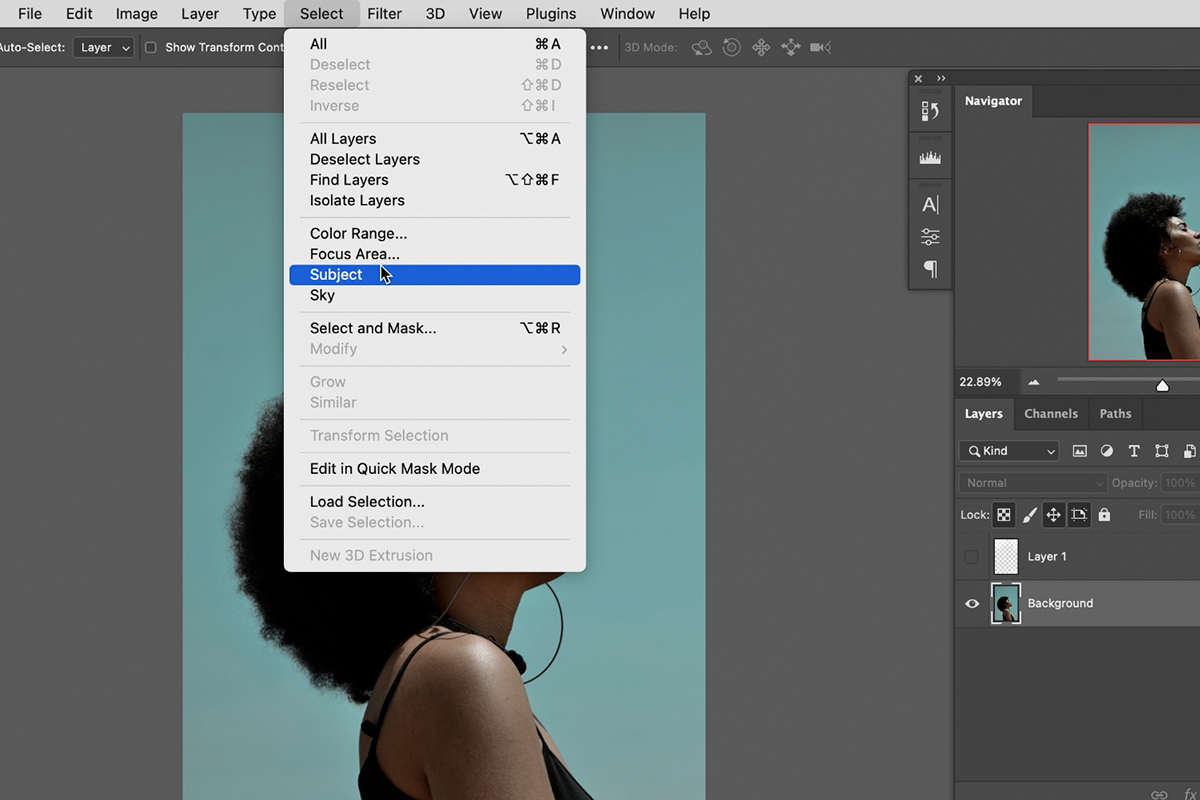
As we said earlier, advanced tools don’t always have to be complicated. Select Subject is a relatively recent addition to Photoshop that utilizes Adobe’s A.I. technology to make quick work of otherwise troublesome selections.
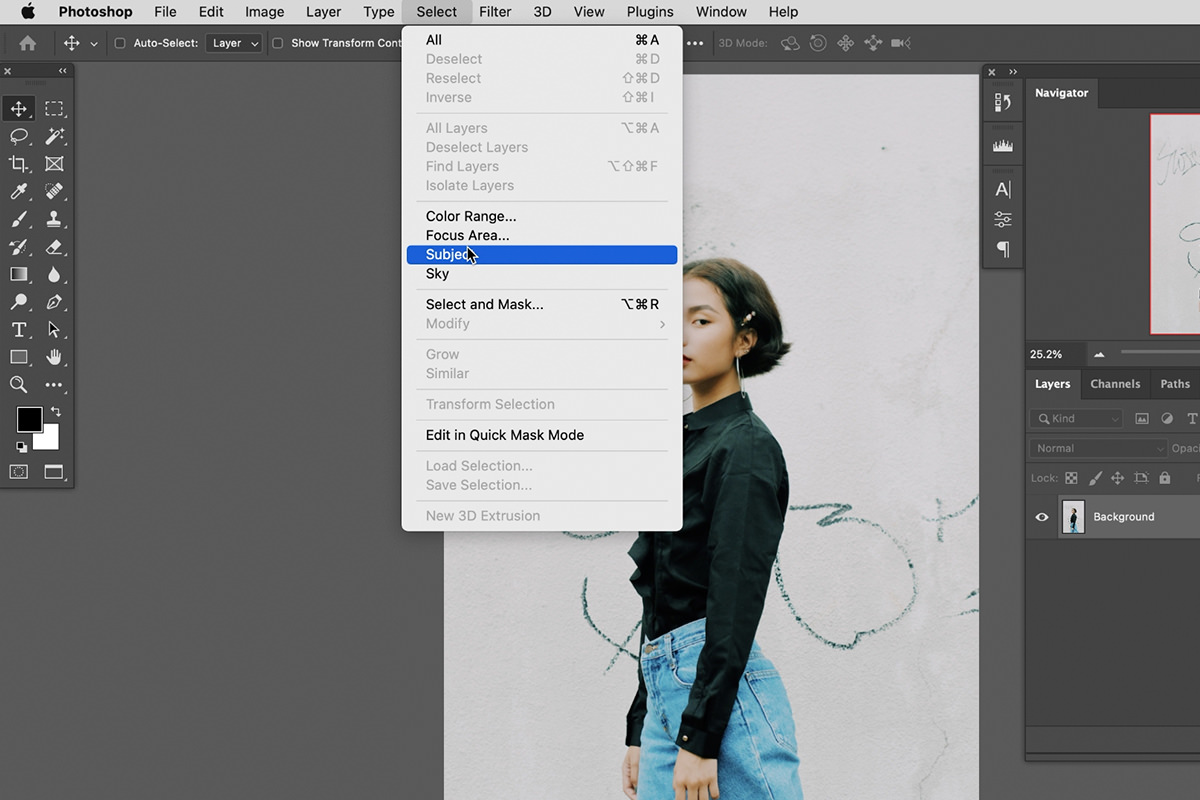
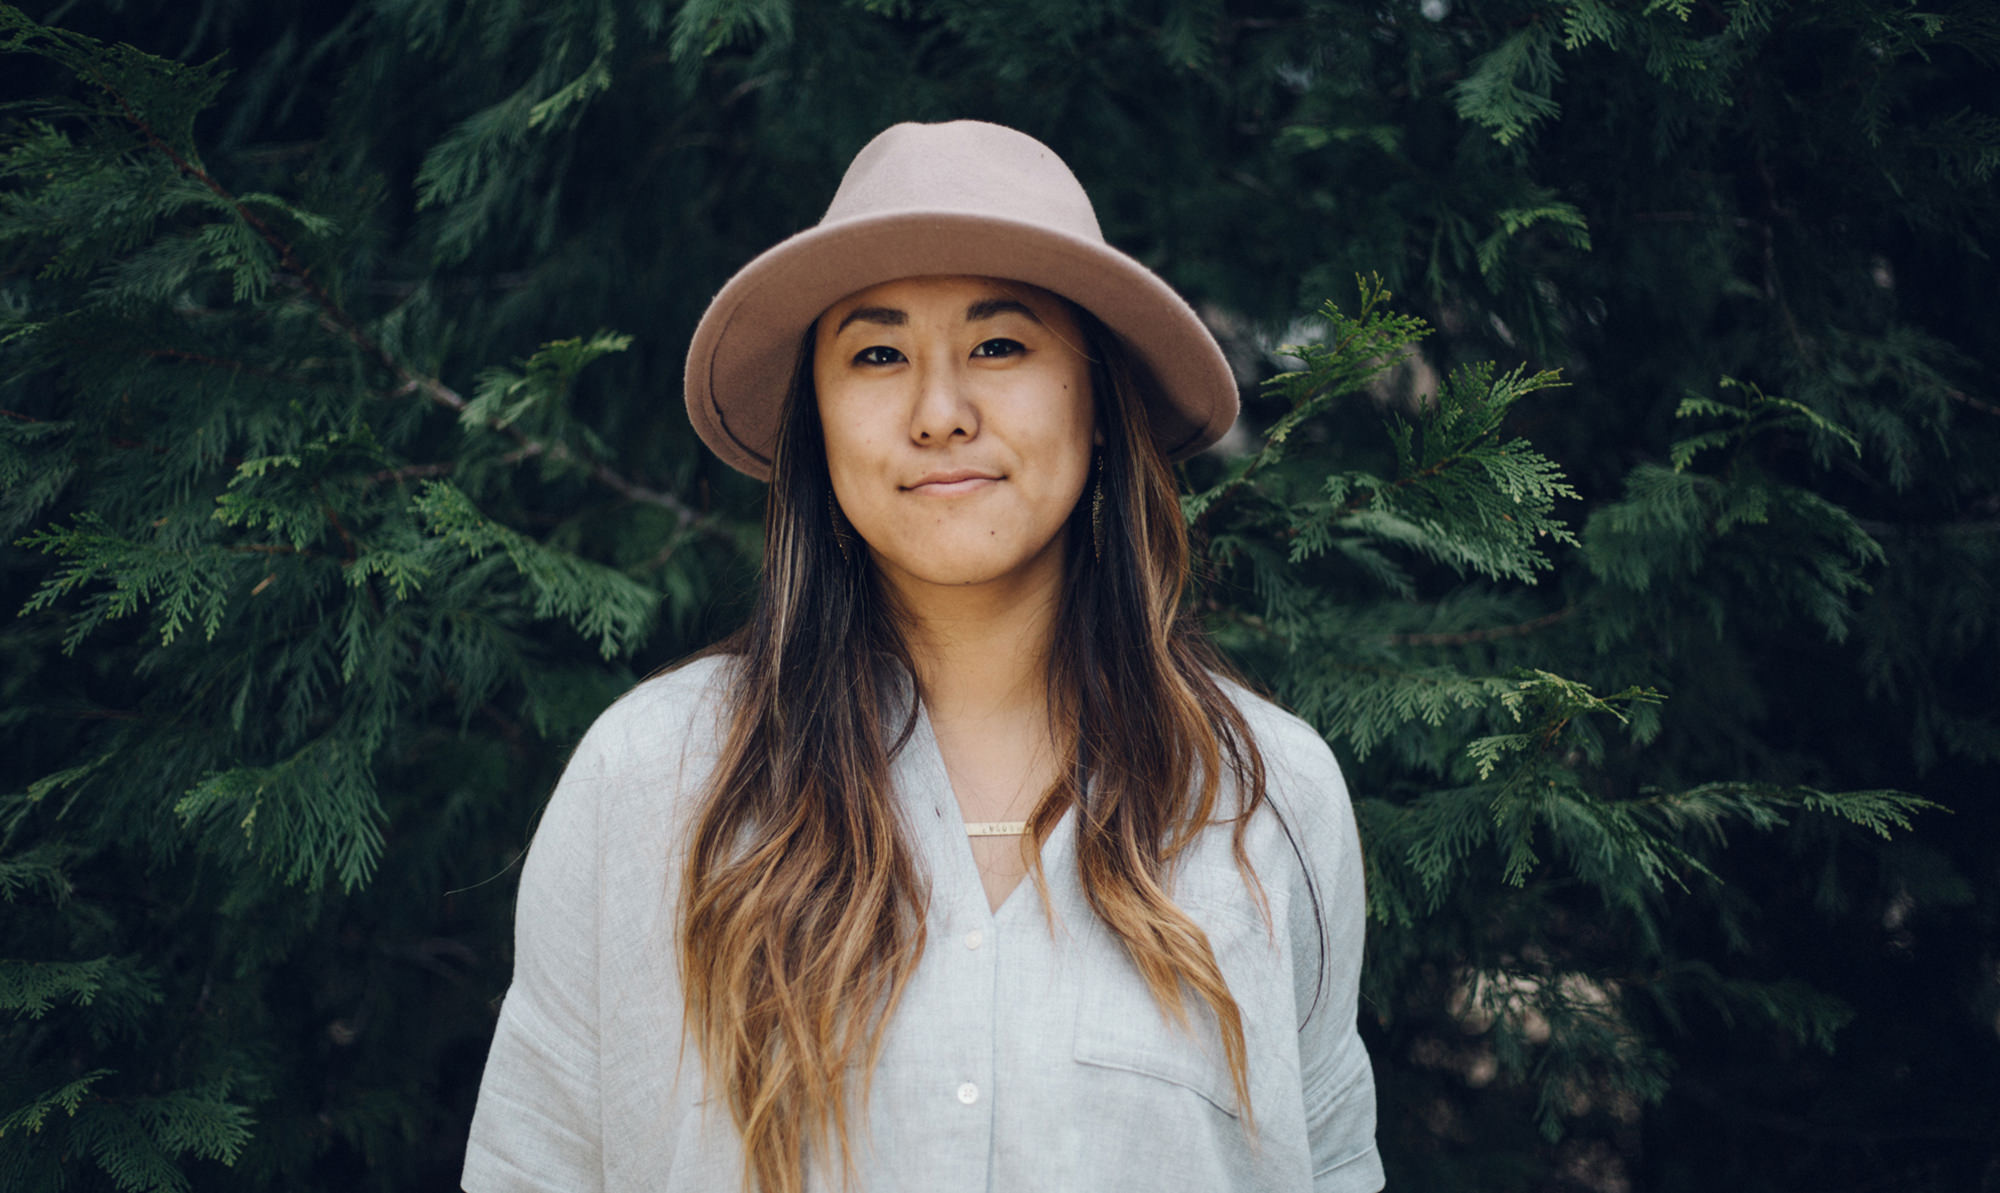
For example, if you have a person in front of a relatively plain background, you can use Select Subject to make a quick selection of that person. Just go to the Select Menu, and then to Subject. Photoshop will do the heavy lifting and create a selection of what it determines the subject of the image to be.
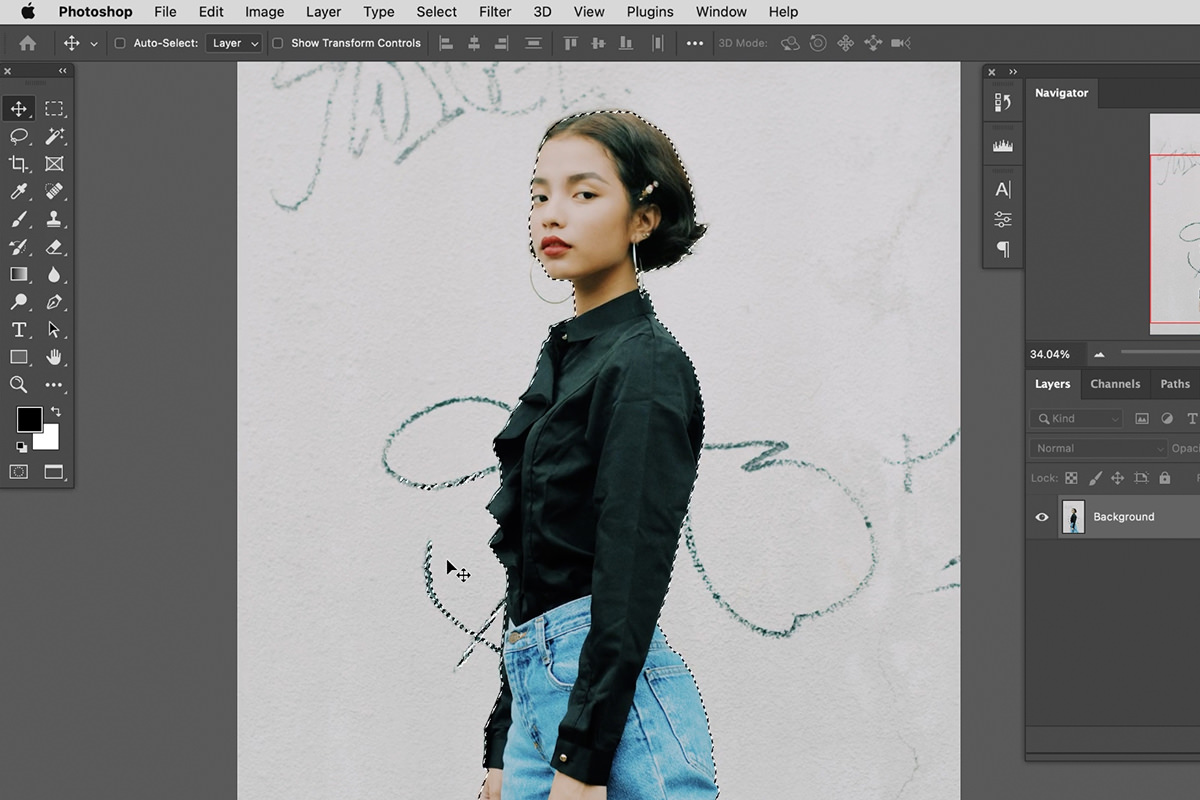
Now, it is an automated tool meaning the result often won’t be perfect. In our example image, the background and the subject both include similar colors and tonal values. Photoshop might accidentally read elements of the background as being part of the subject. Keep in mind that if you use automated tools for a selection, some additional refinement with other tools will usually be required. Fortunately, even making minor adjustment to the selection means you’re still saving a ton of time over more manual processes.
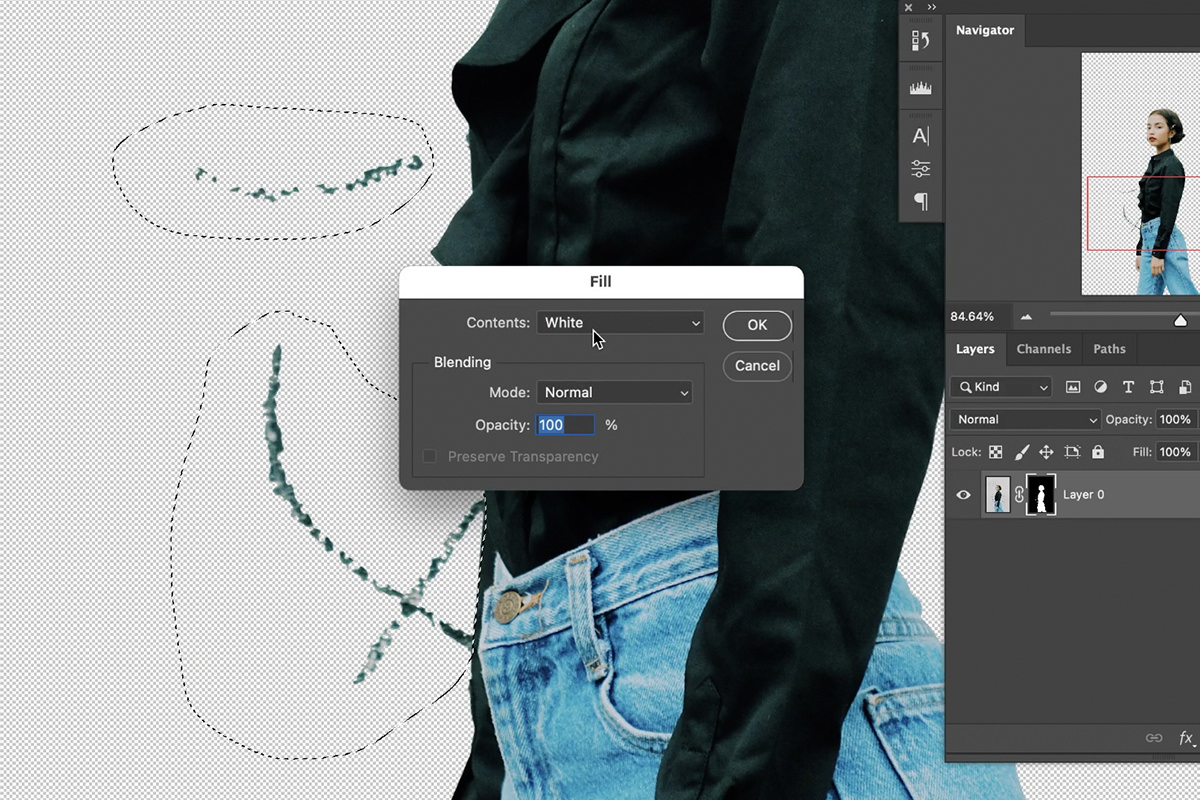
If unwanted elements are selected, just use some basic selection tools to select the bits you don’t want and remove them from the Layer Mask.
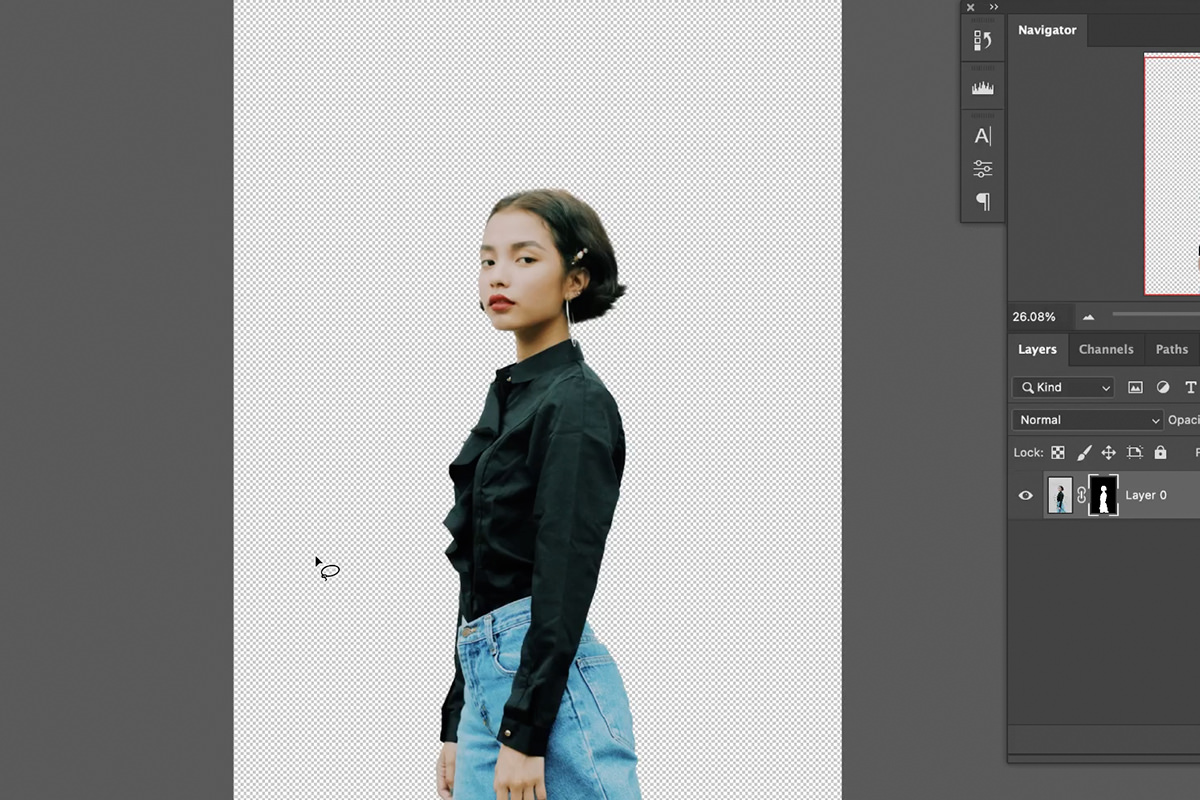
With a little bit of fine-tuning, you should end up with a usable result and in just a matter of minutes!
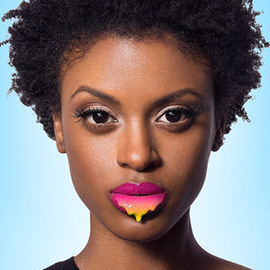
2. Select Color Range
Selections don’t always involved people or objects. What if you wanted to change the color of some element in an image? You would need a way to isolate a particular color rather than a complete shape or object.
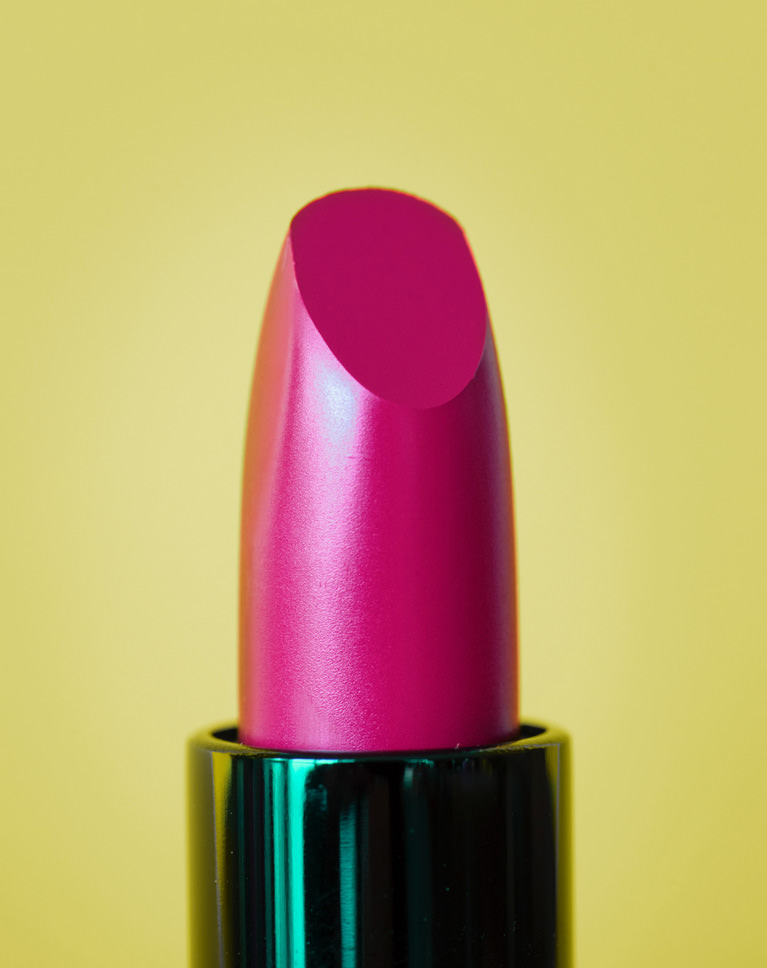
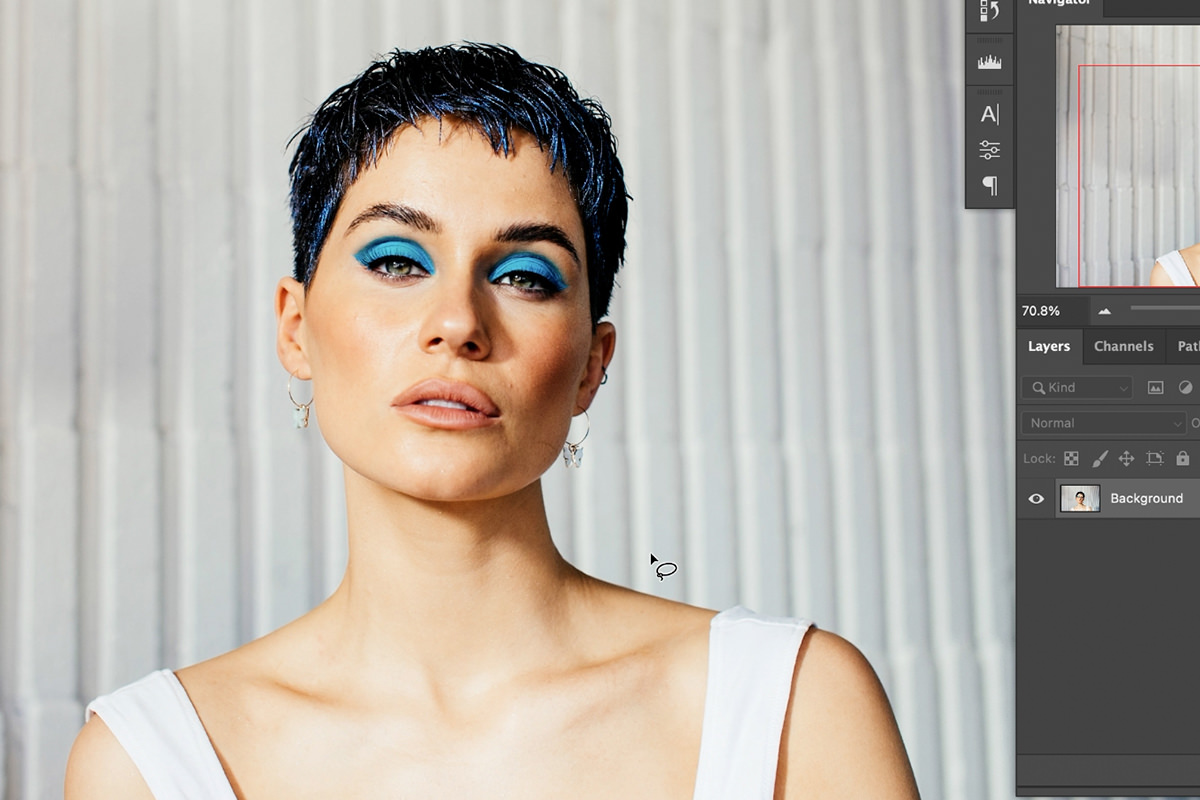
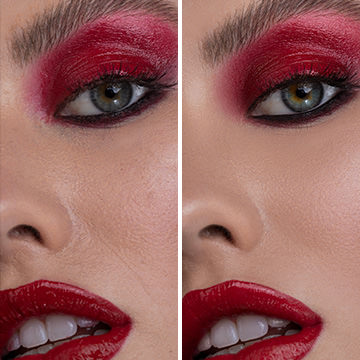
Take the follow image as an example. What if we wanted to change the blue color in the woman’s makeup and hair? Well, it’s a relatively easy work for Select Color Range!
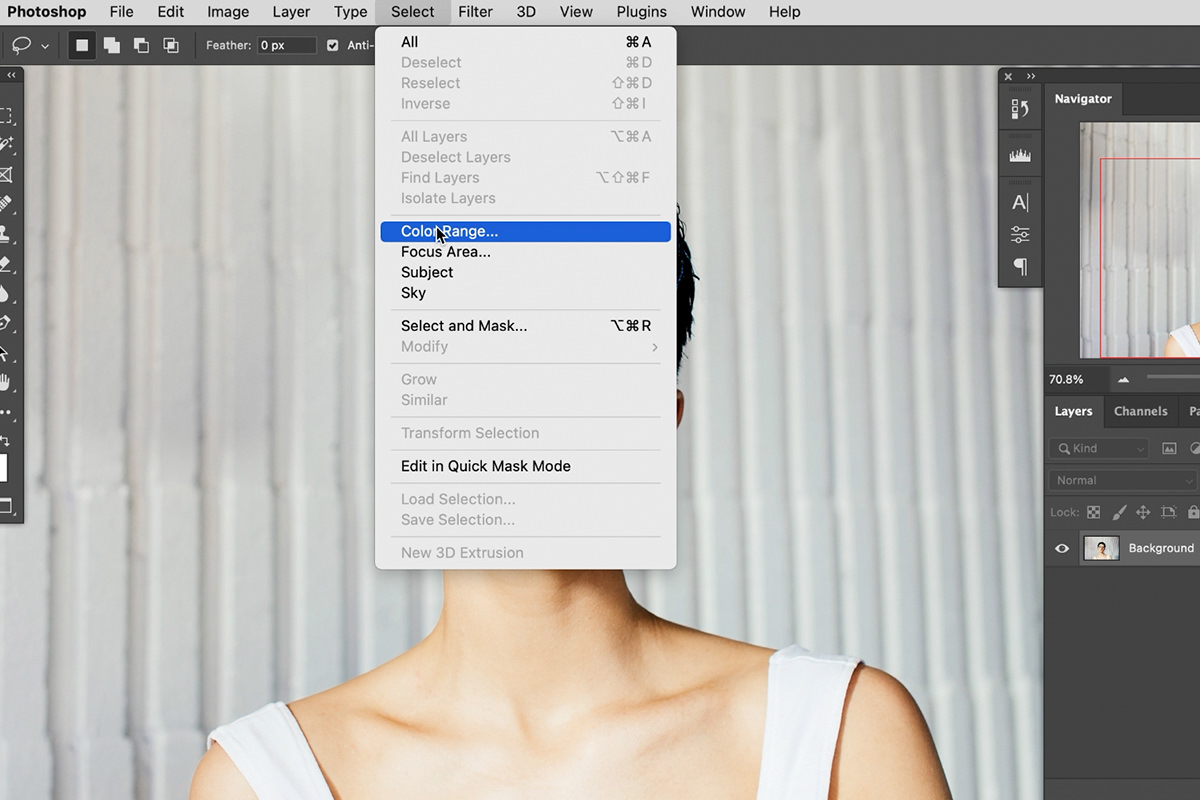
Again, open the Select Menu and click on Color Range.
This dialog provides a number of tools to help you select and isolate a range of colors in a photo. Using the eyedropper tools while making adjustments to the fuzziness allows us to make a selection of those bright blue colors in the image.
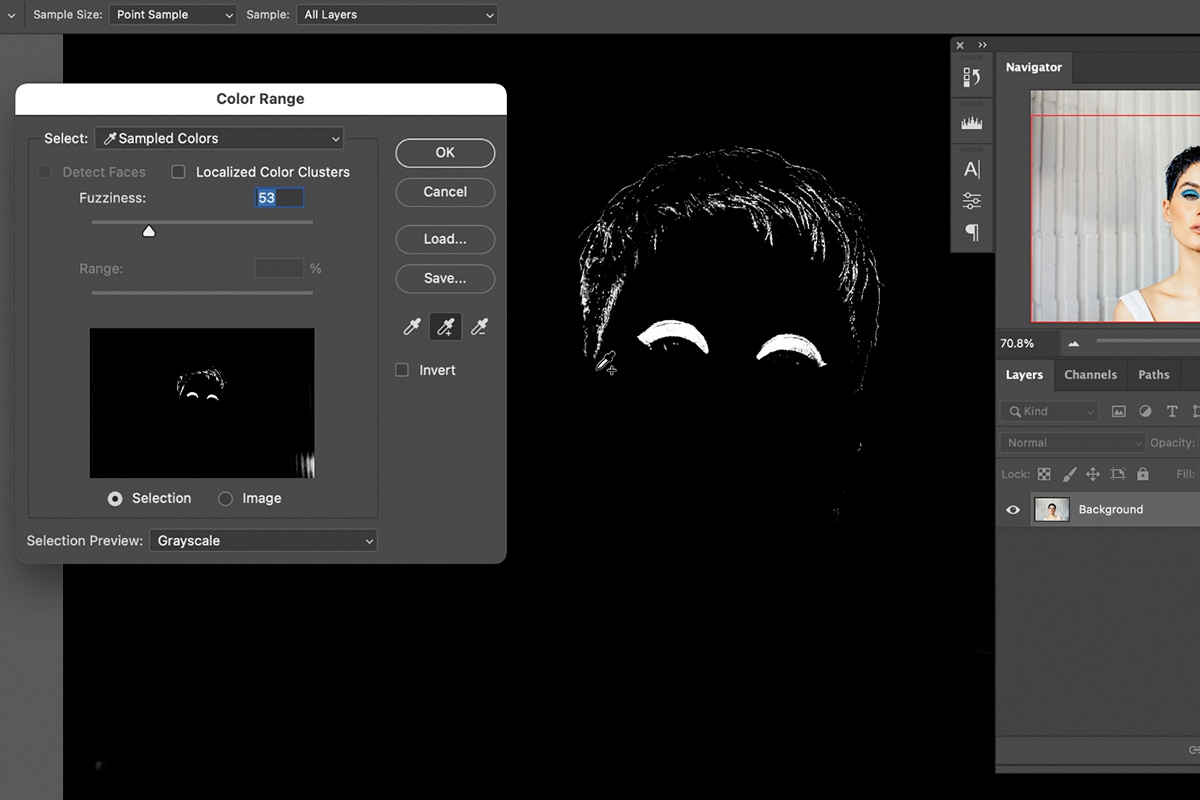
Here you can see we’ve dialed in a pretty good selection of the eye makeup and the blue highlights in the hair.
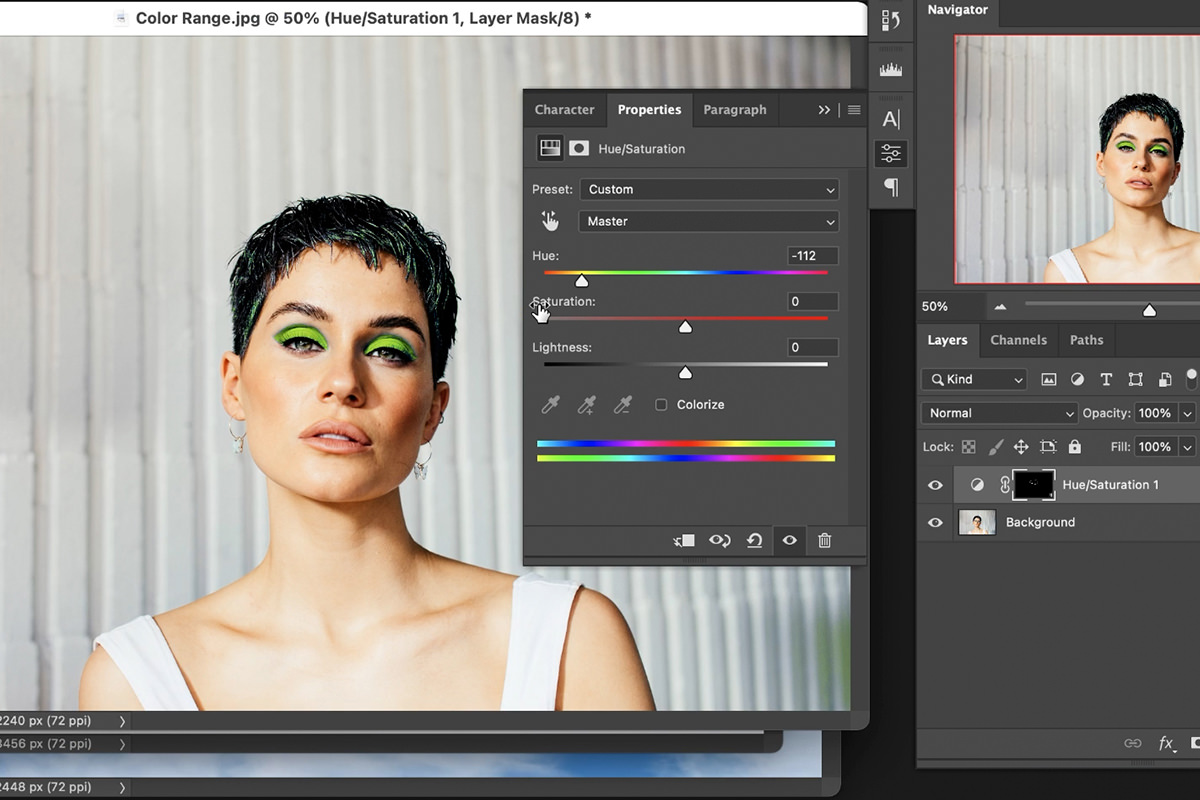
With the selection created, a simple Hue/Saturation Adjustment Layer can make quick work of any color changes and adjustments we want to make!
3. Select and Mask
Select and Mask is a suite of tools that help us make a wide variety of detailed selections and masks. These tools are great for creating a selection from scratch, or for refining a selection you made with another tool (like Select Subject). You can find the Select and Mask dialog under the Select Menu.

Once opened, you’ll be served a number of tools and options from brushes to paint over areas you want to select or deselect, to sliders that help you refine edges and feathering. One of the most helpful features of Select and Mask are the options that allow you to view a selection in a number of different ways.

Better yet, Select and Mask also utilizes a combination of both manual and automated tools. You can click on area with a brush and Photoshop will attempt to figure out what it is you want selected. As you paint more, it will make more accurate determinations. And as add and remove more from a selection, you can use the adjustments on the right side of the dialog to further refine the result.
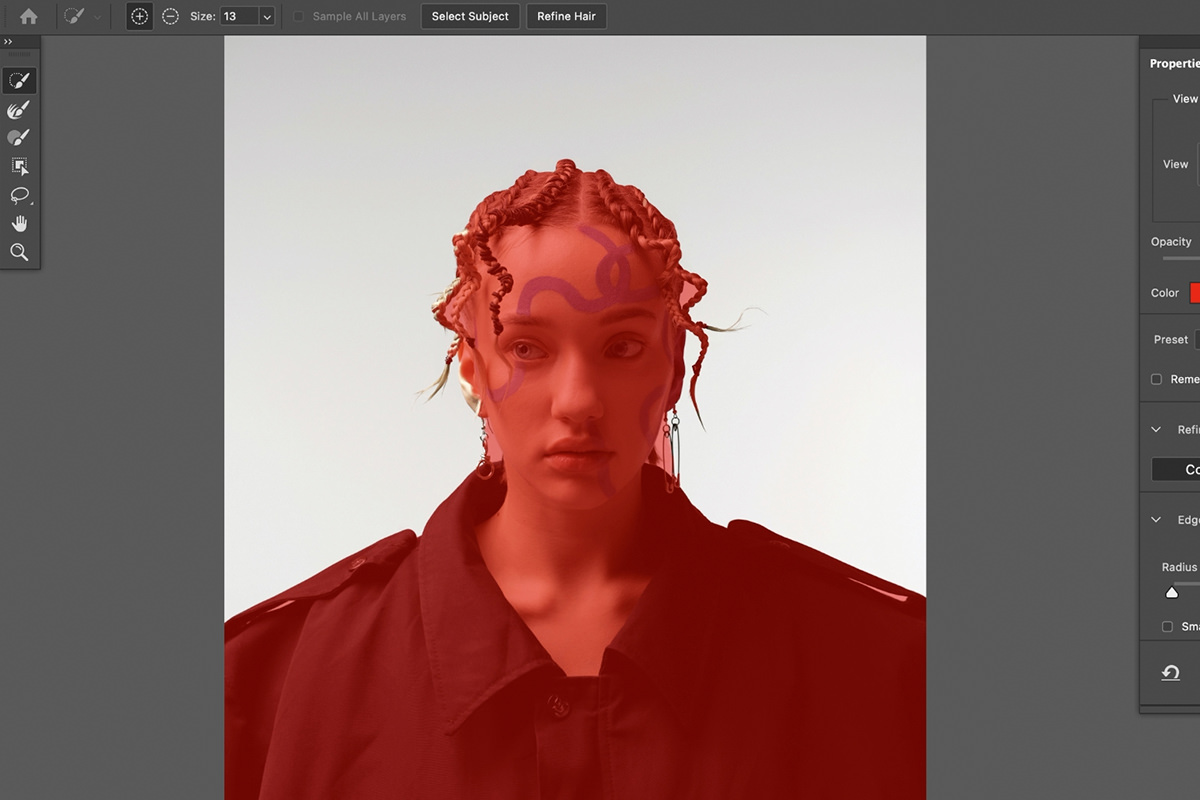
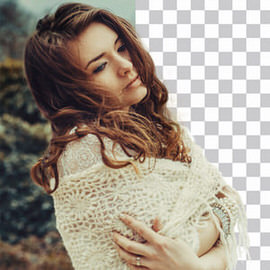
In our example, clicking along the background gave a us a pretty good start to cutting out the subject.
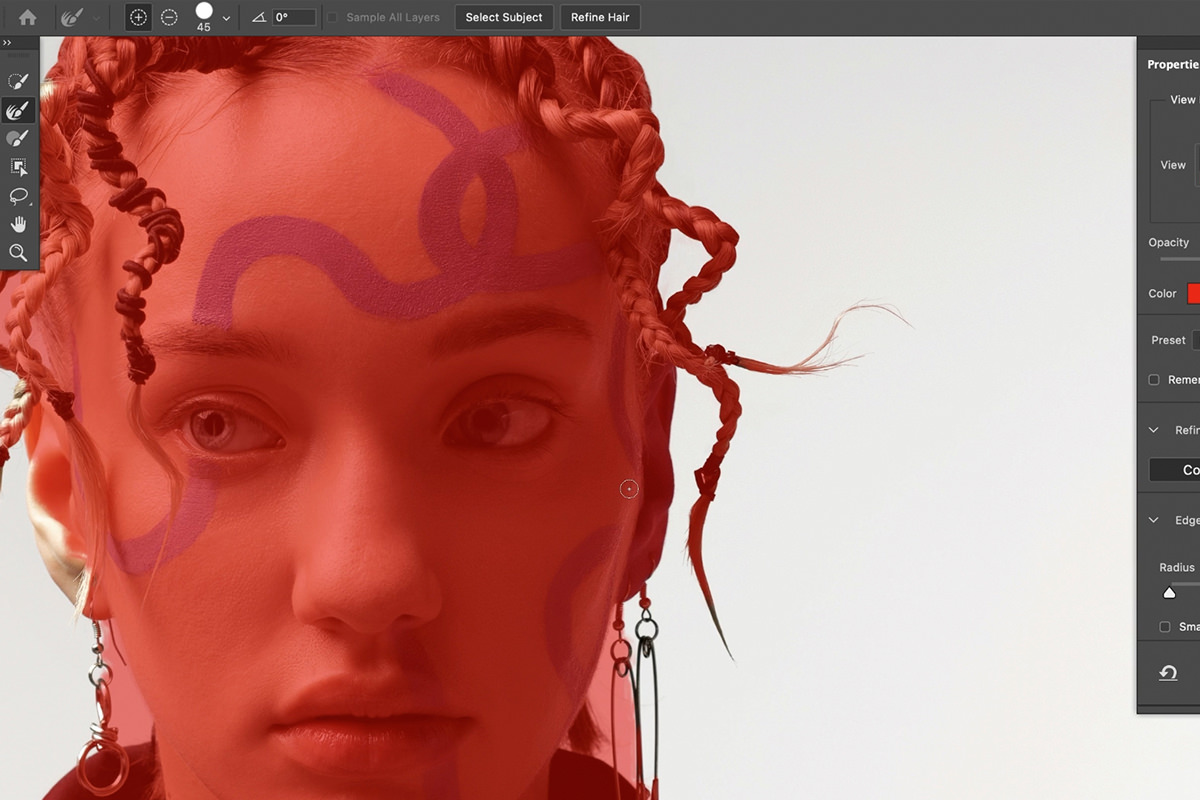
From here we can zoom in and use the various tools to work out some of the finer details and more complicated areas.
While Select and Mask can take a little more time than a tool like Select Subject, its use of automated processes with manual selection allow you to get a much more refined final result.
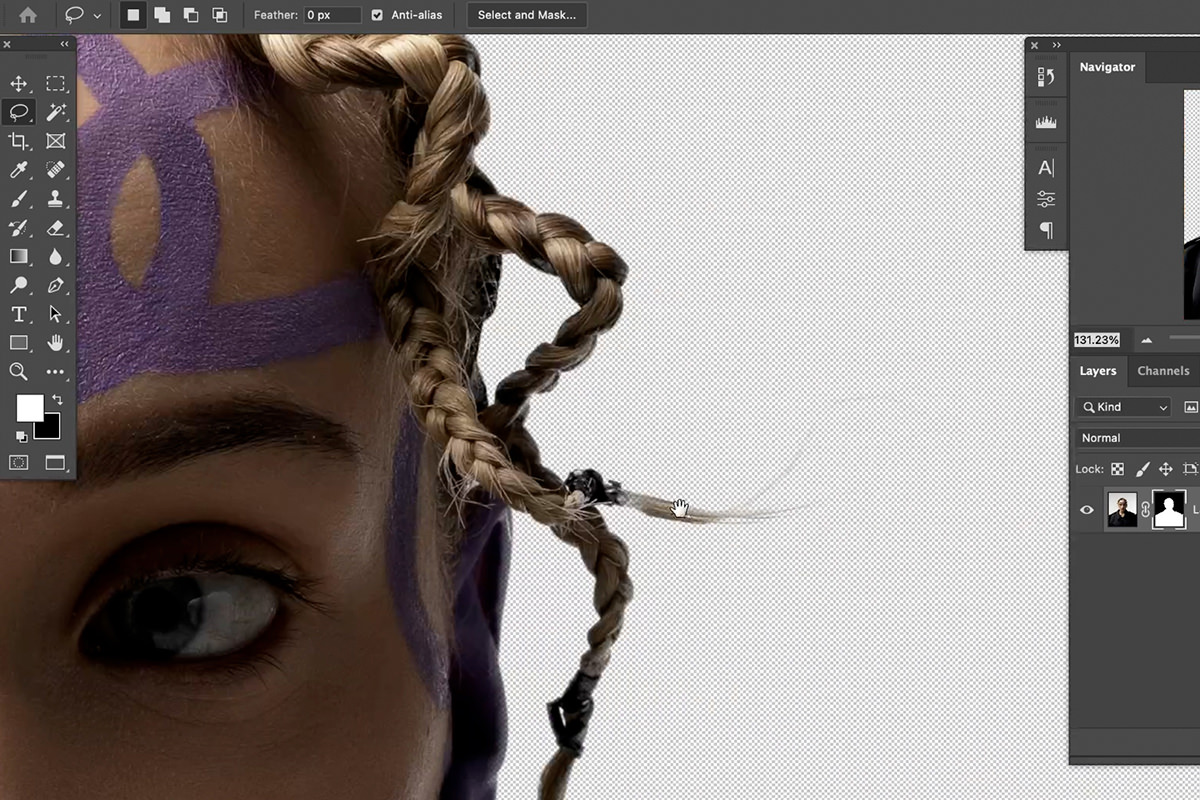
4. The Pen Tool
Some objects require us to manually trace around them to get the most accurate selection possible. And when manual tracing is required, the Pen Tool should be your go-to. We know that it can be tricky to learn, which is why we have a number of free tutorials and in-depth PRO courses on learning it, but with a little practice it will quickly become one of your most-used tools in Photoshop.
The Pen Tool is the best way to get perfectly smooth curves and edges when making a selection. Products and hard objects are a prime example, but it can also be a great solution for cutting out people as well when accuracy is of the upmost importance.
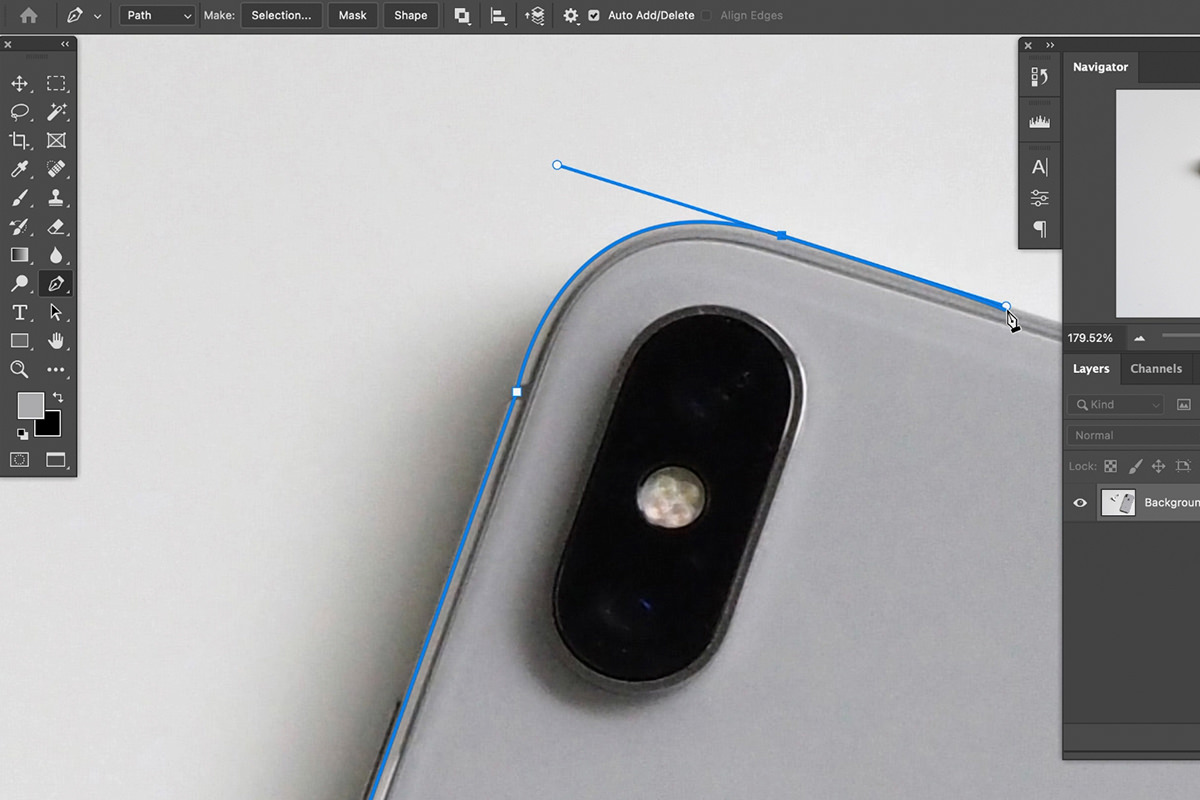
Because of the accuracy you’ll get, it can be one of the more time-consuming selection methods. But if you’re doing professional work, this is the tool we would recommend as it will provide the cleanest selections and give you the most flexibility while you edit.

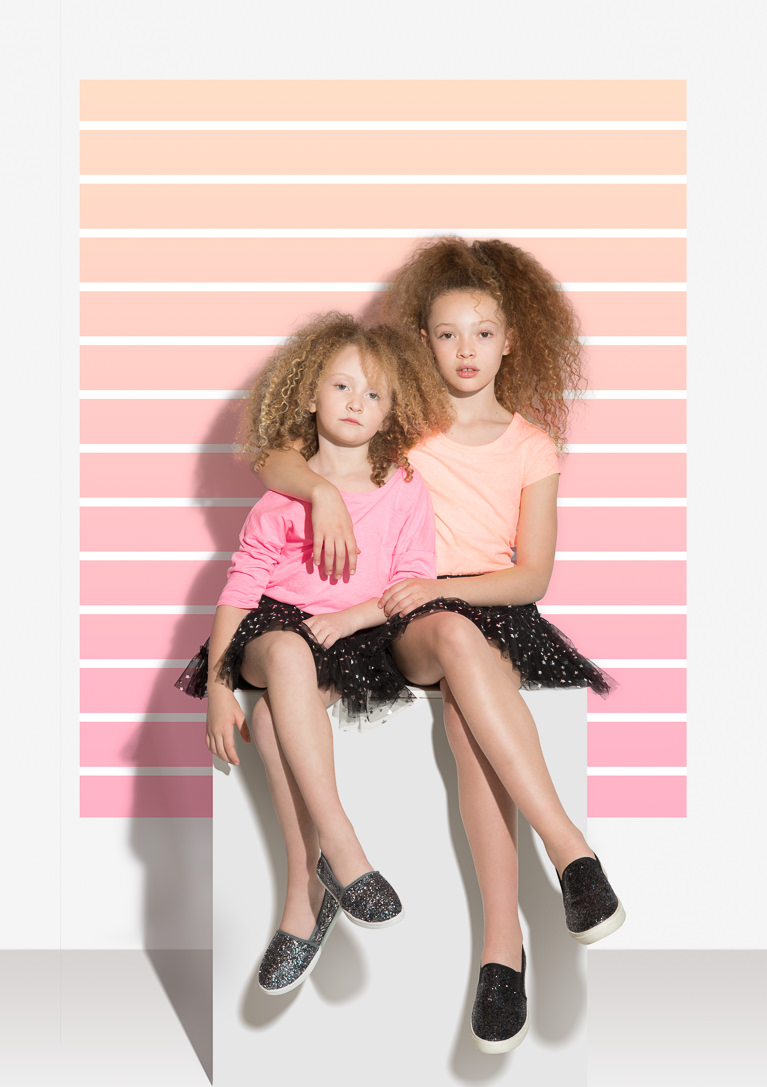
5. Channels
There will be plenty of things you run into that automated tools or manual tracing won’t be able to properly capture in a selection. Take hair for example. Hair is highly detailed and has soft edges. Automated tools will often cut off a lot of the natural details and manual tools (like the Pen Tool) are not practical simply due to the amount of detail and the time it would take.
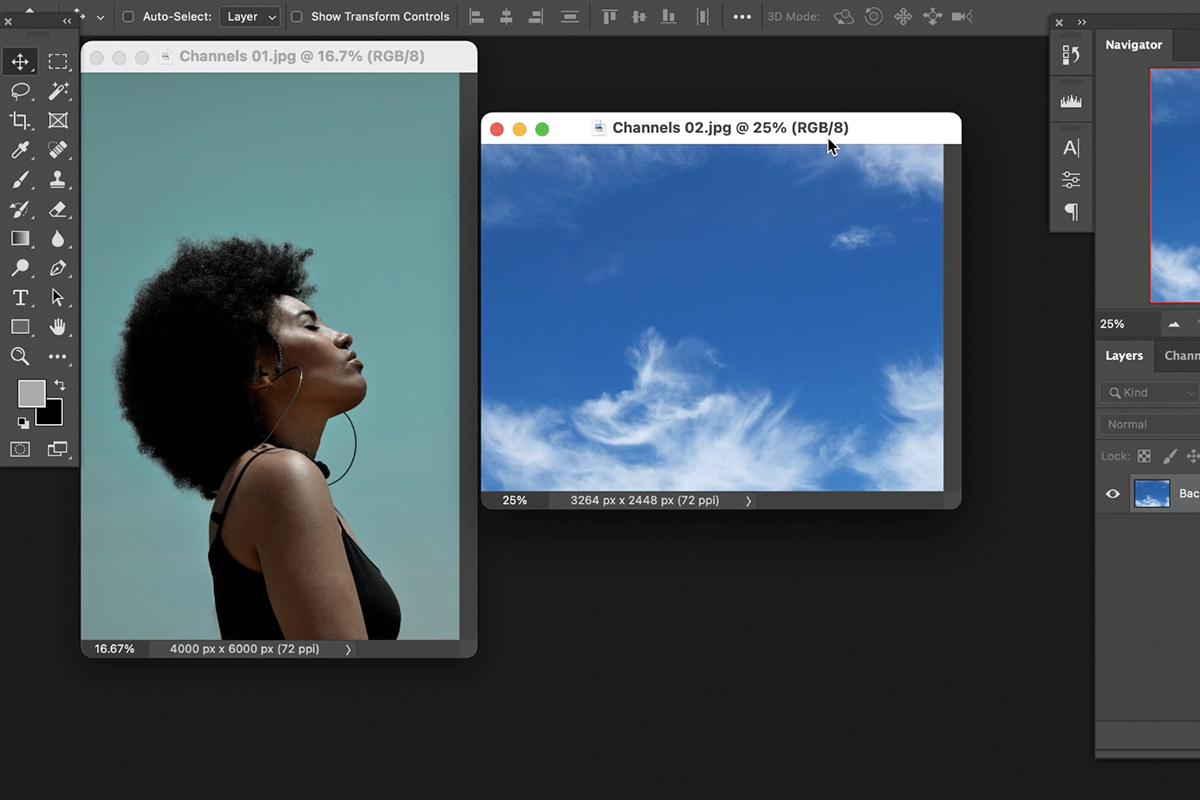
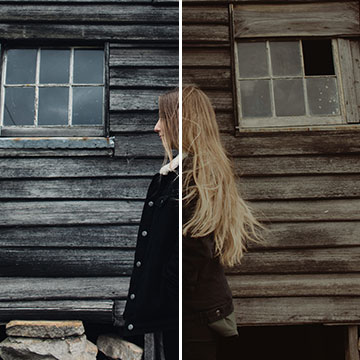
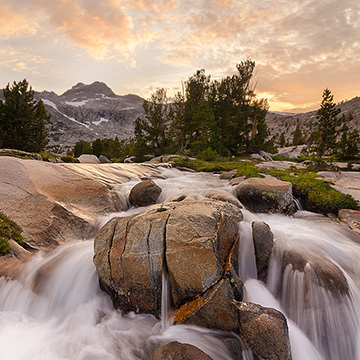
Hair might be the most common culprit, but there are other situations where selections can be extremely tricky. For example, say we wanted to place the clouds from one image into the sky in the background of a portrait.
We know we can’t trace the clouds with the Pen Tool. A tool like Select Color Range might work, but it might yield some rough edges when we smooth, natural edges. For jobs like this, we turn to our favorite selection tool in Photoshop: Channels!
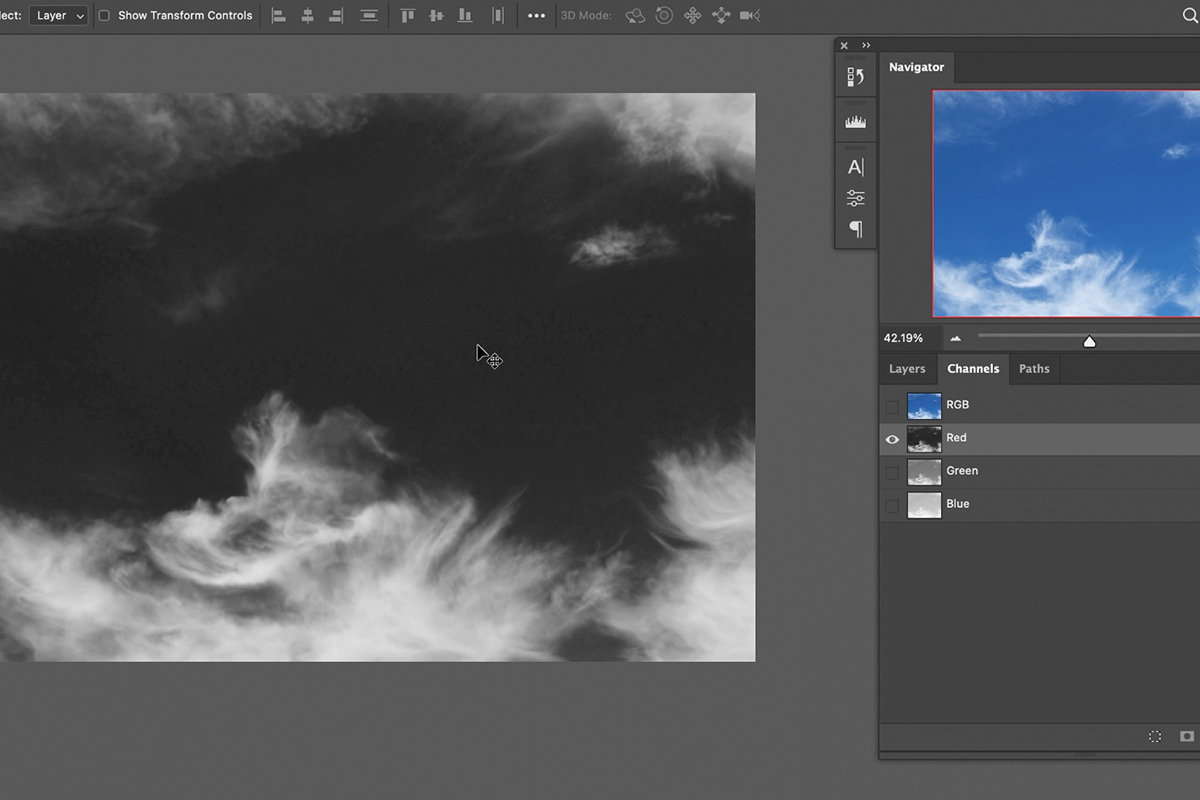
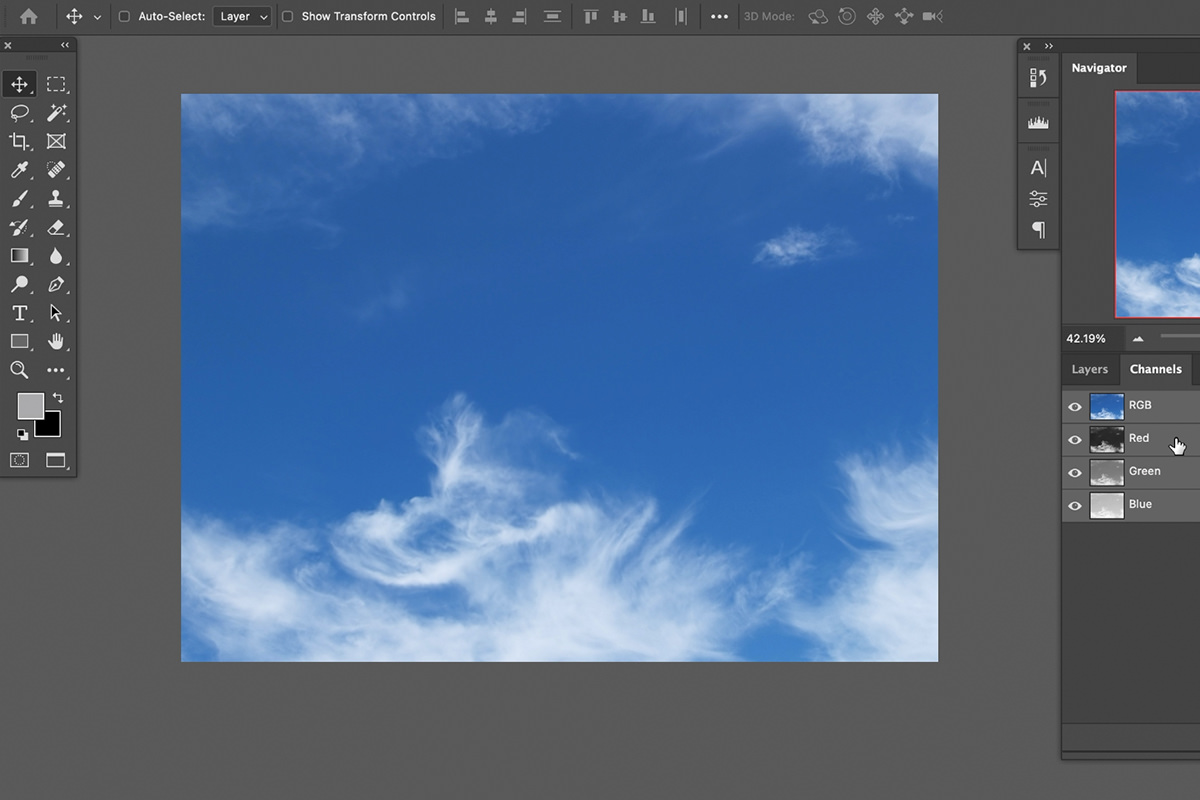
Channels allow us to select parts of an image by their tonal (light or dark) values. To use them, click on Channels Tab in the Layers Panel. Click through each Channel and look closely at the image. In order to get a selection with Channels, we need to find the Channel that has the most contrast–brightest whites and the darkest darks. For our example, this turned out to be the Red Channel.
With that Channel selected, you can use a Levels Adjustment to further increase the contrast. When we convert the Channel into a selection, the white areas will be selected and the dark areas will not. So we want to make sure there is clear definition between the two. Use Levels to make the darks as close to pure black as possible and the light areas as close to pure white as possible.
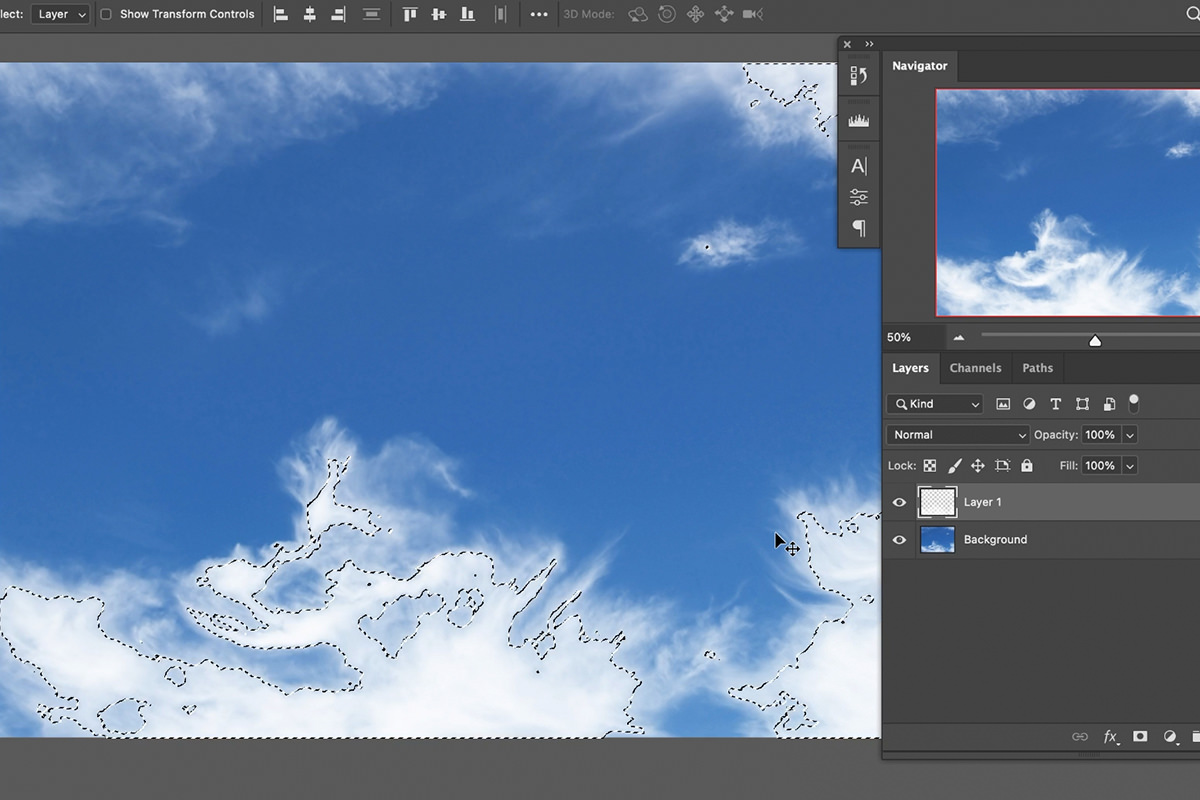
Hold ALT or OPTN and click on the Channel to convert it into a selection. Load that selection as a Layer Mask and you should end up with white fluffy clouds with most of their natural shape and detail in front of a transparent background.
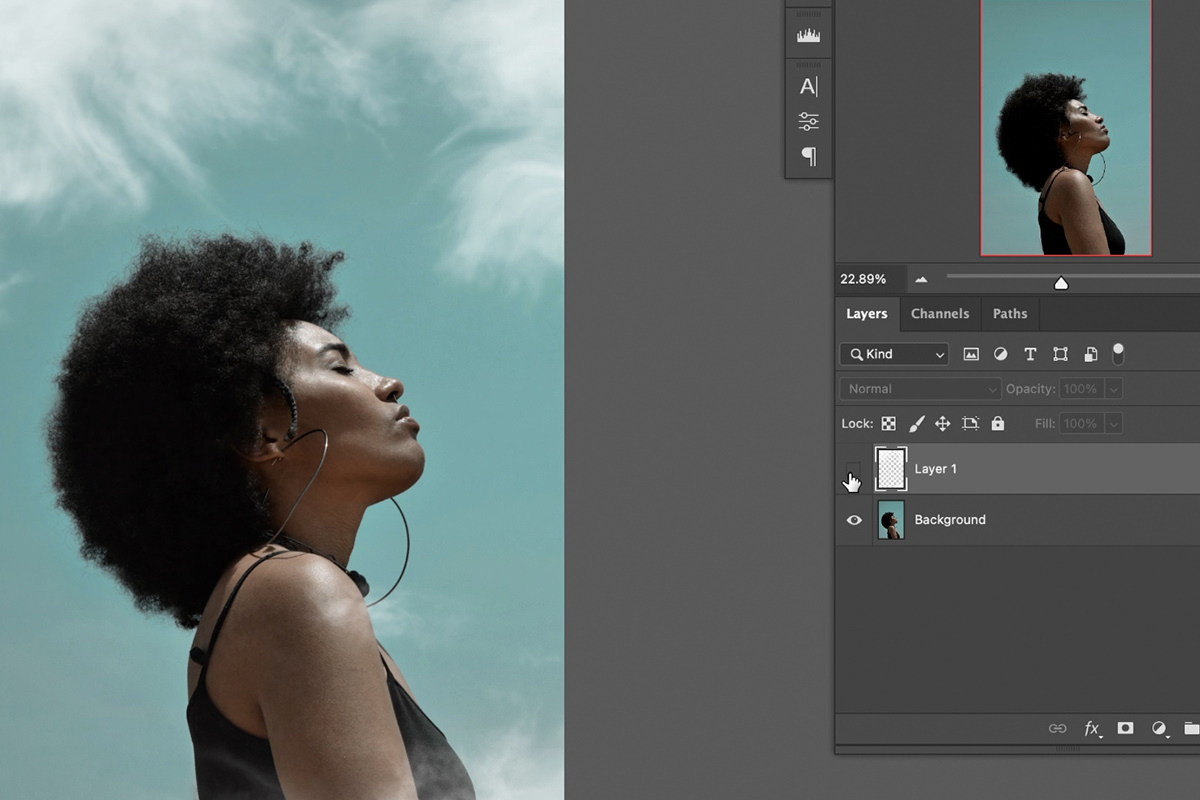
Now we can integrate them into the background of the portrait. Since we only want them to appear in the background and not over the top of our subject, we can use another selection tool to select the subject and then mask that area out of our cloud Layer.
Use Select Subject to make a quick selection of the subject and then load that selection as a Layer Mask on the cloud Layer. Unlink the mask from the Layer so that you can move the clouds around to get the perfect composition while making sure they don’t cover up any parts of the subject.

Using a combination of selection tools you can make precision edits, composite photos together, change out backgrounds and a whole lot more!


Exposure settings are among the most basic of camera controls and yet many photographers, especially new photographers, have anxiety over taking control from the camera’s automation. I have also seen posts or memes that suggest a person is not a real photographer if they don’t use manual (M) exposure settings.
The issue I have with both of those situations is that they really don’t help any photographer to grow, to actually get better at their craft. Exposure compensation is a solution that can be used to fix both of those conditions. This solution gives photographers the best of both worlds – exposure automation with creative control.

The Full Manual Misconception
Especially in this digital age of photography, no beginning photographer needs to be too anxious about taking some control from the automatic modes of your camera. Besides exposure automation, this can also apply to focusing and to electronic flash.
Unless you’re in a fast moving once-in-a-lifetime situation, you can always review your images in order to make sure they look okay. If the image is too dark or too light, you have options to take care of that. One of the options is exposure compensation.
As for the thought that you can’t be a real photographer without using your camera on full manual, it isn’t completely true. Sure, many times I do have to take complete control of every setting on my camera for a particular image or process, such as when making HDR spherical panoramas for virtual tours. I meter meticulously, average out readings, use tables for exposure and hyperfocal distances, relate it all to my experience in similar conditions, and bracket several shots.
In that situation, you bet I am using manual. A primary reason is because I don’t want the settings to change as a pan around to take all the images for stitching together.
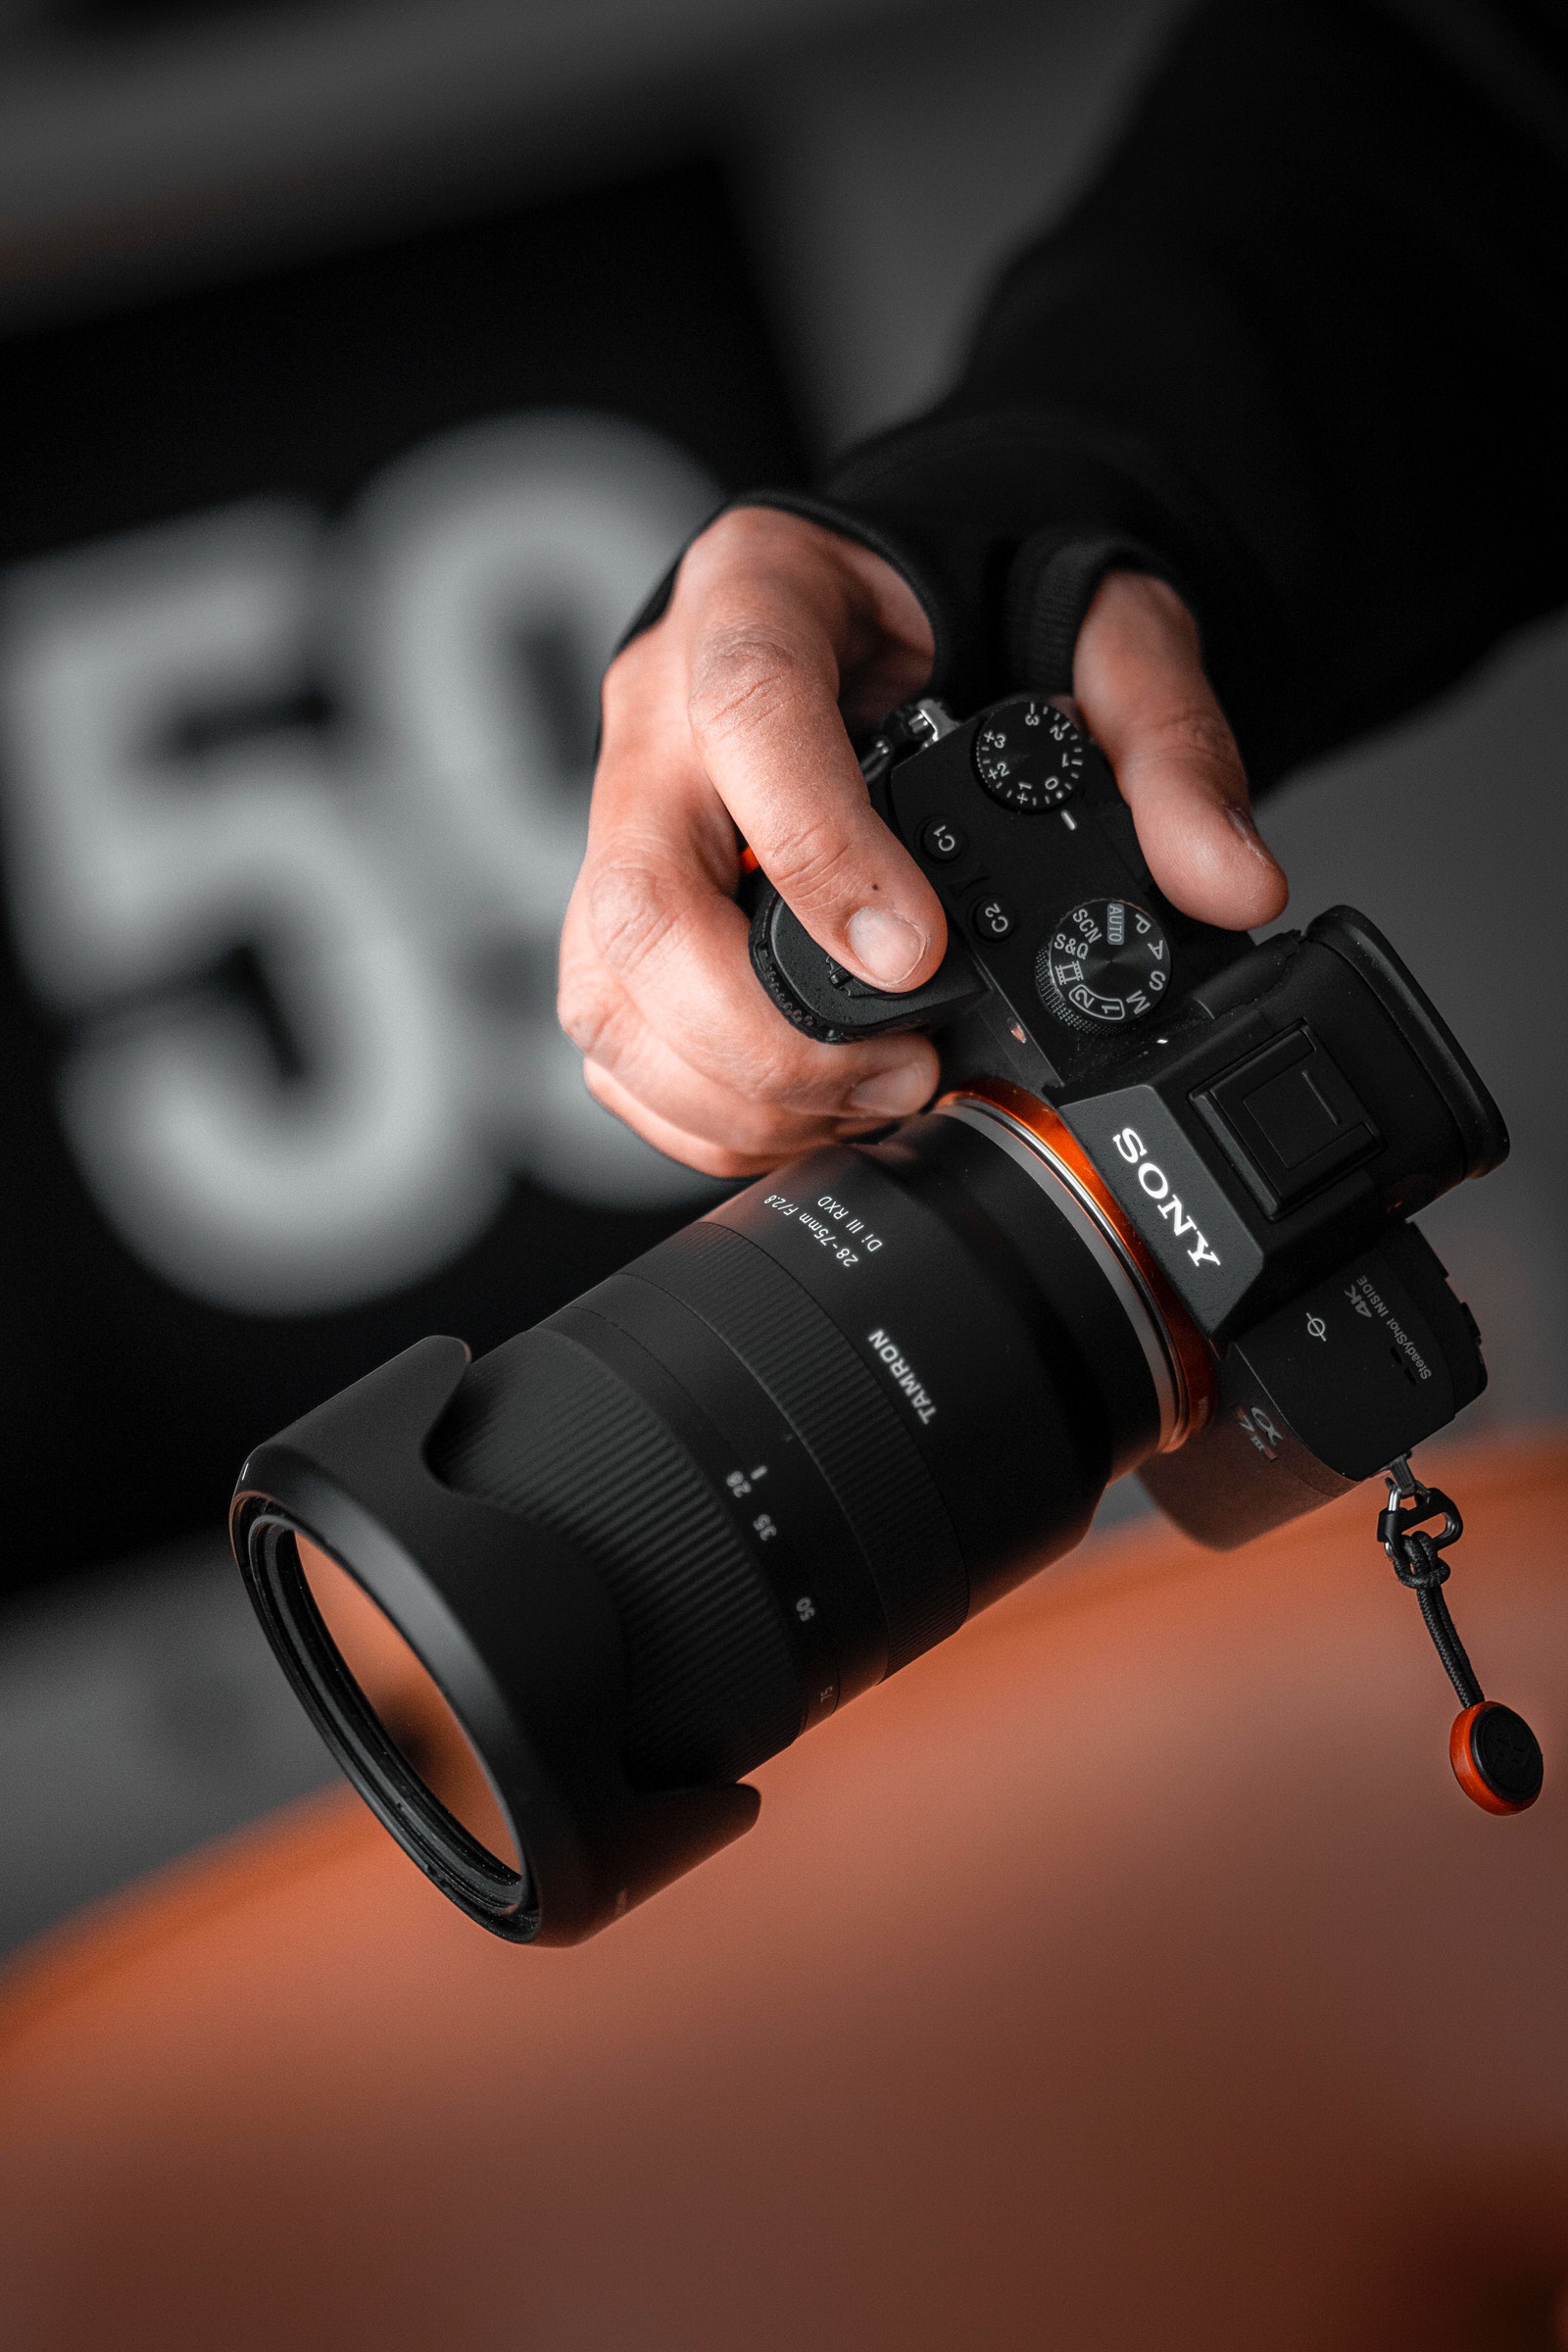
Photo by Michael Soledad on Unsplash
Another imaging situation in which I prefer manually controlling settings is studio photography. Either for portraits or small products. In my home studio, I tend to do the same thing over and over again. From experience, I have learned what ranges of flash power, shutter speed, aperture, and focusing distance result in good images.
So, there are often very good reasons for a modern digital photographer to decide to choose manual exposure, focus, or flash options.
The Case for Automation
However, exposure, focus, and flash automation have improved to the point that virtually anyone can come away with a decent image without figuring out a bunch of variables for themselves. That old Kodak motto from Mr Eastman of “you push the button, we do the rest” is actually a reality much of the time.
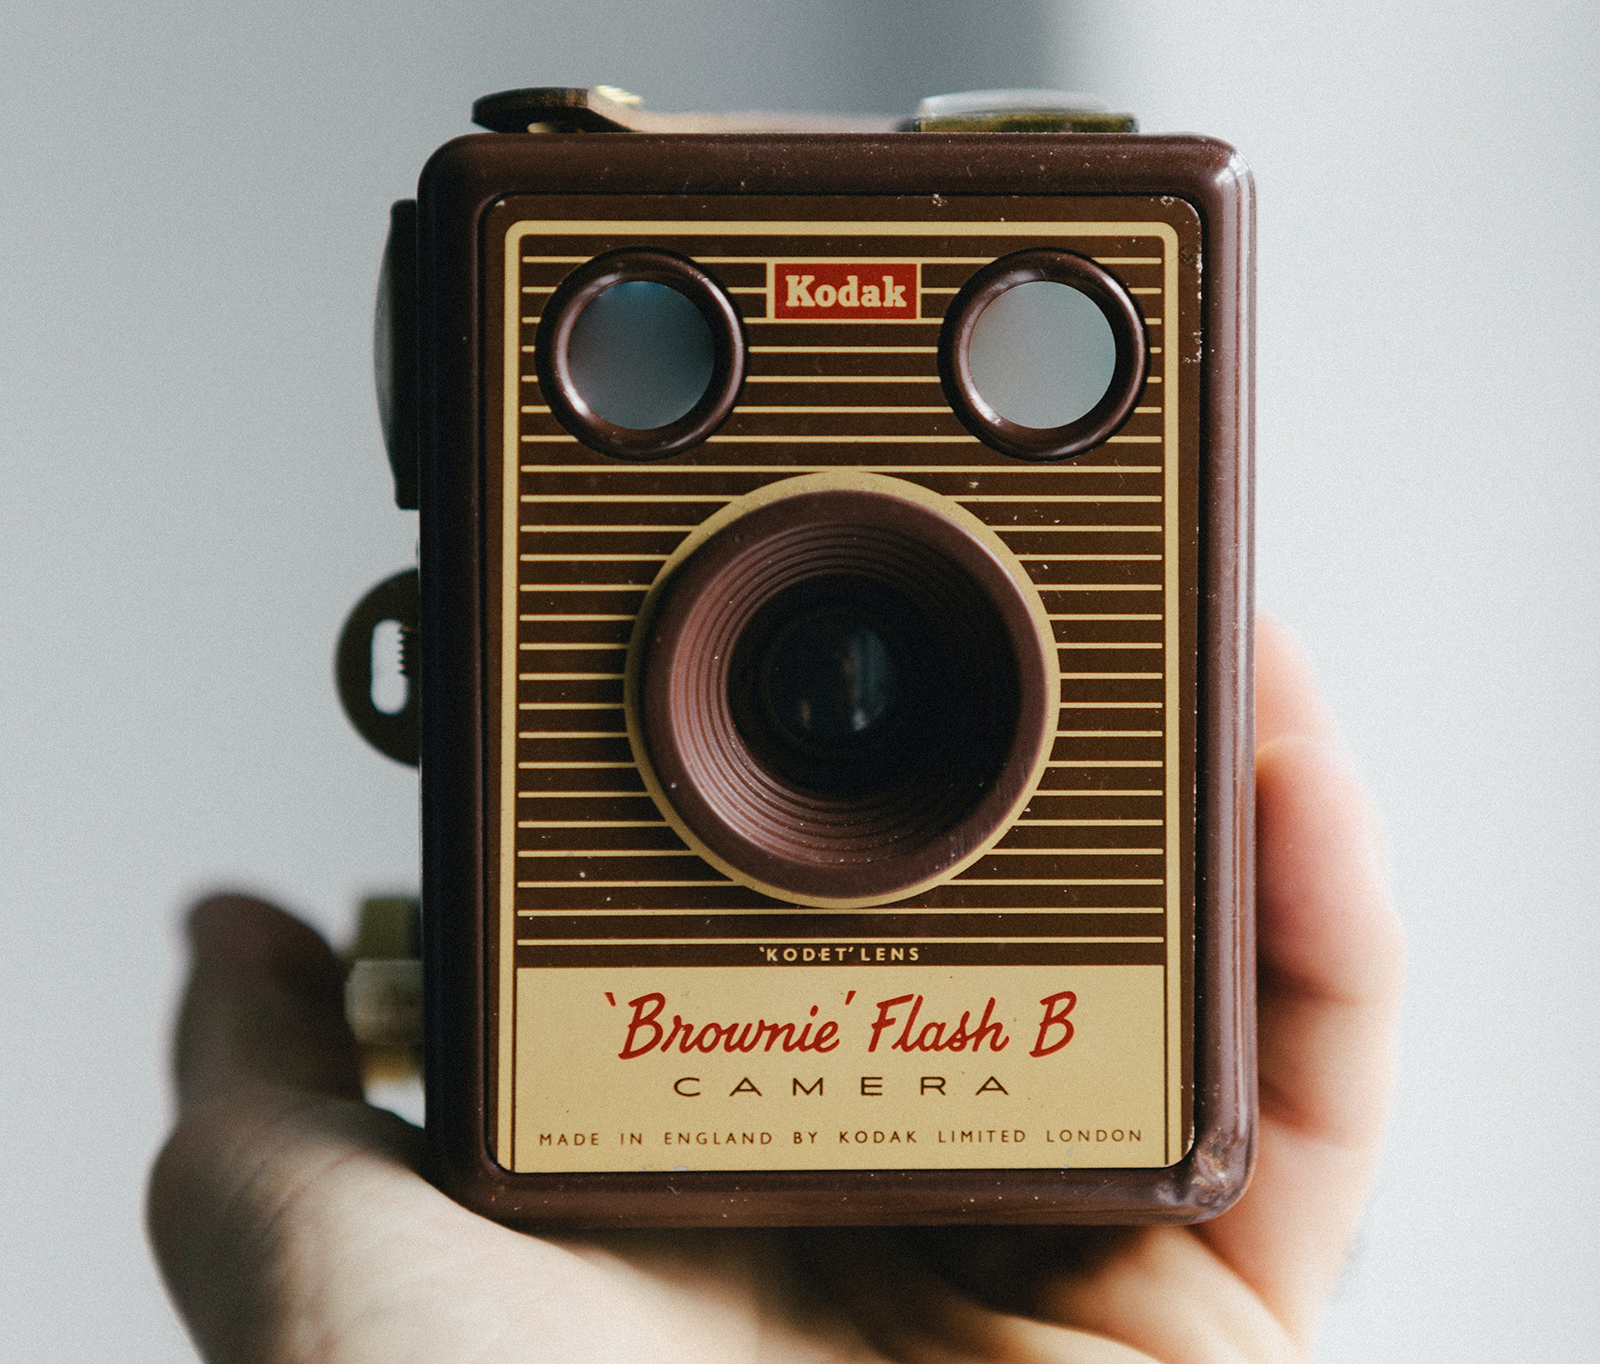
Photo by Little Visuals from Pexels
As a professional photographer, I can tell you that there are good reasons to take advantage of the automatic modes of your cameras and other photographic equipment. It depends on the situation.
For instance, many times, using the very swift and accurate autofocus of modern cameras is a boon for wildlife and sports photographers. Other techniques help you use that automation properly.
In low-light levels, using autofocus may even sometimes be more accurate than you could achieve by eyeballing the viewfinder.
Automatic flash exposure control was revolutionized in the 1970s and 80s, with many camera systems adopting off the film (OTF) plane through-the-lens (TTL) flash metering. For serious photography of many types, this has been of tremendous value. Frankly, I can’t imagine my current photography without this feature being available.
Evaluative metering has increased the accuracy of regular exposure automation. Whatever name it goes by – matrix metering, smart metering, evaluative metering – it is based on preset computer programs that examine a scene for the common metering issues that would normally be poorly exposed.
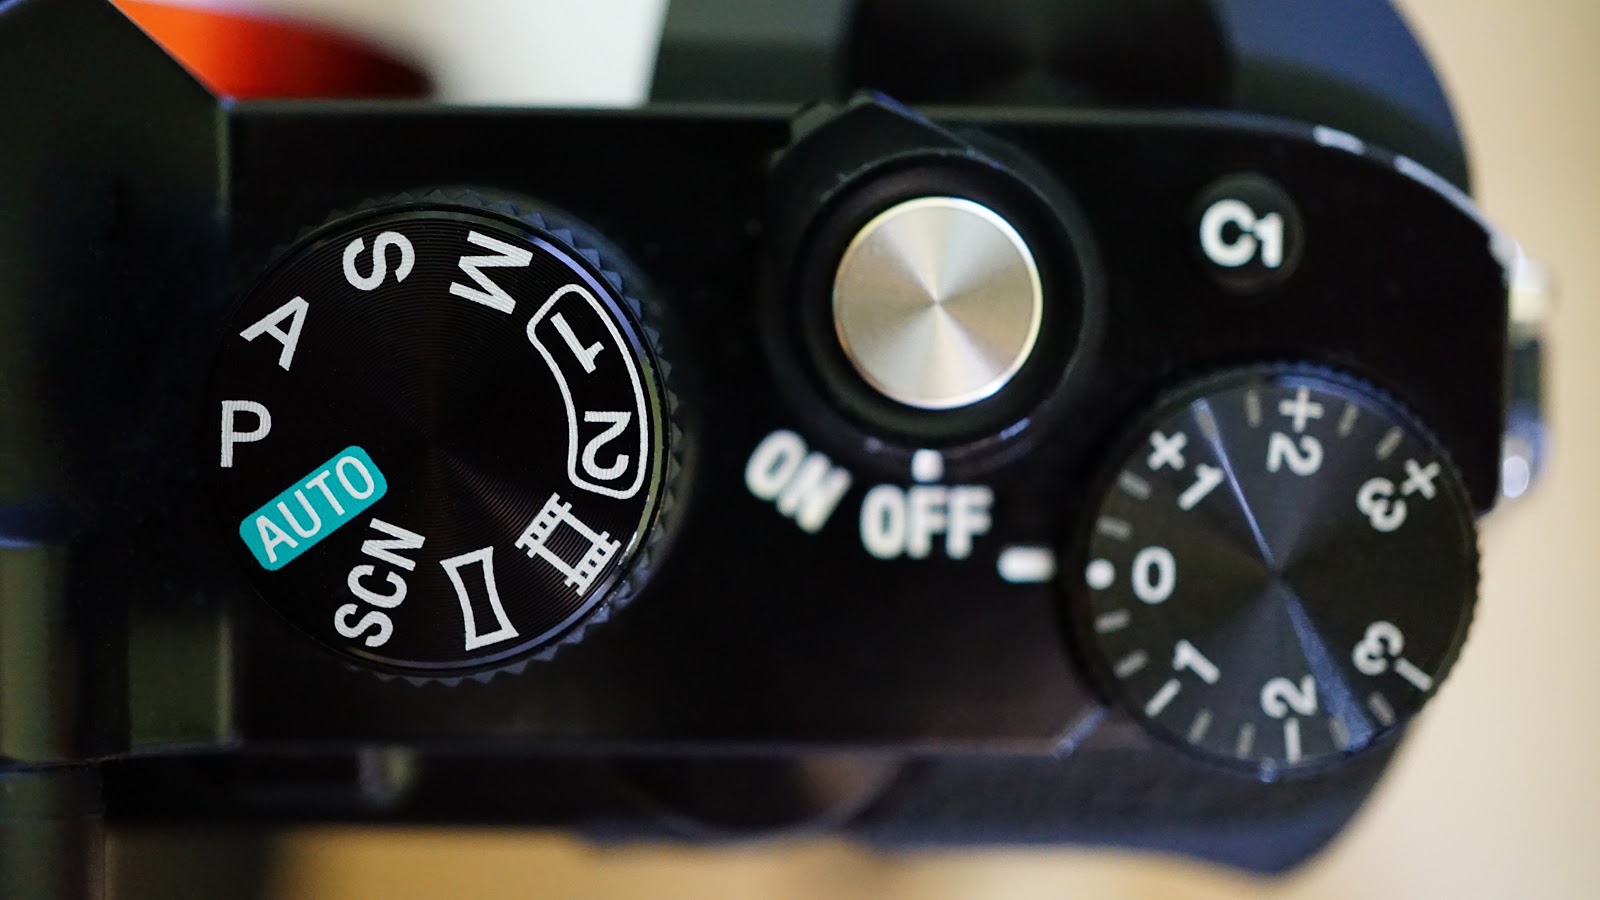
Your camera likely also has several modes that are automatic metering modes. Programmed (P) controls both shutter speed and aperture from the camera. Shutter priority (Tv or S) lets you set the desired shutter speed, while the camera chooses the f-stop or aperture. Aperture priority (Av or A) means you pick an aperture for the lens and the camera matches up the shutter speed.

Why Use Exposure Compensation?
There are times, though, that the capabilities of modern exposure automation are strained to their limits. No matter how advanced and well-designed a photographic metering system may be, there are situations and conditions that demand that you, the photographer, take control.
Manually adjusting the exposure controls is a time-proven method that has existed since photography was invented and developed some 200 years ago. Based on experience, using the Sunny 16 Rule or a handheld meter, you can figure out and decide for yourself what settings to use.
There are imaging techniques and methods that you may be using that require what would otherwise be an incorrect exposure, but the final image you previsualized needs this exposure. However, while keeping your camera in one of the automatic modes, you can skew the exposure up or down by telling the camera to either over- or underexpose the image. This method is what camera manufacturers call exposure compensation.
Thus, you can still take advantage of the built-in metering and computer exposure calculations of your modern digital cameras and yet be ultimately in control of the final exposure.
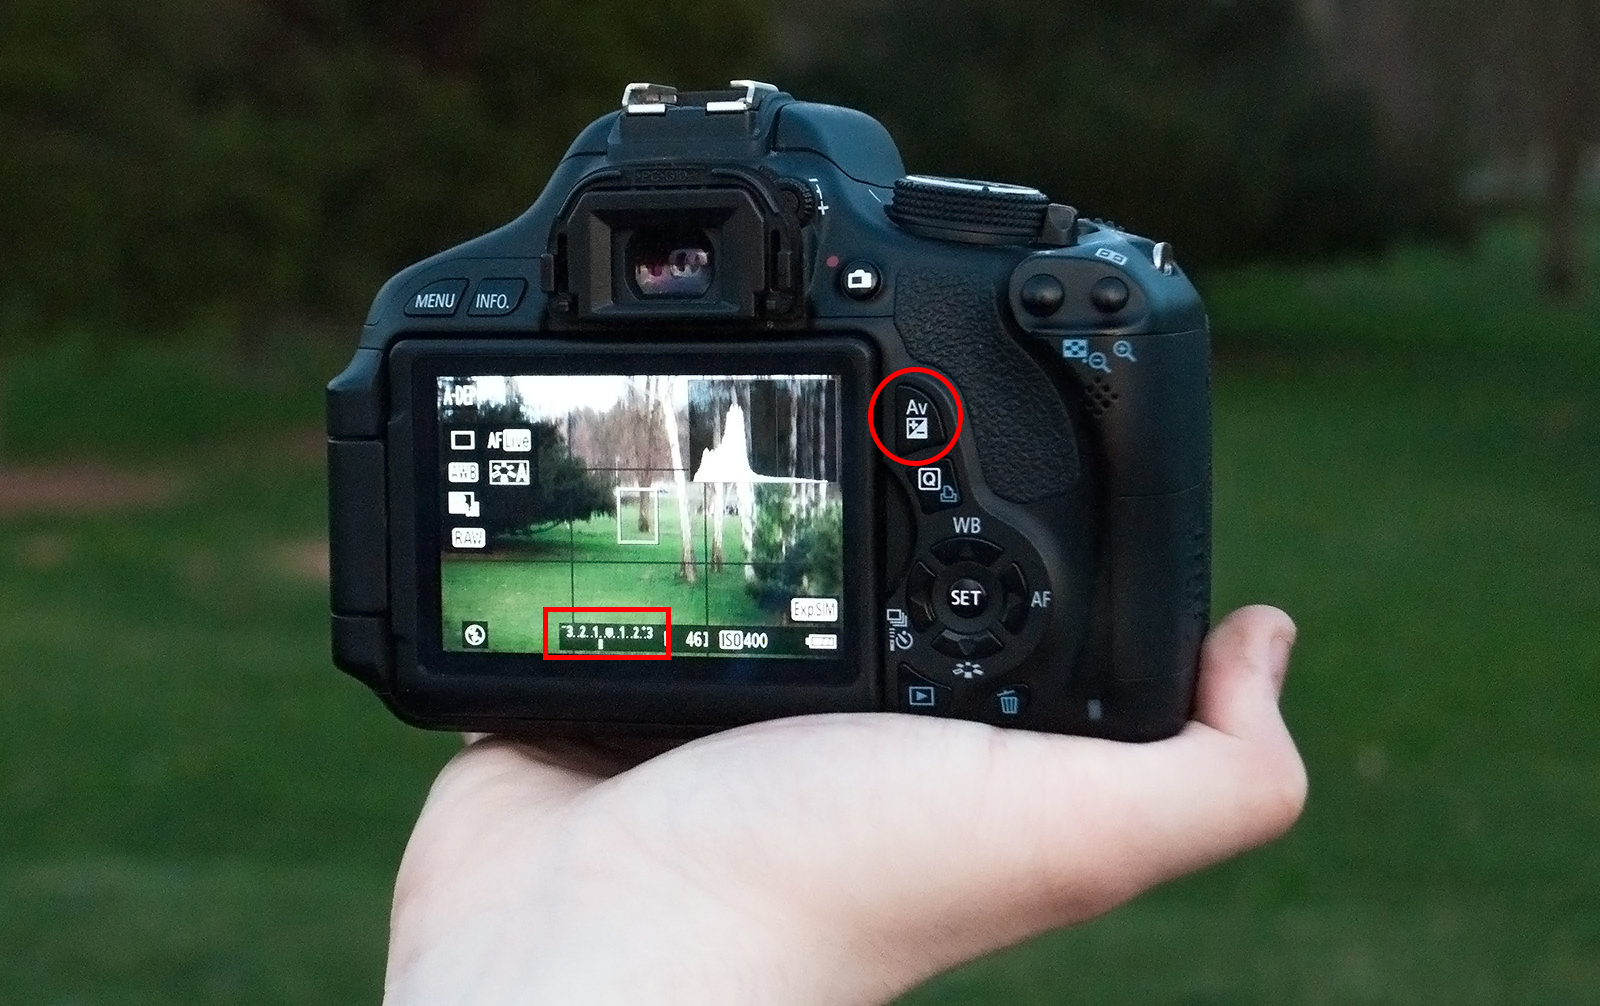
Photo by John Dubanek from Pexels
How to Use Exposure Compensation
Exposure Compensation is generally accessed on camera with a button, dial, or menu control labeled (+-) or (-+) or simply ExpComp. The numbers +1, +2, -1, -2, and so forth refer to how many stops of exposure value we are changing. Some cameras will change only in full stops, while others offer finer control such ½ stops or ? stops.
A stop of exposure value is a measurement of the scene brightness and your control methods. A scene may be brighter or dimmer in total exposure value. Meters see this and make adjustments in readouts or output to compensate.
Camera exposure settings – ISO, shutter speed, and aperture (the Exposure Triangle) – control how that scene brightness gets transferred to the imaging medium. This works similarly in both film and digital.
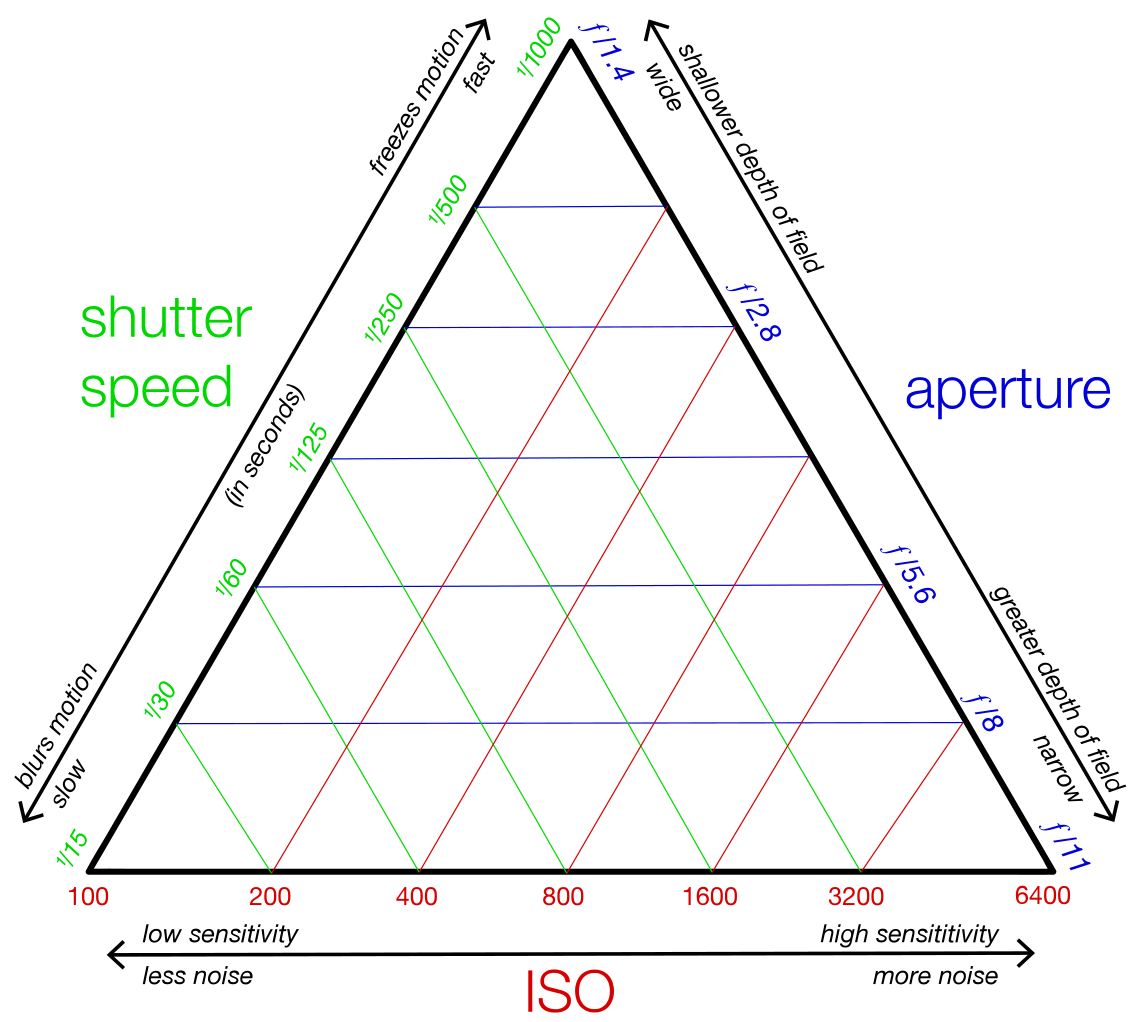
An interesting aspect of photographic metering and exposure control is the science behind it all. In a nutshell, the world is 18 percent gray to camera meters. Exposure control settings are calculated on a Base 2 logarithmic scale. What that means to you as a photographer is that the camera meters attempt to average out scene brightness and then each full stop you make in the Exposure Triangle either halves or doubles what reaches the film or sensor.
When to Use Exposure Compensation
The metering systems in modern cameras are able to handle many challenging lighting conditions. Compared to early camera meters, modern cameras can get good images from scenes that would normally fool a meter. Still, they can’t cover every situation perfectly.
A couple of common scenarios in which you would likely employ exposure compensation include scenes with very large areas of bright or dark that compete with your main subject, or scenes with very large bright or dark areas in which those areas are the actual subject.
At the beach on a sunny day, the sun is high in the sky, the water is clear and blue, and the white sand dazzles your eyes. A beautiful scene. Yet all of those aspects of the scene could fool the camera metering system. Especially that dazzling sand. Same thing with photographs of snowy landscapes.

Photo by Daniel Frank from Pexels
What tends to happen is that the meter will attempt to pull down the exposure to that 18 percent (or middle) gray. The result is an overall underexposure of the entire scene. The meter basically wants to turn the bright white sand to a middle gray value.
Exposure compensation can be added on the plus side to help. You would add exposure compensation on the plus side because the camera wants to underexpose. How much to add is open to consideration.
Another picture-taking scenario that often needs exposure compensation is when a bright light source is behind the main subject. Depending on how much of the main subject fills the frame, the camera meter may end up giving you an exposure that looks about halfway between a silhouette and a proper exposure.
Dialing in a stop or two of plus value exposure compensation will compensate and result in an image where the main subject is properly exposed and the background brightness will pretty much be blown out, showing little detail.
Dialing in underexposure may be needed when shooting dark scenes, such as a cityscape at twilight, or a black bear in a dark forest. In that type of lighting or darker subject matter, the camera meter may try to add exposure to get back up to that middle gray 18 percent value.
This would give you an image that looks washed out, uninteresting. So, you subtract exposure value. Dial in -1 or -2 stops of exposure compensation. To the camera metering brain, you’re underexposing, but the final image has the look you wanted.
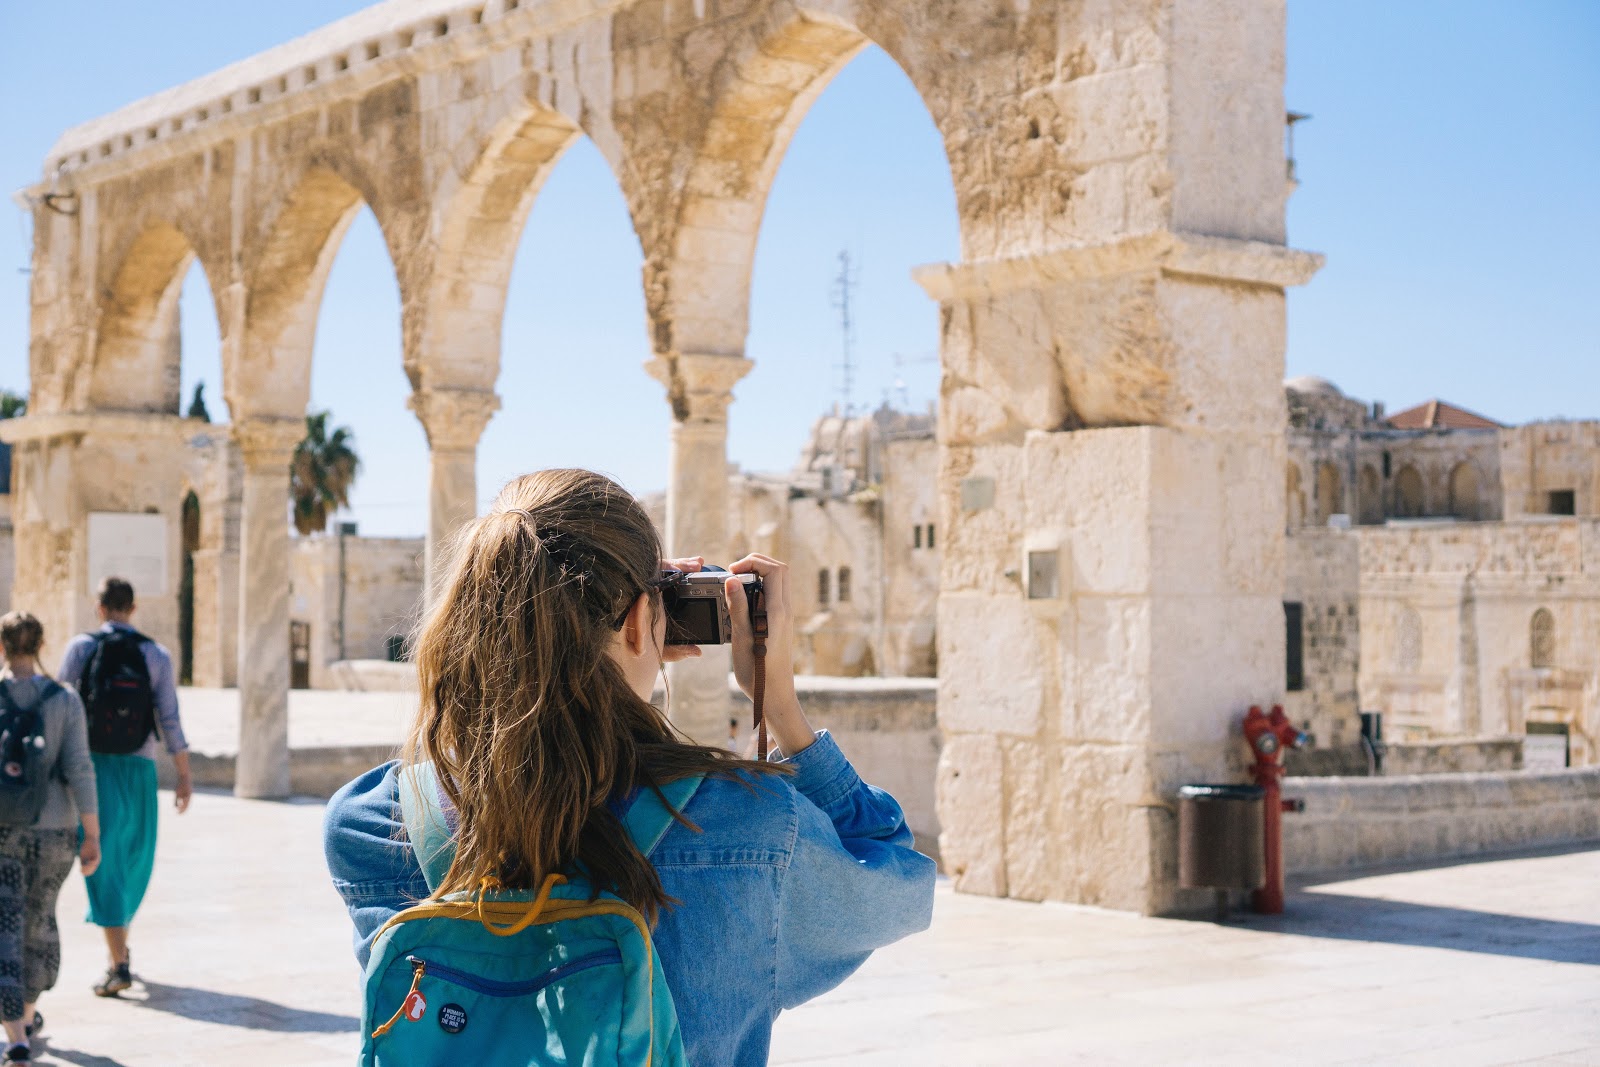
Photo by Haley Black from Pexels
Taking Creative Control
Besides using exposure compensation to get back to what you determine as correct exposure, you could also employ exposure compensation to creatively control the exposure of your images.
Depending on your intended final image, you may not want to keep what the camera is telling you as the suggested correct exposure. Previsualization is the key.
What Is Previsualization in Photography?
Previsualization is exactly what it sounds like. You have an idea of what you are aiming for and what you want the image to look like. You can visualize ahead of time and then work your methods and settings in order to achieve that intended result.
Some of the old masters of film photography used this method to great advantage. We might especially observe the black and white imagery of Ansel Adams.
As a photographer, you probably are at least somewhat familiar with the black and white scenic landscapes of Ansel Adams. If not, take some time to look him up. If nothing else, you’ll enjoy his work. It’s his method that we really want to examine. He devised a system of previsualization called the Zone System.
You can learn about the Zone System in three books authored by Ansel Adams: The Camera, The Negative, The Print. These are well worth reading for an insightful view of the photographic process that is still relevant for digital imaging.
In simplest terms, Adams divided deep black and bright white and everything in between into 11 different discrete values or zones. Zone 0 is deep black, Zone V (5) is middle gray (18 percent gray), Zone X (10) is pure white. By the way, these light values are legitimate in color imaging, too.
As you can readily determine right away, Zone 5, middle gray, is what your camera meter is trying to capture most of the time.
What Ansel Adams and others would do is select an element of the scene and say to themselves that they want that to end up in the final image at a particular Zone System value. Then, they’d do all their exposing and processing to make that happen. In addition to individual parts of the scene and their exposure values, you could also choose several different subject elements and a range of Zone System values you want them to encompass.
You can still do this in digital imaging. In fact, you actually have more control now because of how much more exposure detail your camera sensors and computer processing can hold and reveal.

Photo by Parviz Besharat pur from Pexels
For your creative digital imaging, you could use the Zone System to take the scene in front of you, pick what details you want to emphasize in one way or another, determine ahead of time (previsualize) what zone those parts of the scene would look best as, and then use your exposure compensation dial to shift everything up or down one or two zones.
A similar thought applies if you wish to create high key or low key photos. An easy way to achieve high key is to dial up the exposure. For low key, dial it down towards the minus side. Of course, there is much more that can be done for high or low key, but exposure compensation is an easy start to those effects.
Exposure Compensation Tips
If you’re shooting digital, you have an option that didn’t exist in film cameras. You can review your images right after taking the picture. Some people call that “chimping.” Chimping can be distracting to the shooting experience when you overdo it. On the other hand, chimping, or reviewing images as they are shot, is good practice in challenging lighting conditions.

Photo by Pablo Guerrero on Unsplash
Are you old enough to remember Polaroid cameras? When the developed image showed, you could see if it was correctly exposed. If not, you moved the Brighten/Darken dial one way or the other and reshot. The same idea works for on-camera image review and using exposure compensation.
Another helpful practice is having your camera viewscreen image review also show you the histogram. The histogram exposure value display is one of the more useful tools to have come to cameras in the change from film to digital imaging. Once you know what the histogram is telling you, you can use it to great advantage in all of your digital photography.
What changes in each automatic mode when you change the exposure compensation? It may vary slightly from brand to brand, but generally, it works the same way as the exposure modes.
If you are in shutter priority, the exposure compensation changes the f-stop. In aperture priority it changes the shutter speed. For programmed mode, it changes both shutter and aperture.
One important thing to remember is that with most cameras, if you are in what I call the Green Dot Auto Mode, exposure compensation is disabled. Green Dot Auto Mode takes full control of all settings. The only things it allows you to change is where you point it, how much zoom, and when to click. Useful for quick snapshots, but not the default mode for serious shooting.
Related Exposure Method – Bracketing
Closely related to exposure compensation is another method of exposure control: exposure bracketing. This technique takes extra images at different exposure values. You can set many current cameras to bracket exposures in all auto modes (except Green Dot) and also in Manual (M) mode.
Typically, you can set the camera to fire off three, five, or up to nine shots, changing exposure up and down from one to three stops, sometimes with incremental values allowed.
For instance, if the metered correct exposure for the scene at ISO 400 is 1/125th at f/8.0, the camera could expose extra frames at 1/60th and f/5.6 and 1/250th and f/11.0 if you were in P mode and selected three frames bracketed at +- 2-stops.
Likely, one of the bracketed shots will be a usable image file for what you have previsualized as your final photograph. Obviously, you can adjust your bracketing settings and what mode you’re in depending on your specific camera.
Bracketing is also related to another advanced new method made possible by digital imaging: HDR.
HDR Photography
High Dynamic Range photography, or HDR, is a method of either evening out or enhancing the exposure value or range of values within a scene.

When doing HDR, you take a series of bracketed images of differing exposure values and use a computer post-processing program to blend them together for a final single image. The end photograph can either have exaggerated exposure and color for artistic effect, or it can be processed for a natural appearance.
This method is related to exposure compensation in that you can adjust the blending of values to lean one way or the other, towards lighter or darker, during the computer processing. Most of the time, however, you would probably be using natural looking HDR to expand in both directions.
Natural looking HDR is widely used in real estate photography, virtual tours, and spherical panoramas. You can use HDR in any situation, even portraits, if you can keep the camera still for all of the images to register together properly.
Shoot In RAW – Post Process
Another method that is related to the idea of exposure compensation is to shoot your digital files in RAW and use a good post-processing program such as Adobe Photoshop, Lightroom or ACDSee Photo Studio Ultimate to enhance or adjust what is contained in the file.
Photo by Matan Segev from Pexels
We constantly highlight the advantages of shooting in RAW because of how much extra exposure information is captured in an uncompressed RAW file as opposed to a compressed image file format such as JPEG.
Using these editing programs, you can take an exposure of that beach with bright sand and apply corrections to specific brightness values, colors, or areas of the image. Or adjust the entire image one way or another. This is possible because of the extra exposure information captured in RAW format.
Especially within shadows does RAW seem to have extra info, at least according to my personal experience. If a RAW image file has the highlights blown out, there isn’t much you can do to fix it and see detail. But a subject in shadow can often be enhanced to see detail. Of course, there’s only so much you can do with a file. Post-processing is best used to enhance a decent image rather than to try to save a less than perfect picture.
Taking Advantage of This Useful Tool
Exposure compensation is an extremely useful photographic tool for photographers from absolute beginners to advanced and professional level. But at the end of the day, it is just that – a tool.
Modern cameras are incredible imaging machines. The modes and features that have been invented, developed, and enhanced allow us to take full advantage of the incredible capabilities in the art and craft of digital photography.
Whether you are on vacation at the beach or ski lodge with your brand new mirrorless or DSLR camera, or if you are a product or portrait photographer working on location or out of your own studio, exposure compensation is a good method of controlling how your desired final image turns out.
RELATED ARTICLES

The Golden Ratio/Fibonacci Sequence: What It Means to Photographers

Take Charge of Your Finances: Your Guide to Filing Taxes as a Photographer
Ultimate Photoshop Comparison: New Updates in CC 2020 Compared to Versions of Past Decade

How to Make a Photography Website and Landing Pages That Sell

The Photographer’s Complete Guide to LinkedIn Marketing

The Best Photography Articles & Guides for Covid-19 Support
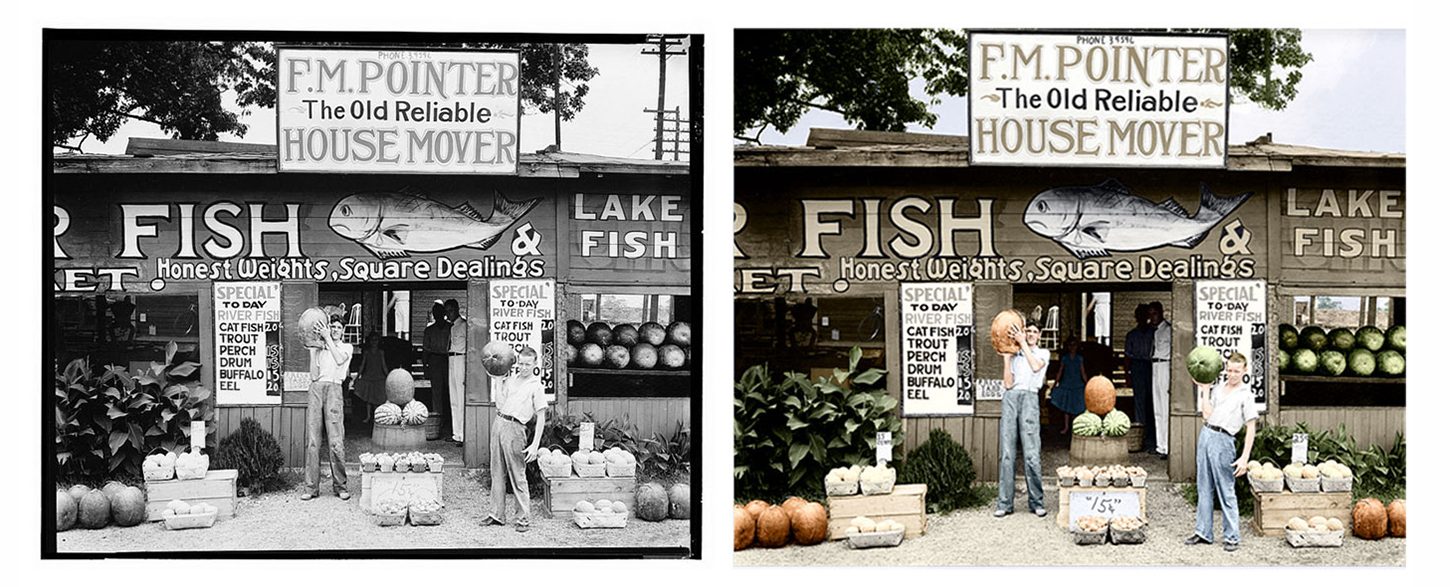
How to Breathe New Life into Old Images with Photo Colorization
Learning Paths > Tools & Techniques Learning Path
Details
7 Courses
30+ Hours
Medium
Get ready for an epic adventure into the world of retouching with this flexible learning path. This awesome collection of tutorials lets you dive into specific techniques and tools that will help you bring all your creative projects to life.
Whether you want to explore a wide range of topics or prefer to zoom in on the tutorials that truly grab your attention, our learning path has got you covered! Along the way you’ll learn the most advanced retouching techniques, including Frequency Separation and Sharpening, and must-know Photoshop tools like the Pen Tool and the Brush Tool!
Photoshop Tools
In this tutorial, we teach you everything you need to know about the Pen Tool, from the most important keyboard shortcuts to making beautiful lines and curves. Learn to change a background color, remove an entire background, and create a simple logo.
Photoshop | Photo Editing | Medium | 2.75 hours | 12 videos
14 Sample Images
( 31 )

Learn how to create rain, snow, and atmosphere from scratch and how paint in photo-realistic hair for perfect cutouts. Watch 15 in-depth examples of how to use some of the 35 custom Photoshop brushes included with this tutorial!
Photoshop | Photo Editing | Medium | 6.25 hours | 16 videos
26 Sample Images | 35 Photoshop Brushes
( 38 )
Adjustment Layers are the smartest and most powerful tools for photo editing in Photoshop. We walk you through all 19 Adjustment Layers while showing you how to fix exposure, apply professional coloring, create custom LUTs and more.
Photoshop | Photo Editing | Easy | 4.5 hours | 33 videos
45 Sample Images
( 29 )
Photoshop Techniques
Create smooth, vibrant skin tones with natural texture and details with Frequency Separation in Photoshop. Learn how to separate frequencies, edit the details and color independently of one another, and use our Photoshop action to work faster.
Photoshop | Retouching | Advanced | 6.75 hours | 26 videos
7 Sample Images | 2 Photoshop Actions | 1 Photoshop Brush
( 169 )
In this tutorial, we walk you through how to manually blend exposures using the power and flexibility of Luminosity Masks. You will learn to create selections based on light levels and then use those selections to paint detail back into your photos.
Photoshop | Photo Editing | Advanced | 3.5 hours | 10 videos
11 Sample Images | 2 Photoshop Actions
( 136 )

Dodging and burning is a staple technique for professional photographers and retouchers. Learn how to sculpt highlights and shadows to add dimension, remove blemishes, and guide the eyes of the viewer to the most important parts of a photo.
Photoshop | Photo Editing | Medium | 5 hours | 14 videos
16 Sample Images | 1 Photoshop Brush
( 65 )
Give your photos a professional finish with sharpening in Photoshop. Learn to enhance details, create contrast, and prepare your images for print, web, and social media.
Photoshop | Photo Editing | Medium | 3 hours | 14 videos
18 Sample Images | 1 Photoshop Action
( 61 )


Reviews
There are no reviews yet.
Key Shortcuts for the Pen Tool in Photoshop
-
-
Add to
favorites
-
DifficultyEasy
-
Length10 hours
-
Videos60
-
Software
Description
Photoshop has dozens of tools for countless applications. We break down the fundamentals, tips, tricks, and extended techniques for 60 of the most powerful tools Photoshop has to offer.
Learn at your own pace and add to your own personal toolbox with our Photoshop Basics Collection
THIS COURSE INCLUDES
- 60 Sample Images
Share
Table of Contents
Photoshop Basics
-
01 - Move Tool9:13m
-
02 - Artboard Tool5:32m
-
03 - Marquee Tool11:37m
-
04 - Lasso Tool8:31m
-
05 - Polygonal Lasso Tool10:26m
-
06 - Magnetic Lasso Tool15:57m
-
07 - Quick Selection Tool6:32m
-
08 - Magic Wand Tool13:39m
-
09 - Crop Tool18:45m
-
10 - Perspective Crop Tool6:04m
-
11 - Slice Tool3:37m
-
12 - Eyedropper Tool7:50m
Photoshop Basics 2
-
01 - Ruler Tool7:50m
-
02 - Spot Healing Brush Tool8:10m
-
03 - Healing Brush Tool11:43m
-
04 - Patch Tool7:32m
-
05 - Content-Aware Move5:09m
-
06 - Red Eye Tool2:05m
-
07 - Brush Tool22:22m
-
08 - Clone Stamp Tool11:31m
-
09 - Rounded Rectangle Tool10:34m
-
10 - Rotate View Tool5:07m
-
11 - Layers12:02m
-
12 - Hand Tool7:32m
Photoshop Basics 3
-
01 - Dodge Tool3:41m
-
02 - Burn Tool3:33m
-
03 - Foreground & Background Colors9:31m
-
04 - Blur Tool4:17m
-
05 - Quick Mask Mode7:30m
-
06 - Zoom Tool5:43m
-
07 - Sharpen Tool4:05m
-
08 - Pen Tool30:06m
-
09 - Eraser Tool9:13m
-
10 - Polygon Tool12:42m
-
11 - Custom Shape Tool11:04m
-
12 - Type Tool26:46m
Photoshop Basics 4
-
01 - Smudge Tool3:25m
-
02 - Gradient Tool8:05m
-
03 - Rectangle Tool8:22m
-
04 - Ellipse Tool6:33m
-
05 - Select & Mask12:09m
-
06 - Smart Objects12:43m
-
07 - Alignment Tools11:11m
-
08 - Actions8:53m
-
09 - Adjustment Layers15:41m
-
10 - Groups6:33m
-
11 - Color Balance6:13m
-
12 - History7:49m
Photoshop Basics 5
-
01 - Black & White6:56m
-
02 - Levels11:10m
-
03 - Liquify Tool14:17m
-
04 - Keyboard Shortcuts7:49m
-
05 - Clipping Masks7:39m
-
06 - Filter Gallery9:15m
-
07 - Curves12:34m
-
08 - Hue/Saturation8:48m
-
09 - Channels11:35m
-
10 - Paths13:27m
-
11 - Layer Masks10:18m
-
12 - Layer Effects15:13m
Course Downloads
Every Tool Explained

Quick Reference
This collection is designed to make it easy for you to get in, learn what you need, and then get back to editing. Every tool and technique has its own tutorial, complete with example images so that you can follow along.
Photoshop, Inside and Out
Photoshop is capable of a lot, and it’s easy to forget that some tools and techniques exist. Being able to quickly identify the best tool to complete a job can greatly improve the speed of your workflow and help you deliver a more accurate, polished product.
Tips & Tricks
We don’t only show you the fundamentals of each tool, we’re going to dive-in and demonstrate some PRO tips to get the most out of everything Photoshop has to offer.

Extended Techniques
Using Channels to make a selection, Layer Masks to edit areas of you image with precision, or Smart Objects to maintain quality and flexibility as you edit. We cover as much as we can, as quickly as we can, demonstrating each tool’s obvious and sometimes not-so-obvious applications.
Selections and Masking
Making accurate selections and masks is one of the most challenging aspects of mastering Photoshop. Not only that, but there are many different methods for both. We’ll show you the best methods to create selections and mask out objects given different circumstances and using a wide variety of tools.
The Essential Tools
While every tool in Photoshop has its uses, you’ll be coming back to some a lot more often than others. A thorough understanding of tools like the Brush Tool, The Pen Tool, and Layer Masks will go a long way in making sure no Photoshop challenge feels insurmountable.

The Right Tool for the Job
Knowing how to use every Photoshop tool is important. Knowing when to use a tool can turn you into a Photoshop master. Learn every tool in Photoshop and the most helpful applications for each.
All About Layers
Layers are the key to understanding the how Photoshop images are structured. Throughout this collection, we’ll cover the optimal ways to use layers for non-destructive editing as well as the many different types of layers you can use to make adjustments to your images.
Keyboard Shortcuts
We provide on-screen keyboard shortcuts for every tool. Learning these shortcuts will help speed up your workflow and make navigating through Photoshop a snap. We even have a section dedicated to keyboard shortcuts, where we’ll reinforce some of the most commonly used combinations as well as show you some recommended custom shortcuts that we’ve created.


Reviews
-
Thank you Aaron I’m back btw ! wish me luck
-
very good
-
I love these basic tutorials Aaron! You are such a great teacher. The only tool i have missed is the background eraser tool. I sometimes use it to remove backgrounds.
-
Pretty cool Aaron 😊
-
Thanks aaron,easy to understand, best photoshop tutor website ever 🙂
-
this is the best toturial for beginners , i hope if you do same foe adobe illustrator <3
-
Great!Nice tutorial.I have learn much.Thank you.
-
Hi I enjoy learning from your lessons. I feel like a pro after so many time going over the same lesson. They are great to get some humour from them. Cheers Michael
-
Was dubious at first but have warmed to the vast range of well described, well timed descriptions. Hooked. Thanks
-
Hi Aaron, I have been a photographer for many years and I loved film/darkroom work but Photoshop is so involved I felt lost! I needed to move my photography to the next level so needed a thorough understanding of the tools in photoshop. I was getting so frustrated with photography I was about to pack it all but decided to buy your Pro subscription a couple of days ago as a last ditch effort to understand Photoshop. So far, so good – slowly working through you Photoshop Basics tutorials and they are great – explained so well and clearly – thank you – 5 stars 🙂
-
I am new in Photography and ofcourse Photoshop and Lightroom. Aron really explains it great with a funny way, Already pleased that i took the pro subscribtion. All members of the Phlearn team… Big Thanks.
-
Man, I love this site! Aaron, I salute you. Since watching the tutorials on here (and a few others *cough cough*), my work has gotten so much better. This simple yet ESSENTIAL list of basics covering all the essential tools is simply … well, it’s just amazing. Something I’ll be watching!!!! Thanks so much for what you do man! Salut from London, UK.
-
Great, great collection of tutorials! Perfect for the beginner or the seasoned Pro. I have taken Adobe certified photoshop courses and due to the lack of time, they couldn’t review all of this material and definitely not in this simple and concise manner. New programs can be so daunting to a beginner and Aaron has a way of breaking it down so that it all makes sense. I have always felt that there has been a lack of foundational curriculum for Photoshop and that other teachers tell you how to do a certain technique, with their particular workflow style and that is the way it is. As everyone knows, the more they use it, there are many different paths to the same end point. Aaron breaks down each tool with different reasons for use, and gives the end user the power to explore the right technique for them. No matter how “basic” the tutorial may be, I still seem to learn something new each time. I wish I had this type of material when I was in school.
-
Although you can spend hours looking through similar videos like this on YouTube, these videos were far better. Clear, concise, and straightforward. Broken down into simple examples that were easy to follow and easy to recreate. I also learned so much more about each tool that I didn’t already know. you are a wonderful instructor, Mr. Nace.
-
Mr. Aaron You are a fantastic Trainer…. Clear and depth training
Key Shortcuts for the Pen Tool in Photoshop
-
-
Add to
favorites
-
DifficultyAdvanced
-
Length5.25 hours
-
Videos7
-
Software
description
It’s time to experiment with design and typography, discover the awesome potential of 3D, and see how smart objects and layers can make your editing life easier.
Follow along and take the final step to Photoshop mastery!
* This tutorial is part of the Photoshop 101-301 Bundle
THIS COURSE INCLUDES
- 7 Sample Images
- 2 RAW Images
- 2 Graphics
share
Table of Contents
Course Downloads
Learn Advanced Photoshop Techniques

Learn 3D in Photoshop
3D is becoming a standard part of modern image and film production. Movies like The Jungle Book and Avatar show how far 3D animation has come. In this Phlearn Pro Tutorial, we will teach you the basics of 3D in Photoshop!
3D Printing in Photoshop
Photoshop has 3D Printing capabilities built in. Whether you have your own 3D printer or you would like to outsource your 3D model, Photoshop has you covered. Learn how to set up a 3D model to be printed and even how to order a 3D print delivered to your door.
Lights, Camera, Render
One of the benefits of working in 3D is the ability to control the 3D environment. For instance, if you want to make a 3D object look like it is in a photo, you can add lighting similar to the original image, and even cast realistic shadows!
Your Own Logo in 3D
Learn how simple it is to create a logo in 3D. Render it out to create a stunning image, or have it 3D printed for signs. The possibilities are endless!

Warping and Scaling
Transforming a layer can be done in a variety of ways. Learn the right tool for moving your image in the way you need to make it work with your vision. See how to warp and scale your images including the content-aware and liquify tool.
Puppet Warp
Ever wish you could pose a person after the photo shoot using Photoshop? The puppet warp tool can move a person in a realistic manner, you just need to know how to place points accurately. Learn the best practices for the puppet warp tool.
Content Aware
Have you ever needed to stretch an image without making it look like it has been stretched out? Save time without sacrificing image quality by using the Content-Aware Scale to give a more natural appearance to scaled images.
Pen Tool and Paths
The pen tool is one of the most powerful and complex tools in Photoshop. Learn the details of working with anchor points and how easy it can be to make adjustments to every point and curve. These paths will give you more editing power than ever before.
Make Perfect Cutouts
Follow along as we explain the correct tools and techniques to cut out any subject. Learn how to use the Pen Tool to create paths and turn the paths into selections. Create incredible selections and speed up your background cleanup.
Create Precise Selections
Pen paths can be easily turned into selections and edited over and over again. If you are not happy with the first selection, simply edit the path, and then convert it into a selection again. This process allows you to be incredibly precise when creating selections from paths.

Vector Masks
Vector masks allow you to control the visibility of a layer based on a pen path. The advantage of using a vector mask is that they automatically update when you update a path. Discover greater flexibility with your masks.
2 Practice Exercises
Take the knowledge you have learned from Photoshop 101-301 and bring it all together to create stunning images. Follow along during two start-to-finish edits in Photoshop and work with the included image files.
Create Perfect Shadows
Learn how to create shadows from scratch in Photoshop. Use what you learn to accurately composite a person from one image to another. Knowing how to properly build shadows with the right amount of color will give you more believable images.
Never Lose Image Quality
Learn how to transform an image smaller and larger without ever losing image quality. This allows you rapidly test ideas without having to go back through your history and erase what you’ve already done.

Advanced Tools
In Photoshop 301, we leave no stone unturned. See every advanced tool and technique in action as we create some amazing images.

Cut Out Curly Hair
Some objects are easier to cut out than others. Hair—and especially curly hair—tends to be one of the most difficult. Learn advanced techniques for cutting curly hair and other detailed objects out of their backgrounds.
Use Smart Objects
When it comes to editing in Photoshop, the ultimate goal is to be non-destructive. This means that anything you do can be undone and doesn’t destroy the image. Smart objects allow you to make and undo changes to your image at any time.
Change Filters at Any Time
When you convert an image to a smart object you have the ability to use smart filters. Smart filters can be changed at any time, making them much more versatile and non-destructive than regular filters.

Create a Custom Logo
Learn how to convert type into a custom logo using pen paths and custom shapes. Manipulating type is just as easy as any other layer you’re familiar working with. We’ll show you the best practices to get you started.
Create Image Variations
Linked smart objects allow you to use external files as references in your image. Simply make changes to the external file and it will automatically update in your image. This can be very helpful when trying out different logos or designs on images for marketing and advertising.
Add Fonts using Adobe Typekit
With the addition of Creative Cloud subscriptions, Adobe added thousands of fonts available for subscribers. Learn how to browse, add and use fonts from Adobe Typekit in Photoshop to create more interesting and custom images.
Advanced Type Controls
Learn how to use all the advanced type tools in Photoshop to create better type layout, design and logos. The character and paragraph palettes have a ton of options that when used properly will make your typography much better.


Reviews
-
This is great, thanks to everybody involved in these videos.
-
Aaron Nace A good teacher is like a candle, it consumes itself to light the way for other.THANK YOU SO MUCH 🙂
-
This video tutorial has been of extreme value to me. I am only half way through so far, and already I’ve learned a ton! I have been photoshopping on and off for about 6 years now, even receiving certification in CS5; and still, the tricks and tips Aaron is including in these tutorials are priceless. Absolutely satisfied and excited to check out the others! Thank you so much.
Key Shortcuts for the Pen Tool in Photoshop
-
-
Add to
favorites
-
DifficultyMedium
-
Videos1
-
Software
Description
Rotate your view of the canvas with the Rotate View Tool.
In this tutorial, learn how to use the rotate view tool to edit difficult areas of a photo.
THIS COURSE INCLUDES
- 1 Sample Image
Share
Course Downloads

Why Use the Rotate View Tool?
One of many great historical urban legends is that Michelangelo painted the ceiling of the Sistine Chapel lying flat on his back on a scaffolding. But, the truth is, he painted it standing up and looking up at the ceiling — and his numerous journals reveal that he paid a high price for it with a lifetime of neck and back pain. This highlights an important point: The tools and canvases that we use to create art are not always compatible with human physiology. Thankfully, Photoshop is designed with a number of tools to make artistic expression more comfortable. One of these tools is the Rotate View tool.
What Is It?
The Rotate View tool allows you to rotate your image or document to make it more comfortable to work on. Documents can be rotated clockwise or counter-clockwise.
Mobile Solutions for a Mobile World
In a mobile world, photographers, graphic artists and designers regularly use tablets and sometimes even cellphones to do editing work on the fly. With the recent advancements in digital pens and pencils, much of this work is done with a digital implement.
Works Like Paper
If you’ve ever sat at a table and written on a piece of paper, you’ve probably noticed that you don’t place the paper parallel to the edge of the table, but rather, you rotate it to make it easier to write. This is why the Rotate View tool exists. When you are working on a tablet, you can sometimes simply rotate the tablet like a piece of paper to make editing more comfortable. Other times, however, your tablet case might make it inconvenient, or you may find yourself working in a very small space (such as on an airplane) where you don’t have a lot of room to maneuver for the best angle. With Rotate View, you are freed from having to rotate the device and can simply rotate the image to exactly where you need it.
Lefties and Righties Rejoice
Needless to say, left-handed users and right-handed users need very different angles to work with. In Rotate View, you can rotate the image to any degree you need to get the best angle and then lock it in place so it doesn’t move any further as you work.
Turn It On or Off
For many devices, Adobe has incorporated the ability to use gestures for certain actions like rotate and zoom. Some users may inadvertently use these gestures and find it annoying when their image suddenly rotates or zooms in when they don’t want it to. For this reason, you can disable gestures in your Settings menu.
For more great tools, tips and tricks to help boost your Photoshop skills, please check out our tutorial video.


Reviews
There are no reviews yet.
Key Shortcuts for the Pen Tool in Photoshop
-
-
Add to
favorites
-
DifficultyAdvanced
-
Length2 hours
-
Videos4
-
Software
Description
While continuing with the skills learned in both Simple and Intermediate Cutouts in Photoshop, this course takes them even further, demonstrating the most advanced techniques for creating cutouts, selections, and masks on the most challenging backgrounds.
Learn how to recreate hair with the Pen Tool and Brush Tool, copy details from alternate stock images, and much more.
PHOTOSHOP CUTOUTS SERIES
- Simple Cutouts in Photoshop
- Intermediate Cutouts in Photoshop
- Advanced Cutouts in Photoshop (this course!)
THIS COURSE INCLUDES
- 6 Sample Images
- 3 Sample PSDs
- 1 Photoshop Brush
Share
Course Downloads
Professional-Grade Cutouts
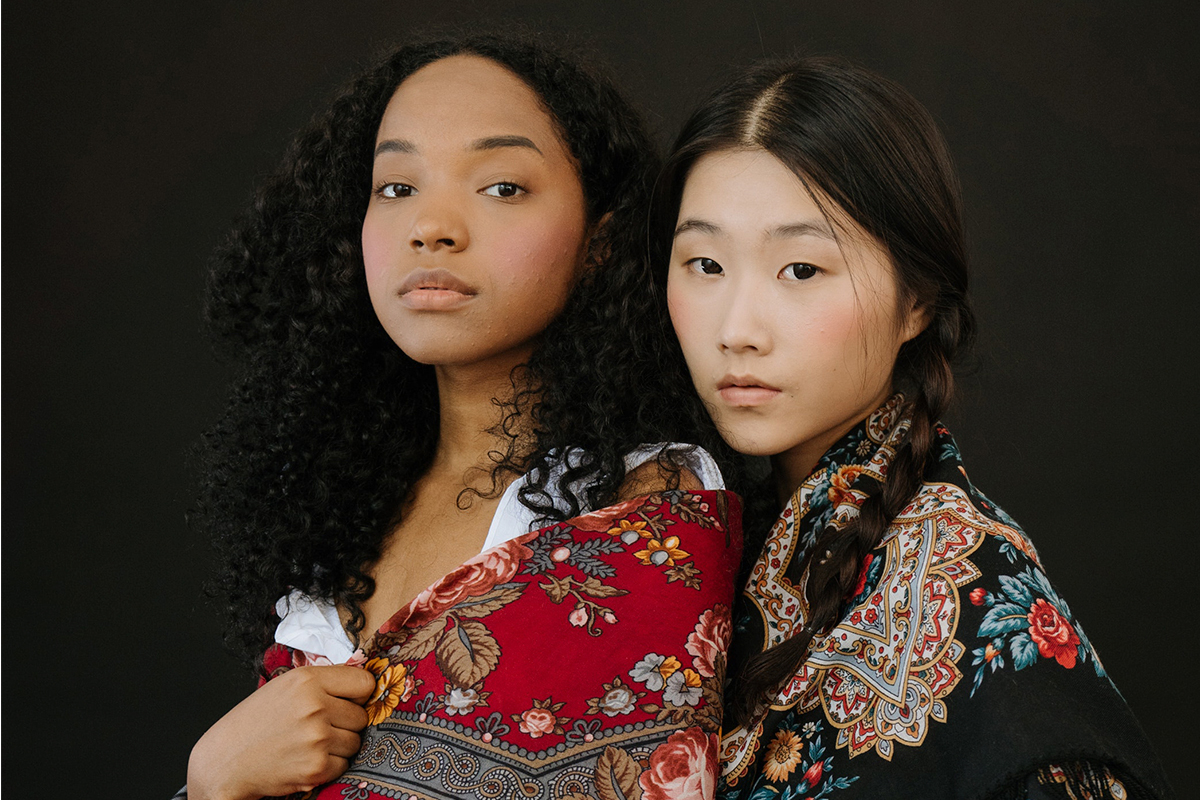

Advanced Cutouts, Professional Results
The best work in Photoshop is often invisible to those that see the finished image. Learn how to create ultra-detailed selections, masks, and cutouts, and avoid that ‘Photoshopped’ look.

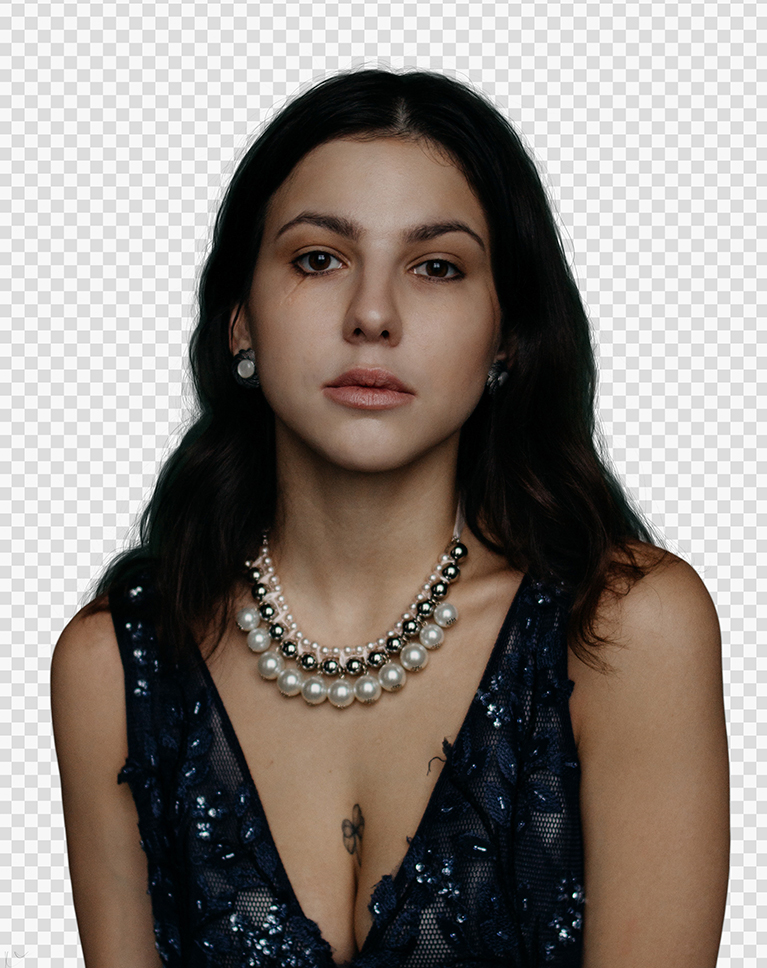
CUTOUT FROM ANY BACKGROUND
ORIGINAL
Advanced Cutouts in Photoshop
Whether you’re a professional editor or photographer that works with images of people, products, fashion, or food, being able to cut things out and place them onto new backgrounds is an essential skill. This course is designed to show you the most advanced methods for creating precision cutouts in Photoshop.
Challenging Backgrounds
Backgrounds are the real troublemaker when it comes to cutting things out in Photoshop. We show you how to work around backgrounds in the most challenging of situations, whether it’s full of complex details or its the same color as thing you’re trying to cut out.
Manual Techniques
Photoshop is packed full of automated tools that can make the cutout process quick and easy. But when you’re working with challenging backgrounds, a more manual approach is the only way to get a professional-level look. Follow along as we show you how to capture every detail.


REMOVE COLOR FRINGING
ORIGINAL
Avoid That ‘Photoshopped’ Look
A rough cutout with missing details, fuzzy edges, and noticeable color fringing makes it obvious that an image has been ‘Photoshopped’. Our goal with this course is to show you how to create ultra-precise cutouts, selections, and masks that will fit seamlessly over any new background or environment.
Impressive Details
The presence of fine details is often a sign of a quality cutout, and makes it much easier to blend a subject into a new environment. We show you how to preserve and recreate delicate details that would otherwise be lost with automated tools.
Combine Tools & Techniques
The toughest jobs in Photoshop will usually require several tools to dial-in the result you want. Throughout this course, we combine all of the basic tools covered in Simple and Intermediate Cutouts in Photoshop, and combine them with some brand new, professional-level skills that can help you finish any project.
Cut Out Anything in Photoshop
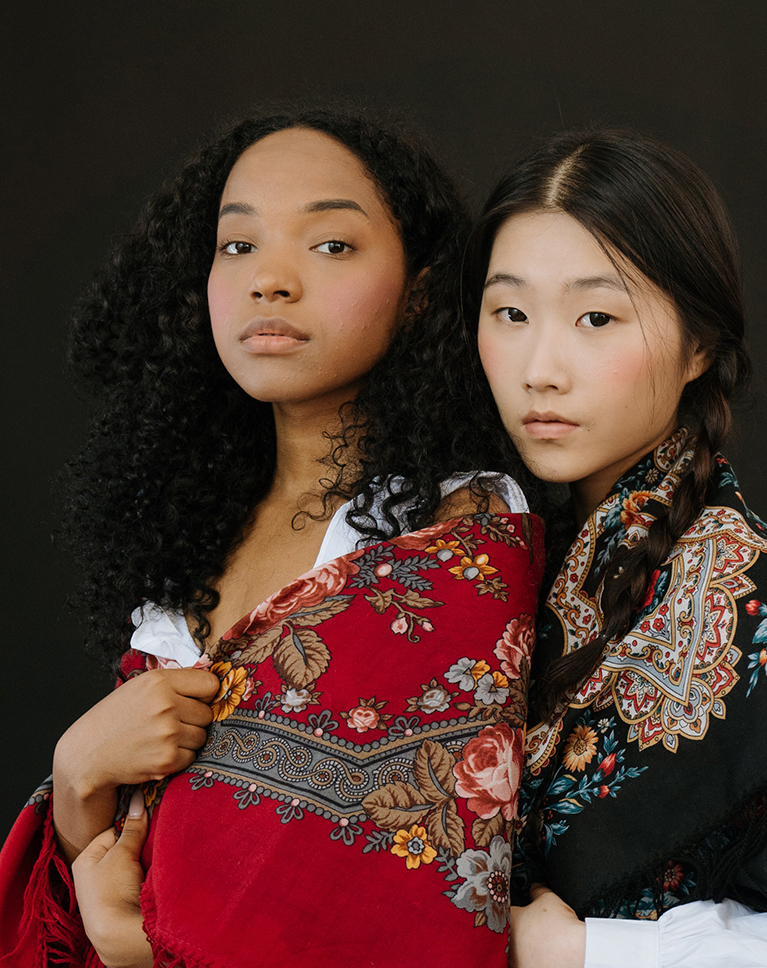
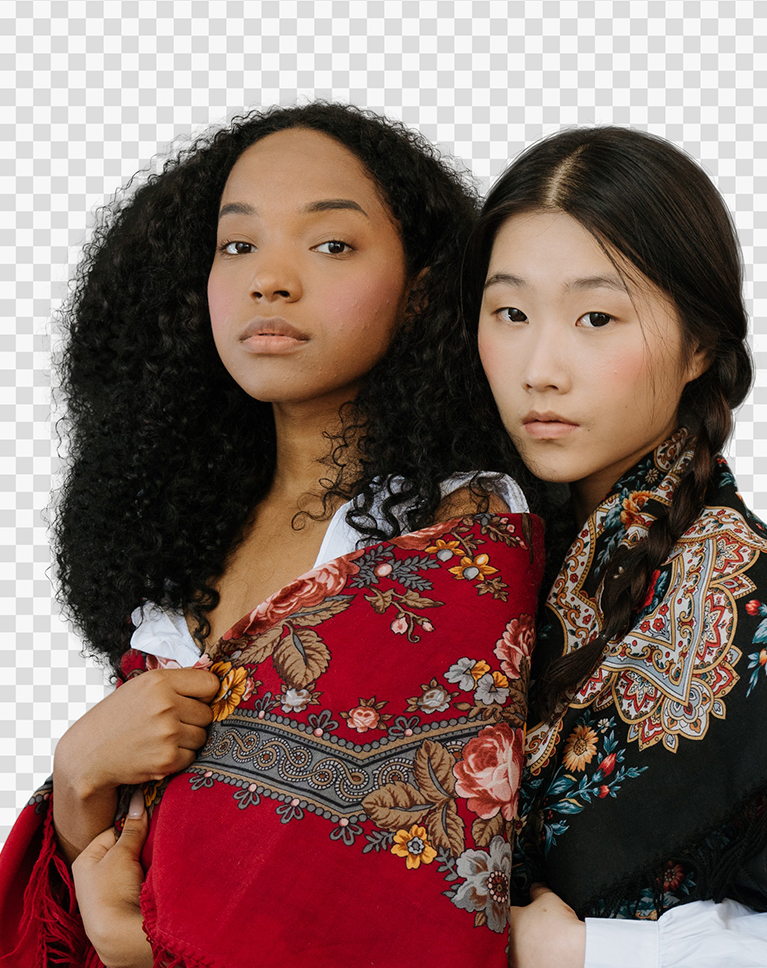
CAPTURE EVERY STRAND
ORIGINAL
Every Detail, Every Strand
We’ve covered cutting out people and hair a lot throughout this series. Why? Well, we believe that if you can accurately cut out people, while capturing every detail in their hair and clothing, then you can cut out just about anything.
Cut Out Anything in Photoshop
Accurately cutting things out is a key skill to almost anything you want to do in Photoshop. From changing backgrounds, to detailed retouching, to complex photo composites, precise selections and masks are essential to bringing your creativity to life.
The Pen Tool
Learn advanced techniques for recreating lost details in your cutouts. Paint in realistic hair using the Brush Tool and Pen Tool, and use a separate free stock image to extract similar hair detail and then use that detail to create a Layer Mask in your main image.
EXTRACT DETAILS FROM OTHER PHOTOS
CREATE HAIR FROM SCRATCH
Recreate Hair
Sometimes it’s just not possible to extract all of the natural details in hair from a busy background. We show you how to create a rough cutout of a subject and their hair, and then recreate lost details by ‘painting’ in hair with tools like the Pen Tool and Brush Tool.
Essential Skills
Looking to explore other essential Photoshop skills? Try our series on removing objects and distractions, an in-depth look at the fundamentals of compositing, or a comprehensive introduction to portrait retouching in Photoshop.
Photoshop Cutouts Series
This course is the last in our series on cutting things out of photos in Photoshop. Need to start from the beginning? Be sure to watch Simple and Intermediate Cutouts in Photoshop to learn the ropes before tackling these more advanced examples.
Class Instructor
Aaron Nace
PHLEARN Founder – Class Instructor
Aaron Nace is a photographer, Photoshop artist and founder of PHLEARN. He is the #1 Photoshop instructor in the world with millions of YouTube subscribers.
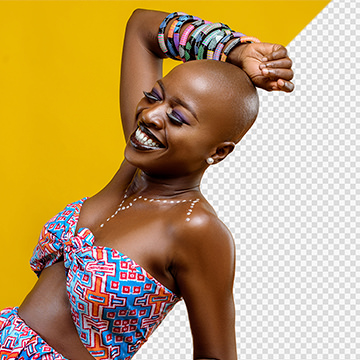
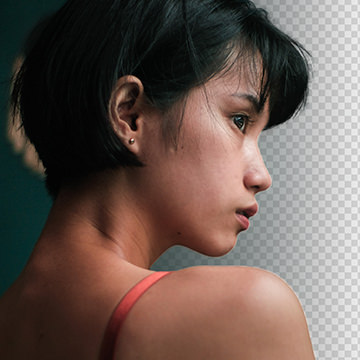

Reviews
-
Fell in love with photography and with Photoshop because of the magic they seem to bring. I LOVE compositing but sometimes cutting out subjects can be stress-inducing, especially with complex backgrounds. This tutorial has shown me how I can make these cut outs happen with results I love. Thanks for adding to the magic, Phlearn!
-
I am really loving these classes that you are doing with the various Simple, Intermediate, and Advanced. It’s like showing us how to do it and taking it gradually step by step. Using various parts of the image and other images is genius and I truly hadn’t thought of it!! Great Job, Aaron!
-
Wonderful tutorial with great tips on one of the most frustrating topics in retouching.
-
Always great stuff Aaron!! That’s why you’re #1 in my “4 Horsemen of Photoshop” that I follow!
Key Shortcuts for the Pen Tool in Photoshop
-
-
Add to
favorites
-
DifficultyMedium
-
Length6.25 hours
-
Videos24
-
Software
DESCRIPTION
Creating precision masks and cutouts is one of the keys to mastering Photoshop. If you’re a product photographer, a web designer, or an artist making conceptual composites, you’ll need to be able to make accurate selections of objects and people to place on a variety of backgrounds.
In this tutorial, we cover several tools and techniques that, when combined, will allow you to create perfect masks of anything from the precision curves of designer products to the messy detail of a head of hair.
THIS COURSE INCLUDES
- 18 Sample Images
- 4 Photoshop Brushes
Share
Table of Contents
Photoshop Compositing: Masking (I)
-
01 - Tutorial Introduction1:32m
-
02 - Techniques Overview1:01m
-
03 - Magic Wand and Refine Edge14:53m
-
04 - Lasso Tool9:35m
-
05 - Color Range13:17m
-
06 - Focus Area7:13m
-
07 - Channels10:48m
-
08 - Custom Brushes15:35m
-
09 - Pen Tool16:12m
Photoshop Compositing: Masking (II)
-
01 - Examples Overview1:00m
-
02 - Logos & Graphics19:47m
-
03 - Solid Edges (Part I)17:16m
-
04 - Solid Edges (Part II)16:03m
-
05 - People (Part I)26:07m
-
06 - People (Part II)13:18m
-
07 - Pets & Animals (Part I)28:59m
-
08 - Pets & Animals (Part II)9:57m
-
09 - Pets & Animals (Part III)22:43m
-
10 - Pets & Animals (Part IV)24:59m
-
11 - Hair (Part I)18:14m
-
12 - Hair (Part II)18:17m
-
13 - Hair (Part III)13:25m
-
14 - Hair (Part IV)18:57m
-
15 - Hair (Part V)25:58m
Course Downloads
Quick & Clean Cutouts in Photoshop

ORIGINAL

CUT OUT
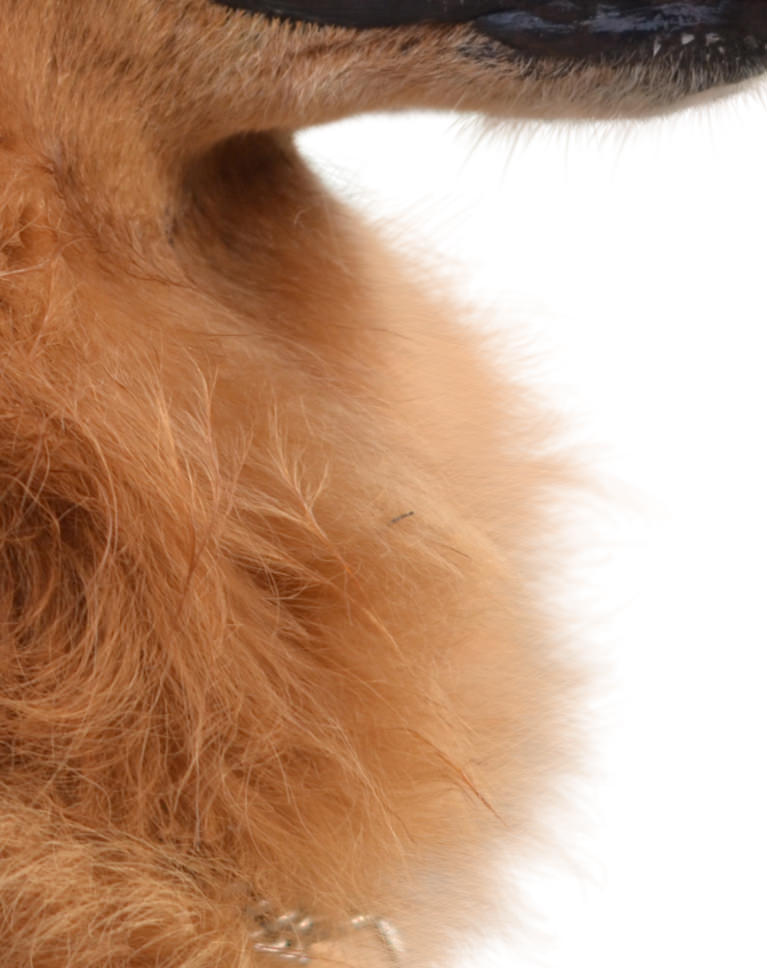
DETAIL

LAYER MASK
Tools & Techniques
There are dozens of tools and techniques that can help you cut an object or a person out of their background. We’ll provide you with a versatile set of options to handle any situation you encounter. From using the Pen Tool to create perfect curves or Channels to capture all of the details of soft edges, you’ll have access to every trick in the book.
The Perfect Combination
Once you have a handle on all of the best methods of masking and cutting out, the next step is understanding that you might need to use a combination of tools to get the job done right. We’ll cover how to mix and match techniques for those circumstances where just one won’t cut it.
Skills For Any Application
Web designers need images to blend seamlessly into the design of their pages. Product photographers need to provide stunning images that can be applied to a variety of backgrounds. Composite artists want to create realistic images that look like they’re straight out of camera. No matter what your goals with Photoshop are, understanding the techniques in this tutorial will bring you one big step closer to mastery.
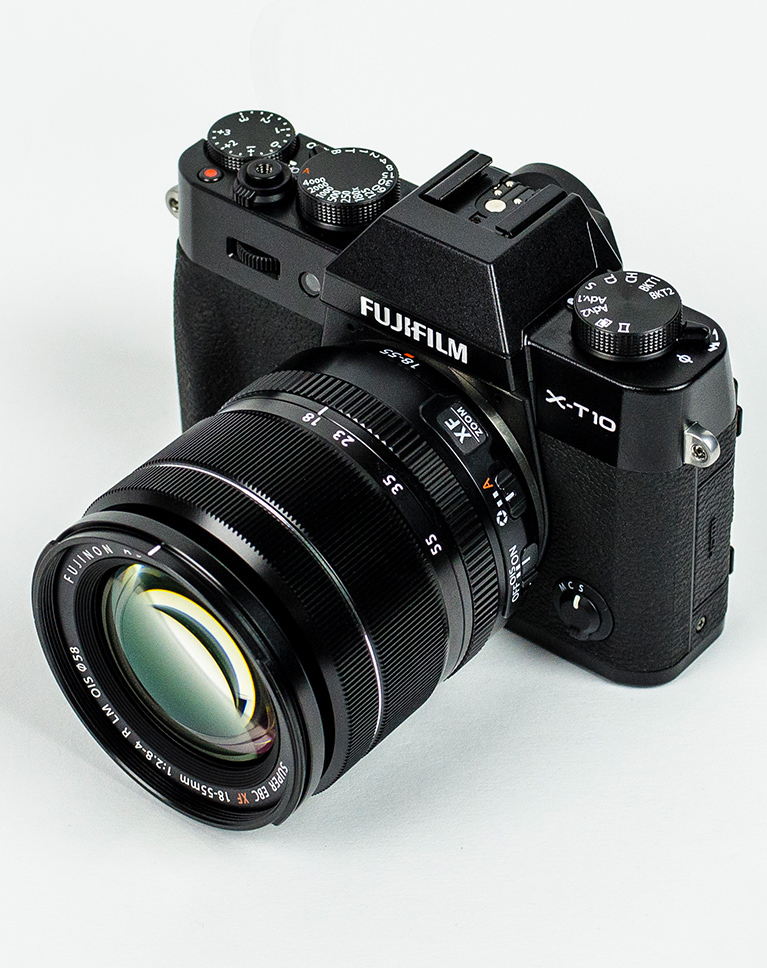
ORIGINAL
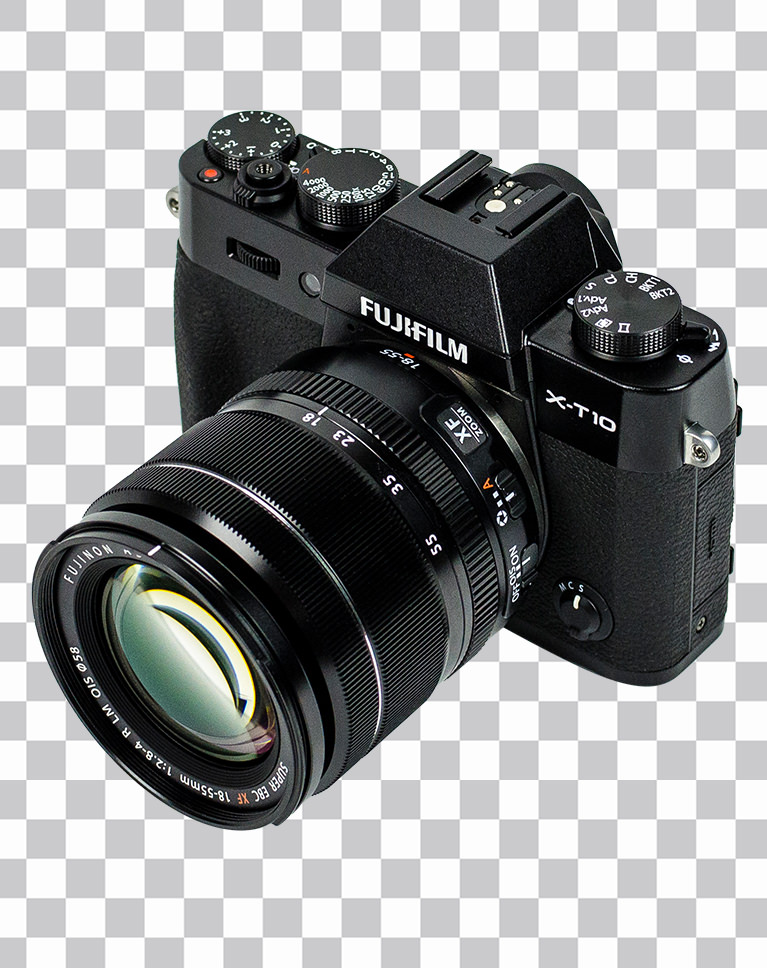
CUT OUT
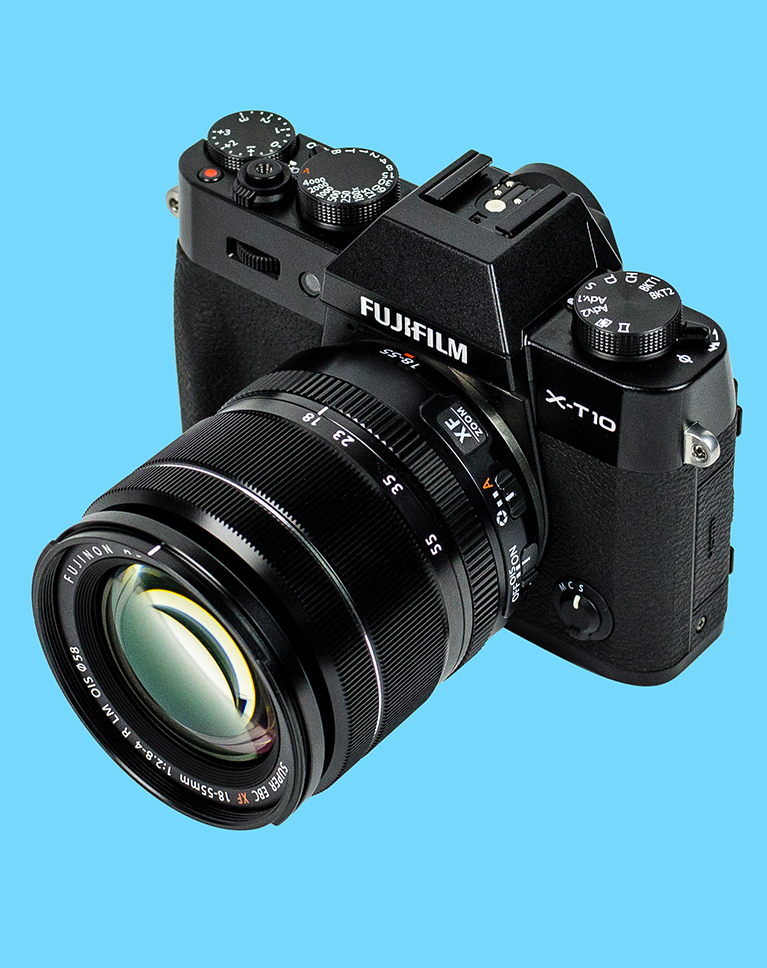
ADD A BACKGROUND
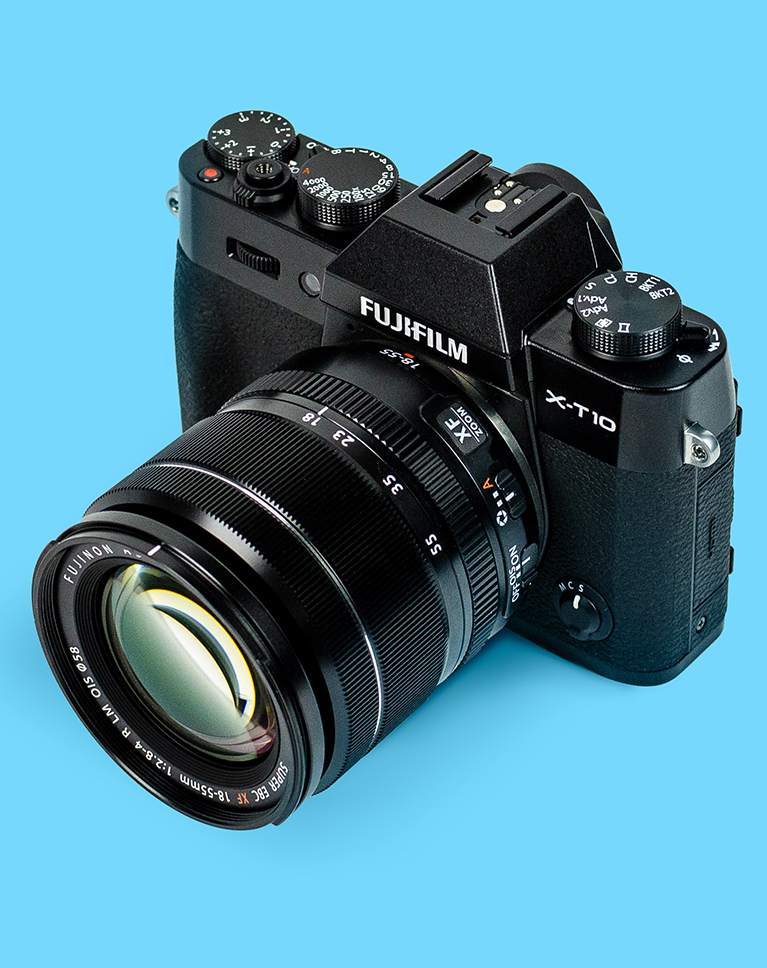
ADD SHADOWS & COLOR MATCH
More Than Meets the Eye
Sometimes cutting something out of a background means more than creating a perfect selection. Depending on the environment that the original photo was taken in, you might find yourself needing to lighten or darken edges or change the color of reflected light. Once we show you how to cut out the subject, we’ll take it a step further and show you how make it look like the new background was there all along.
Edit Faster
Creating accurate cutouts doesn’t have to mean spending hours upon hours in front of the computer. Some circumstances will require a bit of time and patience but we’ll show you some incredible tips on how to start with a rough selection and then refine only the areas that need it, saving you valuable time.
Recreate Details
Sometimes it’s better to make a rough selection and then paint the details back in. In this tutorial, we’ll show you how to create and utilize custom brushes to paint in realistic-looking hair and details that would have otherwise been impossible to cut out.


MAKE COMPLEX CUTOUTS & SELECTIONS
Professional Cutouts
Making precise masks and selections has never been easier! Master all of the tools Photoshop has to offer for making professional cutouts.

ORIGINAL

CUT OUT

LAYER MASK
Hair, Everywhere
Getting a realistic selection of hair is one of the most challenging and satisfying skills to master in Photoshop. We spend a ton of time covering several methods to make it happen. Whether the background is plain or complex, we’ll show you how to get impressive results, every time.

PETS & ANIMALS
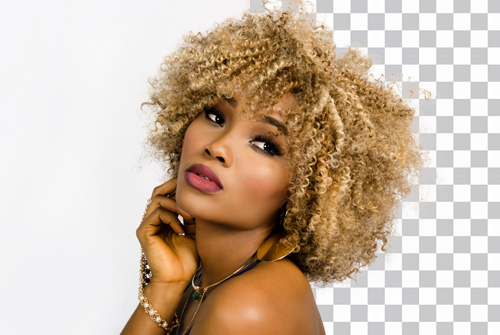
HAIR
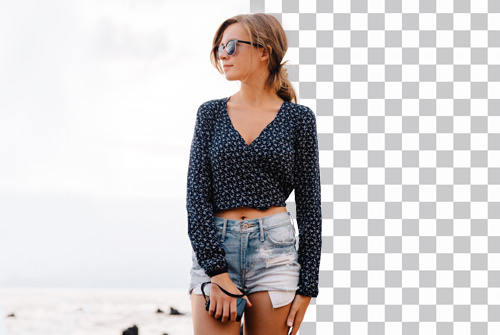
PEOPLE
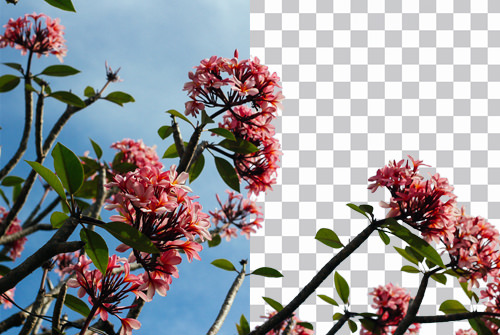
LANDSCAPES & NATURE
Course Instructor
Aaron Nace
PHLEARN Founder
Aaron Nace is a photographer, Photoshop artist and founder of PHLEARN. He is the #1 Photoshop instructor in the world with millions of YouTube subscribers.


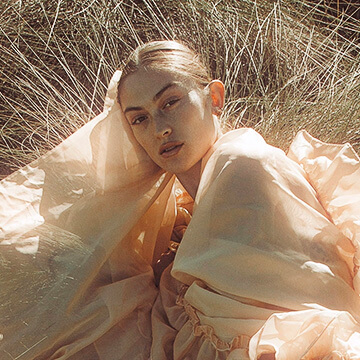
Reviews
-
I bought a course at affinityrevolution “Perfect selections” and it seems like content is 90% similar to this!
-
Great tutorial Will you be updating it when new features comming to photoshop….. like Select subject and remove background?
-
A great lesson with a great range of techniques taught that can be used on many different subjects. This is no slight on the tutorial, or on Aaron, but I had a lot of trouble with the fringing around the hair on the second lady (the one in front of the bridge). I’ve restarted that section 3 times now but I must be doing something wrong. I’m going to go back in and see how realistic (or time-consuming) it might be to shape that mask with the pen tool. Wish me luck!
-
Gotta say love watching Phlearn and how you make so enjoyable , and de mystifying PS 🙂
-
Have been using photoshop since version 1 (yes, I’m an old lady) and yet always there is more to learn, different and better ways to do things. Thank you for this tutorial, learned several things which will help in my work. BY the way, I used your technique to make a “hair” and then turned it 180 and created a double-ended version, since you aren’t using the base of the brush anyway. Then the shape dynamics-angle-control “Direction” feature worked great!
-
So far so good, have only got part way . However I have found the new Curve Pen tool much easier to use and control than the older tool, perhaps Pen tool videos need an update.
-
Excellent excellent teacher really well done and thanks Aaron
-
I like to thank aron for showing me masking and cutting out just love it
-
The cutting out of the baby with the pen tool and the replacing of the hair was a great lesson for me. Now I can move on to the pets which I am grateful for. The pen tool was hard but like you said if you put time into working at it you will get it. I got it now and I use it like nothing. Your class is very important to me because I don’t get to go shooting the way a walking people do to being in a wheelchair; so I shoot my kids and fur kids then place in backgrounds I want to use. I’ve been with you for three years now and I love how you have made it available for all to learn from you. #PhlearnPhiday <3 Rose
-
I love watching the tutorials.
-
Super grateful to Aaron, the tutorials are great and I learned a lot. I’ve been using photoshop for many years and right now I’m doing it correctly, I love you sensei!
-
VERY, VERY, SUPER COOL 😉
-
Hello there, this tutorials are really great. So much to learn and very good explanation. However i have very big problems in cutting out things like wedding veils. How shall i do this with the tranparency in the veil. A tutorial about such objects would be great.
-
Hello Phriends! Love the learning here! 😉 Advertising it to others big time! Guys, please let me know what is the intro song and where can I find it! 🙂 Thanks a lot!
-
Thank you for spreading the word about PHLEARN! The song is Glory Days off of premiumbeat.com
-
-
It’s always too good to follow your tutorials! You have a perfect didactics and the fact that everything happens “live”, that is, there are no stops that can hide some trick, makes it even more useful and applicable to the routine of all professional photographers and amateurs.
-
What Aaron does may seem like magic, but we promise no tricks are used in our tutorials 😉
-
-
I absolutely LOVE your tutorials. So informative and super easy to follow. I ran into a problem, though, and couldn’t figure out how to fix it. Being a “newbie” to Photoshop, I had to Youtube it. While trying to make the fur brush for the dog, I could not get my pen path to produce a stroke that was bigger in the middle and ends in a point on both ends. I am using a mouse and realized that I had the “Control” in the “Shape Dynamics” section of my brush properties turned off from where I was making the cat fur brush. I set it to “Pen Pressure” and then tried the stroke again. It turned out great! Might want to mention that in case someone else runs into that problem.
-
Aaron, will you marry me? 🙂 When the 1st time i use Photoshop to cut somethings out of background, it’s a so hard issue especially hair. Through many years, i can’t still seek methods that can make me happy until i find you, phlearn and now “Masking and Cutting Out Subjects”. You’re the Grand Master. I phlearned so much from this tutorial and thankful due it. Can’t thank you enough, Aaron. Keep it up.
-
You made Aaron blush 🙂 Thanks for taking the tutorial and we’re happy you loved it! Aaron has so many more tutorials on the way for you.
-
-
Phlearn tutorials are the absolute BEST! I’ve taken Photoshop in college and studied online tutorials from both Lynda.com and CreativeLive but only Aaron makes learning easy and fun while providing a comprehensive understanding. So many of the others are boring, confusing and/or shallow. Phlearn is my go-to source for Photoshop tutorials and a constant source of inspiration.
-
This was awesome!! I learned so much, thank you!!
-
Outstanding! I love this Workshop! So many “YES-Moments”. THANK YOU PHLEARN!
-
Aaron is a fantastic teacher and these tutorials are just treasure. I started watching and learned completely new things from the very first minutes. After having watched all the videos in this tutorial, I feel it has definitely helped me a lot and I am looking forward to exploring more from PHLEARN! Also, Aaron seems to be perfectionist to the point that annoys me that sometimes I am not 😛 Like this, I am also having a live example of how a great professional should act when it comes to little details. Congratulations and thank you for this amazing series, now gonna watch some more cool stuff from here!
-
The overlay trick – super! helpful. Thanks!! Love the videos.
-
Aaron please… include captions, these will help a lot, to the ones who dont speak english as natives…as me…
-
Thanks for your comment, all our PRO Tutorials include closed captioning, there is a CC button in the player that will display the closed captions – all the best! – Aaron
-
-
Best so far, I have problem with selections on most part, getting better as time goes on, but I learned so many new techniques in this tutorial and I want to say you rock
-
A really great tutorial!
-
Excellent tutorial!
-
Just amazing!!! One of the best of nothing but the best! Thanks so much for this tutorial and all the fabulous tutorials on this site. Super job!!
-
FANTASTIC! Thank you for the help
-
Phlearn tutorials have been absolutely invaluable to me. Without them, I’d be in a world of Photoshop pain. I love that Aaron’s instructions are clear and concise and are so easy to follow. I also like the way the videos come in short segments – this makes it easier to go back and find a topic you need without searching through a long video.
-
This tutorial by Aaron is THE best on extraction, it builds up from super easy to super difficult.I have seen countless videos on hair extraction by PS experts but this blows them all away, the use of clipping masks is a technique that must be known to many but no one teaches,another top class tutorial from King Aaron
-
Great stuff! Clearly organised and easy to follow. Loving it.
-
Super legit and useful tutorial! Well paced and jamed packed!!!!! Two thumbs up!!!
-
Yesterday I bought Photoshop Compositing: Masking & Cutting Out Subjects x1 .. the videos are obviously in English … I understand English written but not spoken .. Would there be a possibility of getting the written tutorial? .. if there was written tutorial would encourage me to buy more … thanks in advance.
-
Sorry, we don’t have written versions of our tutorials.
-
Catalog > Free Tutorials > How to Retouch Environments in Photoshop


BEFORE
AFTER
Download Sample Images
Click the link below to download the sample images and follow along with this tutorial.
DownloadTutorial Description
Learn how to clean up any environment in a few simple steps!
In this episode, we show you how to use tools like the Brush Tool, Spot Healing Brush, Clone Stamp, and Pen Tool to remove distractions and simplify an environmental photo.
Remove Objects with the Spot Healing Brush Tool
The Spot Healing Brush Tool is perfect for removing objects from a simple background. In this example, we remove wall hooks with the Spot Healing Brush Tool. These hooks are on a white wall, making them easier to remove.
How to Clone Objects in Photoshop
In this example, two of the windows in the photo are frosted and one of them is transparent. The frosted windows look cleaner and more simple than the transparent window, so in this case, it makes sense to replace the transparent window with a frosted one.
To do this, make a selection around one of the frosted windows, then duplicate it to a new layer by pressing CTRL/CMD+J. Next, skew the window by holding CTRL/CMD and clicking on one of the corners of the layer and transforming it until the window matches the perspective in the photo. Next, create a layer mask to blend the new frosted window into the photo.
How to Retouch using the Brush Tool
You may be surprised at the versatility and power of the Brush Tool. In this example, we remove a heater from a photo using the Brush Tool. Simply hold ALT/OPTN+CLICK on the color you would like to sample (In this case it is the wall color) and paint over the object you would like to remove. If you are working on a relatively simple photo you won’t need to sample many colors, if you are working on a more complex photo, you may need to sample repeatedly.
If needed, make a selection to refine where you don’t want your brush paint to be visible. In this example, we use the Pen Tool to outline the chair and remove it from the wall layer.
Key Shortcuts for the Pen Tool in Photoshop
-
-
Add to
favorites
-
DifficultyEasy
-
Length4 hours
-
Videos9
-
Software
description
Photoshop can help you craft impossible scenes and fantastic images. Start your creative journey and follow along as we put together two conceptual composite images–from start to finish.
THIS COURSE INCLUDES
- 8 Sample Images
share
Table of Contents
Beginners Guide to Special Effects: The Light
-
01 - Introduction to Special Effects & Planning an Edit4:49m
-
02 - Selections & Object Removal46:10m
-
03 - Advanced Coloring30:33m
-
04 - Blending Effects with the Brush Tool41:59m
-
05 - Exposure Adjustments & Color Toning9:01m
Course Downloads
Beautiful Special Effects Start Here.

Blend and Composite
Learn the secrets to compositing and blending multiple photos together to create seamless, stunning effects. From start to finish, you will see how each image is adjusted and combined using Photoshop.
Make Perfect Cutouts
Follow along as we explain the correct tools and techniques to cut out subjects for their image. Learn how to use the Pen Tool to create paths and turn the paths into selections. Create incredible selections and speed up your background cleanup.
Add, Subtract and Create Selections
Refine your images by removing unwanted distractions. Master multiple techniques that will allow you to remove literally anything leaving only the focal points you decide.
Bonus Pen Tool Video
Sometimes the best way to create advanced selections is on your own using the Pen Tool. This Phlearn PRO Tutorial includes a Bonus Pen Tool Video with in-depth instructions.
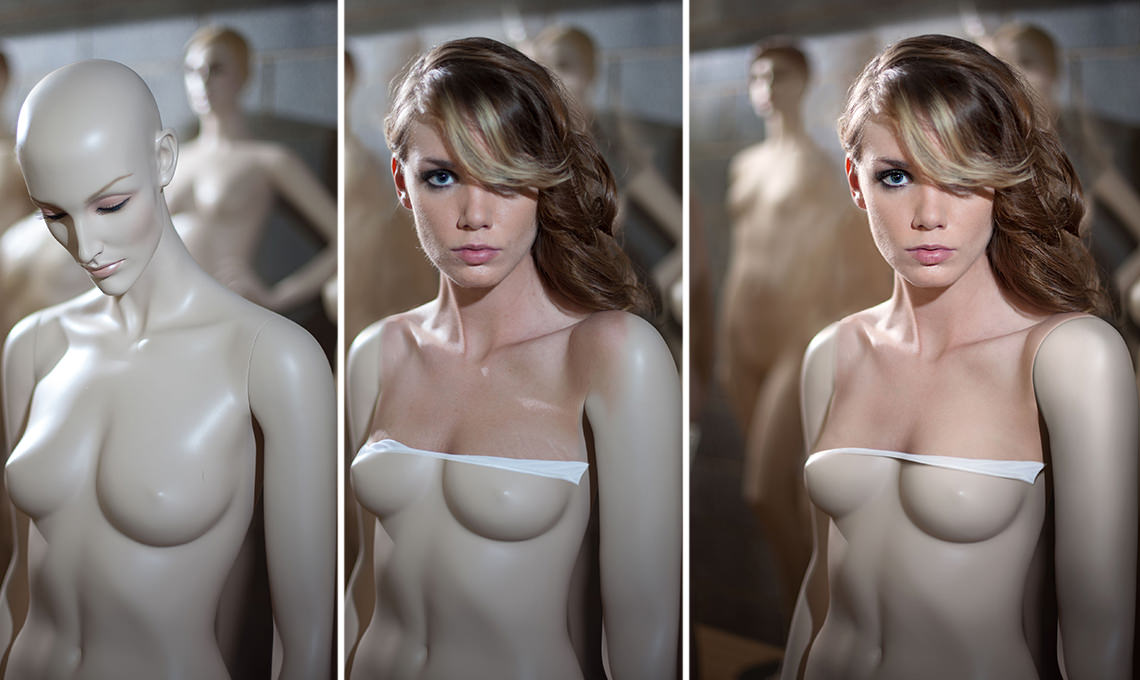
Put Your Imagination to Work
If you can dream it, you can make it. Follow along and create two fantastic images using the powerful tools and techniques in Photoshop.

Perfect Color Match
Create the most believable composite image by matching the colors perfectly. Learn how to adjust the colors separately between shadows, midtones and highlights to create an accurate and realistic color match.
Dodge and Burn
Learn how to dodge and burn in new ways to help blend images together. Alter the highlights and shadows to create extra details in specific areas. Use what you learn to add style and interest to any image.
Sharpen the Details
Learn how to selectively sharpen different areas of the image to draw attention to where it’s needed. Usually, the subject of the photo should be a bit sharper than the rest of the image to catch the viewer’s eye. The most subtle details can make the greatest impact.
Retouch, Quick and Simple
Learn time-saving techniques to significantly speed up your retouching process. Follow along and learn how to easily color-match skin tones from different areas of the body to give any subject a more uniform look.


Reviews
-
Very nice tutorial! Thanks!
-
awesome video!!!!
-
Awesome tutorial and I feel like I learned a lot of things from it!
-
Awesome tutorial. Thats my result 🙂
-
this tutorial is more enough to the beginners…………but little things want more effectively
-
I think this is fantastic tutorial! Thank you!
! -
I have just start looking at this guide and i am very impressed.
-
More great tutorials. The hand painting was challenging with a mouse but I wanted to try even though I have a tablet as well.
Catalog > Free Tutorials > How to Use Vector Masks in Photoshop
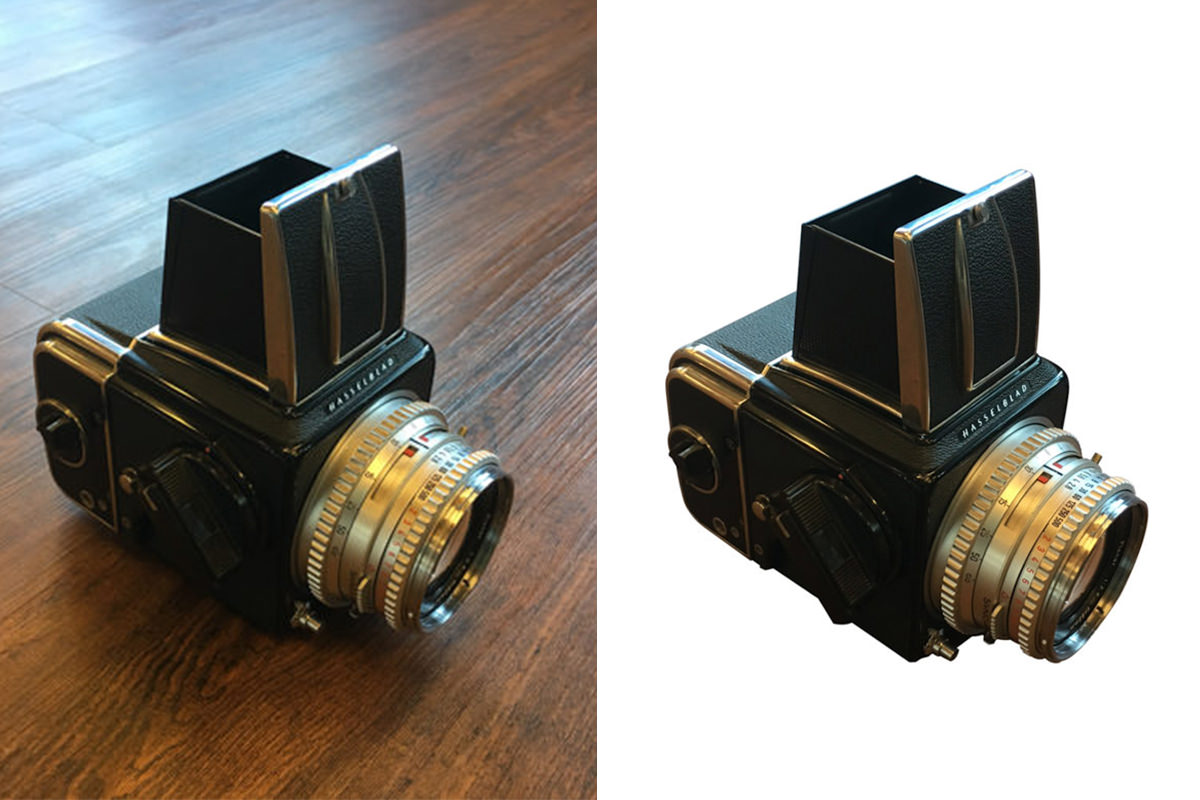
Download Sample Images
Click the link below to download the sample images and follow along with this tutorial.
DownloadTutorial Description
Learn how to cut any object out of its Background in today’s episode featuring the Pen Tool and Vector Masks.
Vector Masks Vs. Layer Masks
When cutting an object out, you can choose between Layer Masks and Vector Masks, here are some of the key Differences between the two.
Layer Masks
• Determines visibility based on pixels, not shapes.
• Paint white on a Layer Mask to make areas visible, black to make them invisible
• Allows Filters like Blur and Sharpen
Vector Masks
• Determines visibility based on Pen Paths and shapes
• Paths can be altered at any time, revealing different parts of an image
• Add feathering using the Properties Window
Density & Feathering
When cutting an object out of its Background, it is important to be able to see what you are cutting out. When using vector masks, the subject can get hidden by the mask. To reveal the subject, open the properties window and lower the Vector Mask density to “see through” the vector mask temporarily.
A Vector Mask will cut an object out with a sharp edge, to add feathering to the edge, open the properties window and slide the Feathering slider to Soften the edge.
Catalog > Free Tutorials > How to Create Pop Art in Photoshop


BEFORE
AFTER
Download Sample Images
Click the link below to download the sample images and follow along with this tutorial.
DownloadCutting Out Your Subject:
In this episode we teach you how to use the Pen Tool to cut your subject out of their Background. The Pen Tool is a vital part of Photoshop and is used to create accurate selections.
We also show you how to create a custom Brush from paint splatter that we photographed in the studio. This Brush is an essential part of creating the final piece of art and is yours to download at Phlearn.com
Catalog > Free Tutorials > How to Recover Detail from Sky
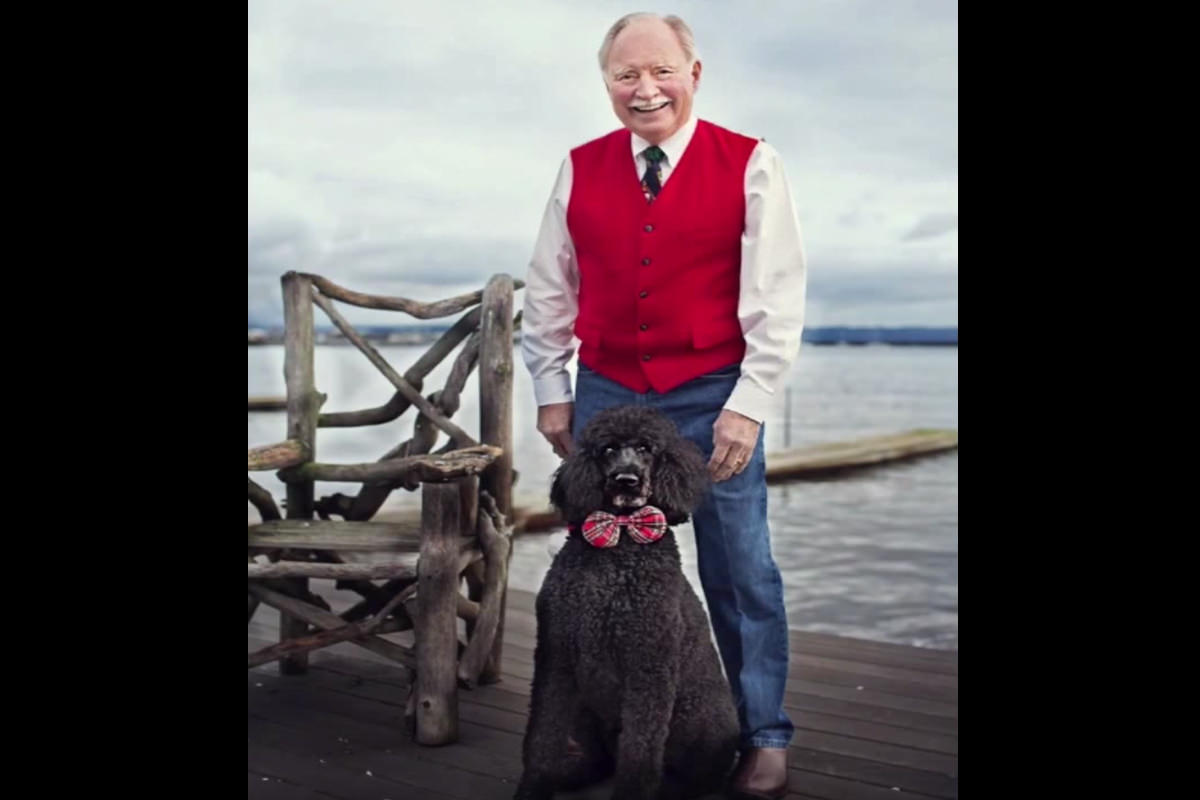
Tutorial Description
In this tutorial we show you how to use the Pen Tool to cut out your subject. Using the Pen Tool can seem a bit daunting but you can see how easy it can be. We are able to cut the subject out of the Background in less than one minute! The key is knowing how detailed the selection has to be.
Selecting Out Your Subject
Once we have the subject cut out we can use that selection to enhance the sky behind him. We use the Clone Stamp tool as well as Levels to change the Color of the sky as well as bring more information into the Highlights
.
Highlights/Shadows
One of the easiest ways to fix an Exposure is to use the Highlights/Shadows command in Photoshop. It is a great way to start your editing process and you can see the results of your sliders live. The best part about this Tool is that there is no “right answer”, it is based purely on taste.
Catalog > Free Tutorials > Going Crazy With Curves and Color in Photoshop

Color Grading Using Curves
Curves are one of Photoshop’s most powerful Tools. And Color can be be an amazingly powerful element in an image. Using Curves to enhance a photo’s Color is an awesome way to add some pop. Yet that doesn’t mean it needs to be a complicated process. A couple Curves Adjustment Layers with some quick hand painted Layer Masks is all it takes to add some incredible Style to your images.
Adding a gradient Color Tone to an image can help with it’s Depth and help Draw the viewers eyes towards your intended point of focus. You’ll see how as we take you through a few curves, a little Pen Tool Action and just one simple Levels Adjustment Layer.
molto utile
The use of the pen tool was really difficult for me and not at all intuitive… until this course!! Thanks a lot to Aaron and your team, now everything is so clear and the pen tool could be my favorite tool, so useful!
Many thanks. Working along with the tutorial I have at last been successful with the pen tool. It has taken a lot of hours of practice, but feel I have achieved something completing the change background. The only problem has been dragging the layers into ps and not been able to combine. I used scripts to get around this in the end. I am sure I am missing something simple.
The greatest all the times in master pen tool.
Excellent. I already look forward to watching more of his tutorials.
I no longer approach the pen tool with fear and loathing, but rather, thanks to Aaron, I now have a grudging respect for it. 🙂 Recently, I have been doing a lot of image clean up and have found the pen very useful for isolating things that need to be removed from these images. I’ve always over-relied on the lasso, with mixed results. Now I find, I can use the lasso, create a pen path with the selection, then modify the pen path and get a great selection. The same approach works well with modifying a ‘select subject’ selection as well. A good use of my time, certainly!
Love your tutorials, I’m using Photoshop for like few years now but never took the time to go indepth into the tools and stuff. I just clicked and thought “hey this is nice”. So this “How to Master the Pen Tool” was an eye opener for me. Thanks for the very clear and understandable tutorials. I especialy like the way you put the into small chapters so you can follow along and test/play between the different parts.
I have always HATED the pen tool but Aaron takes you through it step by step to where you will, with practice, truly learn to master it. Admittedly, I do have to stop some of these sections, rewind, and then replay a few times but he presents things in a no-nonsense way that is unlike so many other instructors out there. I love his teaching style.
AS Usual aron is always excellent
Great tutorial. I used to avoid the Pen tool, out of fear. But after practising with the pen tool on the example images, I now feel comfortable with it. 🙂 Thank you Aaron. I highly recommend this course to people who wish to make better selections in their photos.
I have just finished studying a full 27 of Aaron’s incredible tutorials (123 hours of videos), and cannot recommend more highly buying the PRO subscription. Pen tool is a tricky one, but for clean, sleek selections, nothing else will do. So many applications of the pen tool which obviously you’d never figure out on your own. Truly a masterpiece. Aaron you are a great teacher.
Great course on the Pen tool
Totally awesome, thank you! You guys make the enigmatic practical for us mortals, very grateful.
When scanning through the Pro Tutorials available this is the one that convinced me to give Pro a shot, as I’ve never really taken to the pen tool and it seemed so complicated. I wasn’t disappointed! I feel like I can now use the tool and though it will obviously take some practice to become facile with it, I am definitely off to a good start. Definitely a great tutorial and worth the price of admission.
Really goes into detail. I feel much more confident using the pen tool now.
Awesome tutorial. The pen tool has always scared me but not anymore!
Great course on the Pen tool. I have a question on the pen tool and the optional line color and thickness. When I click on the little gear at the top of the screen, those two options are grayed out. I am operating in PS CC and its the most up to date version. Any help/suggestions would be appreciated. Thank you!
Great tutorial. It certainly makes me more comfortable using the pen tool. The only thing I would change is where you start the fast forward. For example, in cutting out the guy on the beam, start with a few path points, then fast forward to his other side, including the path that selects most of the hair. Then offer an explanation at the end about why such a rough path was made around the hair and show how it’s going to be fixed. Once the user is somewhat familiar with how to use the pen tool after a couple examples, successive “slow” creation of paths is a waste of time because they can always go back to those tutorials to go over the concepts again.
Excellent tutorial on a tool that is usually avoided by the non professional user like me! Now practice, practice, practice. Thank you.
thank you you make my life so easy
This is the best explanation I’ve ever seen for using the pen tool. I’ve avoided it for years after trying to learn it through other tutorials.
Fantastic tutorial, everything about the pen tool is worked through thoroughly and in depth, with lots of practice examples, and I now feel very confident I can do just about anything with the pen tool, albeit rather slowly at the moment! Thanks so much.
Great tutorial. Definitely hits the high points without wasting any time. Everything was super helpful and straight to the point.
I loved this class. I’ve always had a lot of trouble with the pen tool and these lessons really helped me improve my game.
great tutorial, I learned a lot (as always)
these videos are amazing. So impressed with the quality!
Thanks Aaron great tutorial for improve my knowledge.
Came here from Lynda and Pluralsight and must say, I’m too happy. The beauty of any tutorial lies in simplifying even complicated topics to the basics and Aaron is master of that.
Another great tutorial as usual! This is the first one that I have watched all the way through. I try to do a few sections everyday because I want to become a master at all things photography, Lightroom, and Photoshop. That way It will get me that much closer to making a name for my self in this industry. I’m so happy that I found this tutorial, because its going to help me so much. I was SO lost at how to properly cut out things/change backgrounds etc. But this tutorial made it so easy to understand, and it also gave me so many useful shortcuts! Thanks for doing you, and putting your skills and knowledge into the world! 🙂
Great tutorial. The examples and the speed of the tutorial were just right. Thanks!
I have always avoided the Pen Tool because I thought it was too complicated. But after this course I am confident in using this tool. I will need some practice but this course explained everything I always wanted to know about the Pen Tool 🙂 The Pen Tool now belongs to one of my goto tools. As usual a great course with excellent examples.