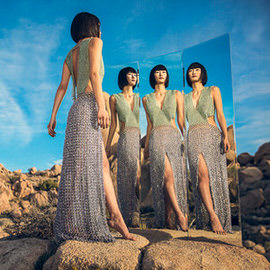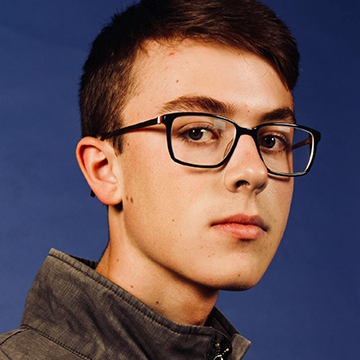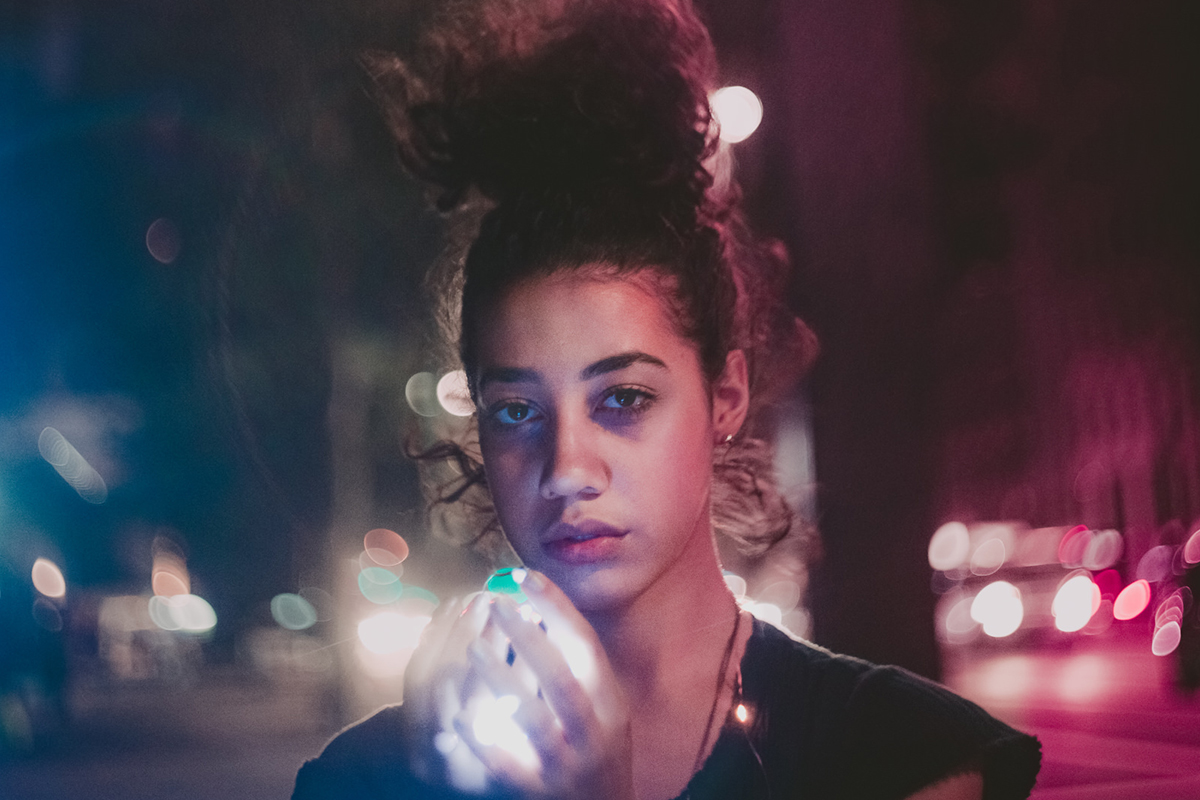
BEFORE
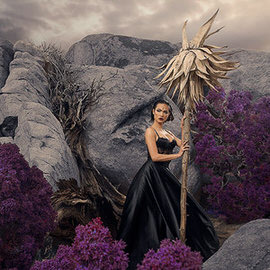
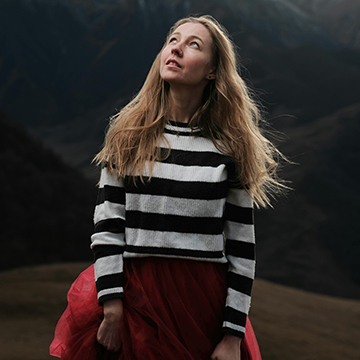
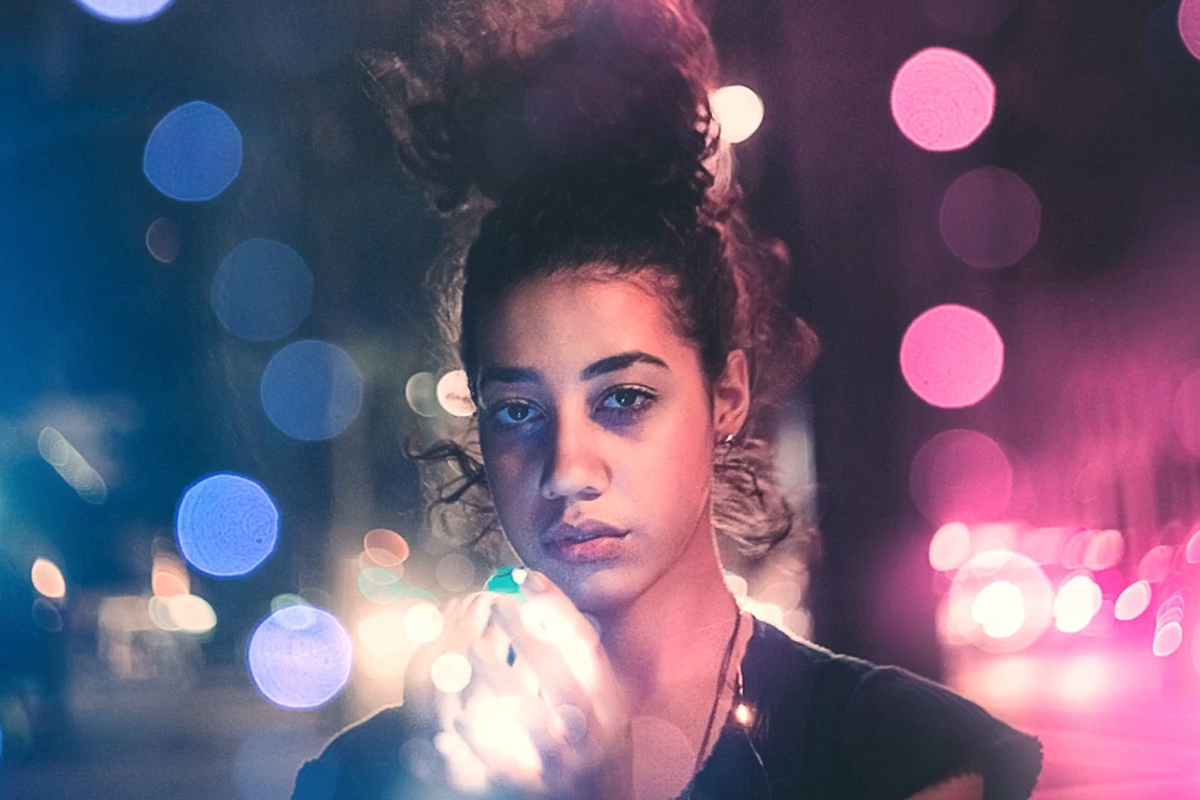
AFTER
Download Sample Images
Click the link below to download the sample images and follow along with this tutorial.
DownloadTutorial Description
Add creamy, beautiful bokeh to your photos in Photoshop using this simple technique! Help your photos look magical and make more friends in the process.
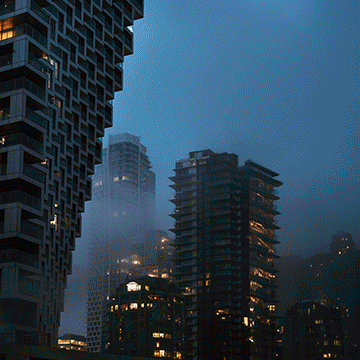
BREAKING BOKEH
Bokeh continues to be one of the most trendy and ubiquitous effects in photography (a quick Google search of “bokeh cats” proves this to be true.) When used properly, bokeh can help isolate your subject from a background while creating a striking and beautiful environment that won’t distract the viewer. When it’s not used properly, well, then you’ve just got another blurry background longing to be something more.
Sad, right? Don’t leave your background hanging like that.
It’s also important to note (which is why we’re noting it) that bokeh isn’t simply the out-of-focus
areas of an image – bokeh is the aesthetic quality of those out-of-focus areas.
So as photographers, how do we create bokeh that is both beautiful and effective? The easiest way is to capture your image with a DSLR and a fast, high-quality lens. In fact, the design of a lens is the single-most important factor in determining it’s overall appearance – the quality and build of a lens can result in bokeh of different sizes, colors, shapes, and softness.
To create the effect, shoot with a shallow depth of field by opening up the aperture of your lens. The wider your aperture, the larger and softer your background (and any lights in it) will be.
And remember, like many other photographic techniques, the use of bokeh is entirely subjective!
Use it as you would any other tool to experiment with and enhance your images. Just be sure to always keep your subject, composition, and exposure in mind!
BOKEH-SHOP
“But PHLEARN,” you ask, softly. “What if I don’t have a DSLR and a super-sweet lens?”
We’re glad you asked, human. The answer, as always, is Photoshop.
In this tutorial we break down a surprisingly easy and useful technique to add bokeh to your images. To follow along, you’ll need two images: an image with a subject and an image of bokeh lights with a dark background.
Now gather ‘round. Like all good adventures, this one begins with LAYER BLENDING MODES.
Drag your bokeh image over your subject image as a new layer – make sure your subject is on the bottom of the layer stack and the bokeh on top. Click on the bokeh layer and change the LAYER BLENDING MODE to SCREEN. This will remove the black and dark areas of the image, leaving only those plump and creamy lights behind. After you’ve isolated the bokeh, feel free to move and TRANSFORM that layer so that it fits with the lighting in your base image. If needed, you can duplicate the bokeh to add more varied effects.
Once you’ve placed the bokeh, load a Layer Mask onto each bokeh layer and use the BRUSH TOOL to paint black over the areas that you don’t want to be visible. We recommend a large soft brush, with a low FLOW.

Quick Tip: Make sure that all of the lights you decide to keep are completely visible and not partially removed.
You can use the BRUSH TOOL to sample colors from your base image to help blend the lighting together. Simply select the BRUSH TOOL, and SAMPLE the color from the base image that you want to blend. We recommend using a soft brush with a flow of about 50%. Create a NEW LAYER and paint around the areas that you want to blend.
Since the color of the light in the subject image won’t always match the color of the bokeh lighting, you can use ADJUSTMENT LAYERS and SMART FILTERS to help make them appear as though they’re in the same environment.
You can create a new ADJUSTMENT LAYER and clip it to the layer you want to affect. COLOR BALANCE and HUE/SATURATION adjustment layers are both great options to start with.
Alternatively, you can RIGHT CLICK on the layer you want to color and select CONVERT TO SMART OBJECT. This will allow you to apply SMART FILTERS to a single layer which can be toggled on/off or changed at any time.
As a finishing touch, you can add a GRADIENT MAP on top of your layer stack to integrate the pieces of the image together.
We hope that this answered your question, human! Now go and add big beautiful bokeh to your holiday photos that will bring tears to your mother’s eyes.
Until next time!