Tutorial Description
Phans of Phlearn are already familiar with Curves as one of the most powerful Luminosity and color adjustment Tools in Photoshop. Whether you’re adding Contrast, brightening shadows, or giving a kiss of magenta to your mid-tones, Curves has the capabilities to get the job done. But there’s so much power packed beneath the hood that most users only ever scratch the surface of what’s possible with this awesome tool.
1) Curves is like Levels on steroids.
“Anything you can do I can do better. I can do anything better than you.” If Adobe Photoshop was a elementary school playground, this is what Curves would be singing tauntingly at Levels. Yes, Levels is a great tool that’s useful for setting Black and White points in an image, as well as adjusting mid-tone Brightness. You can also use it to reduce dynamic range by changing the Black and White output Levels. But not only can you do all these same things in Curves, you can do them with more subtlety, control, and ease.
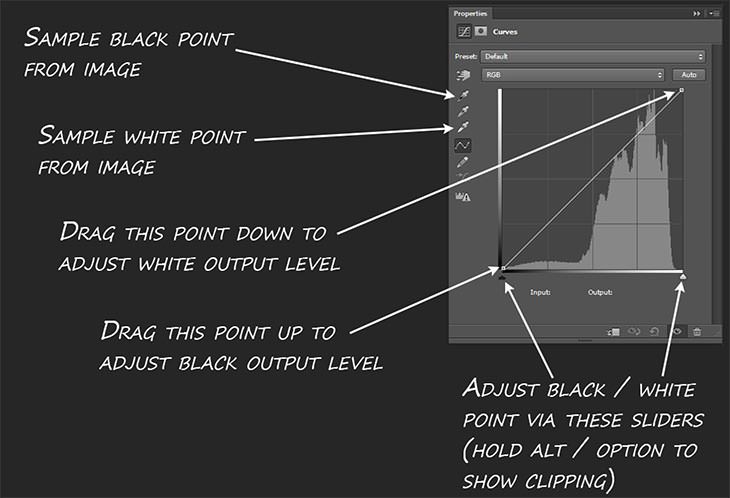
For Black and White points the controls are much the same as in Levels: set black and white points by using the Eyedropper Tools and clicking within the image, or move the black and white point sliders in the Curves window. (Pro tip: if you hold Alt / Option as you move the Black and White point sliders, Photoshop will show you clipped highlights and shadows). To change output levels (useful if your shadows are too dark or your highlights too bright), drag the corresponding black or white control point in the Curves window up or down.
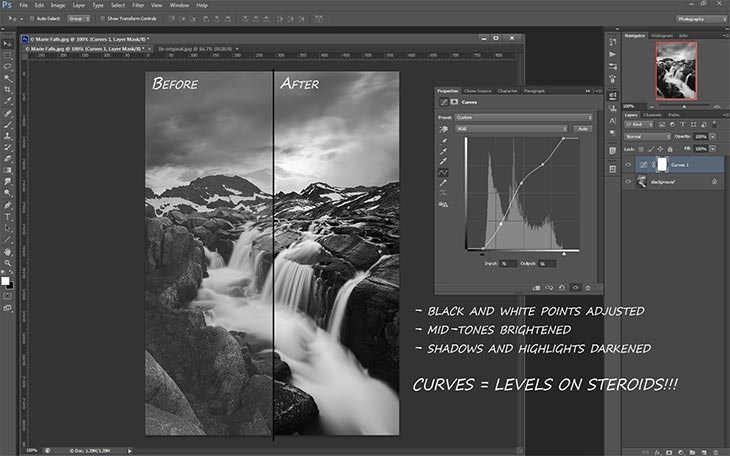
So far this is the same functionality as Levels, but where Curves really shines is in its ability to control mid-tone brightness. With Levels you can only adjust all mid-tones at once, either by making them brighter or darker. But with Curves you can adjust every tonal range individually simply by placing control points on the curve. For example, after you set your Black and White points for an image you decide to brighten the mid-tones by dragging up on the Curve. But you don’t want your shadows or your Highlights to get too bright, so you can simply place control points in each of these regions on the curve and drag them back down. And that ability to control every tonal range is why Curves wins the battle against Levels every time.
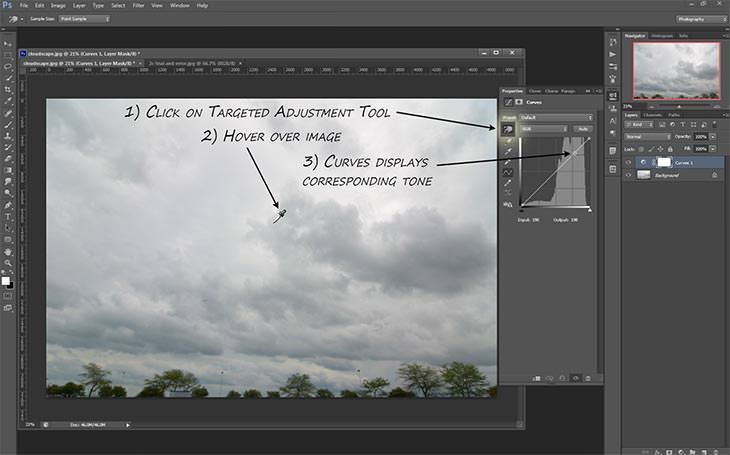
2) Curves will find and adjust tones for you automatically with the Targeted Adjustment Tool
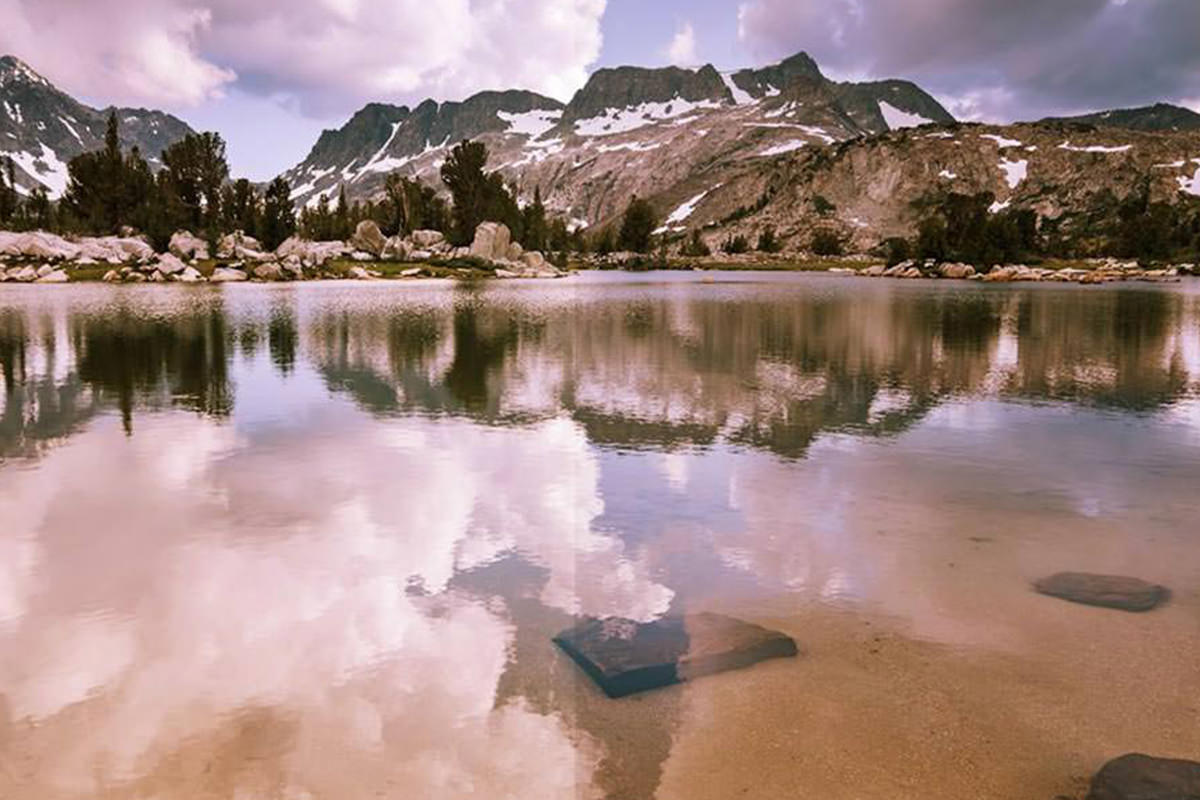
When you want to add contrast to a specific area of an image it’s helpful to know what tonal range(s) that area occupies. Say you’ve got a sweet cloudscape that could use a little punch. Normally you’d add a curves adjustment layer and start by dragging the highlights up and the Shadows down. That doesn’t work in this case though since all the clouds live in the highlights range and adding an s-curve simply blows out the image.
Hover over to see Curves contrast.
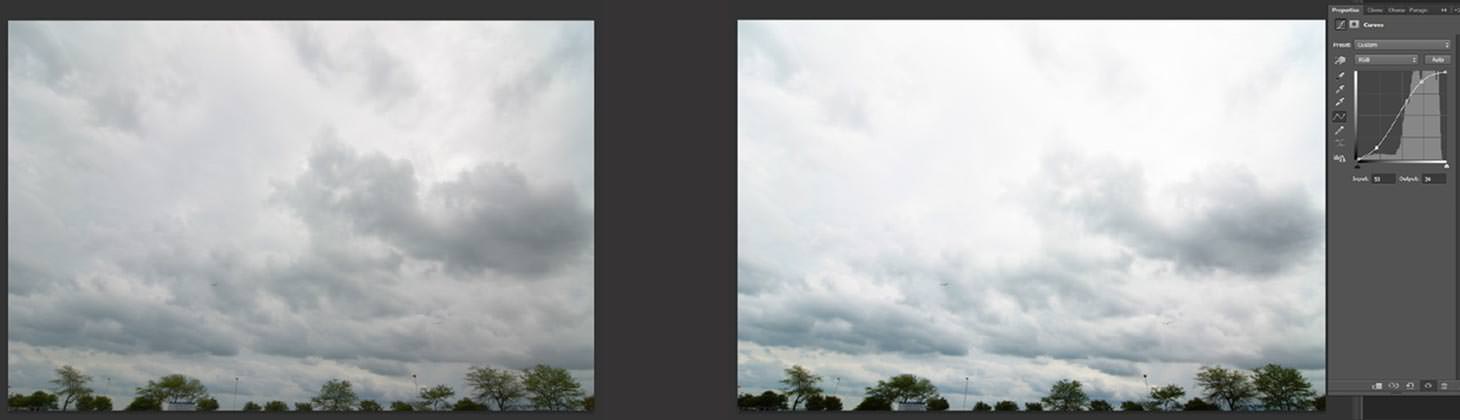
So you keep fiddling with your Curves adjustment and after maybe a minute of trial and error you get something like this:
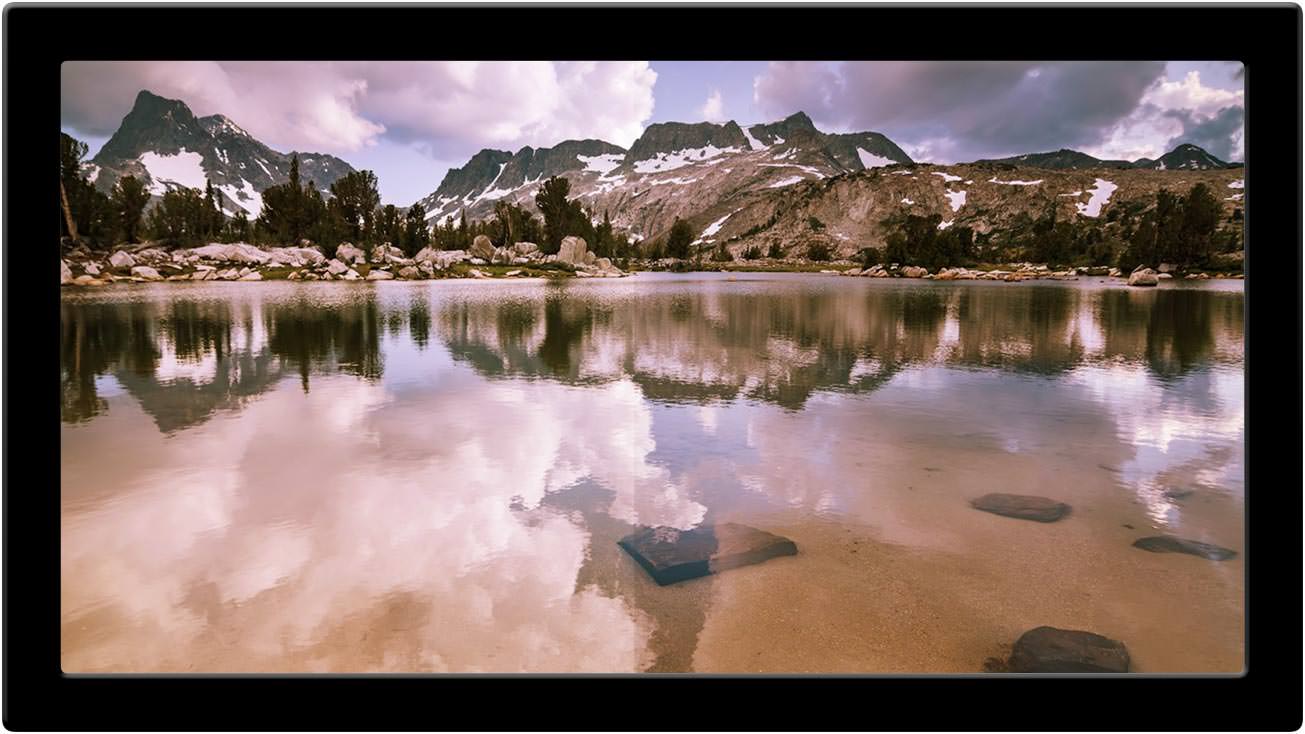
But if you use the Targeted Adjustment Tool (TAT) instead, you can get the same look (if not better) in a fraction of the time with a couple of clicks. Click on the Targeted Adjustment Tool in the Curves window and then hover over your image. You’ll see a little circle appear on the tone curve which corresponds to the exact tone you’re hovering over. That’s Photoshop’s way of giving you a clue about which tones you need to adjust.
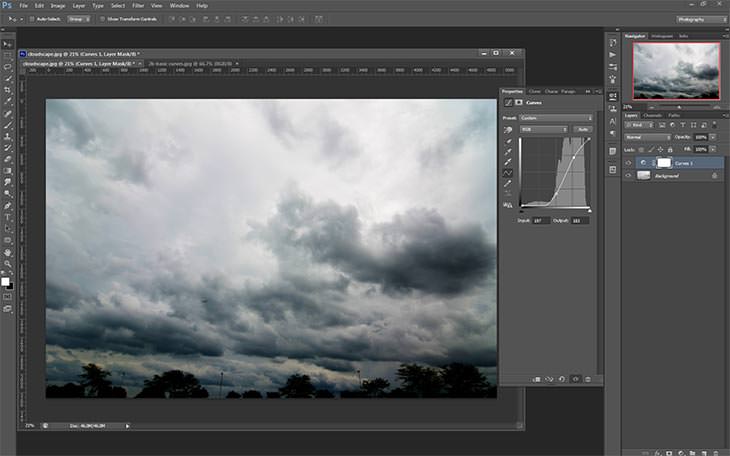
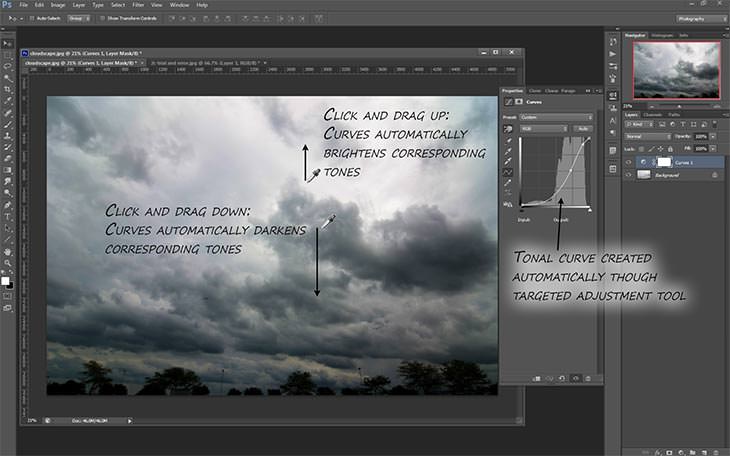
But the TAT takes it one step further: if you then click on your image and drag up or down, the curves Adjustment also moves correspondingly based on the tone you clicked on. In other words: click on a Highlight in your image with the TAT and drag up: the highlights get brighter. Click on the shadows in your image and drag down: the Shadows get darker. And since you can use the TAT as many times as you like you can isolate and adjust tonal ranges instantly and easily.
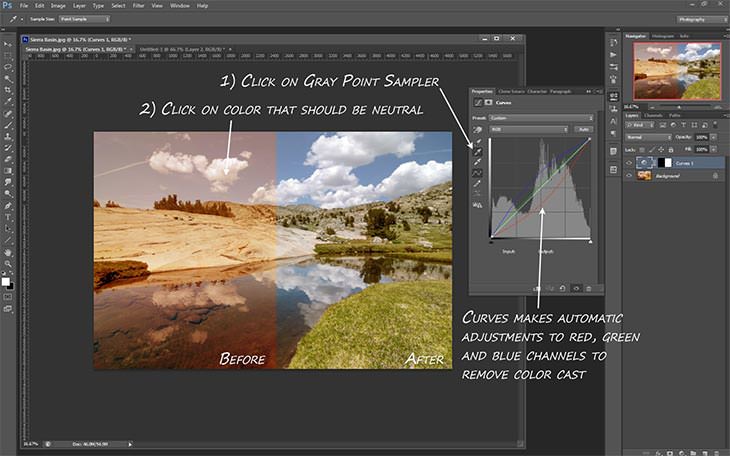
3) Curves lets you adjust white balance at the touch of a button
We already know about the Black and White point Eyedroppers in the Curves Tool, but right in between them is the neglected step-child of the Eyedropper family: the gray point selector. With this tool you can sample any point from within the image and Curves will automatically apply the appropriate Adjustments to the Red, Green, and Blue curves to make that point become gray (note that this affects Color only, not luminosity, so the brightness of your image is preserved). Meaning that if you have an image with a weird color cast or mixed lighting that your camera couldn’t quite figure out, you can use this Curves tool to click on a point within the image you know is supposed to be color neutral (like a gray Card, a white wall, or an overcast sky) and Photoshop will balance out your color for you just like that.
4) Curves allows you to adjust brightness without affecting color
The most basic application of the Curves tool is adding contrast to an image via the classic s-curve (highlights up, shadows down). A little-realized side effect of that kind of adjustment is that it also increases the Saturation of your image. And if you’ve already adjusted your saturation to a point you like, or if you’re dealing with Skin tones, additional saturation can be problematic.
Hover over to see before.
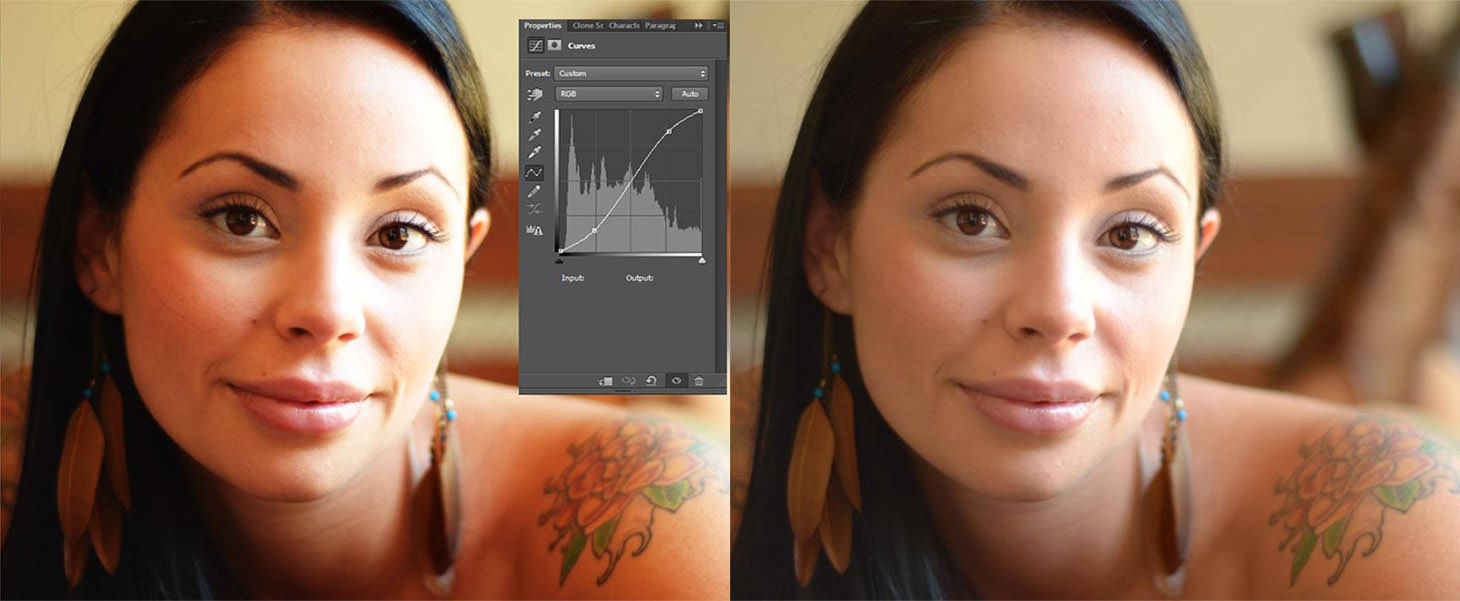
But if you change the blending mode of your Curves Adjustment Layer to Luminosity, then the adjustment will be applied only to the brightness values of the image and not the color values, adding Contrast while not affecting saturation.

5) Curves helps you change color and saturation without affecting brightness
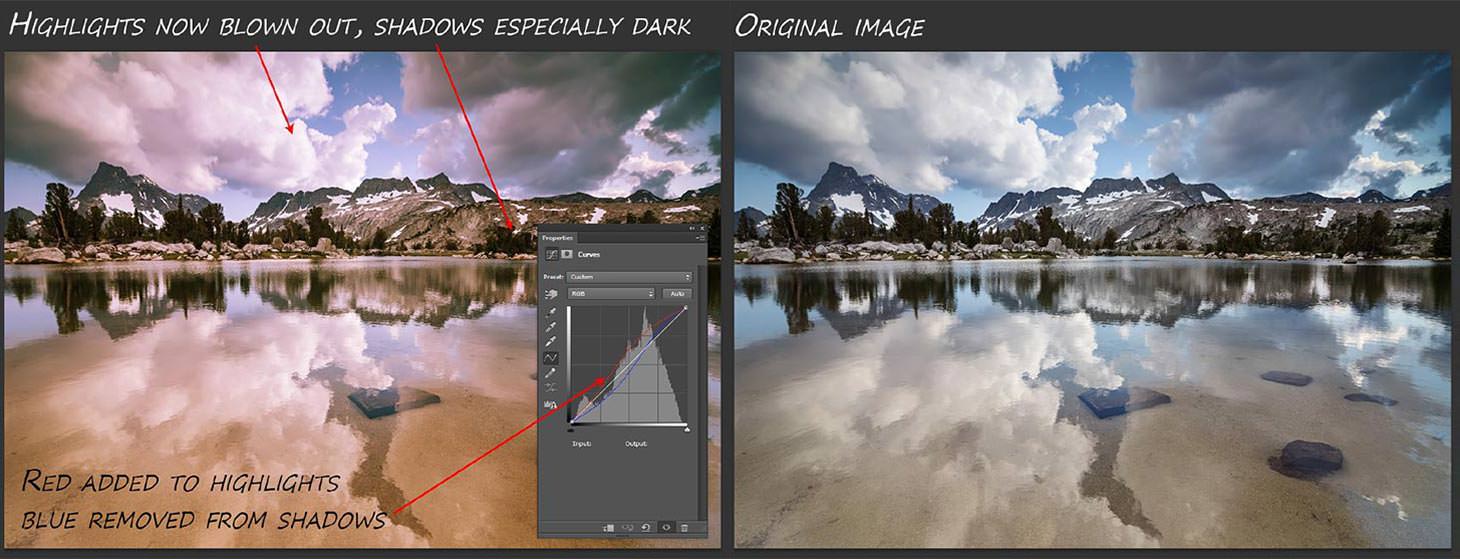
Curves is also a fantastic way to make color Adjustments to your image. By mucking about with the Color Channels in your Curves layer you can change Color Balance, increase Color casts in shadows or Highlights, apply split toning, simulate cross- processing, and create lots of other neat color effects. But just as adjusting Brightness affected our Color in the previous example, adjusting color will affect brightness here.
Say you want to reduce the amount of blue in your shadows; you can simply drag the blue Channel curve down in the Shadow range. But this has the not-necessarily-intended side effect of slightly darkening the shadows as well. If you want to add a little red to your highlights you can drag the Red Channel curve up, but then you’ve slightly brightened the image to boot. And those subtle changes of Luminosity may not be what you want.
Hover over to see before.
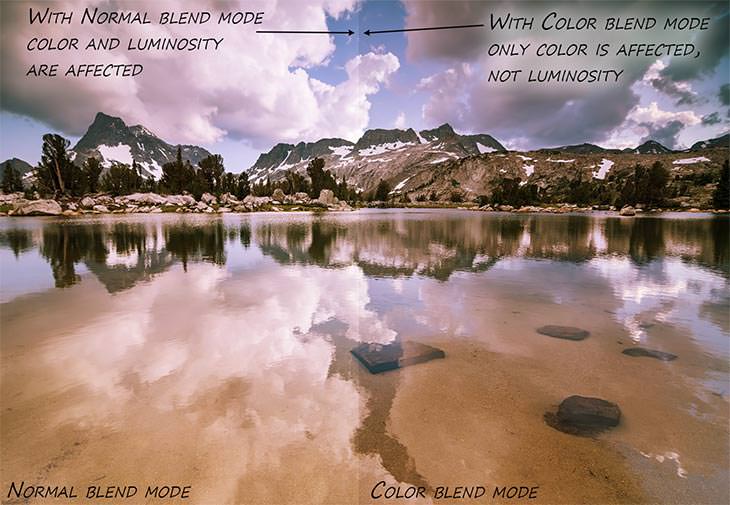
As before, we can bring a blending mode to the rescue. Change your Curves Adjustment Layer mode to Color and you will get all of the color changes you want with none of the luminosity changes.
Similarly, if you want to Increase Saturation without affecting brightness, try putting in a simple s-curve in the RGB curve and then changing the Blend Mode to Saturation.
6) Bonus: Curves lets you have it your way
Alright, I’m incorrigible so I want to give you guys a bonus. Curves has a really bizarre tool built in that I’ve personally never been able to use well but it’s so fun and funky I wanted to show it to you. It’s the Draw-your-own Curve tool, indicated by the little Pencil in the Curves window. Click on the Tool and you can then manually Draw the tone curve however you like. You can Draw a continuous curve, or you can make discrete sections. Or you can just create a bunch of disconnected dots. No matter what you do the result is almost always psychedelic in nature. My only advice on how to use this strange Tool is to experiment and have fun. I guarantee you will get some unpredictable, unrepeatable effects. Enjoy!