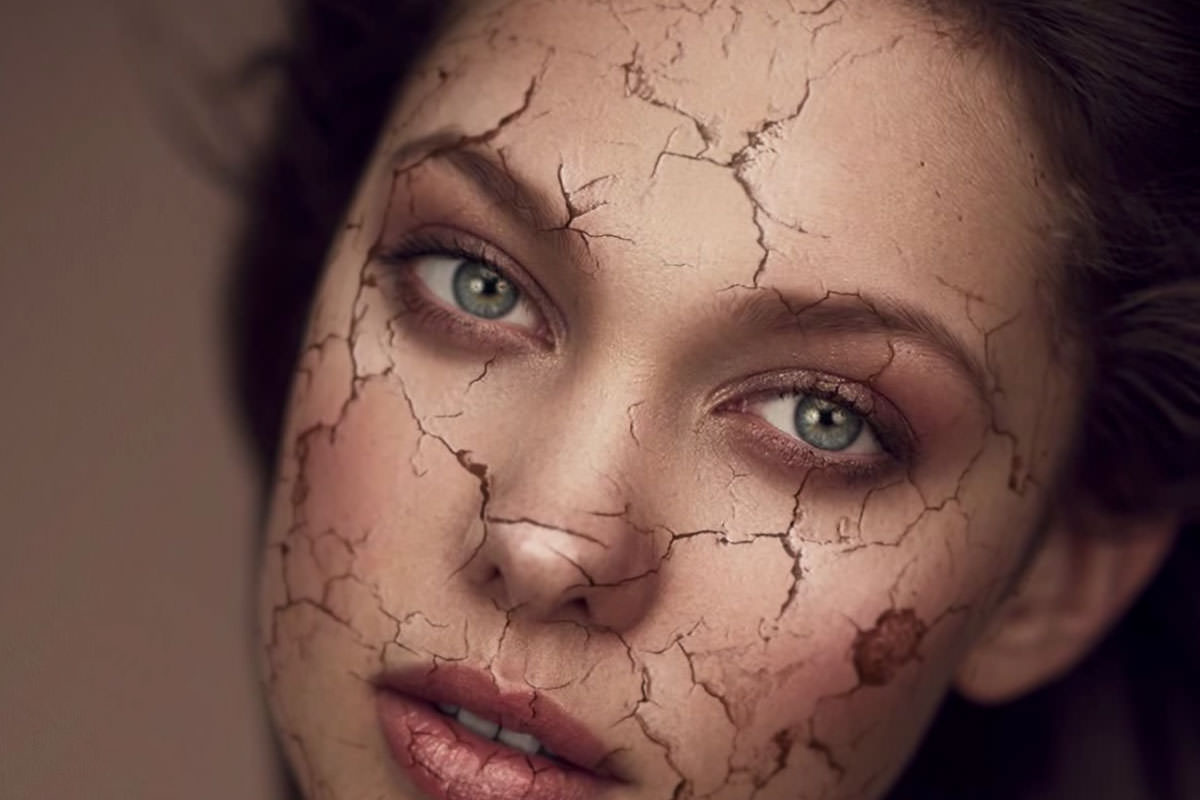


BEFORE
AFTER
Creating a Cracked Skin Effect
In this episode we are creating a cracked skin effect in Photoshop, making it look more three-dimensional and adding blur. Be sure to check out Part 1 where you will learn how to wrap the Texture around a subject’s Face.
How to Give the Cracks Dimension
To apply the cracks in the first part of this tutorial we used the Multiply Blend Mode, making the darks interact with the photo and the Lights invisible. Now we want to add highlights on the edges of the cracks to give them more dimension. We do this by duplicating the original crack layer, inverting and desaturating it, and changing the Blend Mode to Screen. Now we have have white cracks on a Transparent Background. Next we use Blend If to make this layer invisible where the Underlying Layer is darker, removing it from the cracks. This section of the tutorial is pretty complex but will make a huge Difference in the final effect. Next step is to move this layer so it matches the lighting on the original photo.
Create a Peeling Effect on the Cracks
Next step is to make the Skin look like it is peeling up in some places just as paint would. To do this we use a Soft edged brush, painting white on a Soft Light layer. Painting around the cracks and the using the Lasso Tool to remove the Highlights from unwanted areas makes the Skin look as thought it is peeling up. After creating the Highlights we do the same thing with the Shadows, painting black on a Soft Light layer. In this tutorial we cover a small part of the image because of time restrictions.
Add a Blur to Blend into the Image
The original image was photographed using a shallow Depth of field meaning that some of the face is in focus and some of the Face is out of focus. To complete our cracked Skin effect we have to duplicate this gradual blur. To match the blur we use the Blur Tool on a New Layer. Be sure to check the option “Sample All Layers” and set your strength to about 50%. This will allow you to add the blur on a new blank layer, not effecting the layers underneath.