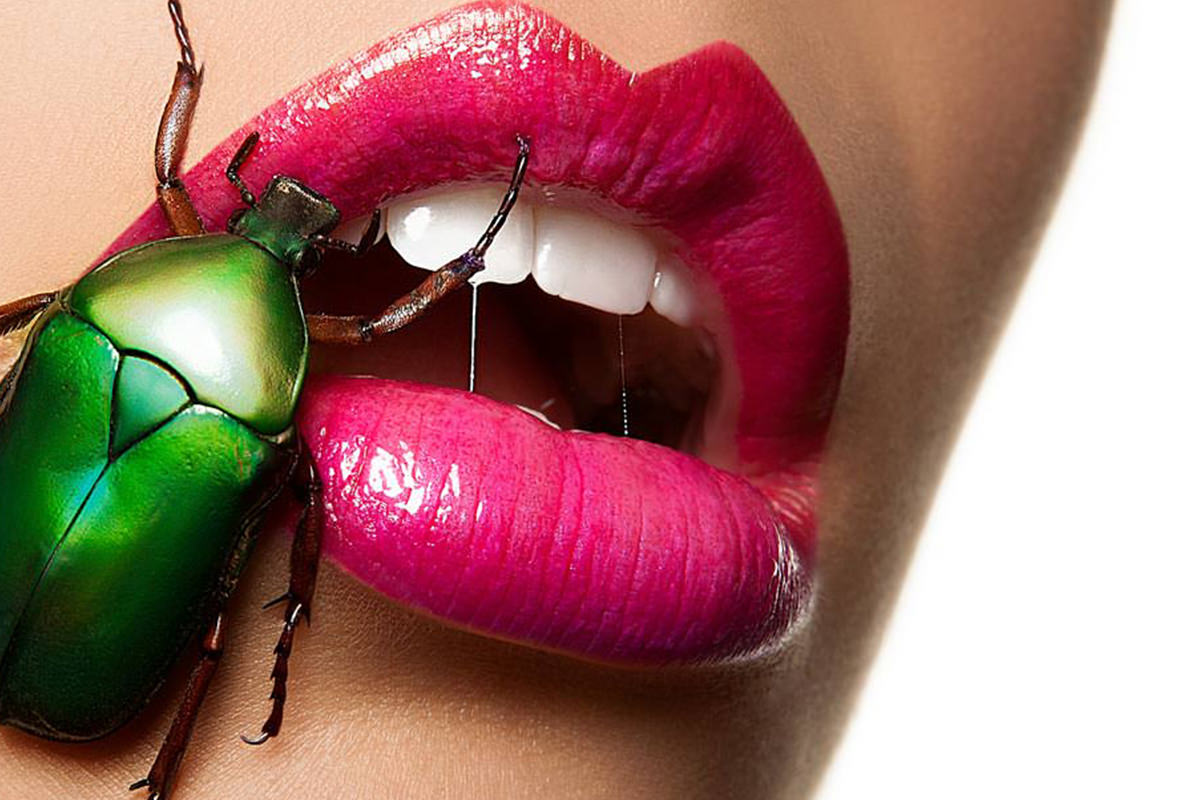
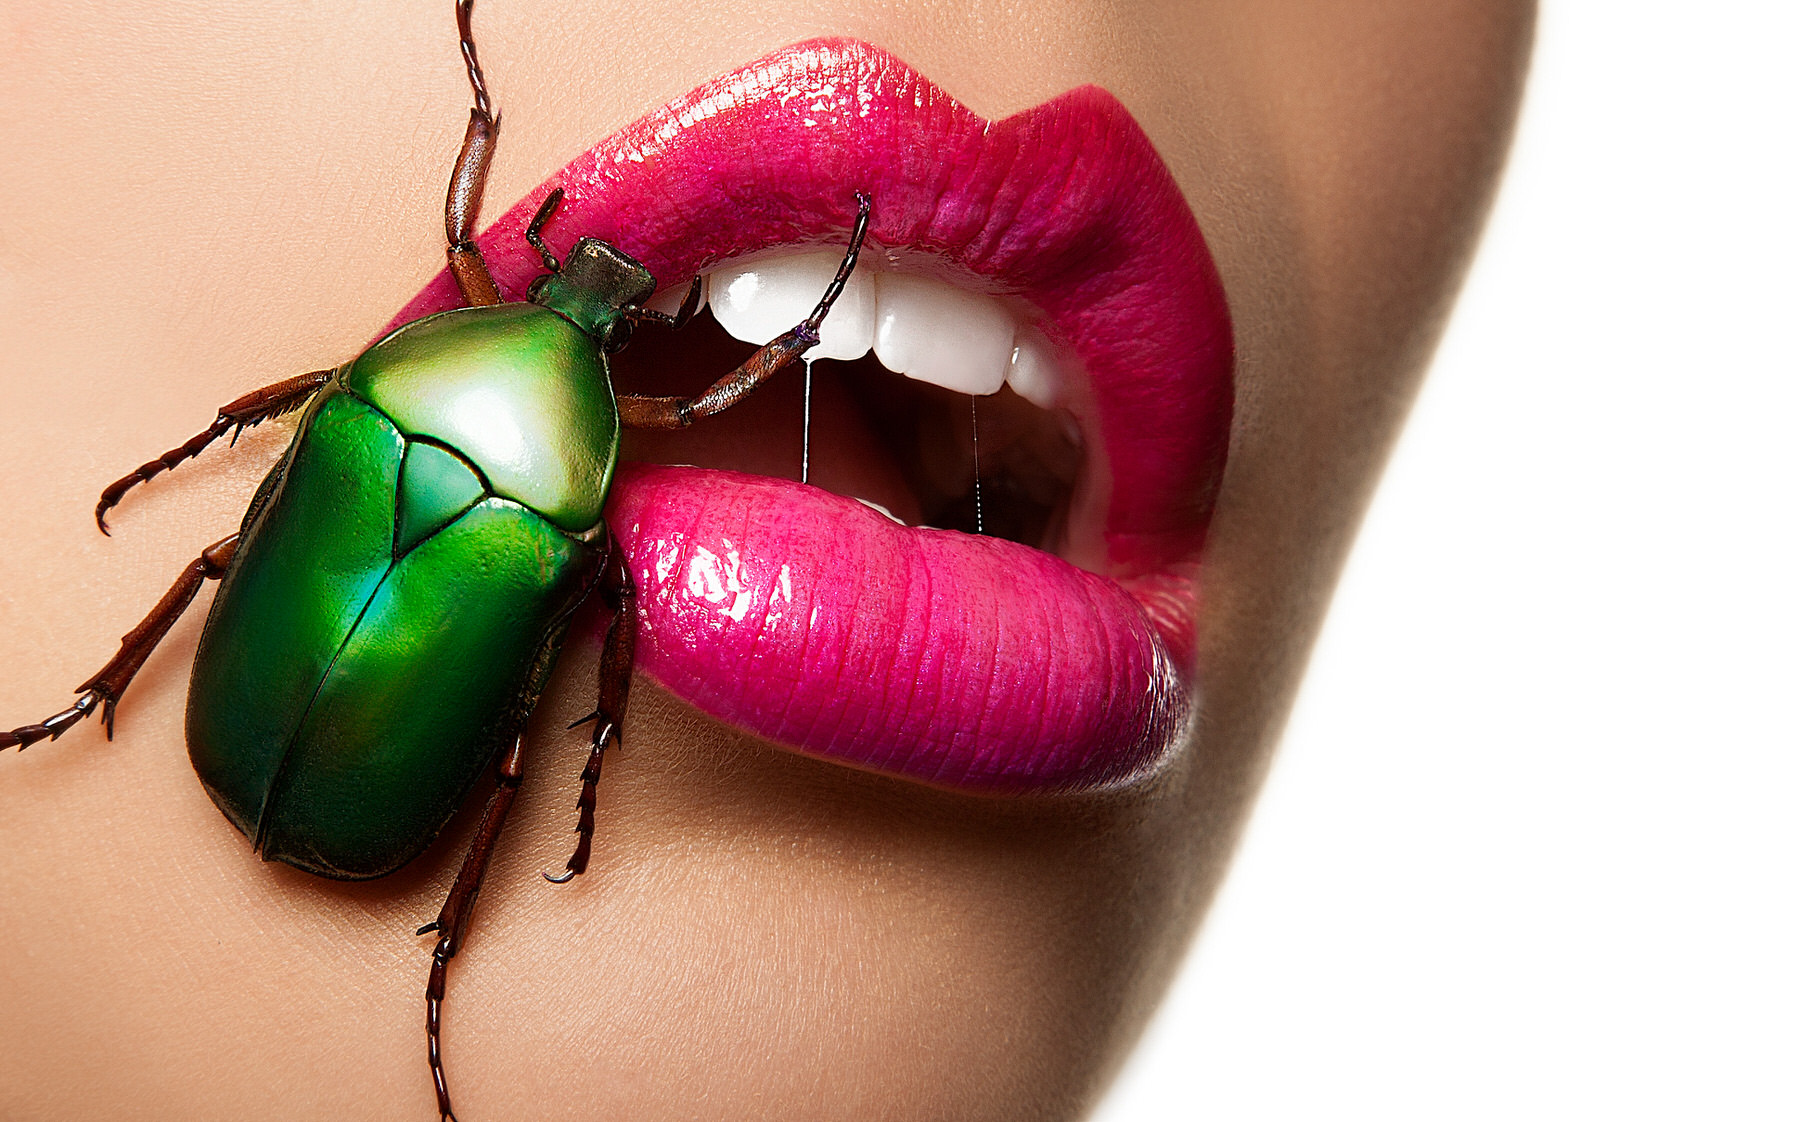
Episode Categories
Behind the Scenes: Beetle Beauty
Lighting
We wanted to keep the lighting fairly simple in these images in order to show off the detail of the beetles, but not become a distraction. It is also important that while the key light is almost directly straight on, that shadow and highlight definition are maintained. If you use a light source that is too large at such a close distance you will wind up with images that don’t have a clear boundary between highlight and shadow.
For the key we used an 11-inch Long Throw reflector, usually reserved for point lights. Because it was so close to our subject, and only a small area needed to be lit, the falloff was not an issue here. This harsh light provides nice highlight detail while also producing shadows.
For the background we used 2 strip lights pointed towards a white seamless. The lights hit the seamless, exposing it properly and because the surface is white, it allowed a lot of light to be reflected. Some of this reflected light came back and hit the back side of the model, giving a faint rim light.
Images are exposed at f/18 ISO 200 1/160 sec. 105mm on a 24-105mm 4.0L IS.
Concept
This shoot was inspired by Rankin‘s amazing series of lips holding things like flowers. We also drew inspiration from the Silence of the Lambs movie poster. I have always thought scarab beetles were beautiful and this was the perfect opportunity to feature them in a photo.
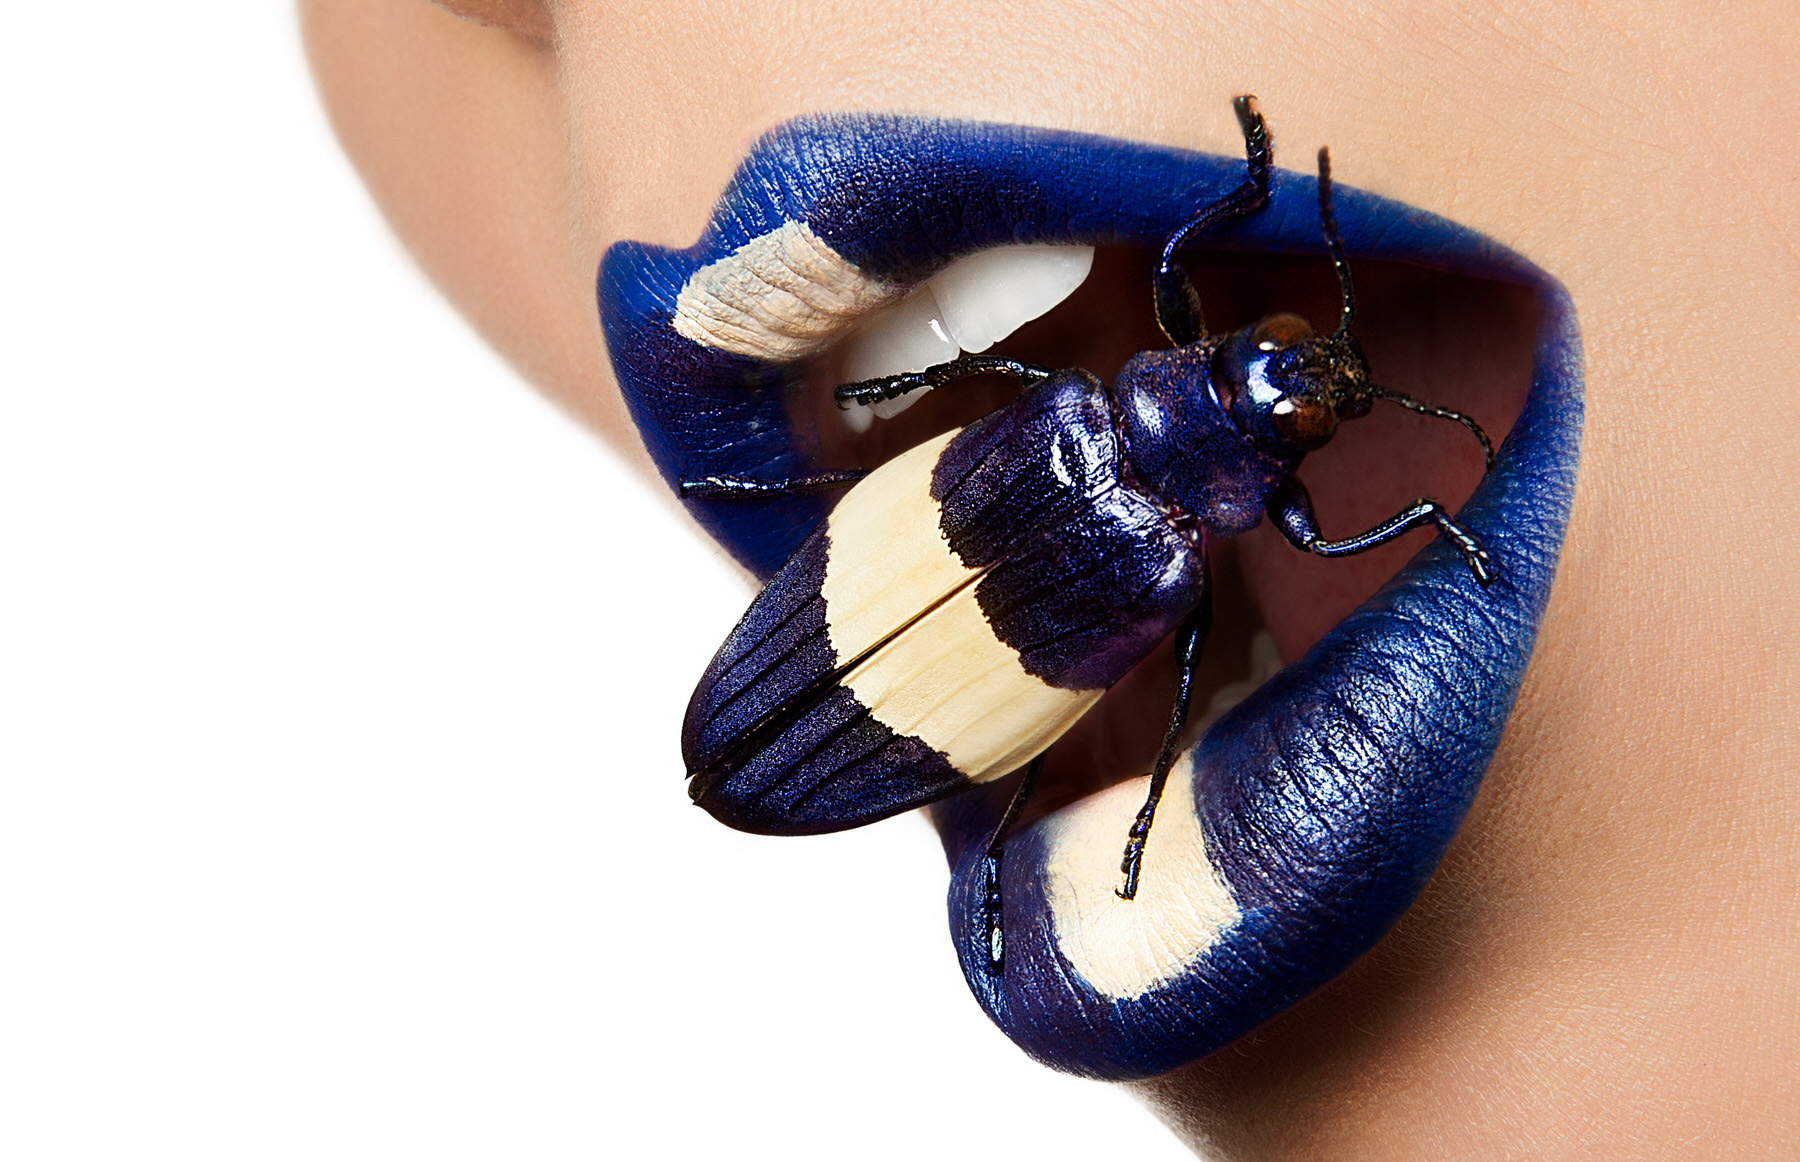
For the concept to come to life we needed an amazing makeup artist who could match the beauty of the insects. For the green scarab we decided to go with complimentary colors, yellow-green and red-violet. This colors play well off each other and allow each to stand out. For the blue beetle we took hints from its natural markings and decided to mimic those in the makeup. Using a dark blue as a base, a light stripe was painted down the middle of the lips. When the beetle was in place the effect took shape, making it look as though the stripe goes from the lips to the beetle.
I am a huge car fan, and I have seen a similar effect done on the Dodge Viper. The way the stripe continues through the steering wheel is pure genius.
Working with Models
Putting giant bugs on a model’s face is a lot to ask. For this shoot we had to find someone who had large lips, great teeth and skin, and was also ok with insects. Be sure all of that is laid out before the day of the shoot so there aren’t any surprises.
There are a couple of things you can do to help your subjects get more comfortable when doing something out of the ordinary. First be sure to show them references of other similar images so they know what they are going to get. If they can imagine the end shot, they are much more likely to have a good time. We also shoot tethered to a laptop so the model can see the images as they are shot. That way they will gain confidence as the shoot goes on and know how to pose for the camera.
We also used a mirror for this shoot so the model could see what she was doing with the beetles. We had her hold them because she has a better sense of pressure than someone else does on her own face. Using a mirror she could place the beetle correctly then pivot slightly for the shot.
Final Images


Credits
Photographer:Aaron Nace. Model: Ashley Brehmer. Production: Chris Todd. Production/Hair: Jamie Sterle. Makeup: Christina Artrip. 1st Assistant: Zach Spinner.
Episode Transcript
Aaron Nace: Welcome behind the scenes of our latest beauty shoot with beetle.
Hey guys. Welcome to Phlearn. My name is Aaron Nace. You can find me on Twitter on @aknacer. Today we’re taking you guys behind the scenes of our latest beauty shoot involving beetles. We’re going to tell you a little bit about how the concept came to involve. We’re going to take you through the shoot, the lighting, the human makeup and the beetles together and then a little bit of post-production.
The whole idea with this shoot was they put these beetles on someone’s face and having that kind of contrast in beauty because I really do think these are beautiful as well we’ve got this green one and then a blue one with kind of like a yellow through it. Doing a beauty shot involving insects is pretty cool and not a whole lot of people do it.
We wanted to make sure that it really did read as a beauty shot. One of those ways was the match the makeup to the actual beetles. When using the green scare beetle, we made sure to match the makeup with a magenta so those complimentary colors work together. For the blue beetle we decided to actually mimic the makeup on the marking on the beetle with the makeup. We wound up with a white stripe right down here which we kind of actually kind of mimic here with this beetle. I think it came out really cool using really, really close-ups. Our makeup artist did an amazing job matching all the colors of the beetles to lip makeup.
Once we found the beetles, it was our job to go ahead and remount them. They were actually mounted in these really nice containers. We have to take them out of there and then we just came up with this little mechanism. It’s really just, as you can see here, it’s a safety pin that goes straight and then at the very end there is an angle that points and that is stabbed into the back of the bug. These bugs were dead when we got them so don’t worry, no bugs were harmed in the making of this photo shoot. What this allowed us to do is create some kind of a handle. These are extremely delicate and they will break if you touch the leg too hard.
We also used a mirror right in front of our model. She couldn’t really see what was going on and it was really important that these bugs were put in the exact right place. A little bit of shift to left, to the right, completely changes the photo and completely changes the lighting. We put a mirror in front of our model so she could kind of see directly as she was placing these insects and what was going on in the mirror and then she can just turn ever so slightly and pose for the camera.
The lighting is a huge part of this beauty shot. We wanted to make sure that the lighting was simple and refine. We went with three lights in total. We have two strip boxes and those are behind the subject. Both of them are basically just firing into a white seamless back shot. The cool thing is when you do put quite a bit of light behind someone, not only do you get a very nice clean backdrop but some of that light is going to spill forward if you don’t use flags which in this case we didn’t use flags. The strip boxes are shining backwards into the seamless and then some of the light actually comes out forward. That creates a very nice soft rim light on our subject as well. As she moves around you’ll even see it on her lip some places. That’s like coming from the background that was lit with the strip boxes.
The key light for this was a long thorough reflector and that was placed directly above the model’s face and directly above the camera as well. We used a boom to kind of get it in place, taking what would normally be a small light source and putting it very close to your subject, makes it appear a little bit larger. That’s how we were able to get a really nice clean look but still get nice deep shadows as well and not have it be too soft.
Be sure you talk to the model ahead of time, before the day of the shoot. Be sure you let them know, “Hey, we’re going to be shooting with bugs. They’re not going to be alive.” You might find a model who’s just not okay with this. Make sure you let them know beforehand. Another great way to make sure the models are okay working with it is to show them reference pictures, other pictures like, “Hey, this is kind of our goal. This is what we’re going to get out of it. It’s going to be worth putting this bug on your face.”
We shoot tethered so that during the photo shoot the model can kind of come around after a couple of shots and look at the photos and be like, “Oh, my God, that’s awesome.” She can get excited about them and kind of really get into it and see that their efforts are really paying off in putting this bug on their face which seems like a totally weird and gross idea actually can be pretty.
Thanks so much for watching guys. I hope you learned a little bit and I hope you enjoy the shots. Look forward to our tutorial on how to edit these images and make them really stand out and pop. Thanks a bunch. I’ll phlearn you later. Bye everyone.
Thank you and thank you and thank you and thank you. Thank you.


Comments