Download Assets
description
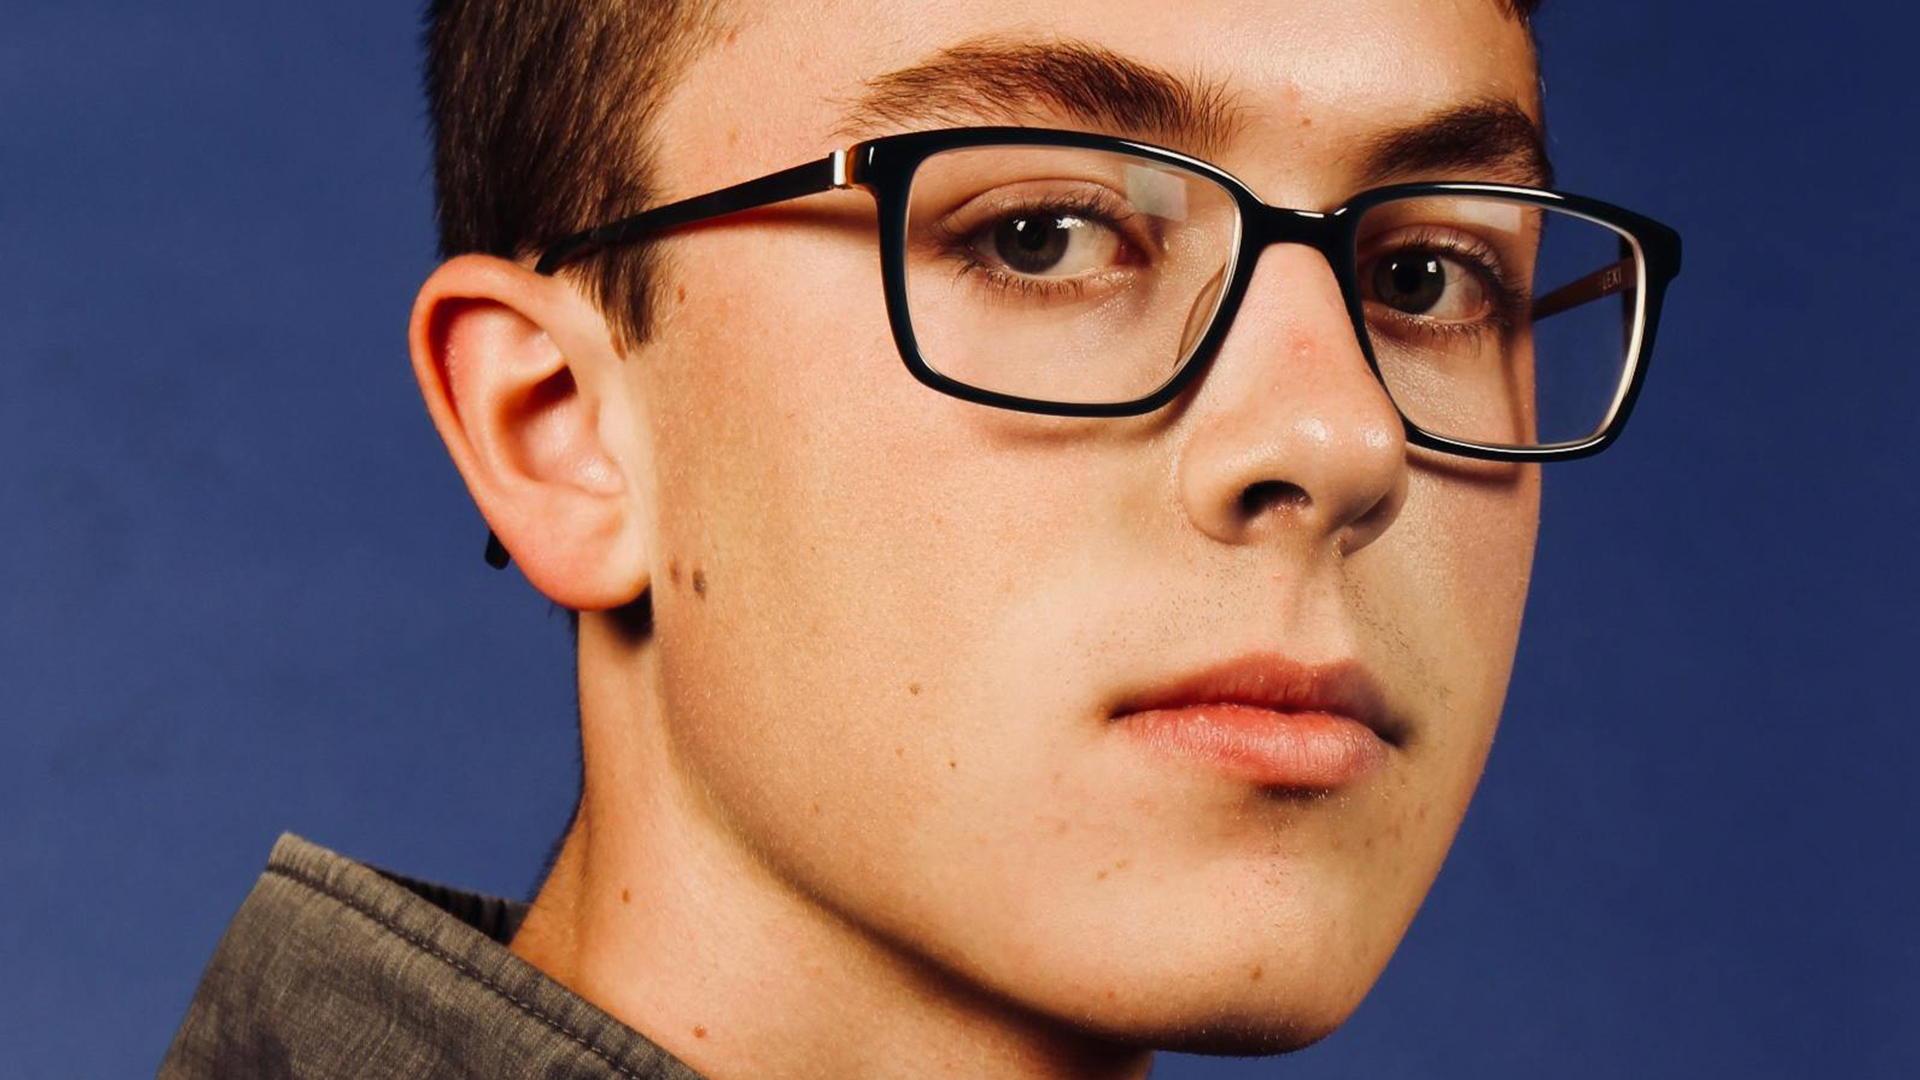
A common challenge in portrait photography is red cast on skin tones. This often appears in areas with increased blood flow, like around the nose, cheeks, and near the eyes. In this tutorial, we’ll show you how to fix it using the Hue/Saturation Adjustment Layer in Photoshop.
Go PRO:
Discover the secrets of classic retouching techniques and AI-powered tools for smooth skin, subtle enhancements, and breathtaking results. Watch our in-depth PRO tutorial The Beginner’s Guide to Portrait Retouching Using AI & Traditional Tools.
Artist Credit
Share
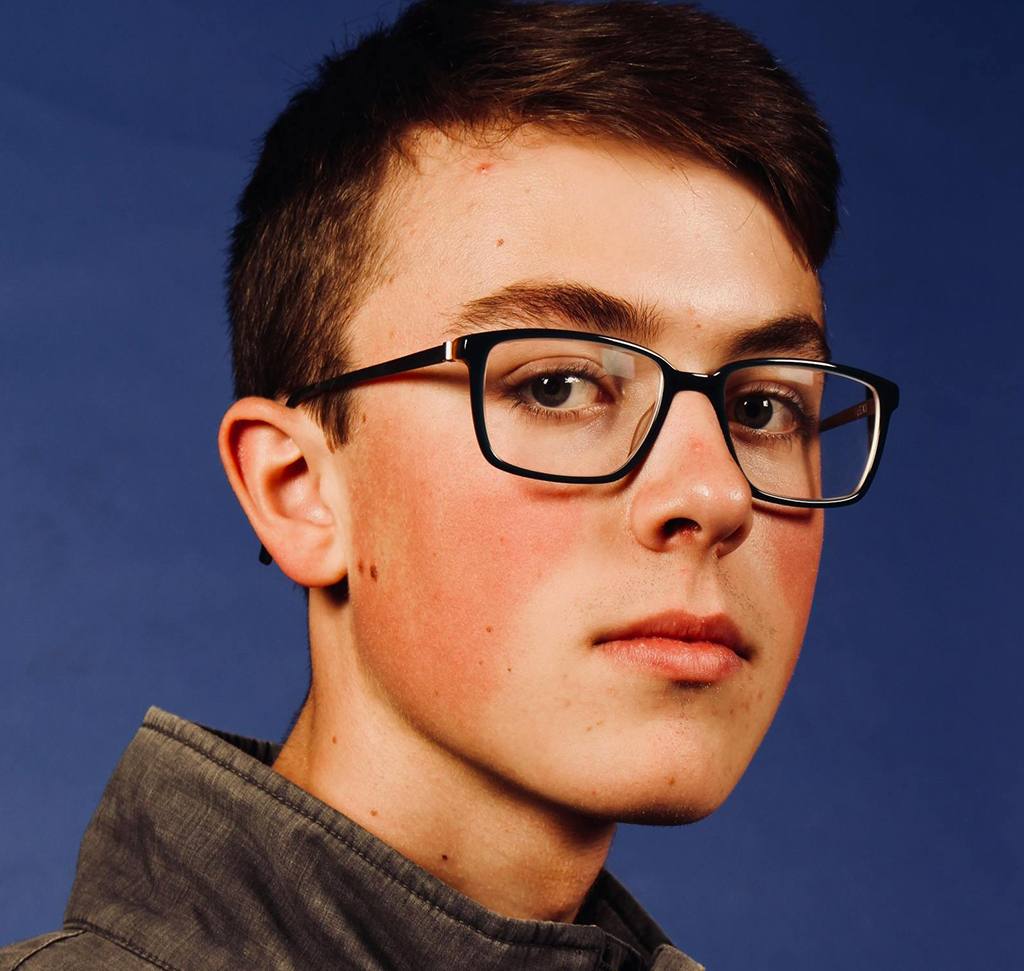
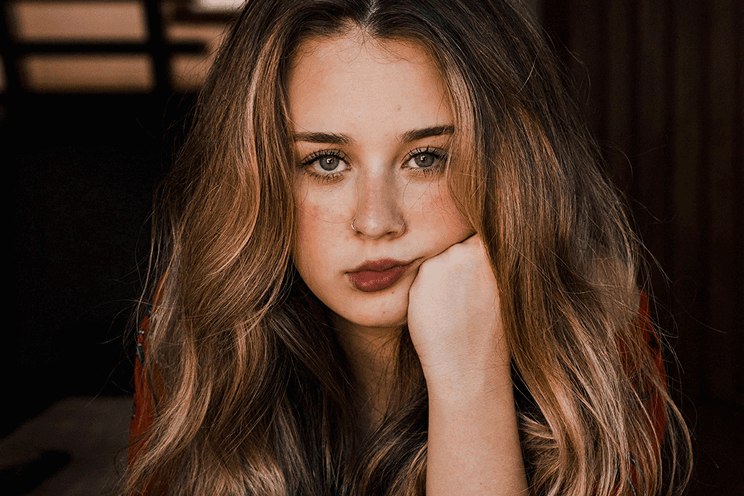
AFTER
BEFORE
Flawless Skin Tones in Minutes
Having perfect skin tones in your portraits can make a world of difference. Redness, especially around the nose, cheeks, and near the eyes, is a common issue that can detract from a natural look. With this technique, you can effectively reduce redness in your portraits using Hue/Saturation Adjustment Layers, achieving natural-looking skin tones and elevating your final image!
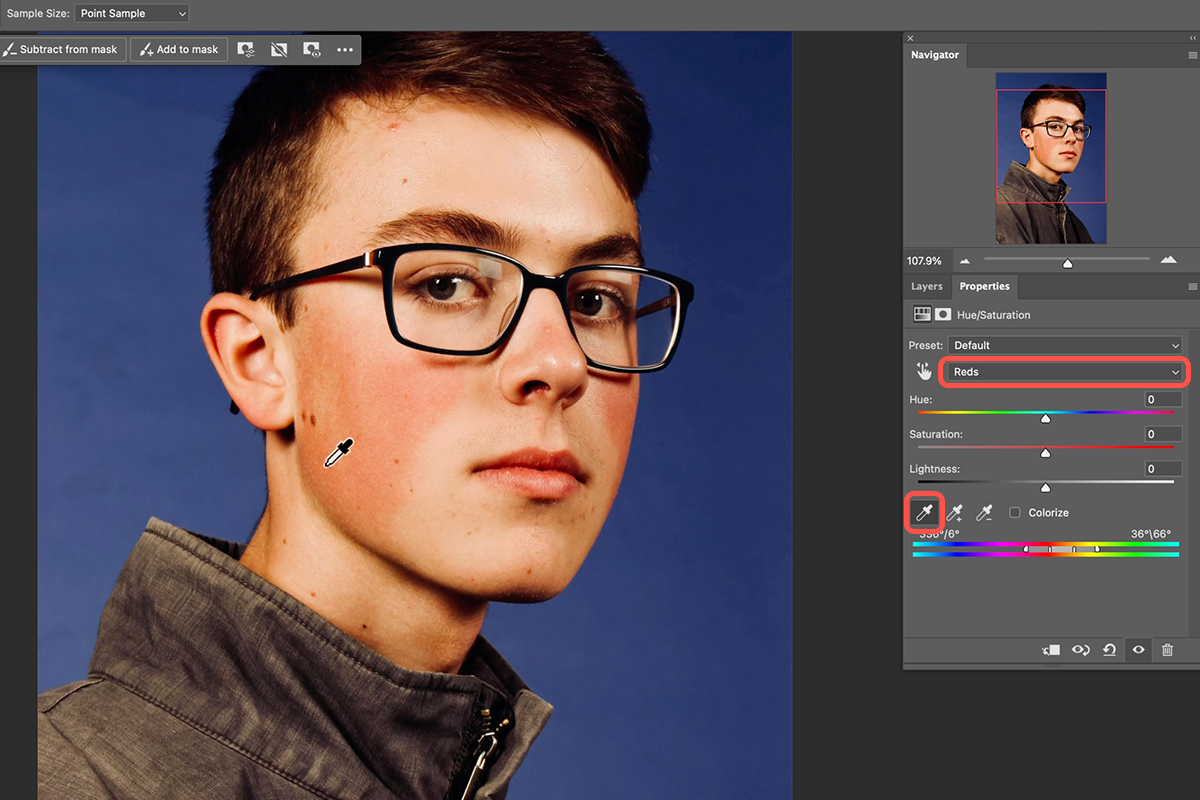
Adjusting Red Tones
1. To add a Hue/Saturation Adjustment Layer, navigate to “Layer” > “New Adjustment Layer” > “Hue/Saturation.” This creates a layer specifically targeting color adjustments.
2. In the “Hue/Saturation” panel, click the dropdown menu next to “Master” and choose “Reds” to isolate the red tones you want to modify.
3. Use the eyedropper tool to click on a red area of your subject’s skin. This sets the reference point for the color adjustment.
4. Drag the “Hue” slider to the right. This will shift the red tones towards a more neutral color, effectively reducing the redness.
5. For more precise control, adjust the slider at the bottom of the panel. Moving it to the left narrows the range of reds affected by the adjustment.
Refine the Adjustments with a Layer Mask
Now it’s time to refine the adjustments in the Layer Mask.
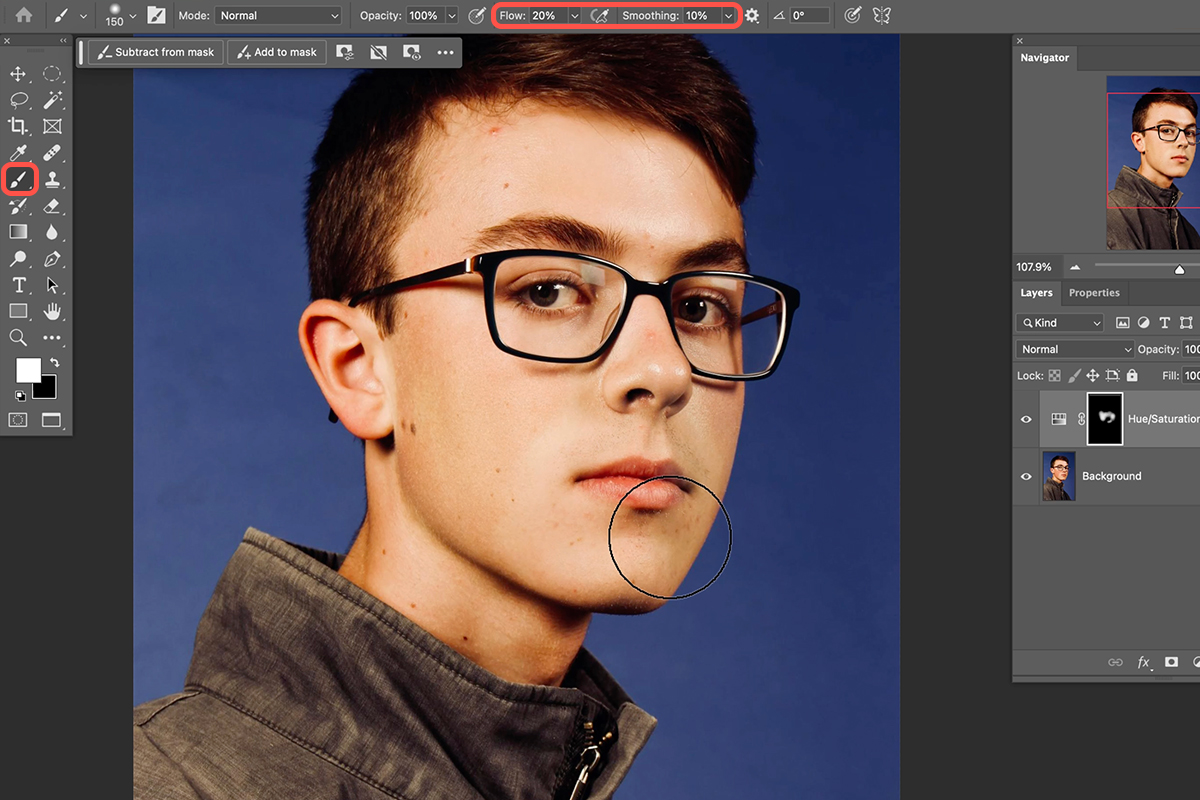
6. To invert the Layer Mask, click the layer mask thumbnail next to the “Hue/Saturation” layer. Press “Ctrl/Command + I” to invert the mask, hiding the adjustment effect entirely.
7. To paint back the effect, select the Brush Tool (B) and ensure white is your foreground color. Carefully brush over areas where you want to reduce redness, revealing the adjustment effect. Remember to set your brush’s flow to 20% and smoothing to 10%.
Adapting to Different Tones
This technique can be applied to various portraits with varying degrees of redness. Adjust the Hue, Saturation, and Lightness sliders based on the specific image to achieve a natural-looking reduction in redness.
For minor skin imperfections like red spots, use the Spot Healing Brush Tool (J). Sample a clear area of skin and click on the blemish to remove it.
With these simple steps and a little practice, you’ve unlocked the power to banish redness in Photoshop. Now you can take your portraits to the next level, revealing the natural beauty and flawless skin tones hiding beneath. Remember to practice and adjust the technique based on the specific photo you’re working on.


