
Download Assets
description
Learn how to find your layers faster in Photoshop Beta! New “Hover Bounds” highlights the layer you’re over, both on the canvas and in the Layers panel. In this tutorial we’ll show you how it works with masks and groups, and even lets you fine-tune it for your workflow.
Note:
Due to copyright restrictions, we’re only able to share a preview of the FREE Adobe Stock image.
Go PRO:
Learn Photoshop’s ins and outs, master pro-level tools, and tackle fun and challenging projects with our in-depth Photoshop Learning Path.
Artist Credit
- Andrii Robitnytskyi
Images sourced from Pexels.
Share

AFTER
BEFORE
Unveiling a New Workflow
Exciting news for Photoshop users! The beta version introduces a brand new feature: Hover Layer Bounds. This innovative tool streamlines navigating complex documents by visually connecting your layers panel to your image. Below we’ll show you how to activate and customize Hover Layer Bounds to fit your workflow.
Accessing Hover Layer Bounds
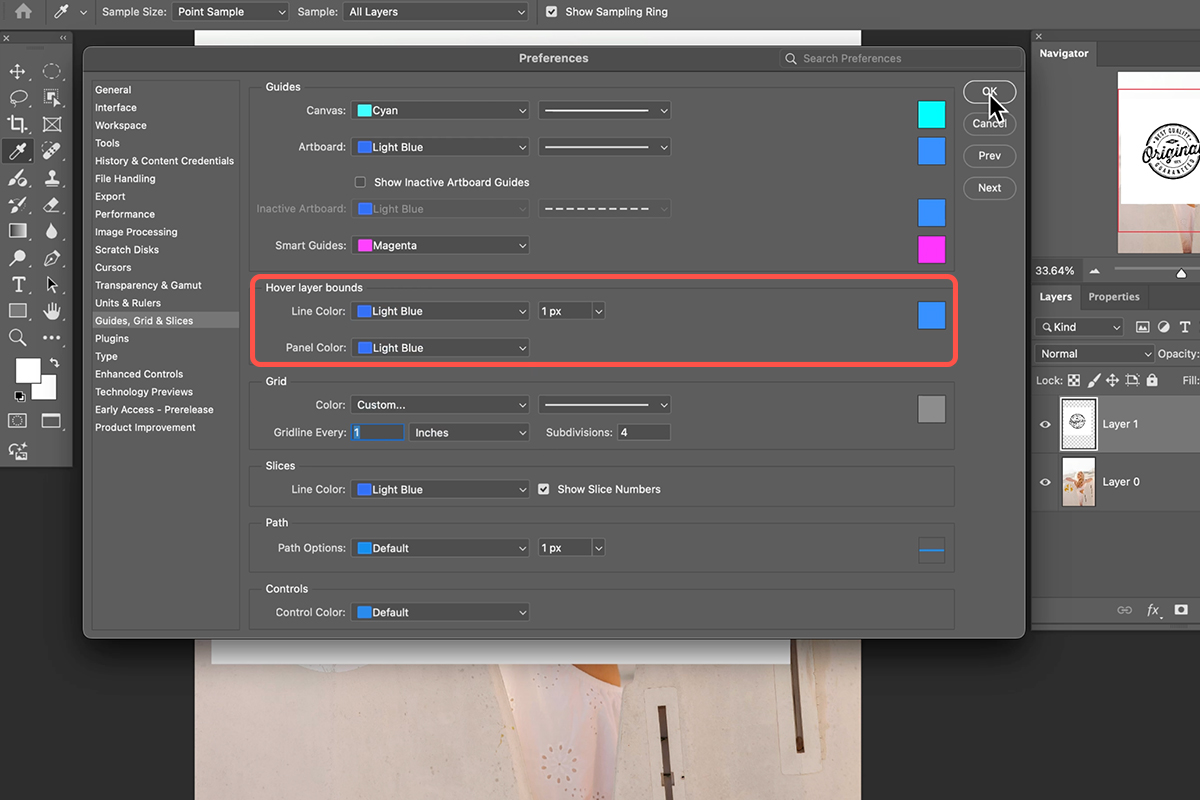
First, ensure you’re using the Photoshop Beta. If not, head over to your Creative Cloud installer and download the Beta version. With the beta open, navigate to your Photoshop preferences (Edit > Preferences on PC users, Photoshop > Preferences for Mac users). Here, find the “Guides, Grids & Slices” section. Look for the new feature titled “Hover Layer Bounds.”
Visualizing Your Layers
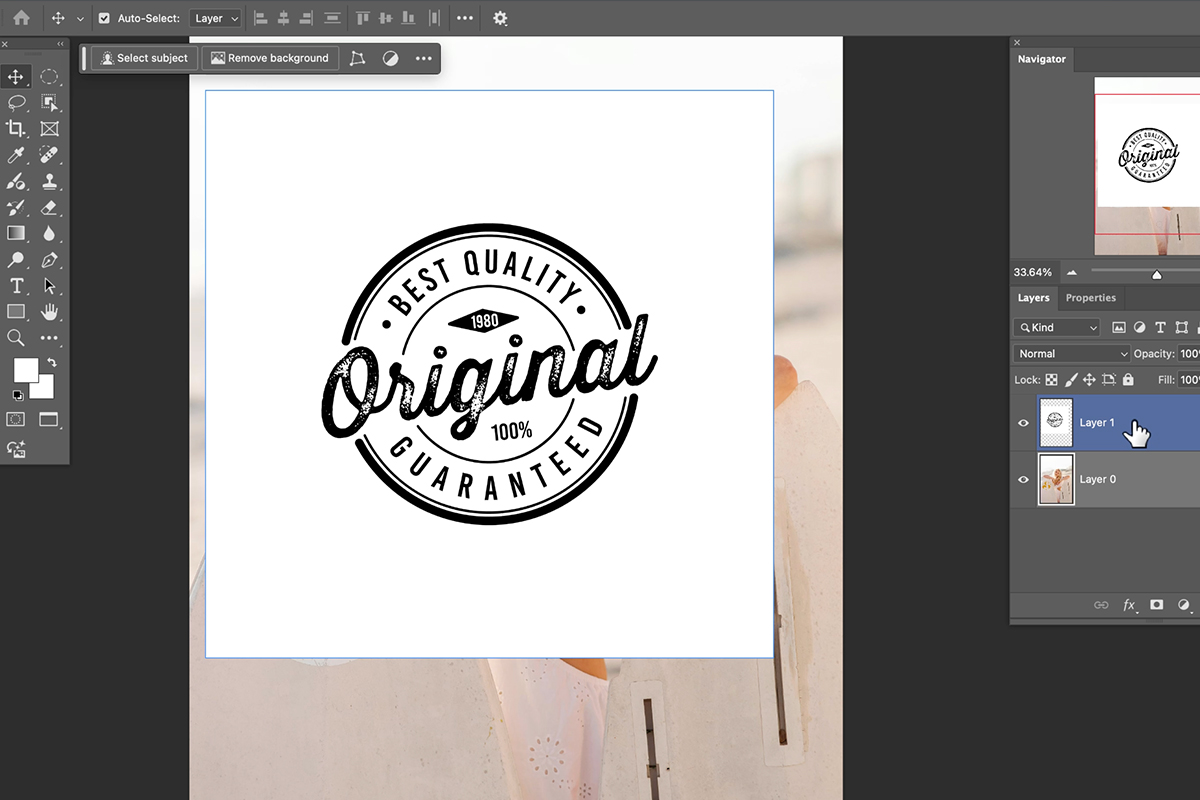
Now, let’s experience Hover Layer Bounds in action! Grab the Move Tool (V key) and open a document with multiple layers. Hover your cursor over a specific layer in the document window. Notice how the corresponding layer in your Layers panel instantly highlights in blue. Hovering over layers in the Layers panel will also highlight them within your document window, making it a breeze to identify and select the desired layer.
Tackle Complex Documents
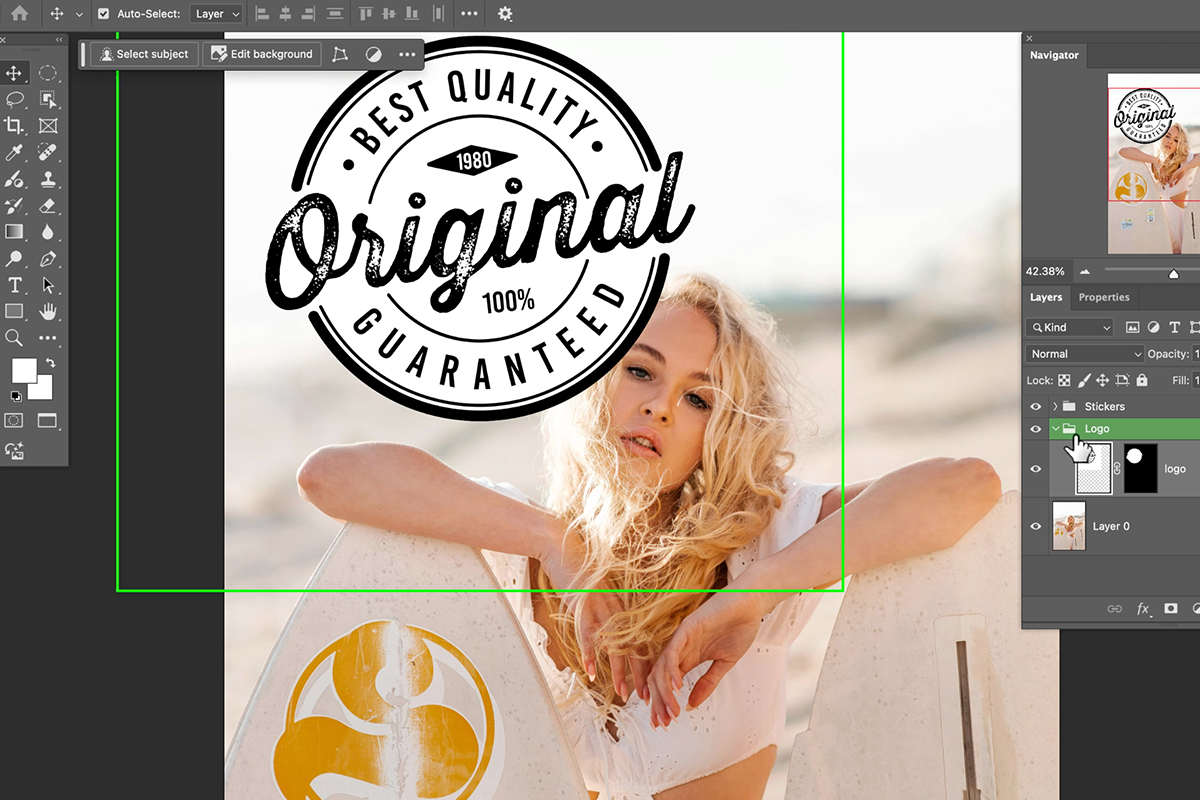
As your projects grow more intricate, Hover Layer Bounds becomes even more valuable. Let’s add some complexity! Create layer masks or groups within your document. Hovering over these elements will still effectively highlight their corresponding sections in the Layers panel. This allows you to maintain clear organization and control, even with intricate layer structures.
Tailoring Hover Layer Bounds
Don’t like the default blue highlight? No problem! Hover Layer Bounds offers customization options. Go back to your Photoshop preferences and explore the “Hover Layer Bounds” settings. Here, you can adjust the line color and panel color to better suit your preferences. You can even modify the line thickness for improved visibility.
Setting Up Your Ideal Workflow
Hover Layer Bounds offers additional functionalities you can enable or disable based on your workflow. Let’s explore these options! Within the “Hover Layer Bounds” settings, you’ll find features like “Show Transform Controls” and “Auto-Select.”
Experiment with enabling and disabling these options to see which settings optimize your workflow. Prefer to select layers directly without automatic activation? Simply turn off “Auto-Select.” Want a cleaner workspace without constant transform controls displayed? Disable “Show Transform Controls.”
Remember, the best settings depend on your individual preferences. Play around and find the perfect combination for you!


