
description
Learn how create a unique artistic effect by combining a portrait with splatter effects in Photoshop. Using channels for precise selections, we select darker areas of the image and fill them with color. Position splatter effects over the subject and use layer masks to fine-tune the outcome. Experiment with layer styles and blending modes to achieve captivating results. This versatile technique adds depth and dimension to digital art, graphic design, and photography projects.
Share
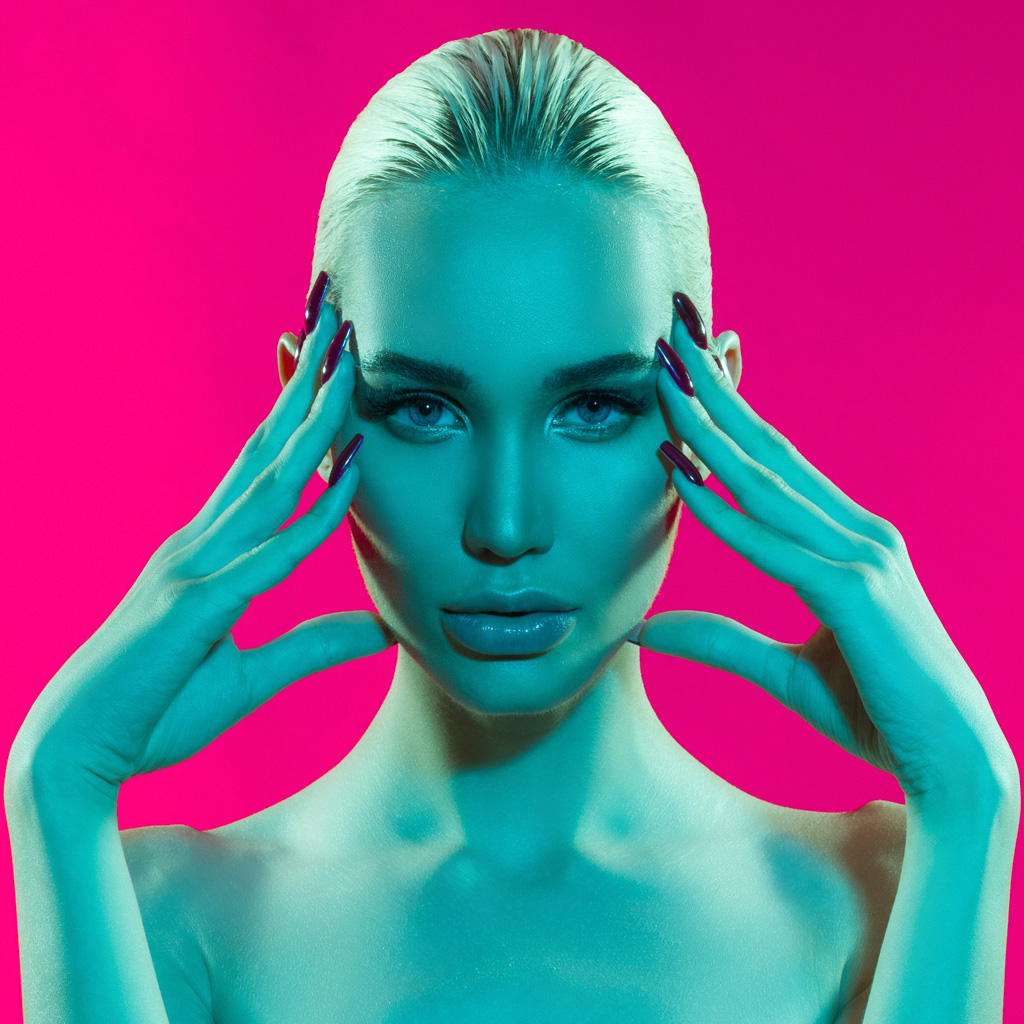
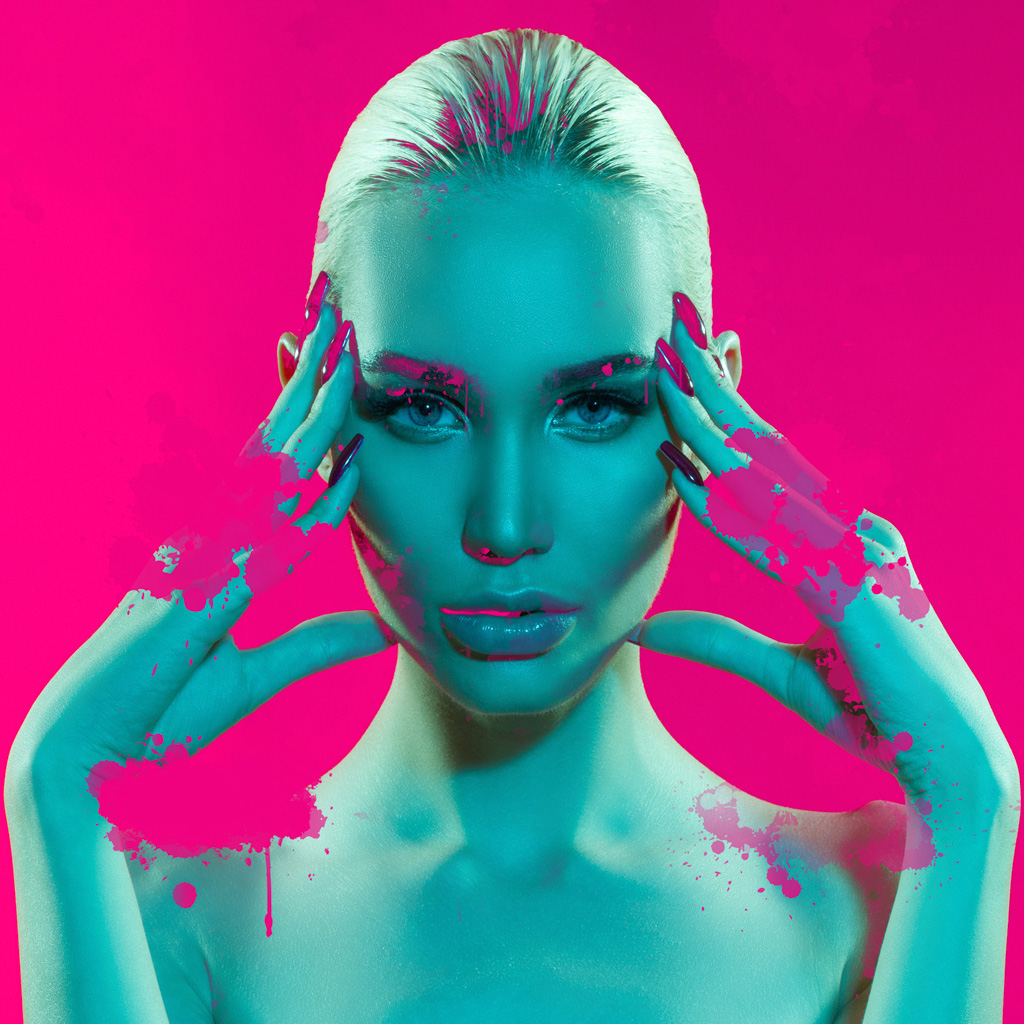
AFTER
BEFORE
Create Vibrant Portraits
Learn how to create a unique artistic effect by combining a portrait with splatter effects in Photoshop. This technique adds depth to the image and produces an impressive outcome that cannot be achieved with simple blend modes.
1. Preparing the image and splatter effect:
Start by selecting a suitable portrait and a high-quality splatter effect. Adobe Stock is a great resource for finding appropriate splatter effects. Download the effect and import it into Photoshop.
2. Understanding blending modes:
The blending mode is essential when working with multiple layers in Photoshop. While the ‘multiply’ blending mode can provide interesting results, it may not produce the desired colors or opacity. To achieve a more controlled effect, we’ll use the ‘normal’ blending mode.
3. Utilizing channels for selections:
Channels are powerful tools for making precise selections in Photoshop. They enable you to select specific areas based on the intensity of color information in the image. To work with channels, open the Channels panel by going to Window > Channels.
4. Selecting the appropriate channel:
The goal is to select the channel that contains the most information. In our case, the green channel provides the best result. To create a selection based on the green channel, either hold control/command and click on the thumbnail or use the selection icon.
5. Creating a new layer:
Return to the Layers panel and create a new layer. The selection made using the green channel selects the lighter areas of the image. Invert the selection by going to Select & Inverse to select the darker areas instead.
6. Filling the selection with color:
Create another new layer, and then go to Edit > Fill. Choose ‘color’ for the Contents, and use the color picker’s eyedropper tool to pick the desired color from the background.
7. Utilizing the splatter effect:
The filled selection now has transparency built into it, which adds depth to the image. Make the subject visible again, and position the splatter effects over them. Duplicate the splatter layer as needed to create multiple effects. Use a layer mask to selectively hide or reveal parts of the splatter effect, ensuring that it doesn’t obscure essential features of the subject.
8. Refining the effect:
To further enhance the final result, you can experiment with layer styles such as ‘inner glow’ or ‘drop shadow.’ Additionally, you can adjust the hue, saturation, and brightness of the splatter effect using adjustment layers. Finally, consider experimenting with different blending modes to achieve a variety of interesting results.
This technique is versatile and can be applied to various projects, including digital art, graphic design, and photography.


