
Download Assets
description
Learn how to color match objects in your photos using Photoshop! This tutorial will guide you through the process of selecting an object, adjusting its hue and saturation, and adding color reference swatches to achieve a perfect match.
You’ll also learn how to clean up the selection and fine-tune the color balance. Then, we’ll add text and color-match it to the image, creating a cohesive design.
Go PRO:
Learn how to match the color between photos in both Lightroom and Photoshop with our in-depth PRO tutorial How to Match Color in Lightroom & Photoshop.
Artist Credit
- Butfirstcaphesuada
Images sourced from Pexels.
Share
MATCH COLORS LIKE A PRO
Perfect Color Match
Imagine transforming an image by making its colors sing in perfect harmony. That’s the magic of color matching in Photoshop! Follow the steps below to unify the various elements in your images, and direct the viewer’s eye within the photo.
Selecting the Object to Recolor
1. Open your photo in Photoshop.
2. Choose the Object Selection Tool (keyboard shortcut W). Hover over the image with the tool to see objects automatically highlight.
3. Click on the object you want to recolor.

Find the Right Color
4. Go to Layers > New Adjustment Layer > Hue/Saturation.
This creates a new layer that will only affect the selected object because of the selection made in step 3.
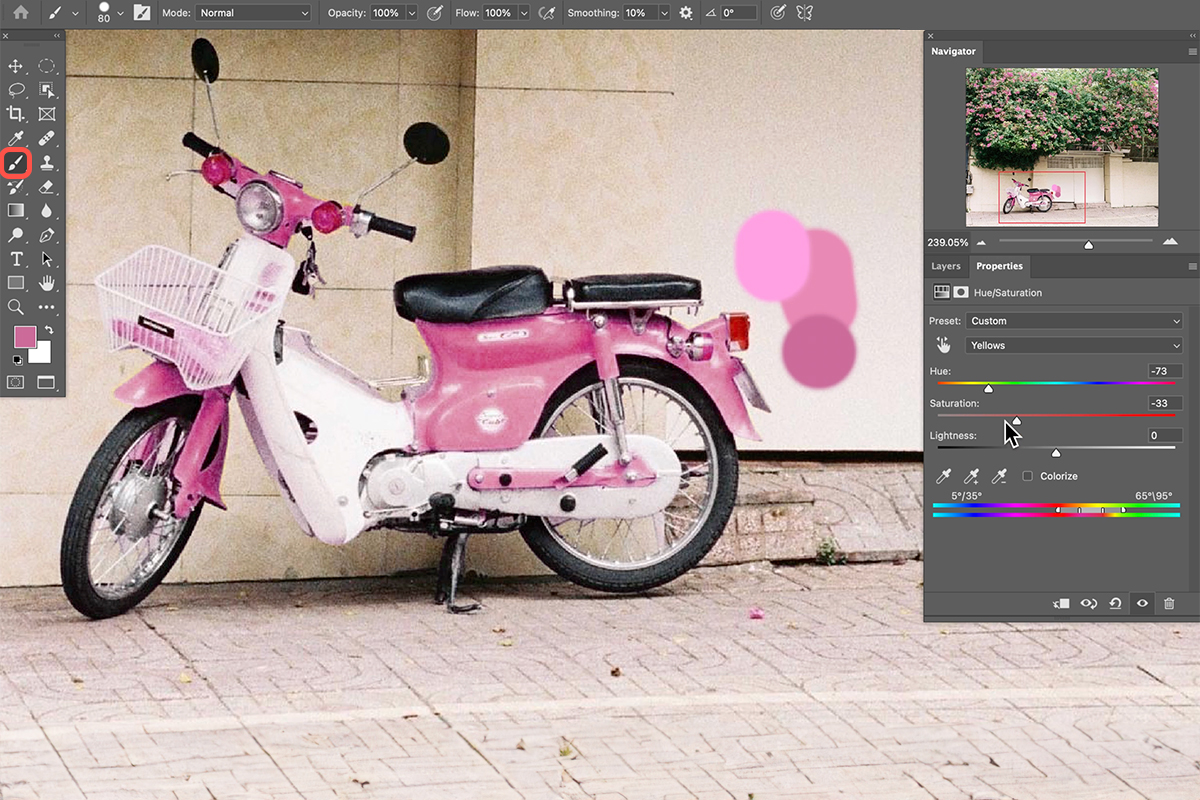
5. Click on the Eyedropper tool in the Properties window.
6. Select the color you want to match the object to (in this case, the pink flowers).
7. Drag the Hue slider until the object’s color closely matches the flowers.
8. Create a new layer (keyboard shortcut B).
9. Use the Eyedropper tool to sample a few colors from the flowers you want to match.
10. Paint these colors on the new layer next to the moped.
11. Use this as a reference point for further adjustments.
Perfecting the Match
12. Go back to the Hue/Saturation adjustment layer.
13. Use the eyedropper tool again to select the color you want to match on the reference layer (the pink color blocks).
14. Fine-tune the Hue and Saturation sliders to achieve the desired color match.
The Object Selection Tool might leave some stray color changes (like the orange taillight). No worries! Click on the layer mask of the Hue/Saturation adjustment layer. This lets you act like a digital painter, using a black brush to erase any unwanted color adjustments. Now your object’s color transformation will be flawless!.
Adding Text
The additional steps below are optional, but they offer a chance to add some artistic flair to your photo. Want to incorporate a title or caption? Follow these steps to make your text sing in harmony with the rest of the image.
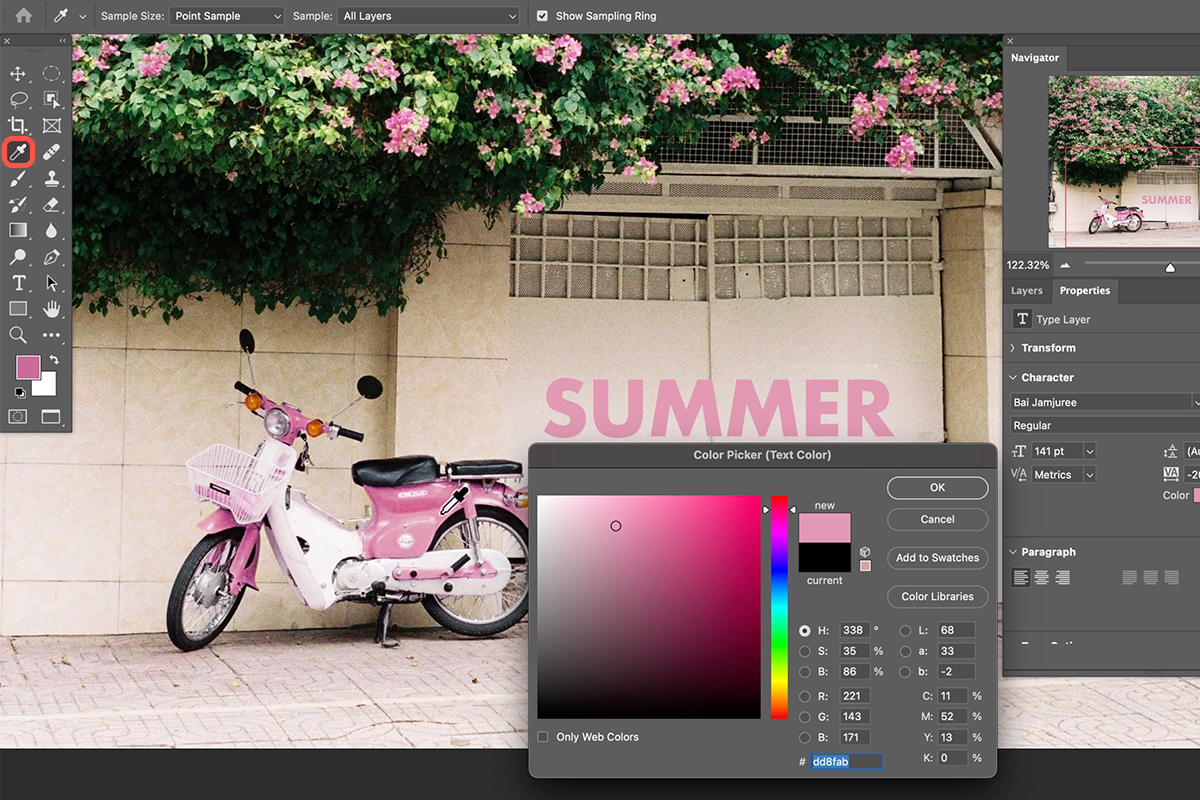
1. Use the Text tool (keyboard shortcut T) to add text to your image.
2. Use the Eyedropper tool to sample a color from the moped to match the text color.
Creating a Drop Shadow
3. Use the Layer Style menu to add a drop shadow to the text.
4. Sample a dark green color from the plants in the photo for the drop shadow color (instead of black) to maintain color harmony.
5. You can use two drop shadows, one closer and one further away, to create more depth.
You’re all set! You’ve successfully used Photoshop’s magic to transform your photo’s color palette. By matching an object to another element, you’ve created a sense of visual harmony and elevated the overall aesthetic. Remember, this technique isn’t just about making edits; it’s about unlocking the power of color to tell a story and evoke emotions in your viewers. So, go forth and experiment! Explore different color combinations and see how they can breathe new life into your photos, transforming them from ordinary snapshots to captivating masterpieces.


