Download Sample Images
Click the link below to download the sample images and follow along with this tutorial.
DownloadTutorial Description
Photoshop has some handy tools for making text-based graphics and advertisements. Learn how to use the Type Tool and Layer Styles to add an outline to text while making the interior invisible, allowing a background image to show through.
And you can learn more about the power of Layer Styles in our PRO tutorial How to Master Layer Styles in Photoshop. Add 3D effects, lighting effects, and do even more to text with Layer Effects!
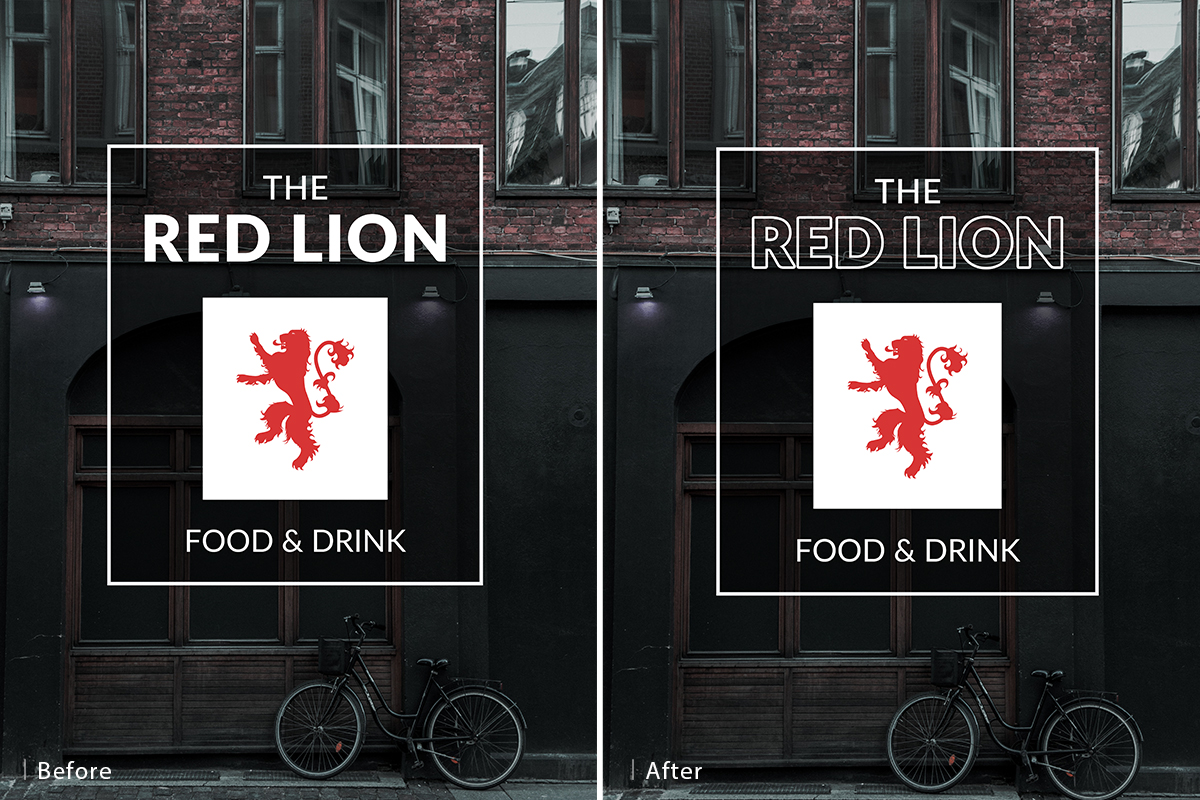
Stroke & Layer Styles
The Layer Styles dialog is the key to adding an outline to anything in Photoshop. If you want to outline text, first use the Type Tool to create a Type Layer in your image. Then either double-click on the Type Layer in the Layers Panel or, with the Type Layer selected, click on the fx icon at the bottom of the Layers Panel.
The Layer Styles dialog has a lot of tools and options, but we’ll be focusing on the Stroke menu to add an outline to our text. Check the Stroke option on the left and the Stroke menu will open. Here you can adjust the size of the Stroke, the color, and the position (whether you want it to appear outside, inside, or centered along the edge of the text).
Play around with the settings until you find something that works for the image you’re making. Also, of you find that the letter spacing needs to be adjusted after adding a stroke, go to the Window menu and open the Character panel. You can do further adjustments to the kerning and leading of your text using this menu.
Opacity & Fill
We’ve got our outline, but what if we wanted to only have the outline be visible and the interior of the text be invisible? Photoshop makes this easy! At the top of the Layers Panel, you’ll see two options for adjusting the transparency of a Layer.
You’re probably already familiar with Opacity, which allows you to make a Layer more or less transparent. Below that you’ll find the option for Fill. What’s the difference? Fill allows you to make a Layer more transparent, but will not affect any Layer Styles on that Layer.
So if you have a Type Layer with a stroke applied and then lower the Fill to 0%, the stroke will remain visible and the interior of the text will be completely invisible. Using this, you can create interesting type effects for logos, graphics, and advertisements!