
Download Assets
Download Assets
This tutorial includes 1 sample image and 1 sample PSD. Downloads are free with a PHLEARN account.
- Download the sample images and PSDs from every free tutorial on PHLEARN
- New free tutorials published every week
- One free account — sign up once, then download anything
description
Ever dreamed of still images that whisper with movement, mesmerizing loops that blur the line between reality and magic? In this tutorial, we’ll show you how to animate your images to create stunning Cinemagraphs using both Photoshop and After Effects.
Enjoying This Free Tutorial?
We publish a new free tutorial every week, each one with sample images and PSDs you can download and follow along with. Sign up and they land straight in your inbox, along with early word on sales, events and subscriber-only offers.
Artist Credit
- Anastasia Ilina-Makarova
Images sourced from Pexels.
How to Create a Cinemagraph in Photoshop and After Effects
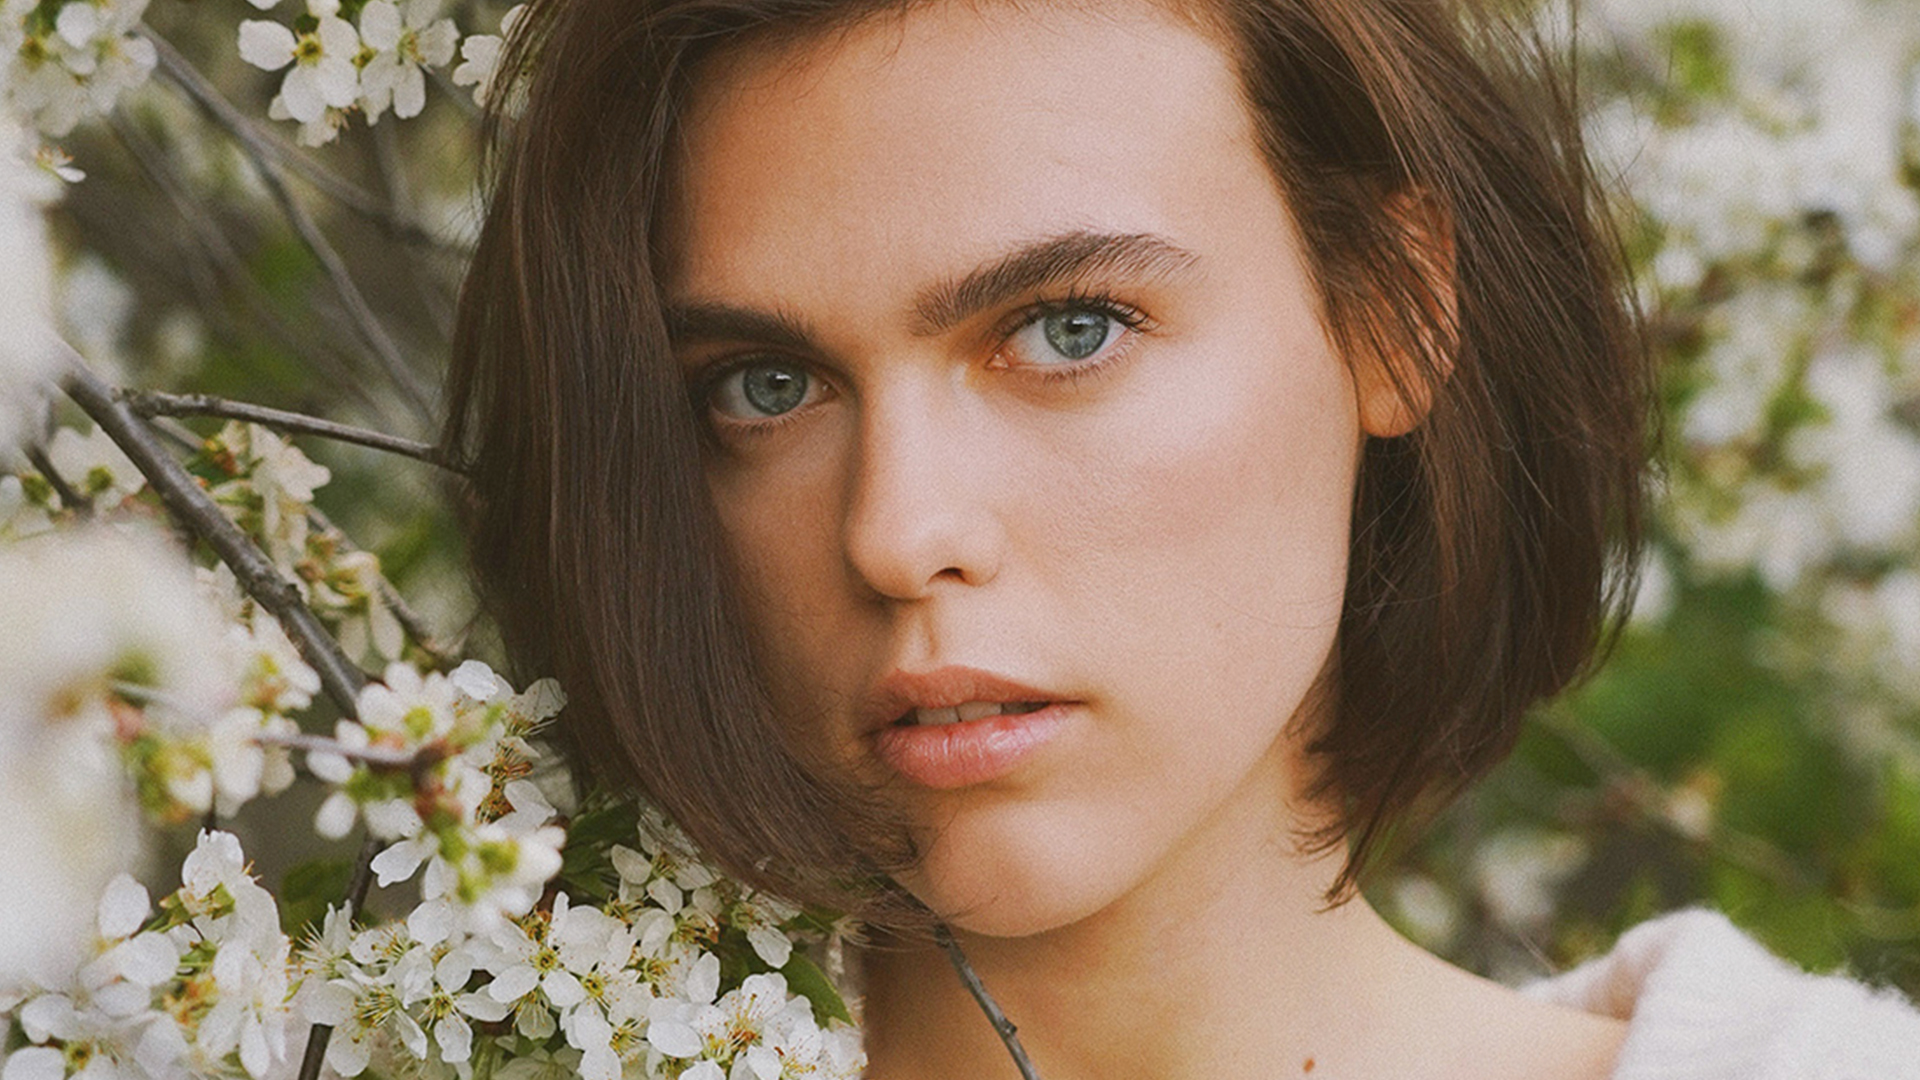
A cinemagraph is a still photograph with one element moving in it — and because everything else holds perfectly still, that single motion is far more arresting than a video of the same scene. The example here is flower petals drifting across a portrait, some passing in front of the subject and some behind.
It is a two-part job. Photoshop does the cutting and preparation, After Effects does the movement, and the split matters: almost every decision that makes the animation easy is made in Photoshop before After Effects is ever opened.
Part One: Preparing the Layers in Photoshop
Separate the subject
Click Select Subject in the contextual task bar to isolate the person. Automatic selection usually misses something — press L for the Lasso Tool and hold Shift to add any areas it skipped, particularly around the head.
With the selection active, click the background layer and press Ctrl or Cmd + J to copy the subject onto a layer of its own. Name it. You will be looking at a lot of layers shortly and unnamed ones become unworkable fast.
Cut out the elements that will move
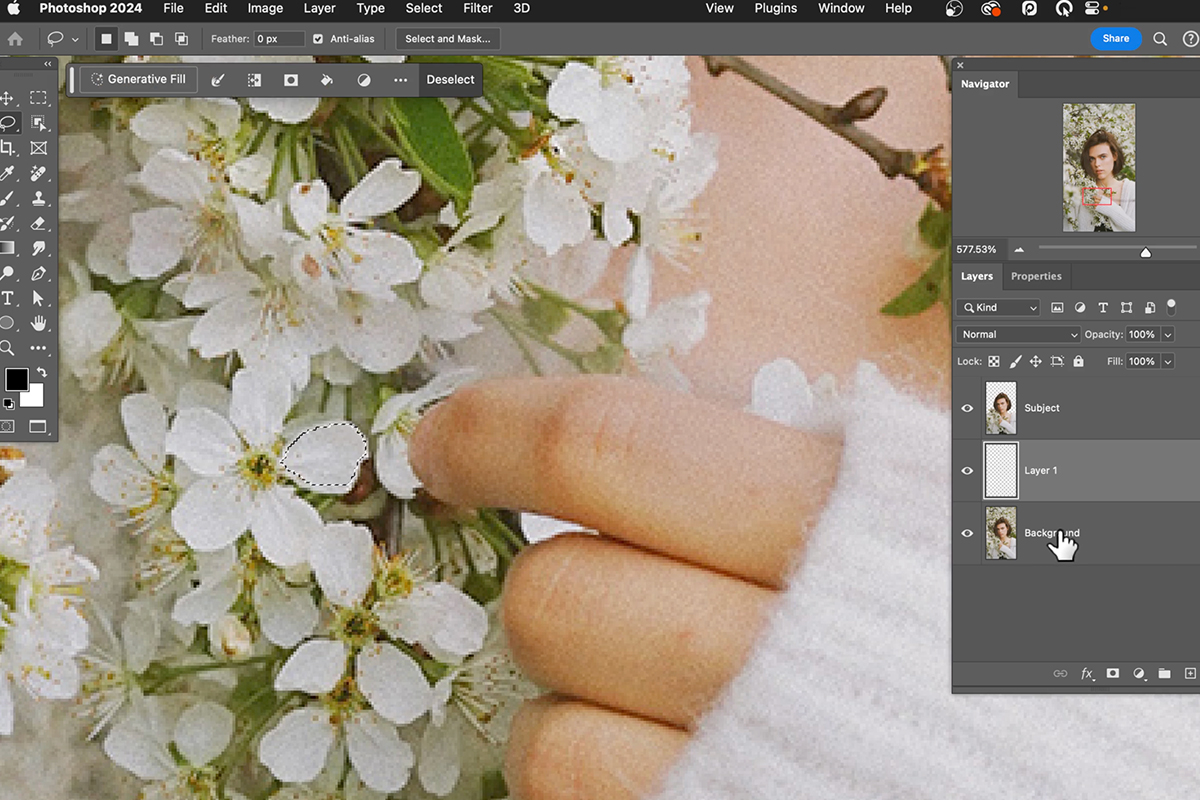
Zoom in on the background and lasso individual flower petals, copying each onto its own layer with Ctrl or Cmd + J.
Select just inside each petal’s edge rather than around it. Catching a rim of background means every copy carries a halo that shows the moment it moves across something else. The selections do not need to be neat otherwise — these will be small and in motion.
Put many elements on one layer
This is the decision that saves the most work, and it is counterintuitive.
You could animate every petal separately in After Effects for total control. It would also take hours. Instead, spread the cut-out petals around the canvas, select those layers, group them with Ctrl or Cmd + G and merge with Ctrl or Cmd + E.
You now have one layer holding a whole scatter of petals that animates as a single object. Build two or three of these — a sparse cluster, a dense one — and you get the appearance of dozens of independently drifting petals from three keyframed layers.
Build blurred copies for depth
Duplicate one of the petal layers and run Filter, then Blur, then Gaussian Blur, pushing it hard. These represent petals passing close to the camera, and they are what stops the animation looking flat.
Heavy blur can leave a layer almost invisible. If that happens, press Ctrl or Cmd + J a few times to duplicate it and merge the copies back together — that builds the density back up without reducing the blur.
Do this in Photoshop, not After Effects. Photoshop handles blur faster and better, and every effect baked in now is one less thing After Effects has to compute on every frame of preview.
Save as a PSD
File, then Save As, keeping the PSD format. After Effects imports PSDs with the layer structure intact, which is the whole reason for doing the preparation here.
Part Two: Into After Effects
Import as a composition
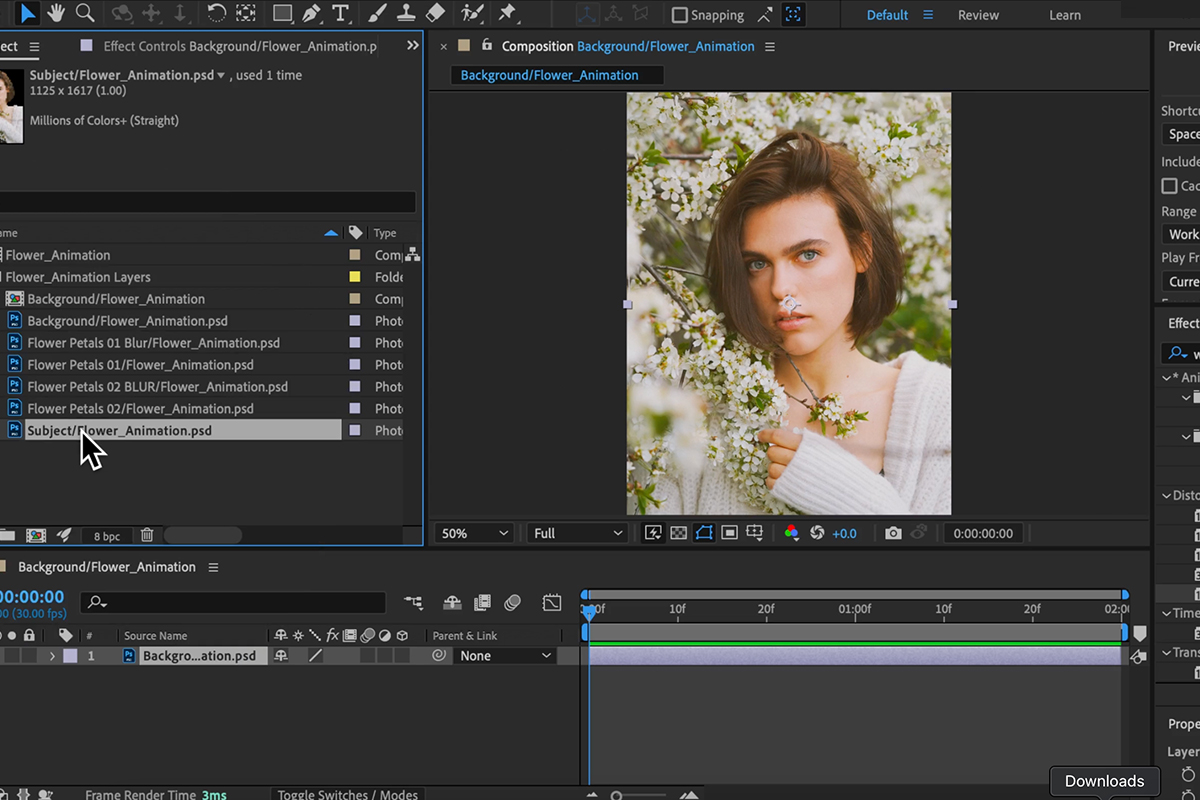
File, then Import, then File, and choose your PSD. When prompted, select Import As: Composition with Retain Layer Sizes and editable layer styles.
Choosing Composition rather than Footage is what preserves your layers as separate, animatable objects. Pick Footage and you get a flattened image and none of the preparation counts for anything.
Align layers to the composition
Dragging layers into the timeline often lands them off-center. Open Window, then Align, set it to align layers to composition, and center horizontally and vertically. Toggling the layer confirms it sits exactly where it did in Photoshop.
Stack for depth
Layer order is what puts petals in front of and behind your subject, exactly as in Photoshop. Working bottom to top: background, then the petal layers passing behind, then the subject, then the petal layers passing in front.
The efficient way to get both is to select your petal layers, copy with Ctrl or Cmd + C, click the background layer and paste with Ctrl or Cmd + V. The copies land above the background — behind the subject — while the originals stay in front.
Set the duration
Composition, then Composition Settings, and set duration to about two seconds. Short is right for a looping GIF — long enough to read, short enough to keep the file manageable.
Animating the Movement
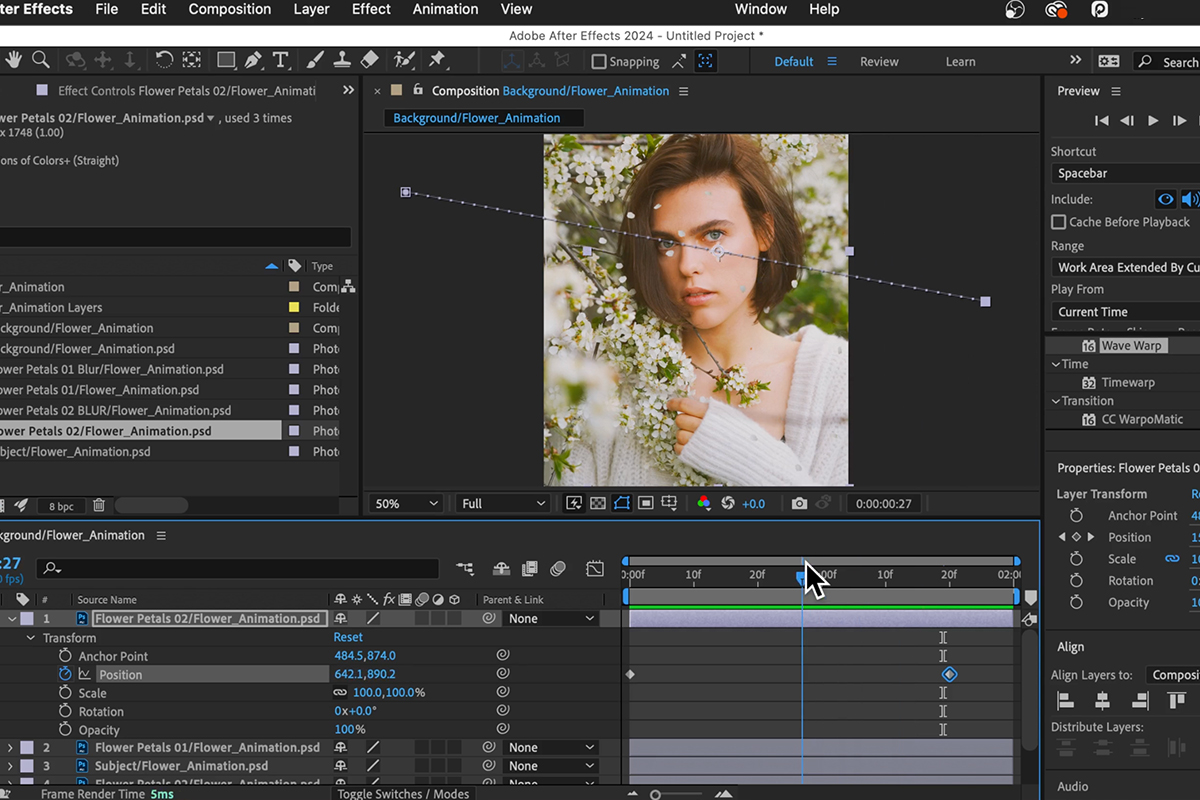
Expand a layer, open Transform, and you have position, scale, rotation and opacity. Clicking the stopwatch beside a property creates a keyframe and starts recording changes to it.
-
Move the playhead to the start
Position the layer fully outside the frame and click the stopwatch beside Position. That sets your first keyframe.
-
Move the playhead to the end
Drag the layer across to the opposite side, fully outside the frame. A second keyframe is created automatically.
-
Add rotation the same way
Keyframe rotation at the start, then a different value at the end, so the petals tumble as they travel.
-
Turn on motion blur
The motion blur switch on each layer, plus the master toggle for the composition. It softens fast movement the way a camera would, and it is the single cheapest thing you can do for realizm.
Three shortcuts worth knowing
Rather than expanding Transform each time: P opens position, S opens scale, R opens rotation. With a dozen layers to animate this saves a great deal of clicking.
Vary the timing
Give each layer a slightly different speed by dragging its end keyframe earlier or later. Identical timing across layers reads as a sheet of petals sliding past; varied timing reads as wind. It costs nothing and it is the difference between mechanical and natural.
The mistake everyone makes
Before adding or changing any property, check where the playhead is sitting. Adjust rotation while the playhead is halfway along and you have created a keyframe in the middle rather than changing the end — and the result behaves in a way that is genuinely confusing to diagnose.
Use the small arrows either side of a property’s keyframe indicator to jump precisely between existing keyframes rather than scrubbing to them by eye.
Making It Loop Cleanly
A looping GIF has one hard requirement: the last frame must match the first. If a petal is halfway across the frame when the animation ends, the loop jumps visibly.
So every moving element starts fully outside the frame on one side and finishes fully outside on the other. The petals sweep through, the frame briefly empties, and the loop restarts invisibly.
Scaling a layer up moves its bounding box, so re-check the end keyframe afterward — an element scaled larger often ends up still poking into frame when it previously cleared it.
Exporting the GIF
-
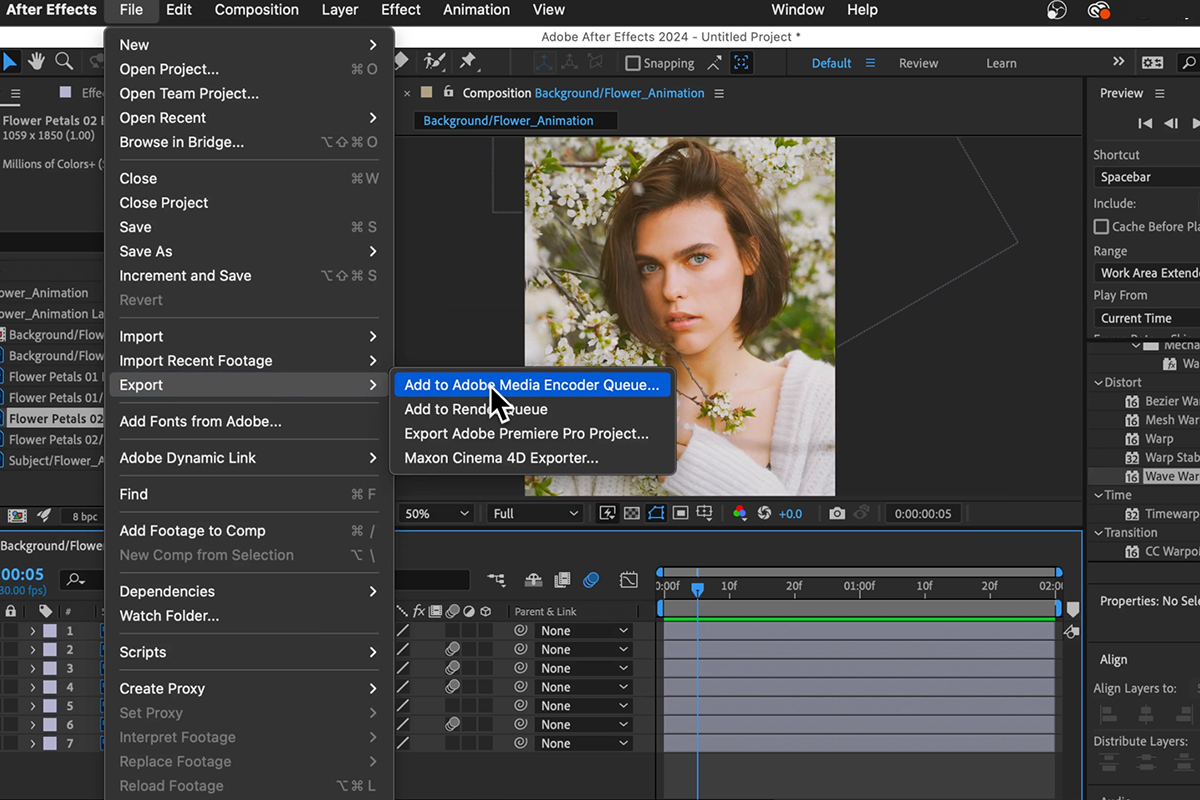
File, then Export, then Add to Adobe Media Encoder Queue
Media Encoder handles GIF output; After Effects on its own does not.
-
Set the format to Animated GIF
It is at the top of the format dropdown.
-
Choose the preset with transparency, matching source
Transparency matters if anything needs to sit over a background later.
-
Set the output location and click play
Rendering a two-second composition takes seconds.
Then compress it
The file will be far too large for the web — a short animation like this can easily land near 90 MB. Run it through any online GIF compressor, which will reduce the dimensions and color count and typically cut the size by an order of magnitude with little visible difference.
Do not skip this. An uncompressed GIF of this length is unusable on a web page.
More Free Visual Effects Tutorials
Cinemagraphs sit between still photography and motion. These go further in both directions:
- How to Animate Photos in After Effects — more on the After Effects half of this workflow.
- Create an Epic Animation in Photoshop — animating without leaving Photoshop at all.
- How to Create Animated GIFs Using AI in Photoshop — a faster route to a looping GIF.
- How to Create a Motion Effect in Photoshop — implying movement in a single still frame.
- How to Use the Select and Mask Workspace — cleaner cut-outs, which this technique depends on.
- How to Export Images in Photoshop — getting the file out at the right size and quality.
Applying It to Other Images
Nothing here is specific to flower petals. Any element you can cut out can be moved across a scene — falling leaves, drifting snow, embers, dust, birds in a distant sky.
The method holds in every case: cut the elements in Photoshop, group many onto few layers, build blurred copies for depth, then keyframe position and rotation with varied timing and motion blur on. Get the preparation right and the animation itself is ten minutes of work.
New Free Tutorials View All »











Enjoying This Free Tutorial? Go Further with PRO.
Unlock Full Sample Files, PSDs, and Hundreds of Masterclasses!

Download full project assets, original PSDs, and RAW images for every lesson
Unlimited access to our complete library of PRO Photoshop & Lightroom courses
Instant 4K Ultra HD streaming on all devices, anytime, anywhere
Full access to our entire library of Photoshop Actions, Presets, and LUTs
Flexible monthly and annual membership plans
Cancel anytime with zero hassle or commitments