Download Assets
description
Learn to master color toning in Photoshop! Discover how to use the Camera Raw Filter to add warmth, coolness, or drama to your images. Create stunning presets and achieve professional-level results without ever leaving Photoshop.
Go PRO:
Discover the world of coloring with our in-depth PRO Coloring Learning Path. From color fundamentals to advanced techniques, you’ll learn to create stunning visuals with a perfect blend of color and style.
Image Source
Share
AFTER
BEFORE
Color Correct in ACR
Learn how to achieve stunning color tones using the powerful Camera Raw Filter hidden within Photoshop. This guide will walk you through the process step-by-step, no editing experience needed!
Preparing Your Image
To ensure maximum flexibility and control over your color adjustments, follow these steps:
1. Convert to Smart Object: Navigate to Layer > Smart Objects > Convert to Smart Object. This allows you to edit the filter non-destructively.
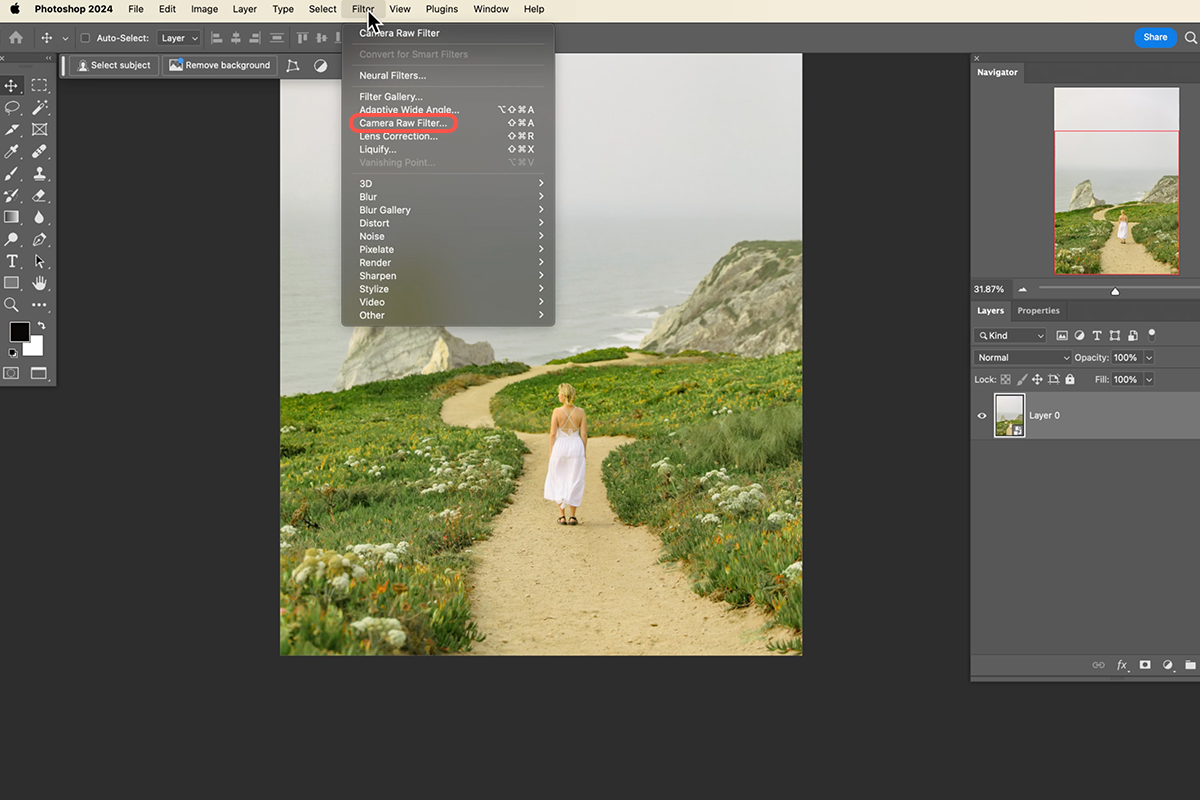
2. Open Camera Raw Filter: Go to Filter > Camera Raw Filter. This opens the interface where you’ll make your color adjustments.
Color Grading with Three-Way Sliders
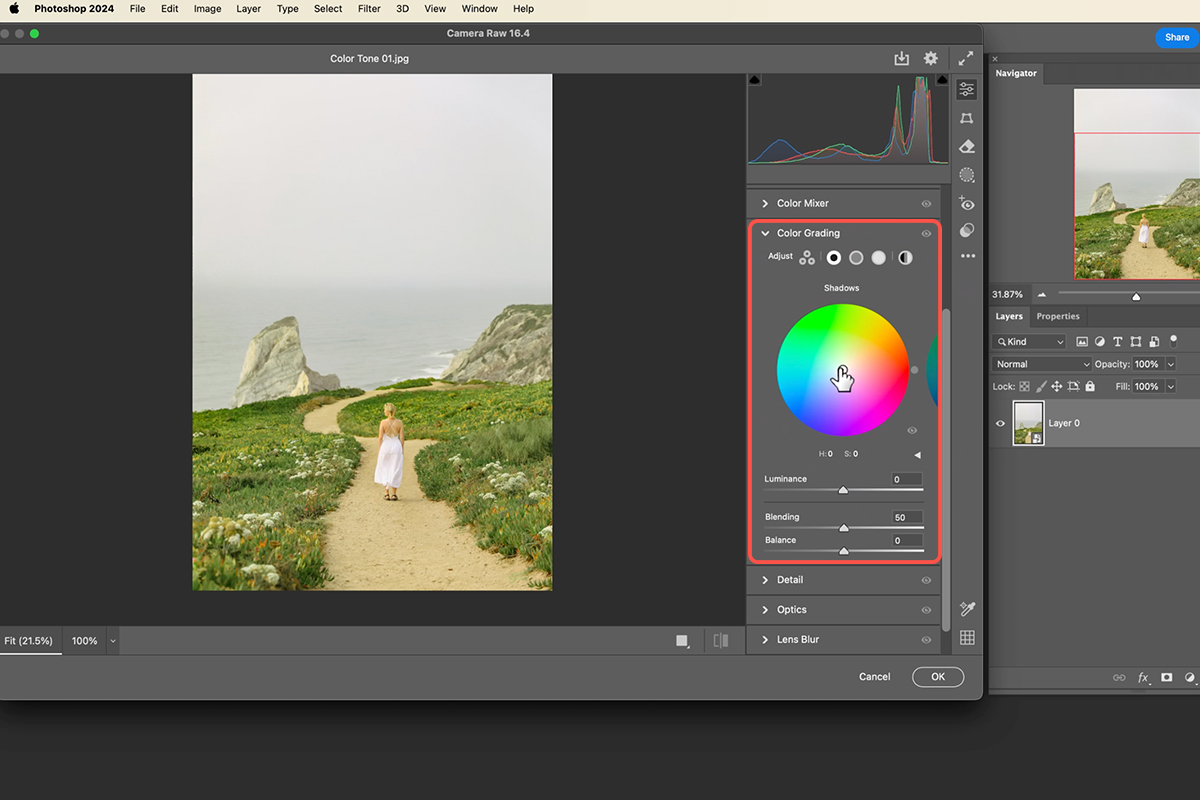
Under the Color Grading tab, you’ll find sliders for Highlights, Midtones, and Shadows. These sliders allow you to precisely adjust the color of each tonal range in your image.
3. Click and drag the center of a slider to choose the desired hue for your highlights, midtones, or shadows.
4. Adjust saturation by manipulating the inner point of the slider, while the outer point controls the hue, to achieve the ideal balance of color intensity.
5. Use the bottom slider to fine-tune the brightness or darkness of the selected tonal range.
Fine-Tune Blending and Balance
To further refine your color adjustments, use the Blending and Balance sliders.
The Blending slider controls how smoothly the shadow and highlight colors transition into each other. You can use it to create a more gradual or abrupt blend.
The balance slider shifts the overall temperature of the image towards warmer or cooler tones. Experiment with different settings to achieve your desired look.
Create and Explore Built-In Presets
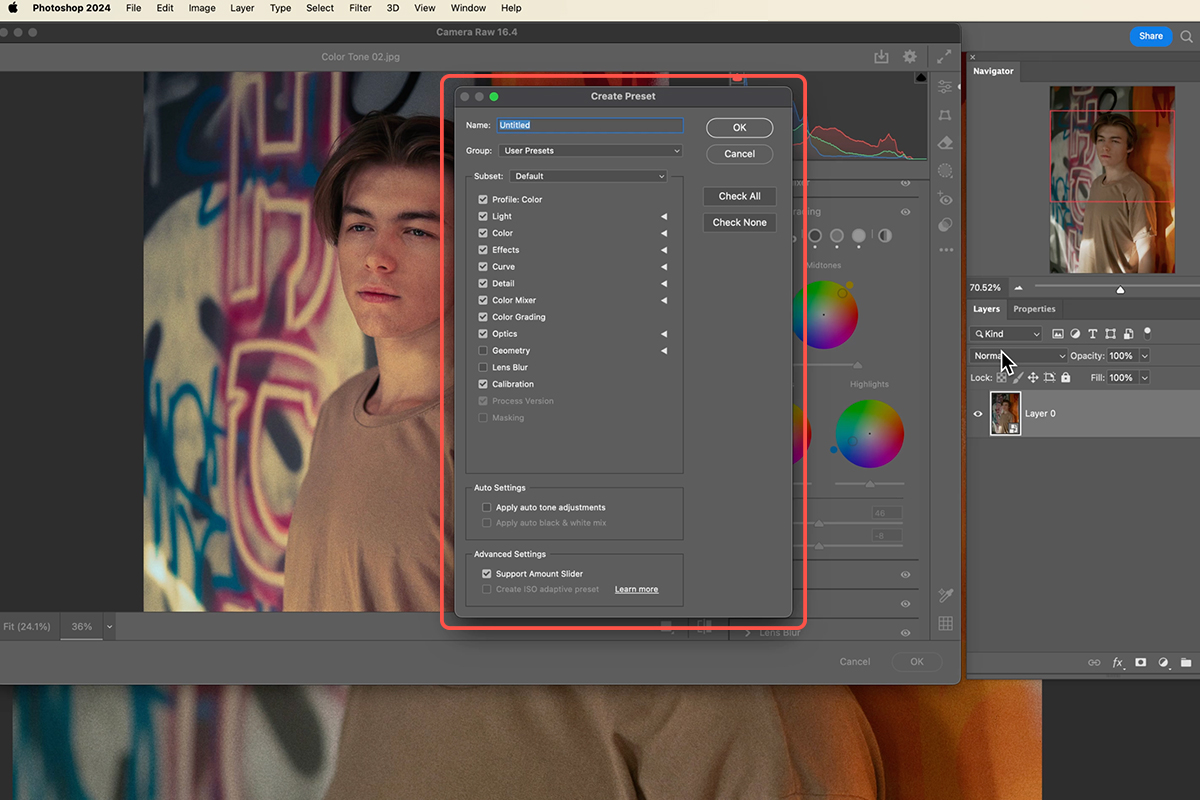
To preserve your custom color adjustments for future use, double-click the Camera Raw Filter to access the settings at any time. You can then save your edit as a preset by clicking the three dots (…) and selecting Create Preset.
In addition to creating your own presets, the Camera Raw Filter comes with a variety of built-in color grading options. Explore these presets to find a starting point that suits your image. You can further customize the strength of these presets using the opacity slider.


