
Download Assets
description
Learn how to completely remove glare from glasses in Photoshop! In this tutorial we’ll show you how to use the Clone Stamp Tool to copy and warp facial features, ensuring realistic results without relying solely on AI.
Go PRO:
Explore more on portrait editing with our PRO tutorial Advanced Portrait Editing in Photoshop & Adobe Camera RAW . This tutorial will guide you through a complete portrait editing journey, transforming RAW photographs from start to finish!
Share


AFTER
BEFORE
Say Goodbye to Glare
Getting rid of glare on glasses in photos can be a real headache, often ruining an otherwise perfect shot. This Photoshop technique makes removing glare surprisingly easy, combining the power of the Clone Stamp tool with smart layering and transformations to give you flawless, realistic results.
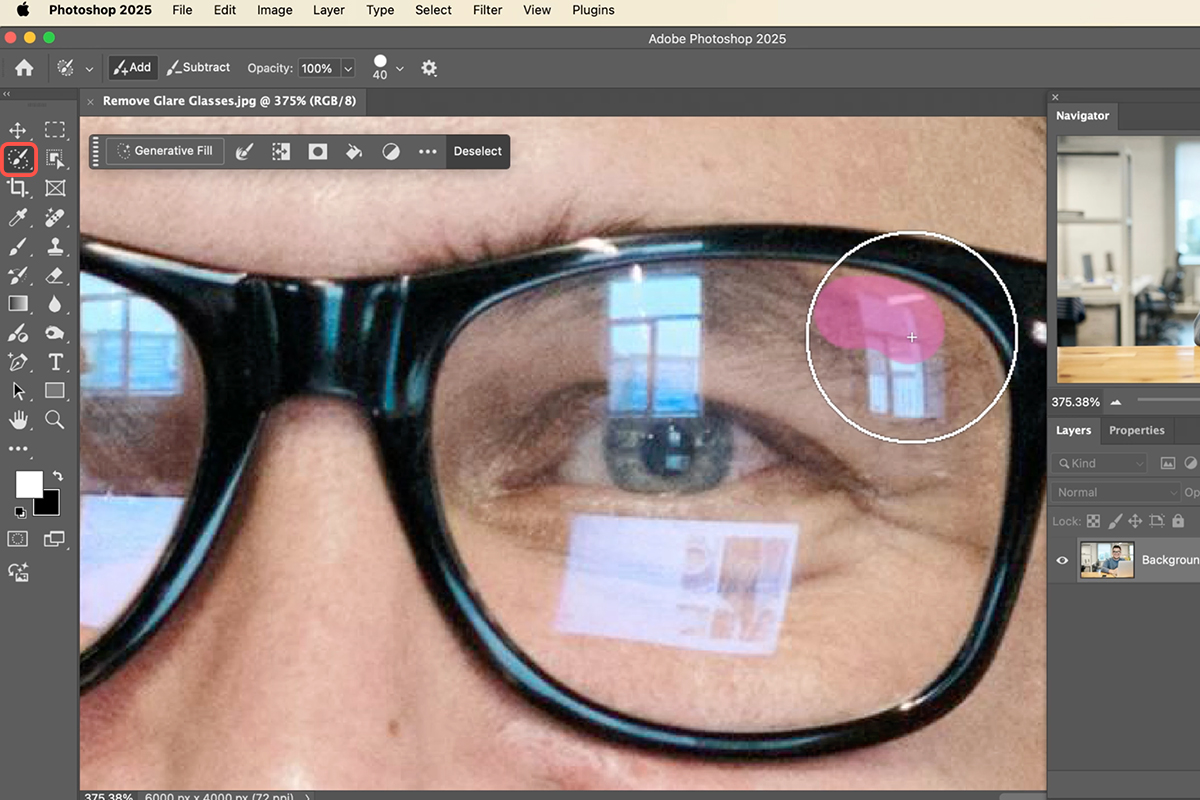
Start with AI
First, tackle the smaller, simpler glare spots using Generative Fill. Grab your Selection Brush tool and paint over areas like glare on eyebrows or tiny corner reflections. Don’t go for the eyes themselves, as AI tends to create unnatural replacements. Once selected, click Generative Fill in the contextual taskbar and then Generate to get a few glare-free options.
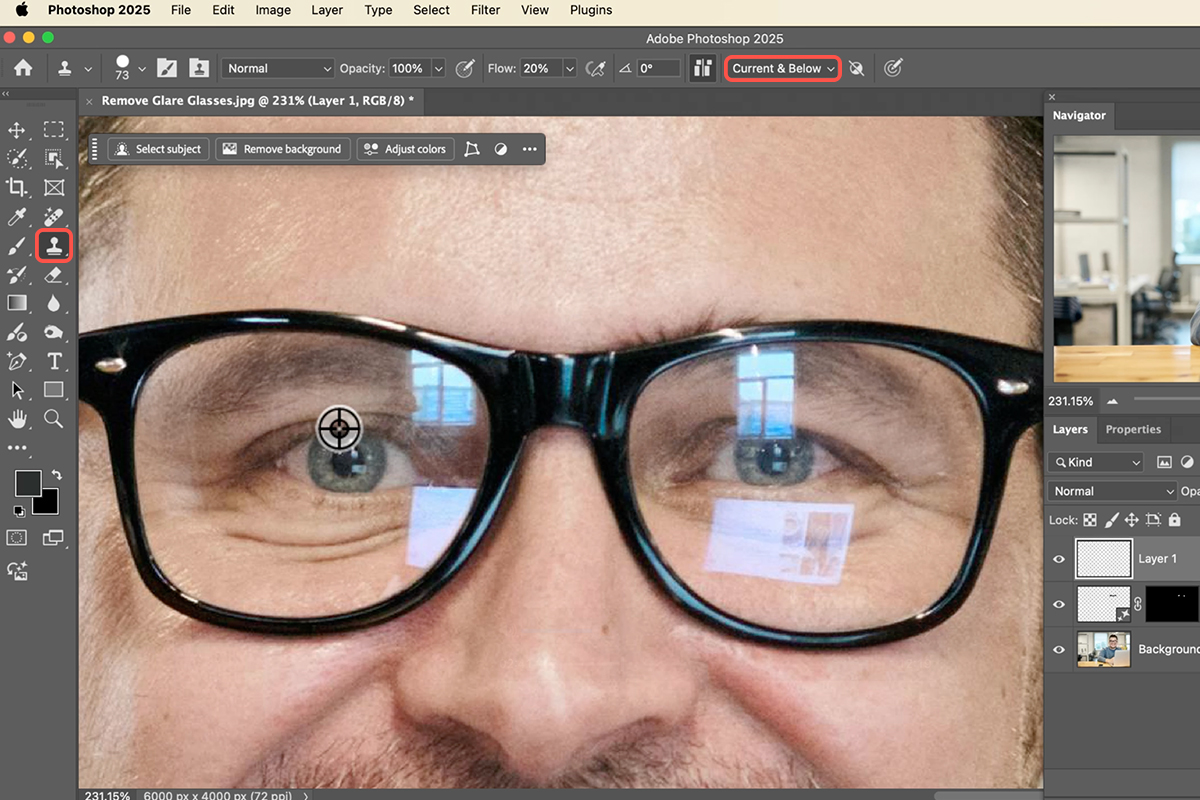
Clone the Eye
For larger glare areas over the eyes, we’ll use the Clone Stamp tool.
1. Select the Clone Stamp Tool (Keyboard Shortcut “S”).
2. Create a new layer and set your Clone Stamp tool to “Current and Below” in the options bar.
3. Find an eye with no glare that’s similar to the one you need to fix. Hold Alt/Option and click to sample the clean area. Then, paint over the glary eye.
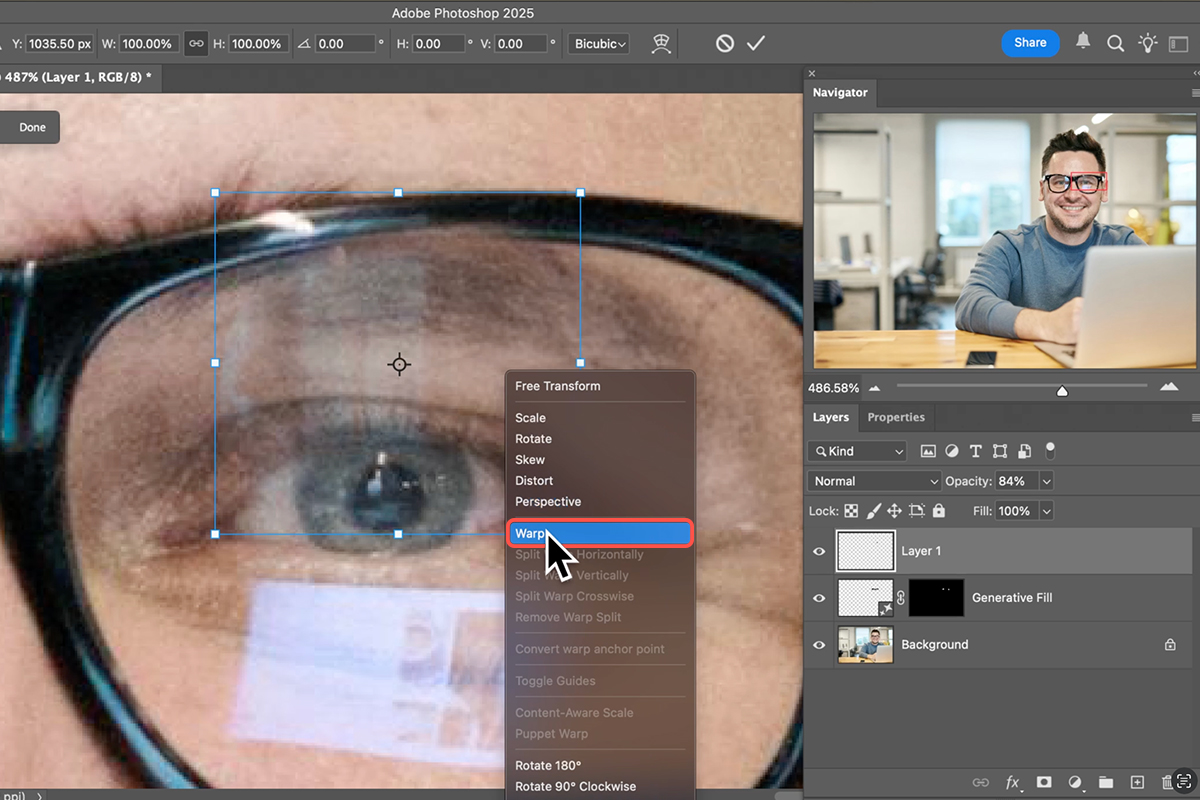
Transform & Refine
Now, let’s get that cloned eye to fit perfectly.
4. Hit Ctrl/Command + T for Free Transform.
5. If the cloned eye needs to be flipped, click “Flip Horizontal” in the contextual taskbar. You can also lower the layer’s opacity to help align it, then bring it back to 100%.
6. For precise adjustments, right-click and choose “Warp” or click the warp icon in the contextual taskbar to reshape the cloned area, blending it seamlessly with the original features.
Mask & Blend
7. With the cloned section in place, add a layer mask to your cloned eye layer.
8. Select the Brush tool (Keyboard Shortcut “B”) and paint with black on the mask to reveal the original eye where the glare was, essentially blending the copied area only where the glare was present.
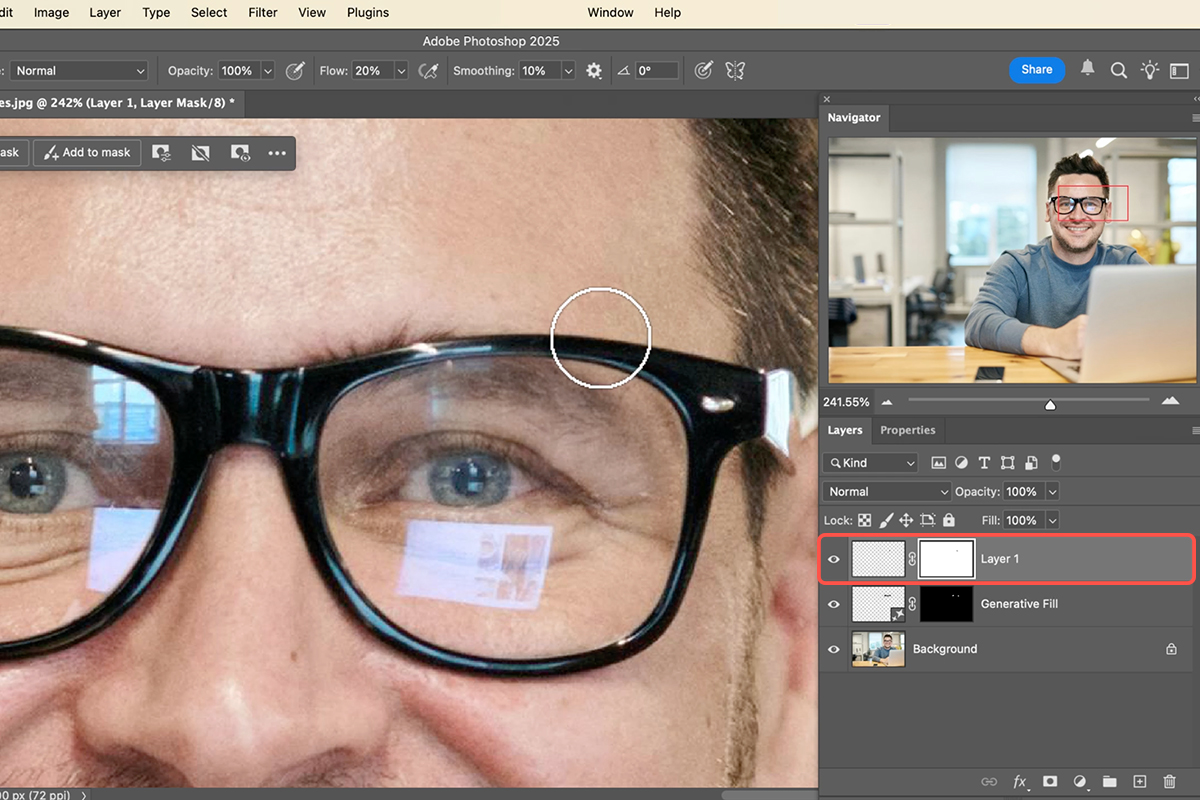
9. You can also use the Clone Stamp tool with a lower flow (e.g., 20%) to gently blend any remaining edges, ensuring a natural-looking fix.
There you have it! By combining the precision of the Clone Stamp tool with smart layering and transformations, you can banish even stubborn glare from glasses in your Photoshop images. It’s a powerful technique that keeps your subject’s true features intact while delivering incredibly realistic, glare-free results. Give it a try and see the difference!