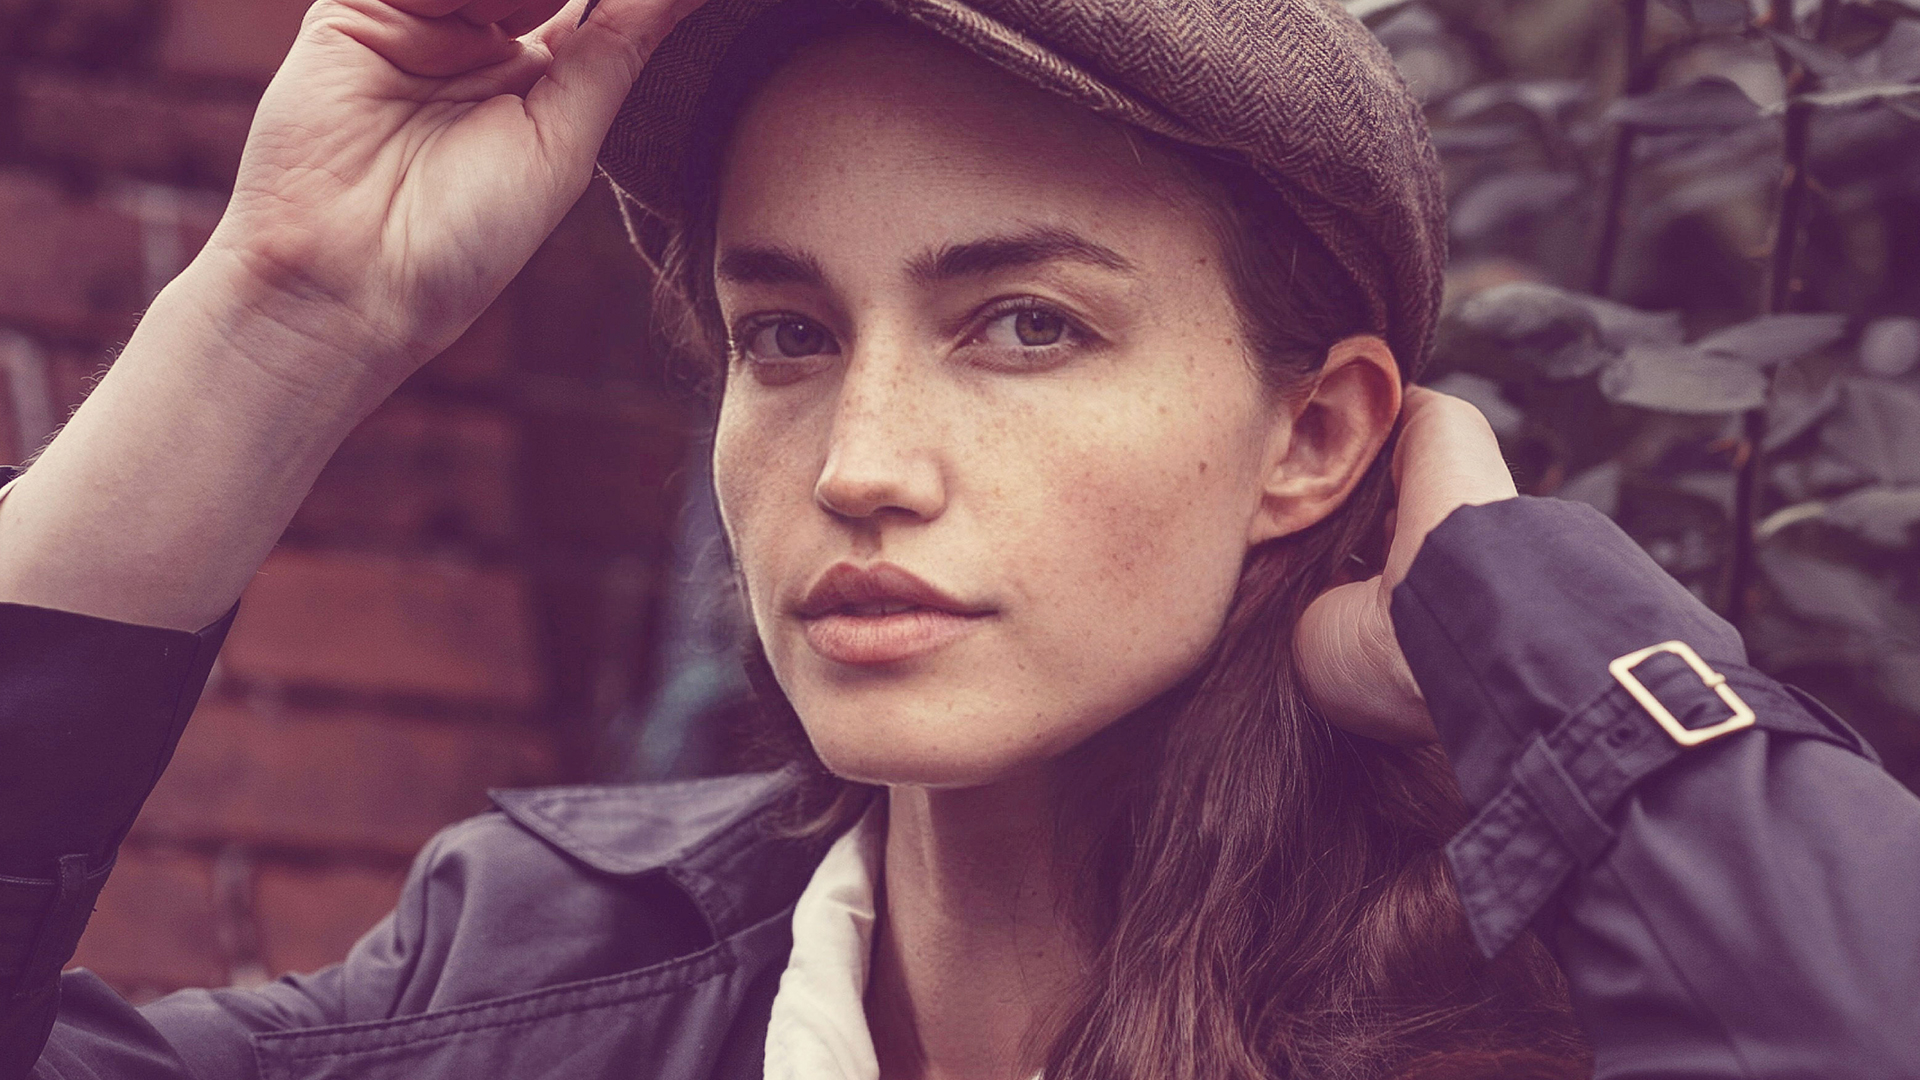

Download Assets
This tutorial includes 1 sample image, 1 sample PSD and 1 PDF guide. Downloads are free with a PHLEARN account.
- Download the sample images and PSDs from every free tutorial on PHLEARN
- New free tutorials published every week
- One free account — sign up once, then download anything
Free PDF Guide · 3 Pages
This Tutorial as a Step-by-Step PDF
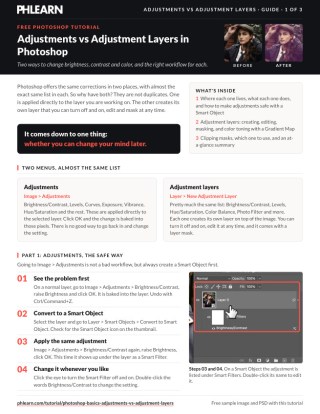
Every step from the video in order: Image > Adjustments on a Smart Object so it becomes a smart filter, Layer > New Adjustment Layer, the layer mask filled black and painted white on the face, the Gradient Map with Reverse and low opacity, and Alt/Option-click to clip adjustments to one layer. Keep it next to your keyboard.
description
Adjustments vs adjustment layers comes down to one thing: whether you can change your mind later. In this tutorial, we’ll show you how to apply them for image enhancements like brightness, contrast, and color, emphasizing best practices for each, including the use of Smart Objects and Clipping Masks, to achieve a non-destructive workflow.
Enjoying This Free Tutorial?
We publish a new free tutorial every week, each one with sample images and PSDs you can download and follow along with. Sign up and they land straight in your inbox, along with early word on sales, events and subscriber-only offers.
Image Source


Adjustments vs Adjustment Layers in Photoshop
Photoshop offers the same corrections in two places. Image > Adjustments gives you Brightness/Contrast, Levels, Curves, Hue/Saturation and the rest. Layer > New Adjustment Layer gives you an almost identical list.
They are not duplicates. One writes into the layer you are on; the other creates a separate layer that sits above and can be changed, masked, faded, or deleted at any point. Knowing which is which — and the one trick that makes the first kind safe — is the difference between an editable file and one you have to start over.
What Each One Does
Adjustments (Image > Adjustments) apply directly to the selected layer. Raise the brightness, click OK, and those pixels are now brighter. There is no separate object in the Layers panel and no way to reopen the dialog and change your mind.
Adjustment layers (Layer > New Adjustment Layer) create their own layer above the image. The pixels beneath are untouched; the layer describes a change that is calculated live. It can be hidden, re-edited, faded, masked, reordered, or thrown away.
Make Adjustments Safe With a Smart Object
The straight Adjustments menu is not a bad workflow — it just needs one step first.
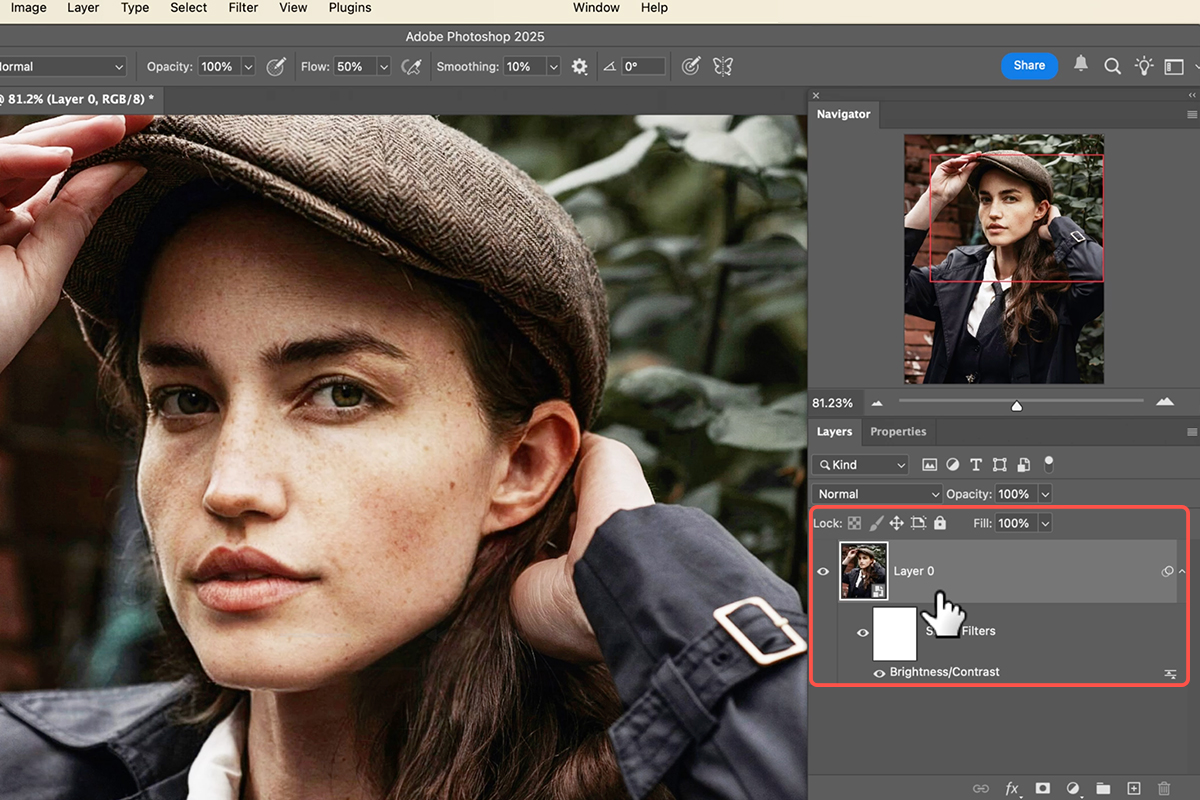
Before applying anything, go to Layer > Smart Objects > Convert to Smart Object and check for the badge on the thumbnail.
Now run Image > Adjustments > Brightness/Contrast as before. Instead of baking in, it appears beneath the layer as a Smart Filter. You can toggle its visibility, and double-clicking its name reopens the dialog with your settings intact.
That single step converts a destructive edit into a reversible one. If you use the Adjustments menu at all, use it on a Smart Object.
Creating Adjustment Layers
Three routes to the same thing:
Layer > New Adjustment Layer, which offers a dialog with naming and a clipping mask option. The half-filled circle icon at the bottom of the Layers panel, which is quicker. Or the Adjustments panel under Window > Adjustments, which is quickest of all.
Edit one at any time by double-clicking its thumbnail or selecting it and looking at the Properties panel.
The Three Things Only Adjustment Layers Give You
A Layer Mask
The big one. Every adjustment layer arrives with a mask, so the correction can be limited to part of the image.
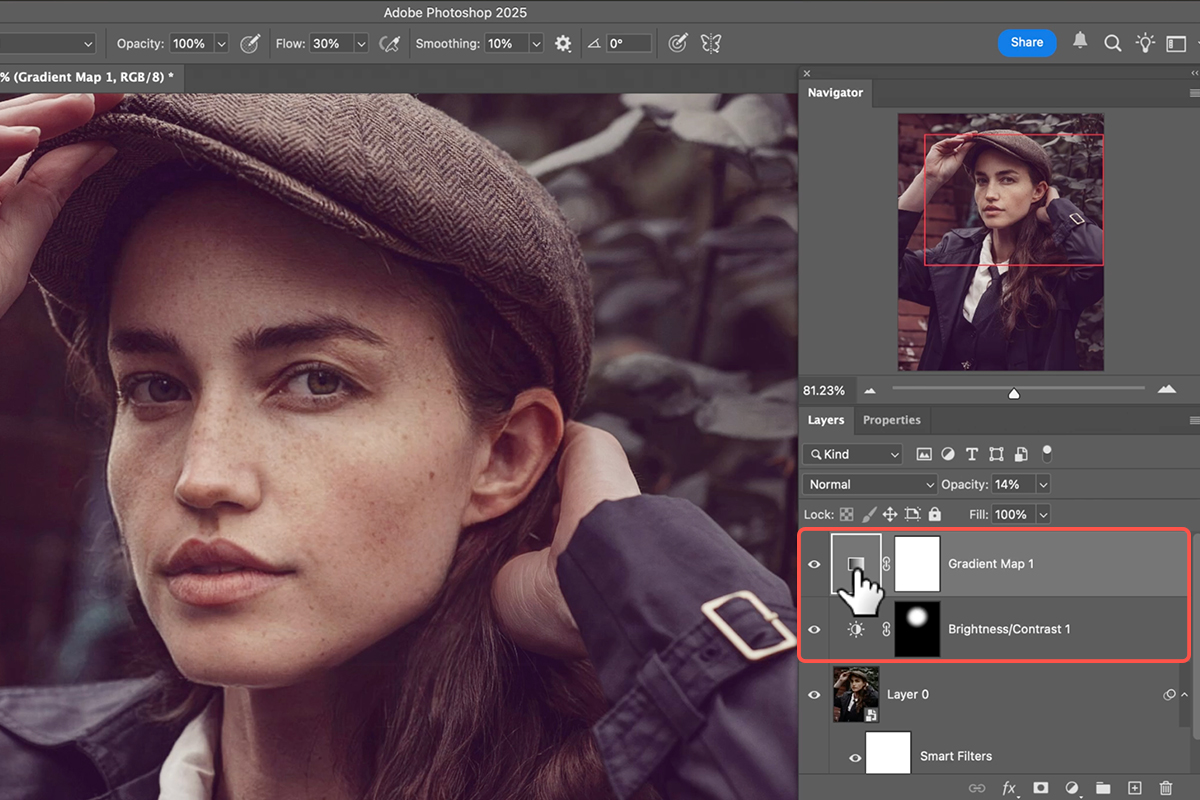
Select the mask, use Edit > Fill > Black to hide the effect everywhere, then paint white where you want it — brightening only a face, for instance, rather than the whole frame.
A straight adjustment has no mask and no way to add one. It is all or nothing.
Opacity
Adjustment layers have an opacity slider, so the strength of any correction can be dialed back after the fact.
This is particularly useful with Gradient Map, which is one of the best color-toning tools in Photoshop and always arrives far too strong. Add one, click Reverse in Properties if it looks inverted — it usually does — pick a gradient, then drop the layer opacity to something like 20 or 30 percent. What was an overwhelming effect becomes a subtle grade.
Stacking and Reordering
Adjustment layers stack. Several can sit above one image, each independently toggleable, maskable and adjustable, and dragging them into a different order changes the result.
The Catch: They Affect Everything Below
An adjustment layer applies to every layer beneath it, not just the one you had selected.
Add a text layer under a Gradient Map and the type gets recolored along with the photograph. Add it under a Brightness/Contrast layer and the type gets brightened too. This surprises people, and it is the most common source of confusion with adjustment layers.
Clip It to One Layer
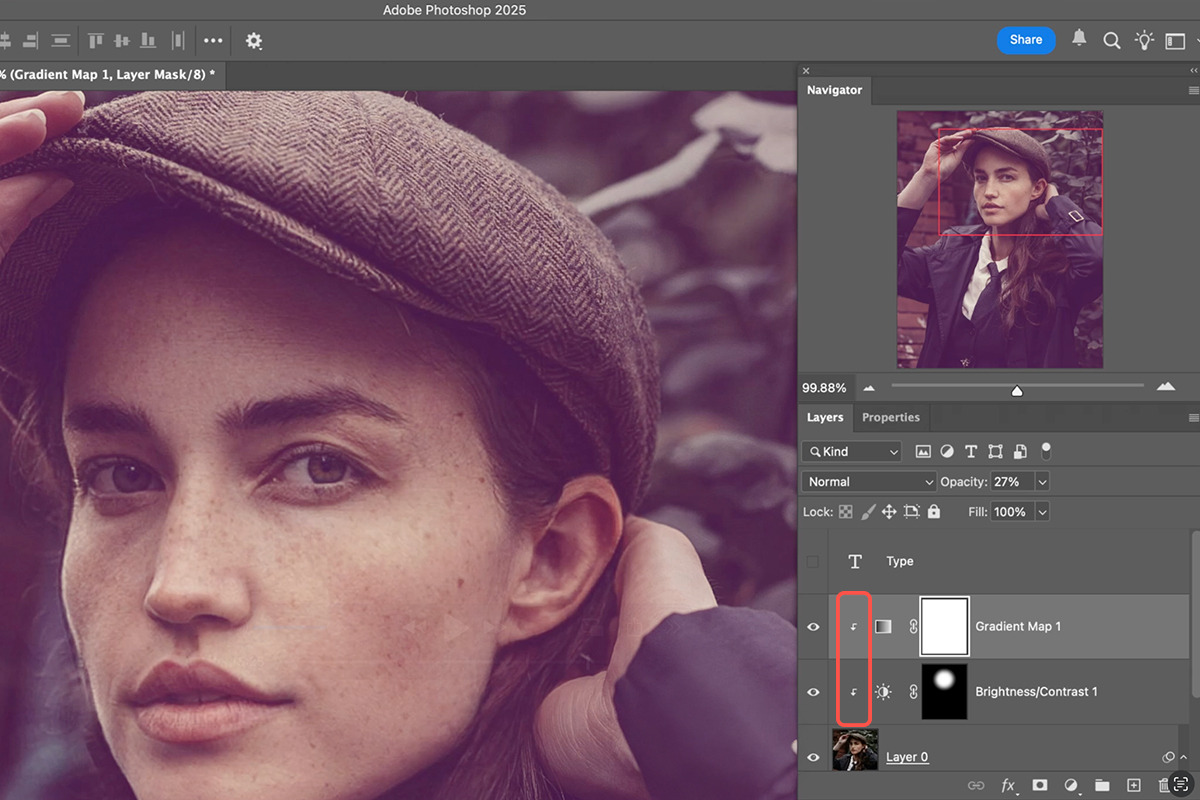
The fix is a clipping mask. Hold Alt or Option and move your cursor to the boundary between the adjustment layer and the one below — the cursor becomes a box with a downward arrow. Click.
The adjustment layer indents and now affects only the layer directly beneath it. Everything else in the document is left alone.
Clip each adjustment you want restricted. On any file with several elements — type, graphics, multiple images — this is what keeps corrections where you intend them.
The New Adjustment Layer dialog also has a Use Previous Layer to Create Clipping Mask checkbox, which does the same thing at creation time.
Which to Use
Adjustment layers for most work. Masking, opacity, stacking and clipping cover nearly everything, and none of it touches your pixels.
Adjustments on a Smart Object when you want a correction bound to one specific layer and do not need a mask — it keeps the Layers panel tidier on a complex file.
Adjustments on a normal layer essentially never. That is the only combination with no way back.
Summary
Image > Adjustments writes into the layer. Layer > New Adjustment Layer creates a separate, editable one with a mask.
If you use the Adjustments menu, convert to a Smart Object first so it becomes a re-editable Smart Filter. If you use adjustment layers, remember they affect everything below them, and Alt-click between layers to clip one where that is not what you want.
Quick Reference: Keys, Menus and Settings
- Adjustments (direct)Image > Adjustments > Brightness/Contrast, Levels, Curves…; baked into the layer
- Make them undoableLayer > Smart Objects > Convert to Smart Object first; the adjustment becomes a smart filter you can toggle and double-click
- Adjustment layersLayer > New Adjustment Layer, the half-circle icon in the Layers panel, or the Adjustments panel (Window > Adjustments)
- Edit oneDouble-click its icon, or use the Properties panel; the eye toggles it; Opacity softens it
- Limit it to an areaClick the mask, Edit > Fill > Black, paint white where it should show
- Gradient mapTick Reverse if it looks wrong, pick a preset, lower Opacity
- Limit it to one layerAlt/Option-click the line between the adjustment layer and the layer below (clipping mask)
Adjustment layers affect every layer beneath them unless clipped.
Free Downloads
Follow Along on the Same Photo
Get the portrait from the video, the PSD with the smart filter, the adjustment layers and the clipped gradient map, and the PDF guide. Free with a PHLEARN account.
Adjustments vs Adjustment Layers: Common Questions
What’s the difference between an adjustment and an adjustment layer?
Image > Adjustments changes the pixels of the layer you’re on. Layer > New Adjustment Layer makes a separate layer that applies the same change to everything beneath it, with a mask, and can be edited or switched off any time.
I used Image > Adjustments and can’t change it. What went wrong?
It was baked into the layer. Convert the layer to a Smart Object first and the adjustment arrives as a smart filter you can toggle and double-click to re-edit.
What do adjustment layers give you that adjustments don’t?
A built-in layer mask, an opacity slider, and a layer you can reorder, duplicate or clip. The video fills the mask black and paints white over the face so the brightness only lands there.
Why is my adjustment layer changing my text too?
Adjustment layers affect every layer below them. Alt/Option-click the line between the adjustment layer and the photo to clip it, and it affects that one layer only.
Why does my gradient map look terrible?
Click Reverse in Properties, pick a preset you like, and drop the layer opacity. Low-opacity gradient maps are one of Aaron’s favorite ways to color tone.
Where else can I make adjustment layers?
The half-circle icon at the bottom of the Layers panel and the Adjustments panel under Window both create adjustment layers.
Which should I use?
Adjustment layers most of the time. Direct adjustments are fine for a whole-image tweak if the layer is a Smart Object. Neither is wrong.
Are the sample files free?
Yes, with a free PHLEARN account. You get the portrait, the PSD with both approaches and the PDF guide.
Master Photoshop, Lightroom and Photography
Join PHLEARN PRO for $12.99 a month or $99.99 a year. Cancel anytime, with a 100% money-back guarantee.





