Download Sample Image & PSD
description
Take advantage of the brand new artificial intelligence masks located within Photoshop. Learn the proper workflow using Smart Objects in order to maintain maximum control over your image to create beautiful looking photos every single time.
Artist Credit
Special Thanks to the following artist for uploading their images and making them available for free for everyone to use.
Share
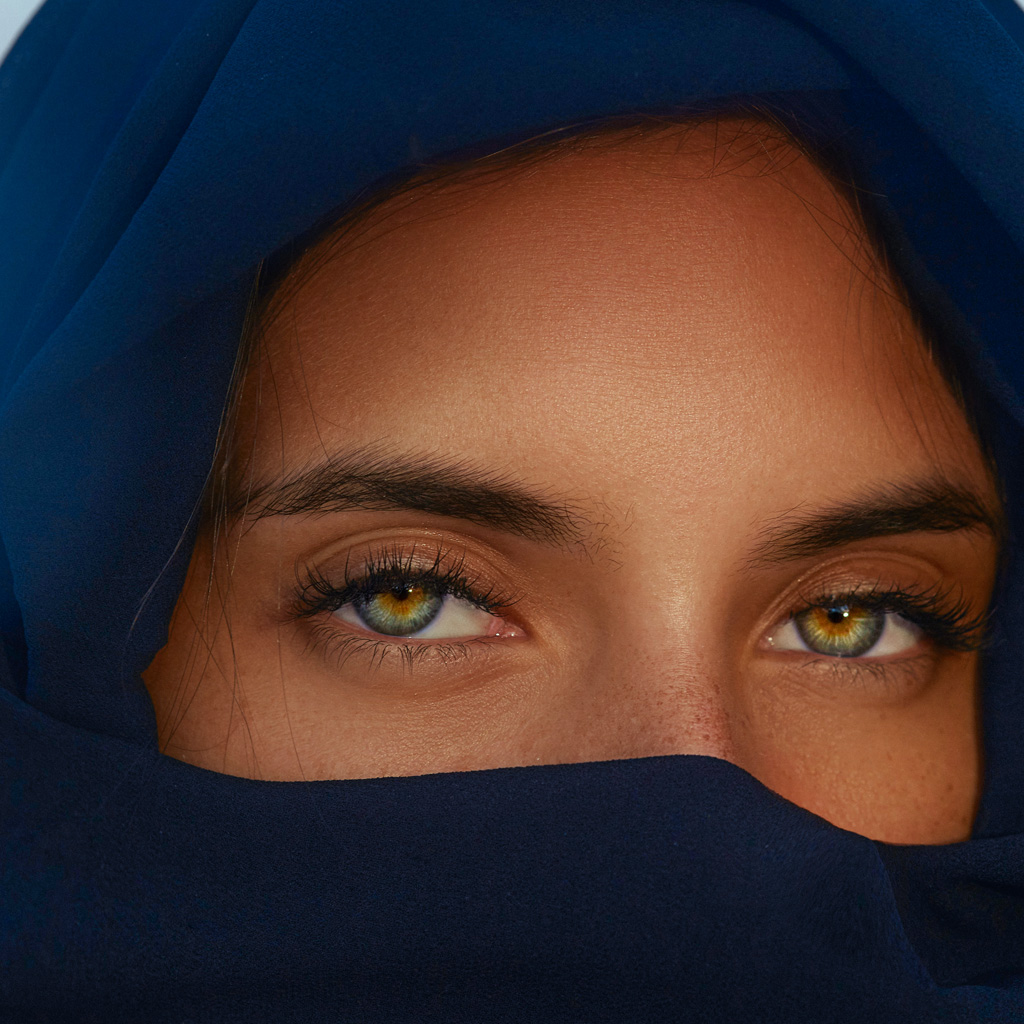
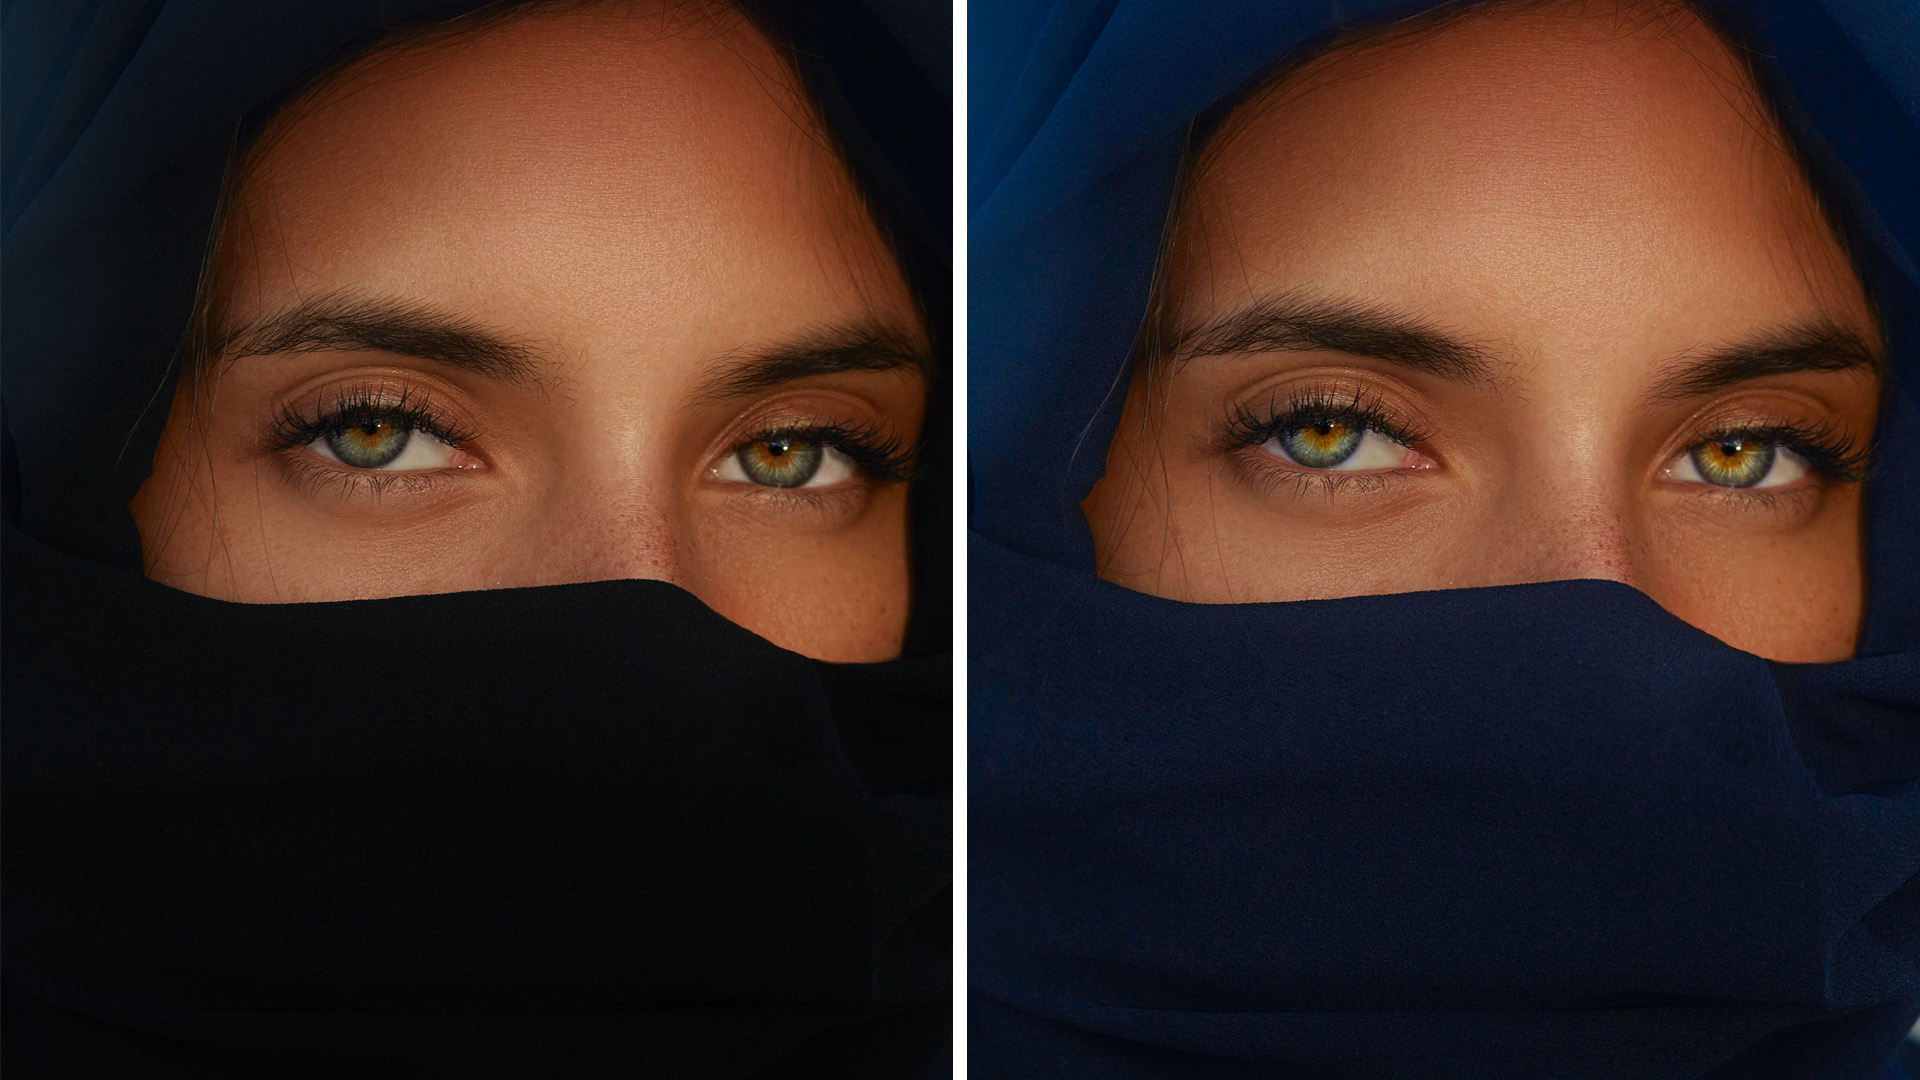
AFTER
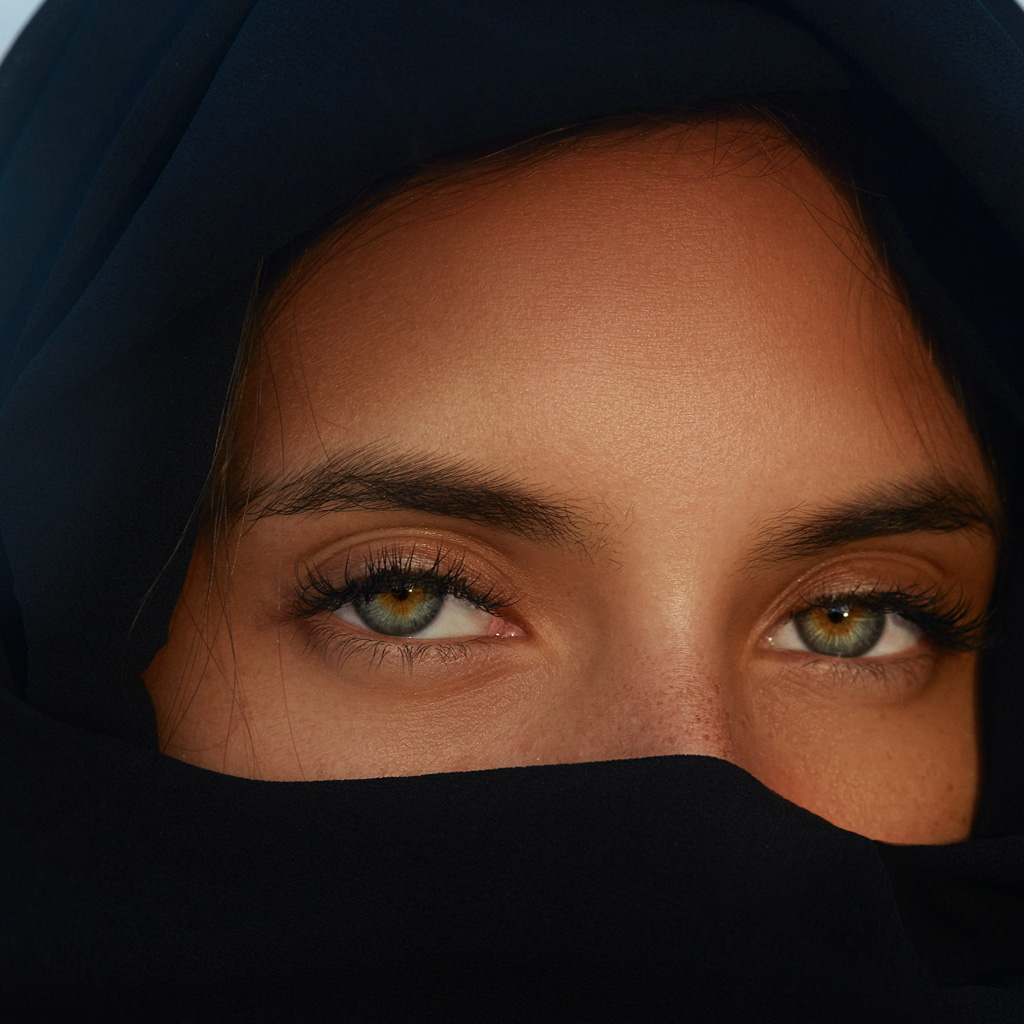
BEFORE
Masking Has Never Been Easier
Just updated for the end of 2022, we now have the ability to access artificial intelligence masks within Photoshop. These masks are located within the Adobe camera raw filter in Photoshop and are easily accessed through the filter menu.
For maximum flexibility in your workflow, it is recommended to first create a smart object out of your layer in which you would like to apply these new masks. To do this simply right click on the layer and select convert to Smart Object. Next, go to your filter dialogue and select Camera Raw Filter. Within the camera raw filter you are now able to access the new artificial intelligence masking, simply click on the masks feature and select whether you would like to cut out your subject the background or select individual people within the image.
When selecting new people in your images, Photoshop artificial intelligence also allows you to select certain areas of a person’s body-for instance just their hair or their skin or even the pupils of their eyes.
These new tools allow extensive control over masking and help to create dramatic changes in your images without focusing on the overly technical aspects of creating the masks.
In this example, we will show you how to select out the person’s pupils and add more contrast as well as saturation to make them appear more dramatic. You will also learn how to select this person’s clothing by first selecting the person as a whole and then subtracting out different features to leave their clothing as the only thing being selected. then once the clothing is selected we bring up the shadow levels and add a little bit of saturation to bring detail that wasn’t previously visible in the photo.
Follow along with the included sample image and PSD file available for download on this tutorial page.


