


Color, Light, Perspective
These are the three major variables that go into creating a Composite. To create a believable end result, the Color, Light, and perspective has to match as much as possible between the images you’re Compositing.
Fixing the Problem
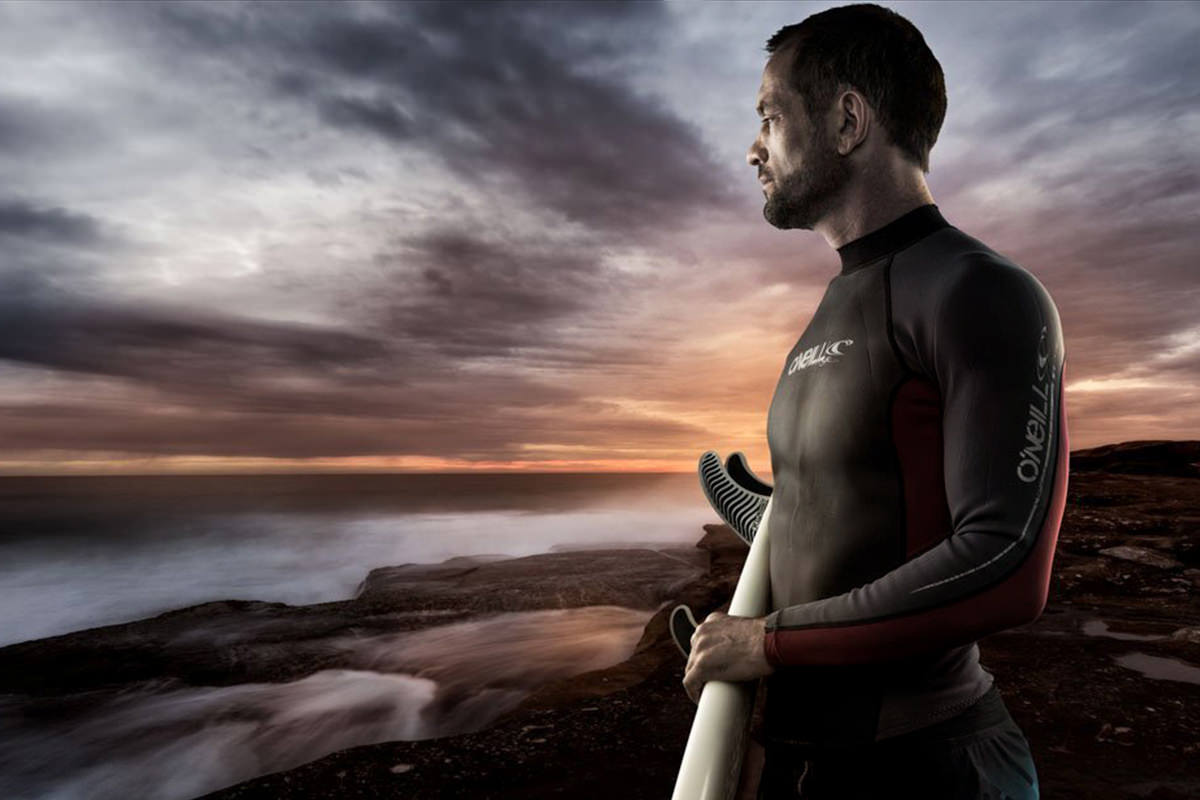
In this image by Dean Richter, he’s pretty much nailed all three. But some of the color in the sunset isn’t present in the surfer’s wetsuit. It may not be strikingly apparent at first, but by creating a Color Fill layer and setting the Blend Mode to “Hue“, we can see that the sunset is much more saturated than the wetsuit.
Now that the Color Fill layer has showed us what needs adjusting, it’s up to us to fix it! By sampling Color from the sky with the Brush Tool and painting onto a New Layer set to Soft Light, we can bring the appropriate Colors into the areas they need to be. It’s not a huge Difference, but it does help to tie the image together.
Some of the color we painted has spilled onto the rest of the image. No problem, just group the layers together and create a Layer Mask. We can then paint on the mask, letting us control where the Color is visible.











Enjoying This Free Tutorial? Go Further with PRO.
Unlock Full Sample Files, PSDs, and Hundreds of Masterclasses!

Download full project assets, original PSDs, and RAW images for every lesson
Unlimited access to our complete library of PRO Photoshop & Lightroom courses
Instant 4K Ultra HD streaming on all devices, anytime, anywhere
Full access to our entire library of Photoshop Actions, Presets, and LUTs
Flexible monthly and annual membership plans
Cancel anytime with zero hassle or commitments