Download Assets
description
Learn how to replace backgrounds using Photoshop’s new Remove Background and Generate Background tools. As a bonus, we’ll give you a glimpse of the upcoming Enhance feature (available on Beta) that can elevate the realism and detail of your AI-generated images in just a few clicks!.
Go PRO:
Explore AI’s full capabilities with our in-depth PRO tutorial The Ultimate Guide to AI in Photoshop: Generative Fill & More.
Artist Credit
- AMikhail Nilov
Images sourced from Pexels.
Share
AFTER
BEFORE
Simplify Your Editing
Photoshop’s new Remove Background and Generate Background tools offer a simple solution that helps you create professional-looking images with minimal effort. Follow the steps below to get started!.
Select & Remove
1. Start by opening the image you want to work with in Photoshop.
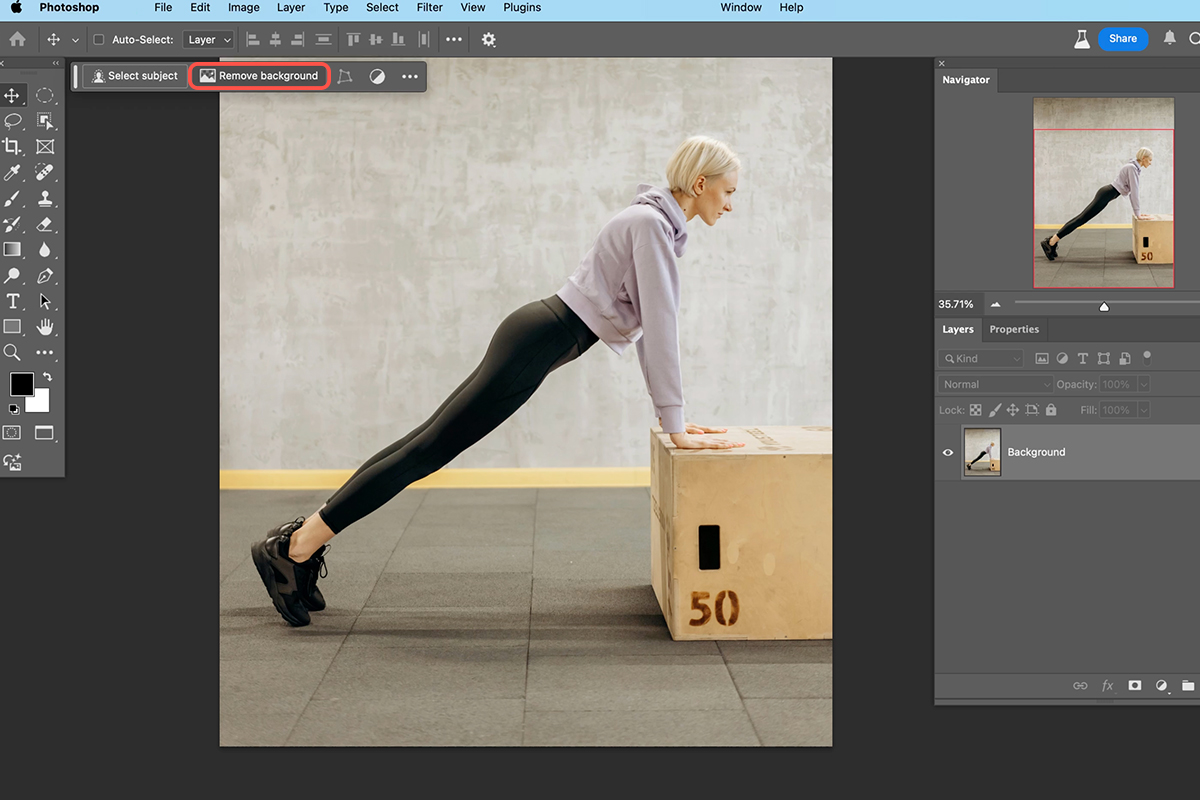
2. Go to the “Remove Background” tool located in the contextual task bar. This will automatically select the subject and create a layer mask.
Generate a New Background
3. If you want to replace the background completely, click on “Generate”. Photoshop will use AI to generate a new background that blends seamlessly with your subject.
4. Choose a desired background style from the options provided.
If you’re using the Enhance feature (currently available in Beta), click on it to improve the quality and realism of the generated background.
Make Partial Changes
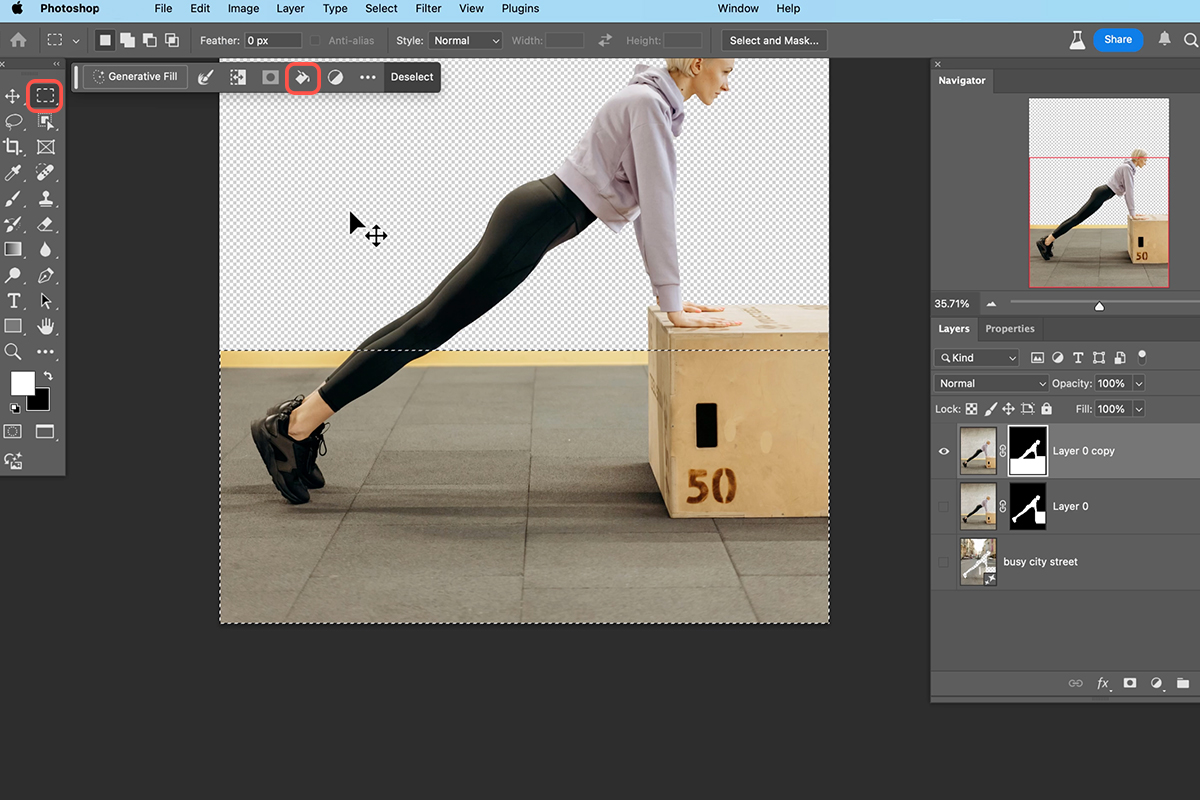
To preserve part of the original background, use the rectangular marquee tool (Keyboard Shortcut “M”) to select the desired area. Then, add a layer mask and fill the selected area with white. This will reveal the original background while allowing you to generate a new background for the remaining portion of the image.
Additional Tips
For more precise control, consider using the Refine Edge tool to adjust the layer mask.
If you’re not satisfied with the generated background, try different styles or experiment with manual adjustments. Don’t be afraid to experiment and have fun with the new tools!


