

Download Assets
description
Learn how to create a soft, dreamlike light bloom manually in Photoshop without using AI! Discover how to isolate highlights with Color Range, build customizable glow using stacked blur layers, and use Camera Raw for precise color grading and grain.
Go PRO:
Explore more special effects with our in-depth PRO Special Effects Learning Path. Dive into the world of Photoshop and discover how to transform ordinary photos into extraordinary masterpieces. From watercolor paintings to pop art explosions, realistic sketches to glitchy wonders, we’ve got you covered..
Image Source
- A.C.
- Hannah Popowski
Images sourced from Unsplash.
Share
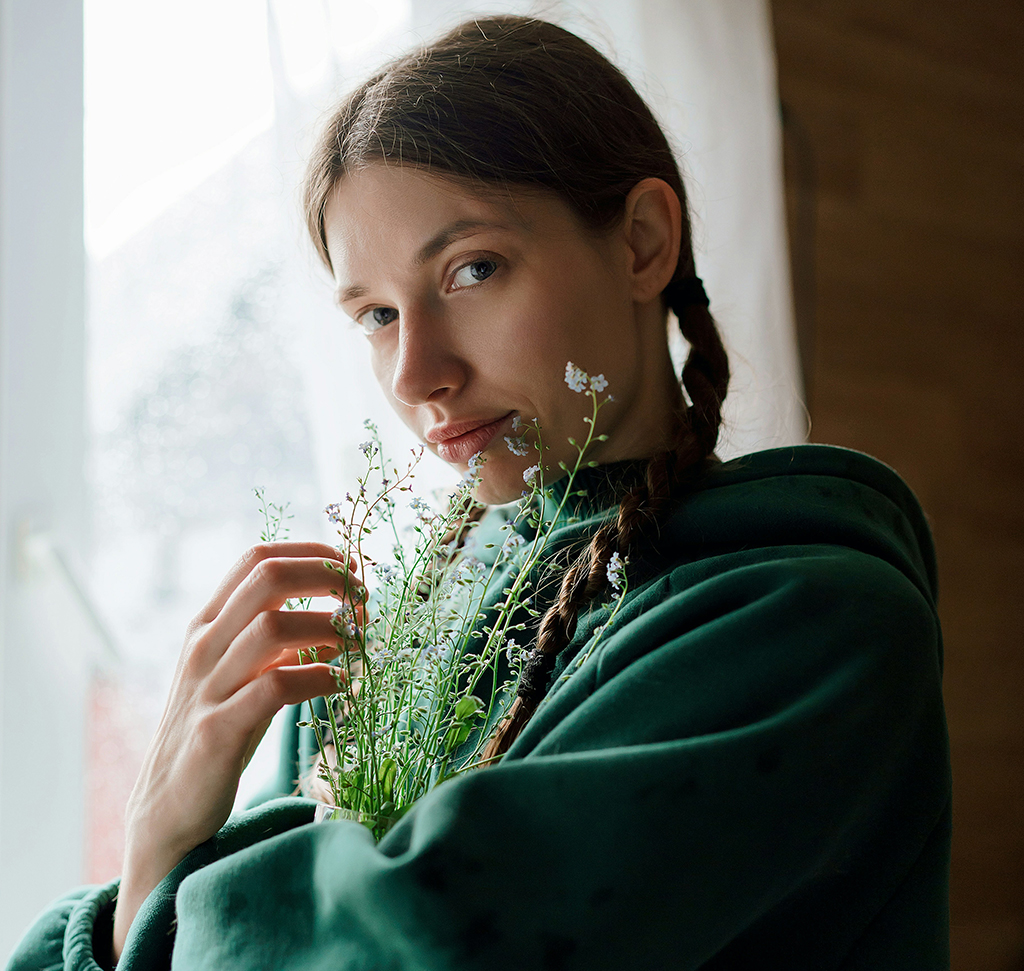

AFTER
BEFORE
Ethereal Color Grading
At PHLEARN, we love teaching special effects that bring your photos to life, and this classic light bloom is one of our absolute favorites. It is completely manual, super easy to follow, and gives you total artistic control without relying on AI. Let’s jump into Photoshop and build this dreamy effect step by step!
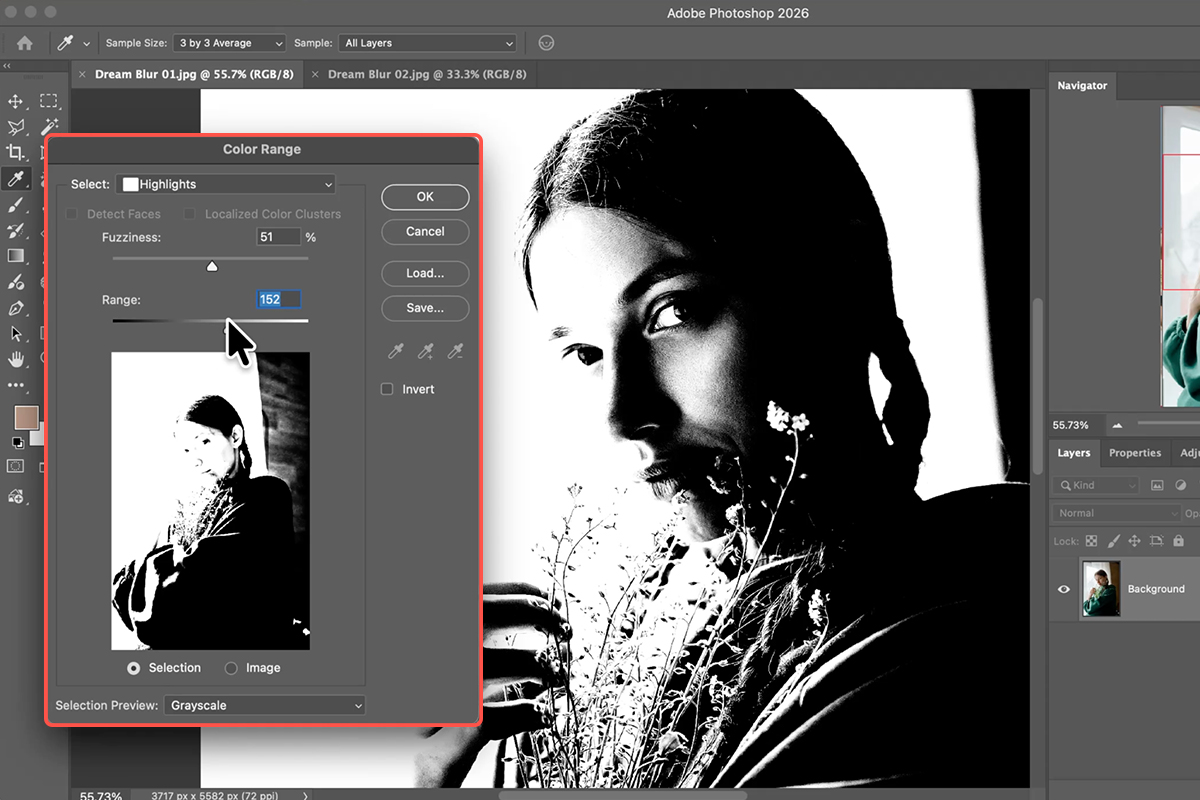
Isolate Image Highlights
1. Start by selecting your background layer in the Layers panel. Go to Select > Color Range, change the Select dropdown to Highlights, and set your Selection Preview to Grayscale.
2. Adjust the Range slider to target only the brightest areas, and tweak Fuzziness to soften the edges. Press Ctrl/Cmd + J to copy those highlights onto a new layer.
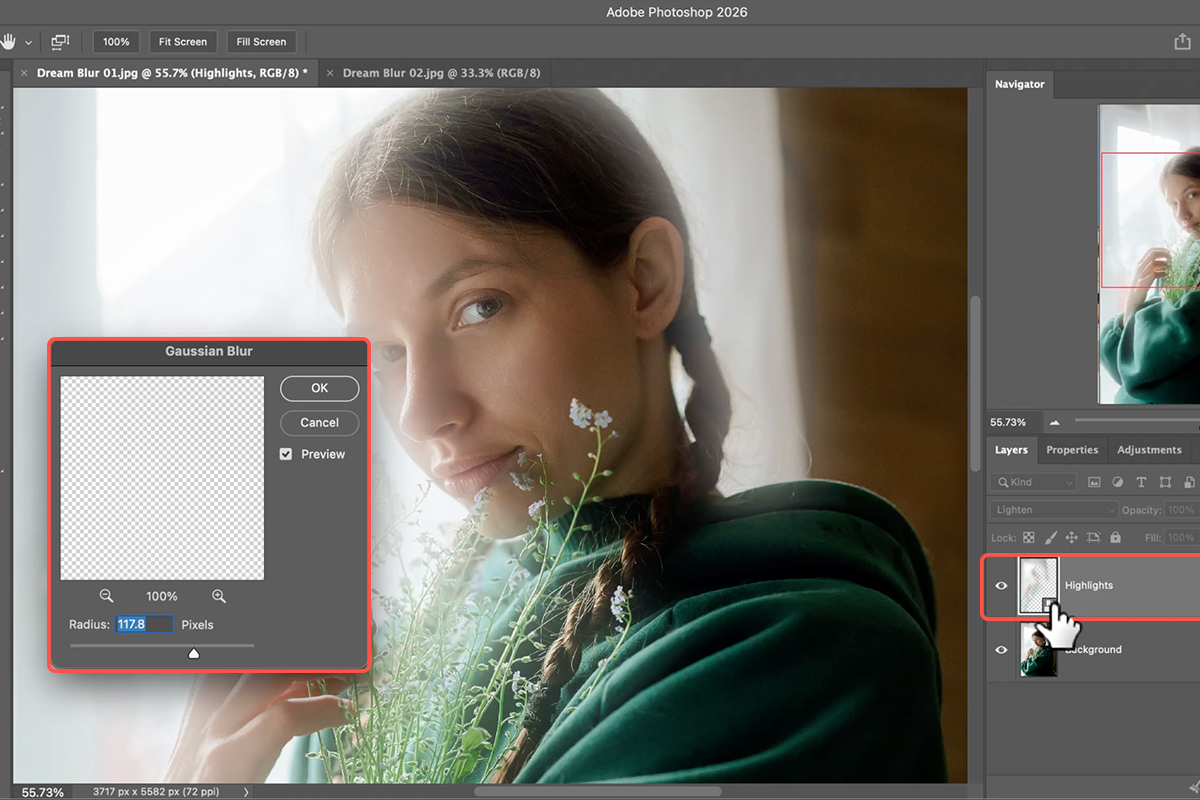
Build Stacked Blurs
3. Convert your highlight layer into a Smart Object by going to Filter > Convert for Smart Filters.
4. Set the layer blend mode to Lighten for a natural look. Apply a blur via Filter > Blur > Gaussian Blur, dialing in a subtle radius.
5. Duplicate this layer using Ctrl/Cmd + J, then double-click the Smart Filter to increase the blur radius on the copy, blending multiple layers for a richer glow.
Finish in Camera Raw
6. Create a stamp visible layer at the top of your stack by adding a blank layer and going to Image > Apply Image.
7. Convert it for Smart Filters, then open Filter > Camera Raw Filter.
8. Toggle on the Highlight Clipping Warning to ensure your bright areas do not blow out.
9. Finish by adding warmth or cool tones in the Color Grading panel and applying a touch of Grain for extra mood.







Enjoying This Free Tutorial? Go Further with PRO.
Unlock Full Sample Files, PSDs, and Hundreds of Masterclasses!

Download full project assets, original PSDs, and RAW images for every lesson
Unlimited access to our complete library of PRO Photoshop & Lightroom courses
Instant 4K Ultra HD streaming on all devices, anytime, anywhere
Full access to our entire library of Photoshop Actions, Presets, and LUTs
Flexible monthly and annual membership plans
Cancel anytime with zero hassle or commitments