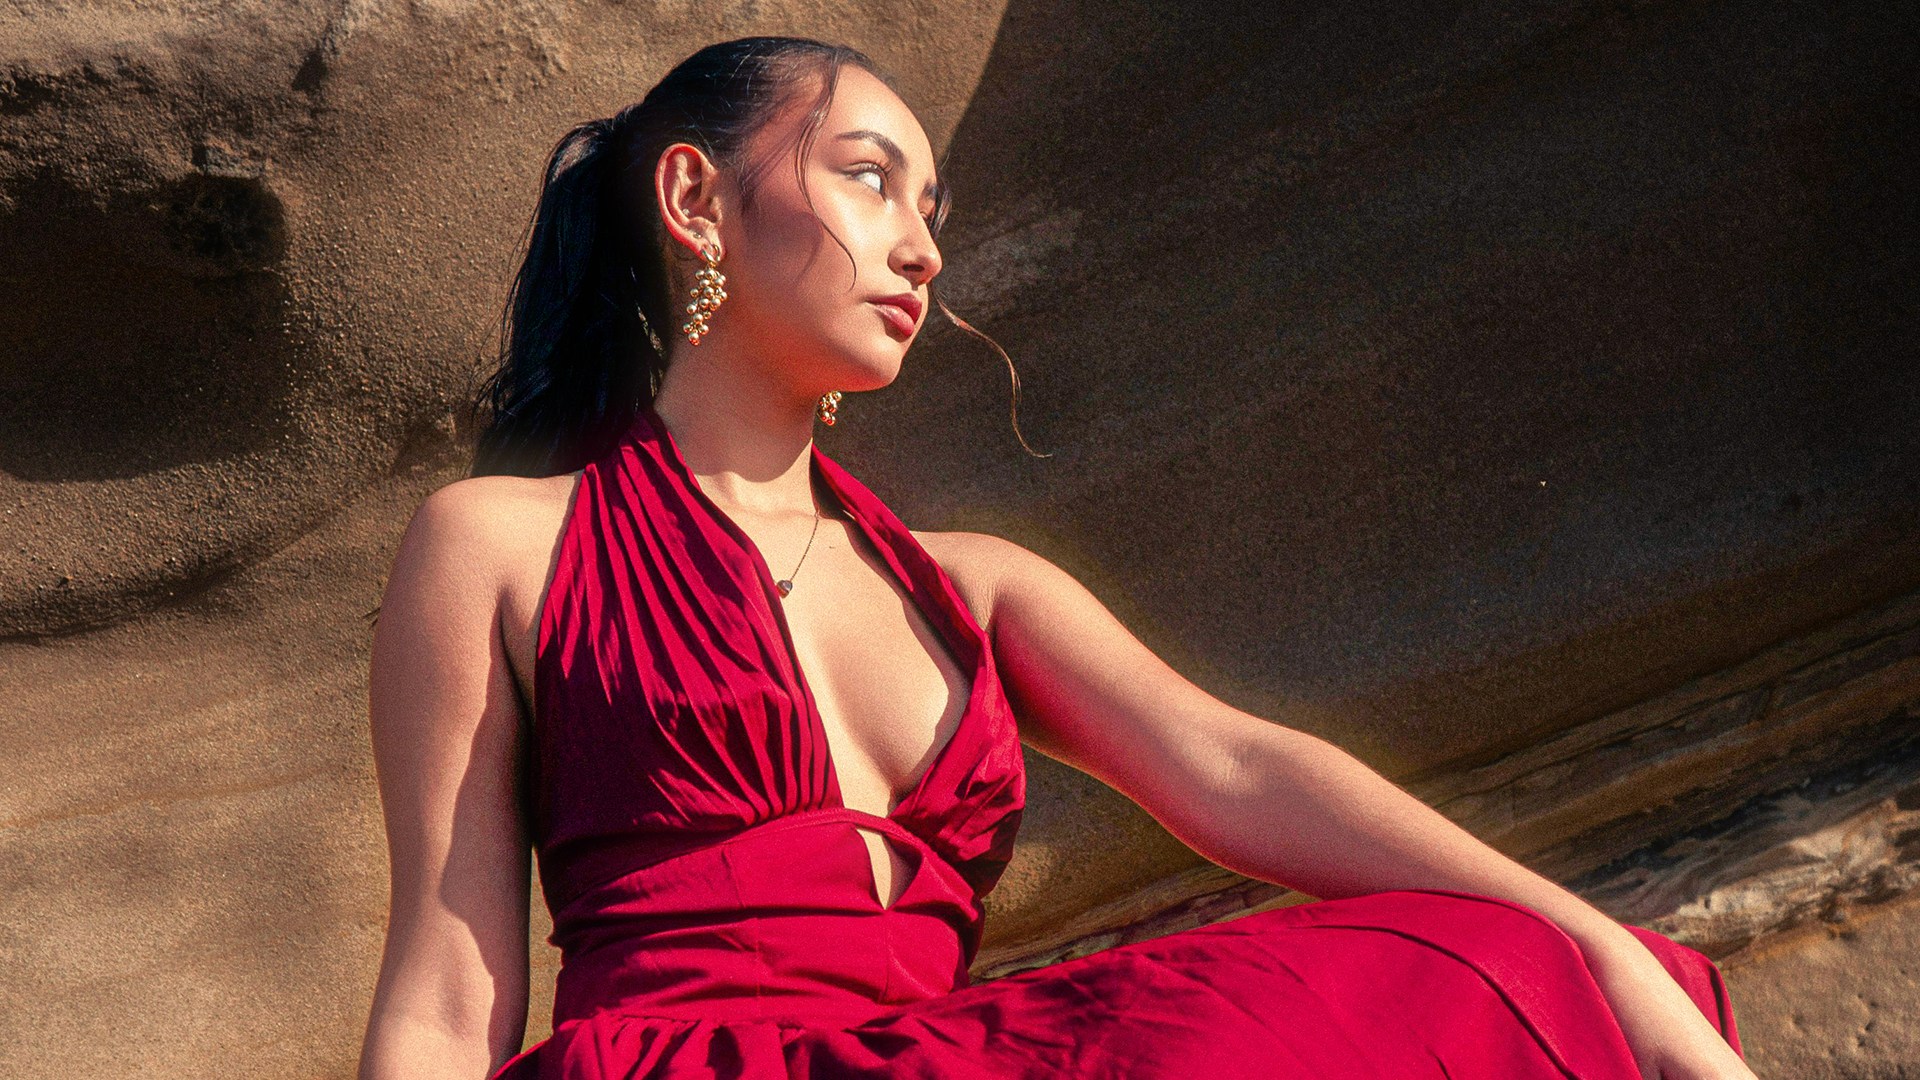

Learn how to recreate the trending 2000s digicam look right inside Photoshop using Adobe Camera Raw! In this tutorial, we’ll walk you through the key techniques to replicate that nostalgic, flash-lit aesthetic from scratch. You’ll learn essential Camera Raw tweaks, smart masking, and custom glow effects to get that punchy Y2K vibe without buying extra gear. We’re even including a preset to help you get started!
Free practice files
Practice Files for This Tutorial
The sample image, the layered PSD, the XMP preset and the 4-page PDF guide from the video, so you can follow every step on the same files.
This tutorial includes 1 sample image, 1 sample PSD, 1 XMP preset and 1 PDF guide.

Create a free PHLEARN account to download, or log in if you already have one. One account gets you the files for every free tutorial.
description
Enjoying This Free Tutorial?
Image Source
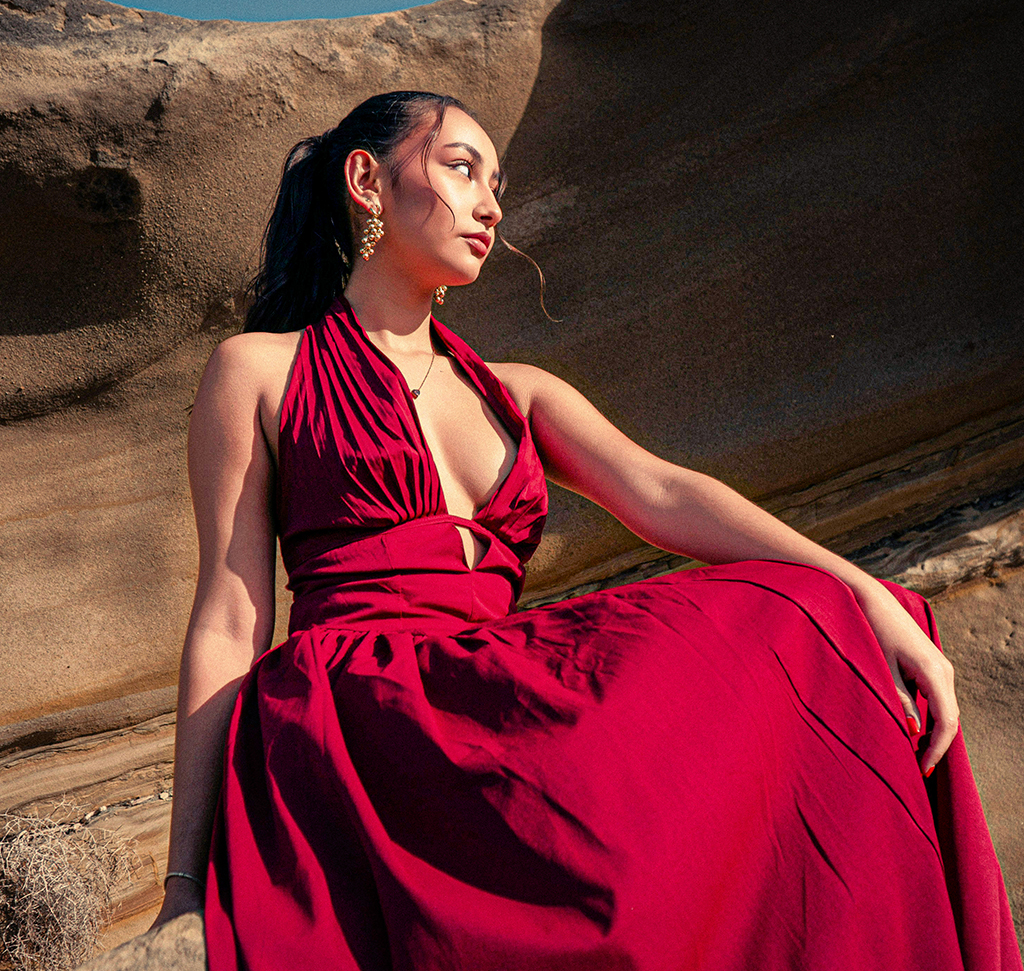
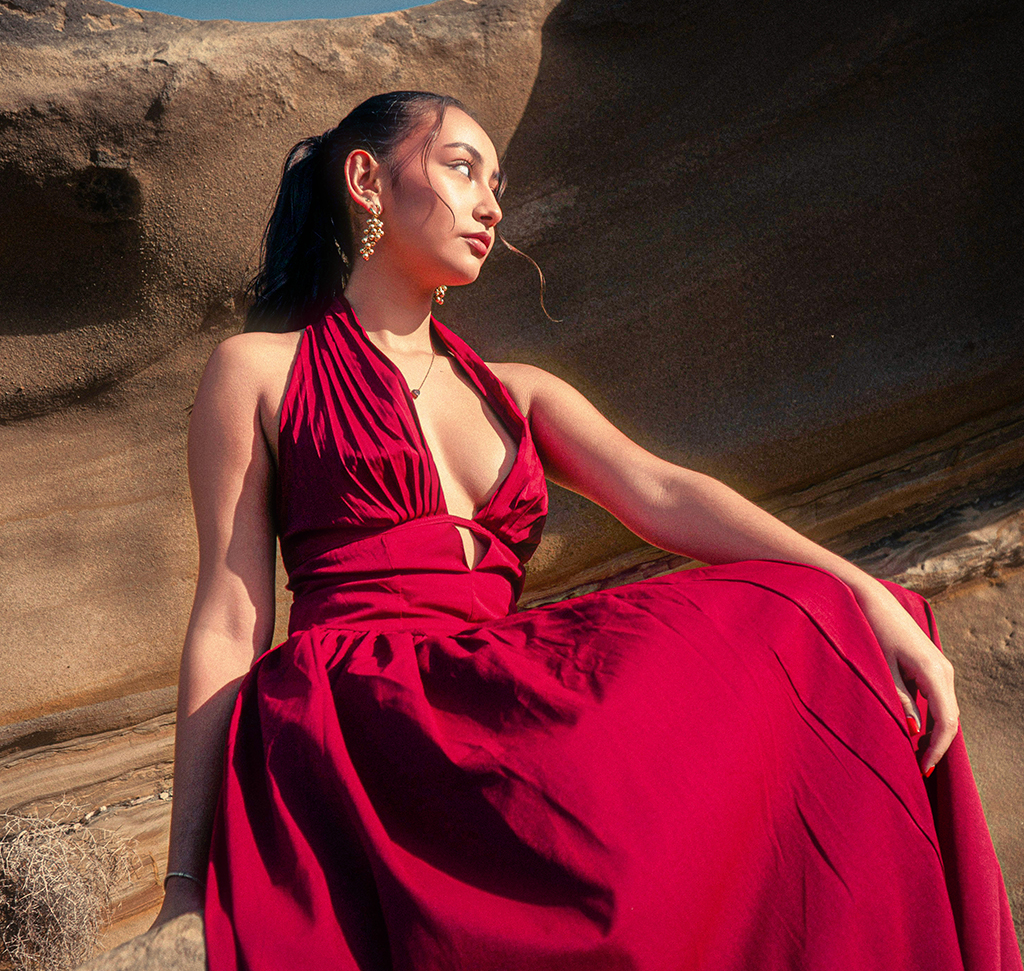
The Y2K Digicam Look, Built by Hand in Photoshop
The Y2K digicam look is everywhere right now — a bright, punchy center, deep shadows falling off toward the edges, a cool color cast, and a layer of grain that makes a photo feel like it came straight off an old point-and-shoot from the early 2000s. That look comes from the on-camera flash those cameras used: fire it straight at your subject and you get exactly this kind of harsh, high-contrast lighting.
You don’t need to track one of those cameras down on eBay to get the effect. Every part of it — the flash, the color shift, the grain — can be rebuilt by hand in Photoshop and Adobe Camera Raw, and once you know the moves, it’s a repeatable edit you can apply to any photo, not a one-time trick tied to a secondhand camera.
The Case for Doing This by Hand
Skip the Vintage Gear Hunt
Sourcing a working point-and-shoot can turn a quick creative idea into a whole shopping project. Building the look in Photoshop means you can start right now, with whatever camera you already have.
Full Creative Control Over Every Detail
Manual edits mean nothing is locked in. If you want more grain and less flash, or a stronger color shift, every slider is yours to adjust — and because the whole effect lives on a Smart Filter, you can always come back and change your mind later.
Getting Started
-
Open Your Image
Start by opening your image in Photoshop and selecting your photo in the Layers panel.
-
Set Up for Non-Destructive Editing
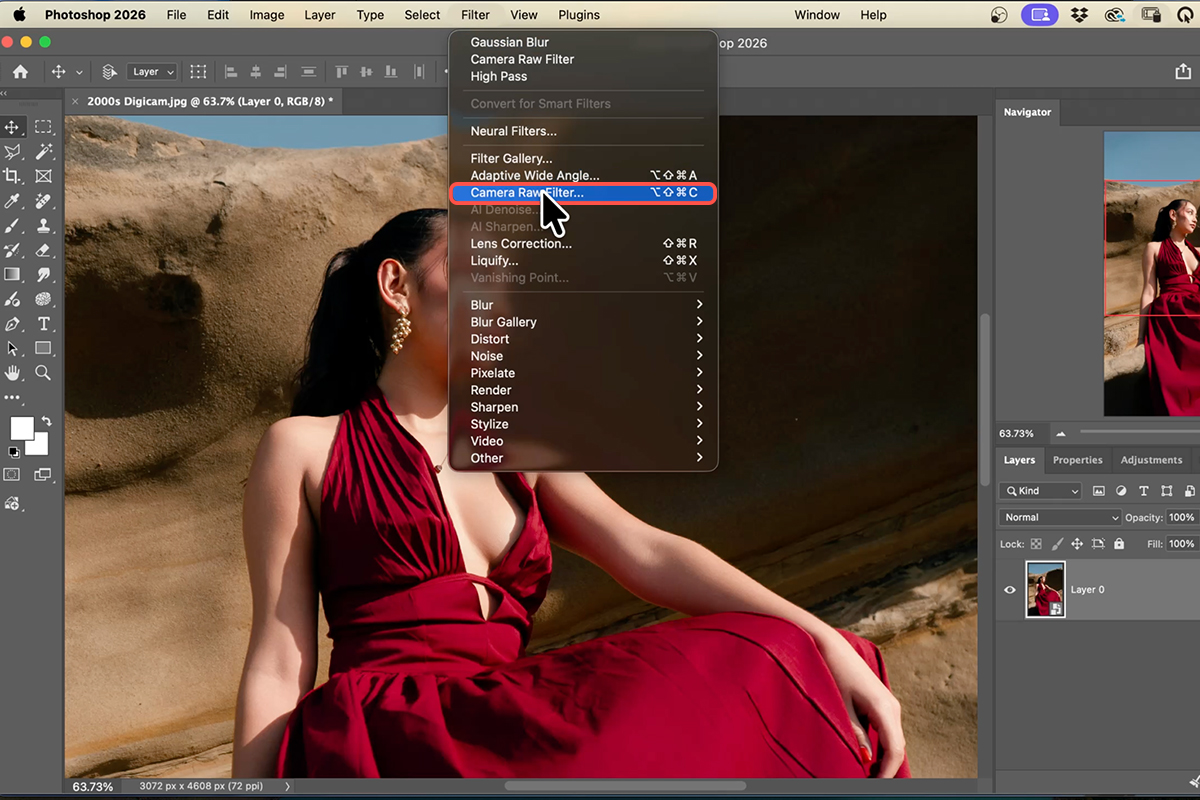
Go to Filter and choose Convert for Smart Filters. This turns your layer into a Smart Object, which means everything you’re about to do stays fully editable — nothing here is permanent.
-
Launch Camera Raw
Go back to Filter and select Camera Raw Filter (or press Shift + Cmd + A on Mac / Shift + Ctrl + A on Windows). This opens a Lightroom-style editing workspace right inside Photoshop, and it’s where almost all of this effect happens.
Adjust Color & Texture
-
Boost Contrast
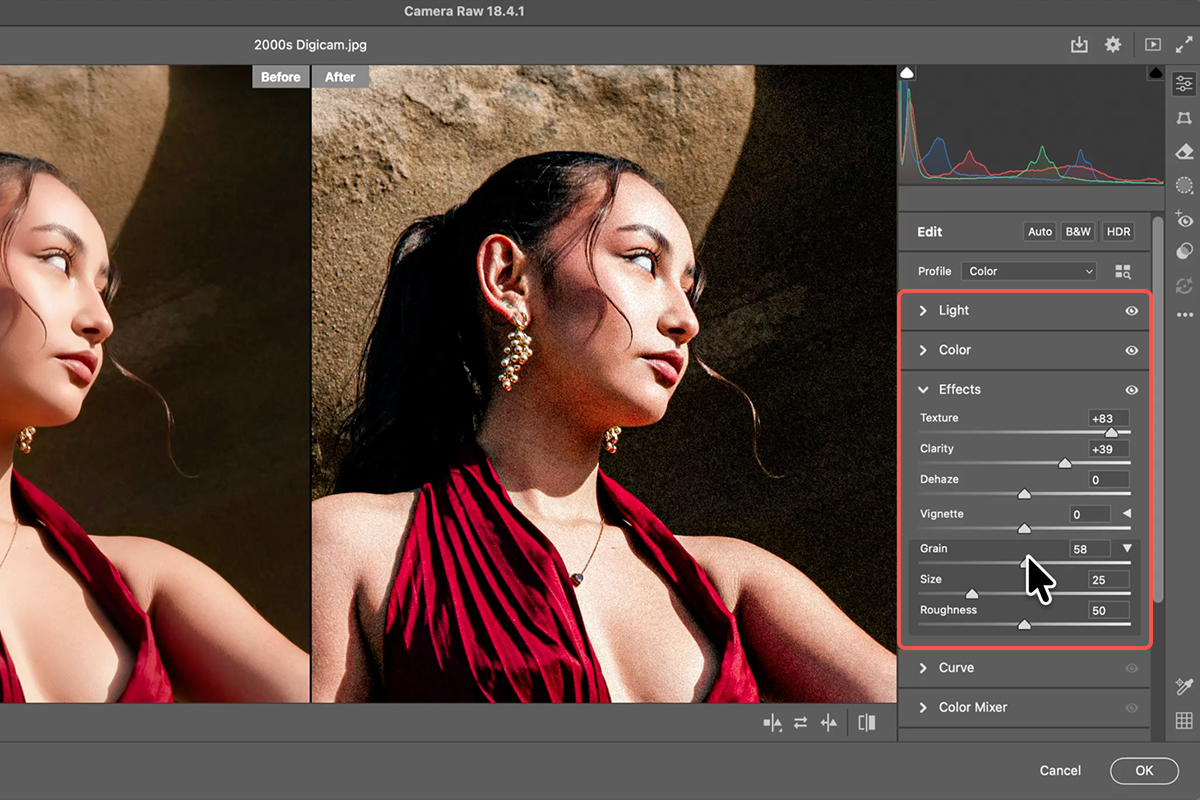
In the Light panel, push the Contrast slider up noticeably. Don’t worry about your Highlights or Shadows sliders yet — this pass is just about getting that harsh, direct-flash contrast in place.
-
Shift Temperature and Tint
In the Color panel, drop both Temperature and Tint by around -10. Older cameras threw off a cooler color balance whenever the on-camera flash fired, and this one adjustment does most of the work of recreating that.
-
Increase Texture and Clarity
In the Effects panel, bring up both Texture and Clarity to mimic the extra in-camera sharpening older sensors applied. Zoom in to 100% while you adjust these — it’s the only way to actually judge how much is too much.
-
Add Fine Grain
Open the Grain settings — click the small icon next to the Grain slider if you don’t see separate Size and Roughness controls. Keep Size relatively low (too high and you lose detail fast), then adjust Roughness to taste. Pull the overall Grain amount back down once it’s dialed in; it adds up faster than it looks.
Grade Tones & Flash Effect
-
Color Grade Highlights and Shadows
Open Color Grading and use the three-way shadows/midtones/highlights wheels. Pull Shadows slightly toward blue — you don’t need to push this far. Then move to Highlights and dial in some warmth; this is what keeps skin tones looking natural instead of sickly once everything else has gone cool. Toggle Color Grading off and on to compare — the warmer highlights make a bigger difference than they look like they should.
-
Add a Vignette
Go to Optics and drag the Vignette slider to darken the outer edges of the frame, pulling more attention toward your subject. You can adjust the Midpoint slider to control how far the darkening reaches in, and if the corners feel too cool afterward, nudge the Highlights warmer again to compensate.
-
Build the Radial Flash Mask
Switch to Masking, choose Radial Gradient, and click-drag a large circle centered over your subject. With the mask selected, go to the Light panel and raise Exposure — this brightens the center of the frame, but it’ll blow out your highlights at the same time. Fix that by clicking Subtract on the mask, choosing Luminance Range, and clicking an eyedropper on your subject’s skin. If the transition looks harsh or banded, drag the left-hand point on the Select Luminance slider to the left to feather it — that’s the difference between a rough edge and a clean one. Once your highlights are protected, you can push Exposure even brighter than you’d otherwise be able to. If you want more practice with Camera Raw’s masking tools before tackling this, check out our AI Masking in Adobe Camera RAW walkthrough, or dig deeper into object masking for more precise selections.

Add the Highlight Glow
-
Duplicate Your Layer
Click OK to apply your Camera Raw edits, then duplicate your layer with Cmd/Ctrl + J.
-
Change Blend Mode and Nudge
Change the new top layer’s blend mode from Normal to Lighten, then grab the Move Tool (V) and nudge the layer slightly out of alignment with the one underneath. Bring its Opacity down to around 30% — this is the layer that’s about to become your glow.
-
Apply Gaussian Blur
Go to Filter > Blur > Gaussian Blur and apply around a 20-pixel blur. Because this is still a Smart Object, you can double-click the Gaussian Blur entry in the Layers panel at any time to change the amount, and use the Move Tool to reposition exactly where the glow sits. This is what spreads the brightest highlights into that soft, hazy bloom — the same look you get when an on-camera flash fires straight into the lens. For more ways to build glow and light effects like this one, see our guides on glow motion effects and cinematic highlight glow.
One more thing worth knowing: because every edit above lives inside a single Camera Raw Smart Filter, you can dial back the whole effect at once instead of undoing individual sliders. Double-click the small sliders icon next to “Camera Raw Filter” in the Layers panel and you’ll get one master Opacity slider for the entire look — handy if you like the direction but want it a little more subtle. And if you’d rather skip rebuilding these settings from scratch on your own photos, the free download for this tutorial includes the exact Camera Raw preset used here — load it from the Camera Raw menu under Load Settings and it’ll apply every adjustment above in one click.
Easy Mistakes to Sidestep
Overdoing Grain and Contrast Together
Stacking heavy grain on top of heavy contrast can make skin look muddy instead of gritty. Add grain last, and check it at 100% zoom before committing.
Skipping the Radial Mask
Without the radial gradient mask, your flash effect looks flat and uniform rather than concentrated on your subject the way a real flash falls off toward the edges of the frame.
Pushing the Glow Opacity Too High
Around 30% opacity on the highlight glow layer is a good starting point. Push much past that and it starts to look like a blur filter instead of an authentic flash bloom. For more on building layered light effects the right way, see our guide on light effects in Photoshop or this updated light effect tutorial.
If you want to take retro and cinematic grading much further, our PRO course on advanced cinematic and film effects walks through the full workflow in depth.
Why the Digicam Look Works So Well on Social Media
Part of what makes this look so popular right now is how well it performs in a feed. The harsh flash, cool grade, and visible grain all read as intentional and stylized among photos that are otherwise over-smoothed and algorithm-polished. Because you built it manually rather than relying on a preset or a physical camera, every part of it — flash intensity, grain, color shift — can be pushed or pulled to match your own style instead of settling for a one-size-fits-all filter.
Take It From Here
You don’t need a working point-and-shoot to get this look. With a handful of adjustments inside Camera Raw and two layers back in Photoshop, you can recreate the harsh flash, cool tones, and grain of an early-2000s camera — and adjust every part of it to fit your own style. That’s the real advantage of building this effect manually: it’s free, it’s repeatable, and it’s entirely yours.
Quick Reference: Keys, Menus and Settings
- Make it editableFilter > Convert for Smart Filters, then Filter > Camera Raw Filter
- The digicam baseLight: a lot of Contrast. Color: Temperature and Tint about −10 each
- Crunch and grainEffects: Texture and Clarity up; Grain with a small size and rougher roughness
- Warm skin, cool shadowsColor Grading > Three-Way: shadows toward blue, highlights warm
- Dark edgesOptics > Vignette to the left, adjust Midpoint
- The on-camera flashMasking > Radial Gradient from the center, raise Exposure; Subtract > Luminance Range, click the skin, feather the left slider
- Before and afterThe split-view icon at the bottom of Camera Raw; Space + click to zoom out
- Save or load the presetCamera Raw menu > Create Preset; Save Settings or Load Settings for the XMP file
- The glow layerCmd/Ctrl + J, blend mode Lighten, opacity about 30%, Filter > Blur > Gaussian Blur about 20 px
- Fade the whole effectThe sliders icon next to Camera Raw Filter in the Layers panel: an opacity for the filter
Mac first, then Windows where they differ.
Image source
Free Downloads
Follow Along on the Same Photo
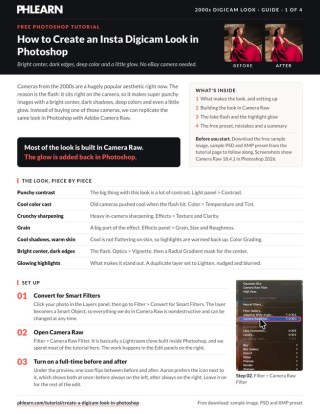
Get the sample image, the finished PSD, the Camera Raw preset and the PDF guide, and build the digicam look on the same portrait. Free with a PHLEARN account.
Digicam Look: Common Questions
What makes the 2000s digicam look?
The on-camera flash. Those cameras gave a bright center with dark edges, deep contrast, slightly off color balance, heavy in-camera sharpening, grain and a little glow. The tutorial rebuilds each of those in Camera Raw instead of buying an old camera.
Why convert the layer to a Smart Object first?
So Camera Raw Filter becomes a Smart Filter. You can double-click it later to change any setting, toggle it off and on, and the glow layer’s blur stays editable too.
Which Camera Raw settings give the base look?
A lot of Contrast in the Light panel, then Temperature and Tint both down about 10 for that cool, slightly green cast, then Texture and Clarity up in Effects to copy the in-camera sharpening, and Grain with a small size and a rougher roughness. Keep the grain size low or you lose detail.
Won’t the cool white balance make skin look bad?
That’s what the color grade fixes. In Color Grading’s three-way view, push the shadows a little toward blue and the highlights warm. The shadows stay cool while the skin tones warm back up.
How do I get the bright center and dark edges?
Two things. Optics > Vignette dragged to the left darkens the edges; adjust Midpoint to taste. Then a Radial Gradient mask from the center with Exposure raised brightens the middle like a flash.
The flash mask blows out the skin. How do I protect the highlights?
In the same mask, choose Subtract > Luminance Range and click the skin with the eyedropper. It looks harsh at first; drag the left handle of the Select Luminance slider to the left to feather it. The center stays bright while the brightest skin is left alone.
How do I use the free preset?
In Camera Raw, open the panel menu, choose Load Settings and pick the XMP file from the download. To keep it, choose Create Preset, tick every section you used, including Masking, and it appears under User Presets. Save Settings exports your own version as an XMP you can share.
How is the glow made?
After clicking OK, duplicate the layer (Cmd/Ctrl+J), set it to Lighten, lower the opacity to around 30%, and add Filter > Blur > Gaussian Blur at about 20 px. Because the layer is a Smart Object, you can double-click the blur to change it, and move the glow with the Move tool.
What if the whole effect is too strong?
Click the sliders icon next to Camera Raw Filter in the Layers panel. It’s an opacity control for the entire filter, so you can blend the effect back toward the original. Lower the glow layer’s opacity as well.
Are the sample files free?
Yes, with a free PHLEARN account. You get the sample image, the finished PSD, the Camera Raw preset and the PDF guide, so you can build the look on the same portrait.
Master Photoshop, Lightroom and Photography
Join PHLEARN PRO for $12.99 a month or $99.99 a year. Cancel anytime, with a 100% money-back guarantee.





