

Learn how to create a cinematic vintage glow completely by hand in Photoshop 2026! You’ll learn the secret to building realistic film bloom, adding analog grain, and using advanced color channels to dial in the perfect look.
Free practice files
Practice Files for This Tutorial
The sample image, the layered PSD and the 4-page PDF guide from the video, so you can follow every step on the same files.
This tutorial includes 1 sample image, 1 sample PSD and 1 PDF guide.
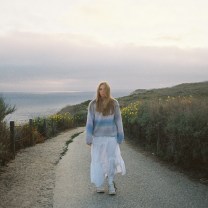

Create a free PHLEARN account to download, or log in if you already have one. One account gets you the files for every free tutorial.
description
Enjoying This Free Tutorial?
Image Source


A Timeless Cinematic Vintage Glow
A cinematic vintage glow is one of those looks every preset promises and almost none deliver. One-click presets and mobile filters flatten a photo the same way — the same curve on every image regardless of what’s actually in it. Building the vintage glow by hand takes a few more minutes and gives you something a preset can’t: bloom that comes from your photo’s own highlights, grain you can dial to the image, and color shifts you place exactly where you want them.
Everything here is manual and non-destructive. No AI, no plugins, and full resolution preserved from start to finish.
Why Build the Vintage Glow Yourself
Presets Flatten Every Photo the Same Way
A filter doesn’t know where your highlights are or how much grain your image can carry. Doing it by hand means the bloom lands on the parts of the frame that are actually bright, and the grain suits the photo rather than burying it.
Nothing Here Is Baked In
The bloom lives on a Smart Object, the grain on its own overlay layer, and the color work on adjustment layers. Every piece stays editable, so you can come back and soften the glow or re-balance the color without rebuilding anything.
Isolate the Highlights Before You Blur
This is the step that separates a real film bloom from a plain blurry overlay. Rather than blurring the whole photo, grab just the bright areas first — the glow then spills out of the highlights the way light does through a real lens.
-
Open Color Range and Set the Preview to Grayscale
With your background layer selected, go to Select > Color Range. Before anything else, change the Selection Preview dropdown at the bottom from None to Grayscale — now you can see exactly what’s being selected painted onto the image instead of guessing from the thumbnail.
-
Switch the Select Dropdown to Highlights
At the top of the dialog, change Select from Sampled Colors to Highlights. Use the Range slider to keep the selection to the genuinely bright areas — grabbing too much is what turns a bloom into a soft, muddy mess.
-
Copy the Highlights to Their Own Layer
Click OK, then press Cmd/Ctrl + J to lift those highlights onto a new layer. Convert it to a Smart Object (right-click the layer > Convert to Smart Object) so the blur you’re about to add stays editable.
Craft the Vintage Glow With Film Bloom
-
Apply a Gaussian Blur
Go to Filter > Blur > Gaussian Blur and set a radius that creates a soft halo around your high-contrast edges. Because it’s a Smart Filter you can reopen and re-dial this at any point.
-
Set the Blend Mode to Lighten or Screen
Change the layer’s blending mode to Lighten or Screen. This confines the blur to the bright values and gives you that organic 35mm lens bleed instead of a flat grey wash over the photo.
-
Pull the Opacity Back
Almost every version of this vintage glow looks better at less than full strength. Drop the layer opacity until the glow reads as atmosphere rather than an effect. If you want to go further with light shaping, our free tutorial on cinematic highlight glow builds a stacked, multi-radius version of this same idea.

Add Analog Film Grain
Digital noise looks harsh and electronic. Analog grain sits into the image and adds a tactile warmth — the trick is building it on its own layer so you can tune it independently.
-
Create a 50% Gray Overlay Layer
Press Cmd/Ctrl + Shift + N, set the Mode to Overlay, and tick “Fill with Overlay-neutral color (50% gray)”. The layer is invisible on its own but gives the noise somewhere to live.
-
Add Monochromatic Noise
Go to Filter > Noise > Add Noise. Choose Uniform, check Monochromatic, and set the amount to roughly 8–12%. Monochromatic matters here — colored noise reads as digital sensor grain, not film.
-
Soften It Slightly
Run a Gaussian Blur of about 0.5px directly on the noise layer. That tiny amount takes the digital edge off the grain and makes it sit like emulsion rather than pixels.

One thing worth doing while you set the grain: zoom back out and judge it with the whole photograph in view. Grain that looks perfect at 100% is almost always far too heavy when you see the image at the size people will actually look at it.
Cross-Process the Color Channels
This is where the analog character really comes from. Instead of grading the image as a whole, you shift the individual color channels against each other — the same imbalance that gives cross-processed film its signature look.
-
Add a Curves Adjustment Layer
Grab a Curves adjustment layer from the bottom of the Layers panel. You’ll be working inside its individual channels rather than the composite RGB curve.
-
Warm the Shadows in the Red Channel
Switch from RGB to the Red channel and lift the shadow baseline slightly. That single move pushes warmth into the darks, which is most of what reads as “aged” to the eye.
-
Push Cream Into the Shadows in the Blue Channel
Move to the Blue channel, lift the bottom-left output point to put subtle yellow-cream tones into the shadows, and pull the top-right point down to take some blue out of the highlights. Keep both moves small — a few pixels of travel is usually plenty. For a deeper grounding in why these pairings work, our PRO course on color theory and composition covers it properly.
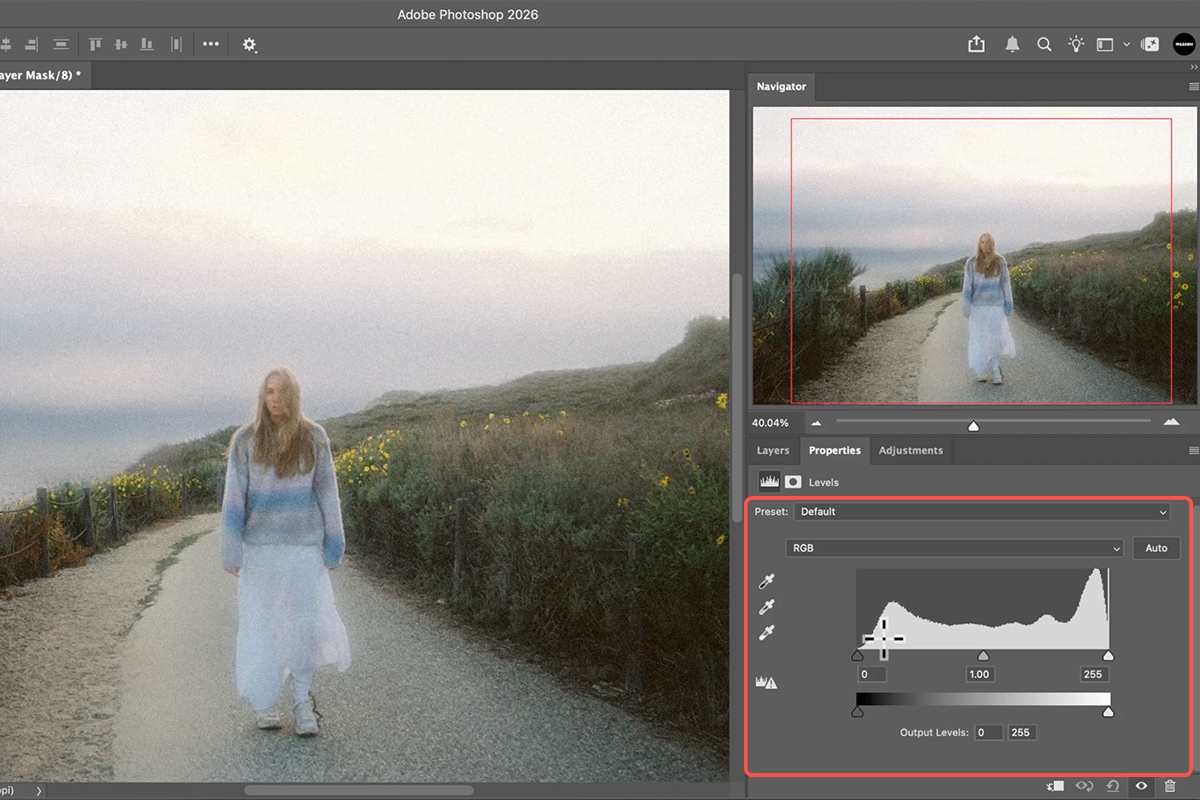
Fade the Blacks for a Matte Finish
-
Add a Levels or Curves Layer on Top
Put a fresh Levels or Curves adjustment layer at the very top of the stack. This one affects the whole composite rather than a single channel.
-
Lift the Black Point
Drag the bottom-left point straight upward. The deepest blacks stop being pure black and take on the slightly lifted, dusty quality of an old print. Go gently — a small lift reads as film, a large one just looks washed out.
If you enjoy this kind of manual grading, our PRO course on advanced cinematic and film effects takes the same principles a great deal further.
Where This Usually Goes Sideways
Judging Grain While Zoomed In
At 100% you’re looking at a crop no viewer will ever see. Set your grain with the whole image in view, or you’ll consistently overdo it.
Blurring the Whole Layer Instead of the Highlights
Skipping the Color Range step and blurring a duplicate of the entire photo is the single most common shortcut here, and it’s why so many attempts look hazy rather than glowing. The bloom needs to come from the bright areas specifically.
Overcooking the Channel Curves
Red and Blue channel moves compound fast. If your image is drifting toward an obvious color cast rather than a subtle warmth, halve both adjustments and look again.
What Sells the Cinematic Vintage Glowg Feel
Film never recorded light cleanly. Highlights bloomed past their edges, the emulsion carried texture, the dyes shifted unevenly across the tonal range, and the blacks never quite reached zero. Every step in this tutorial reproduces one of those imperfections deliberately — which is why the result reads as a photograph that was shot a certain way rather than a digital file with a filter dropped on it.
It also means the effect adapts. Because the bloom is drawn from your own highlights and the grain is judged against your own image, the same handful of steps produce a noticeably different result on a bright outdoor frame than on a moody indoor one.
Bring the Cinematic Vintage Glow Into Your Own Work
A Color Range highlight selection, a blurred Smart Object set to Lighten, a grain layer on 50% gray, a couple of channel curves, and a lifted black point — that’s the whole recipe, and every part of it stays live. Download the free sample image to follow along, then try it on your own photos; once you’ve built it twice, it takes about five minutes and you’ll never reach for a preset again.
Quick Reference: Keys, Menus and Settings
- Select the highlightsSelect > Color Range, Selection Preview: Grayscale, click the sky, set Fuzziness
- Copy them to a layerCmd/Ctrl + J
- The bloomFilter > Convert for Smart Filters, then Filter > Blur > Gaussian Blur; double-click the filter to change it later
- Film grainLayer > New Adjustment Layer > Grain; judge it zoomed out
- Vintage colorLayer > New Adjustment Layer > Levels; switch RGB to Red, Green or Blue and move the input sliders
- Matte blacks and soft whitesThe bottom Output Levels sliders in RGB
- Start over on a Levels layerThe reset icon at the bottom of the Properties panel
- Try variationsA second Levels layer; toggle between them or leave both on
Mac first, then Windows where they differ.
Image source

Free Downloads
Follow Along on the Same Photo
Get the sample image, the finished PSD and the PDF guide, and build the vintage glow on the same photo at full resolution. Free with a PHLEARN account.
Cinematic Vintage Glow: Common Questions
Does this vintage effect use AI?
No. AI effects tend to take control away and lower the resolution. This one is built by hand with Color Range, Gaussian Blur and two adjustment layers, you keep 100% of your resolution, and every part stays editable.
How do I select just the highlights for the bloom?
Select > Color Range with Selection Preview set to Grayscale, click a bright area like the sky with the eyedropper, and set Fuzziness to take more or less of the light areas. Press Cmd/Ctrl+J to copy the selection to its own layer.
How is the bloom made?
Convert the highlights layer for Smart Filters, then Filter > Blur > Gaussian Blur. The amount of blur sets how much bloom and haze you get, and because it’s a Smart Filter you can double-click Gaussian Blur and change it at the end.
Where is the grain adjustment layer?
Layer > New Adjustment Layer > Grain. Adding grain used to be complicated; now it’s an adjustment layer with amount, size and roughness. Judge it with the whole image on screen, not zoomed in, and use more than you think.
How does a Levels layer change color?
Switch the RGB drop-down to Red, Green or Blue. In the Red channel, dragging the left input slider pushes red into the shadows and the right slider pushes cyan into the highlights; the middle slider shifts the midtones. Do the same in Green and Blue and one layer recolors the whole photo.
How do I get the faded, matte blacks?
With the Output Levels sliders at the bottom of the Levels panel. Dragging the black output slider to the right turns the darkest areas gray, and dragging the white one left softens the whites.
What’s the difference between the two Levels graphs?
The top one is Input Levels: the black point, midpoint and white point, which add contrast. The bottom one is Output Levels: how bright the blacks and whites are allowed to be. The vintage look uses both.
Can I try more than one color version?
Yes. Make a second Levels adjustment layer with different channel settings, then toggle between them, or leave both on and let them combine. The blur underneath still works through the grain and color.
Are the sample files free?
Yes, with a free PHLEARN account. You get the sample image, the finished PSD and the PDF guide.
Master Photoshop, Lightroom and Photography
Join PHLEARN PRO for $12.99 a month, or $99.99 a year (save 36%). Cancel anytime, with a 100% money-back guarantee.





