
description
Transform your studio setups with just a few clicks using the power of AI in Photoshop! This step-by-step tutorial will teach you how to seamlessly remove imperfections, wrinkles, and distracting objects from your photos, resulting in flawless and captivating images.
If you want to explore the full potential of AI in Photoshop, check out our in depth PRO tutorial The Ultimate Guide to AI in Photoshop: Generative Fill & More.
Enjoying This Free Tutorial?
We publish a new free tutorial every week, each one with sample images and PSDs you can download and follow along with. Sign up and they land straight in your inbox, along with early word on sales, events and subscriber-only offers.
How to Clean Up Studio Backdrops Using AI in Photoshop
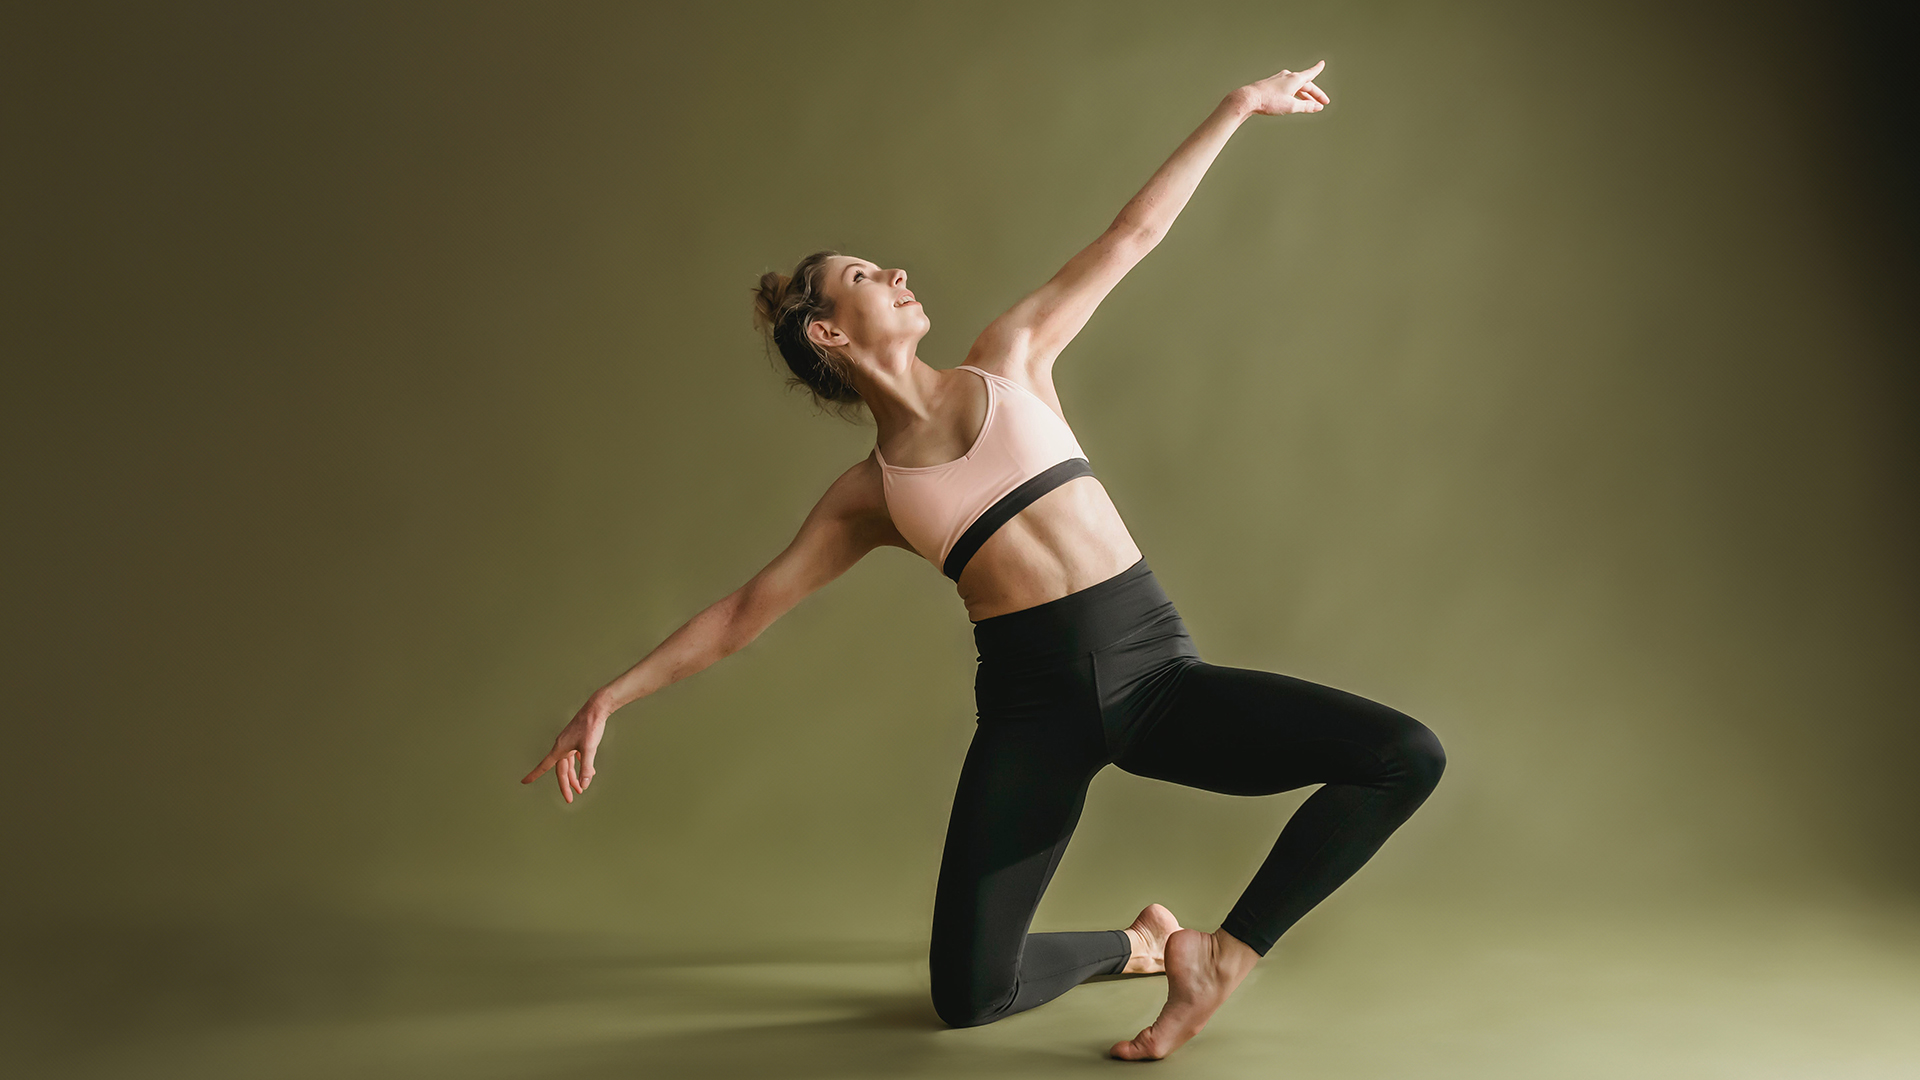
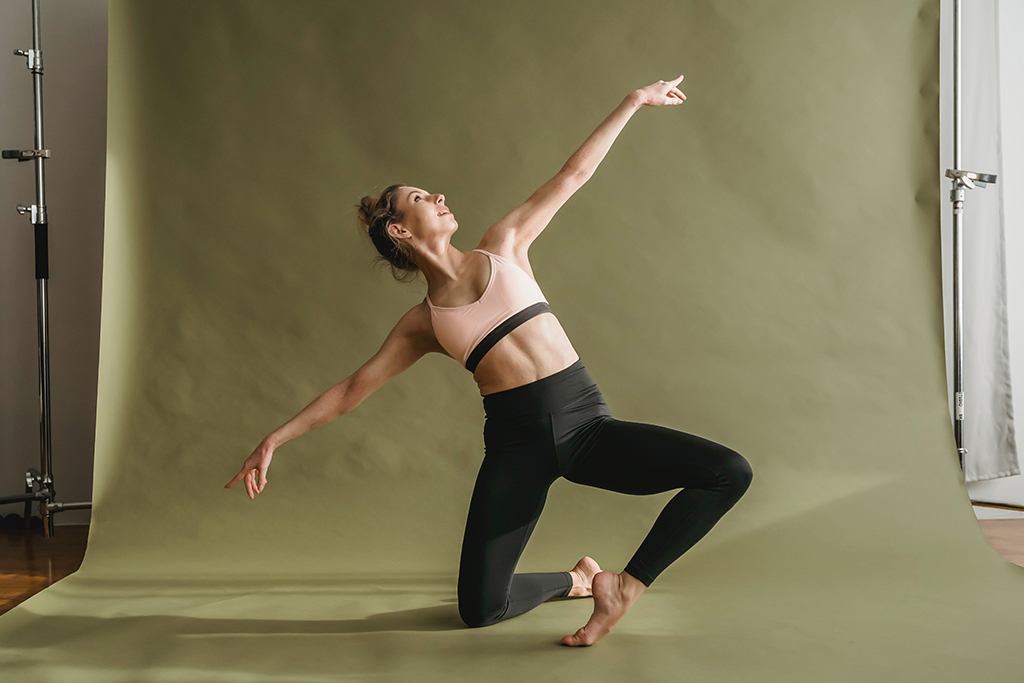
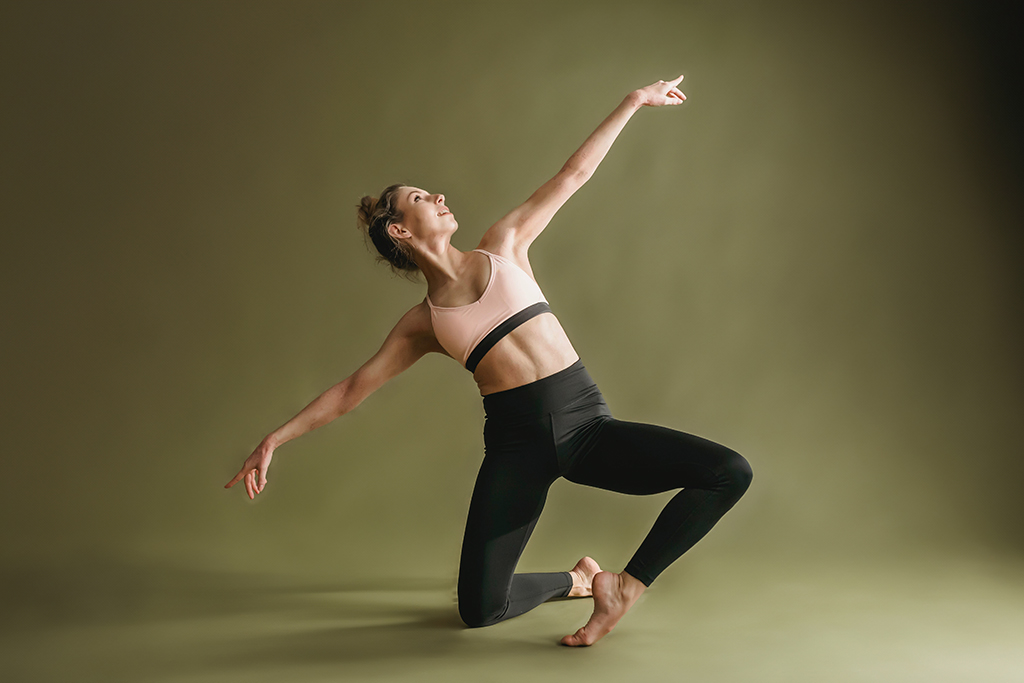
Paper and fabric backdrops never look as clean in the file as they did in the studio. Creases show, seams appear, the light falls off unevenly toward the edges, and there is almost always a stand leg or a strip of floor in shot that has to go.
Fixing that used to mean careful cloning across a large, subtly graded surface — one of the more thankless retouching jobs, because any inconsistency in a smooth backdrop is immediately visible. Generative Fill handles it well, and there are two specific tricks that make the difference between a clean result and a patchy one.
The Basic Approach
-
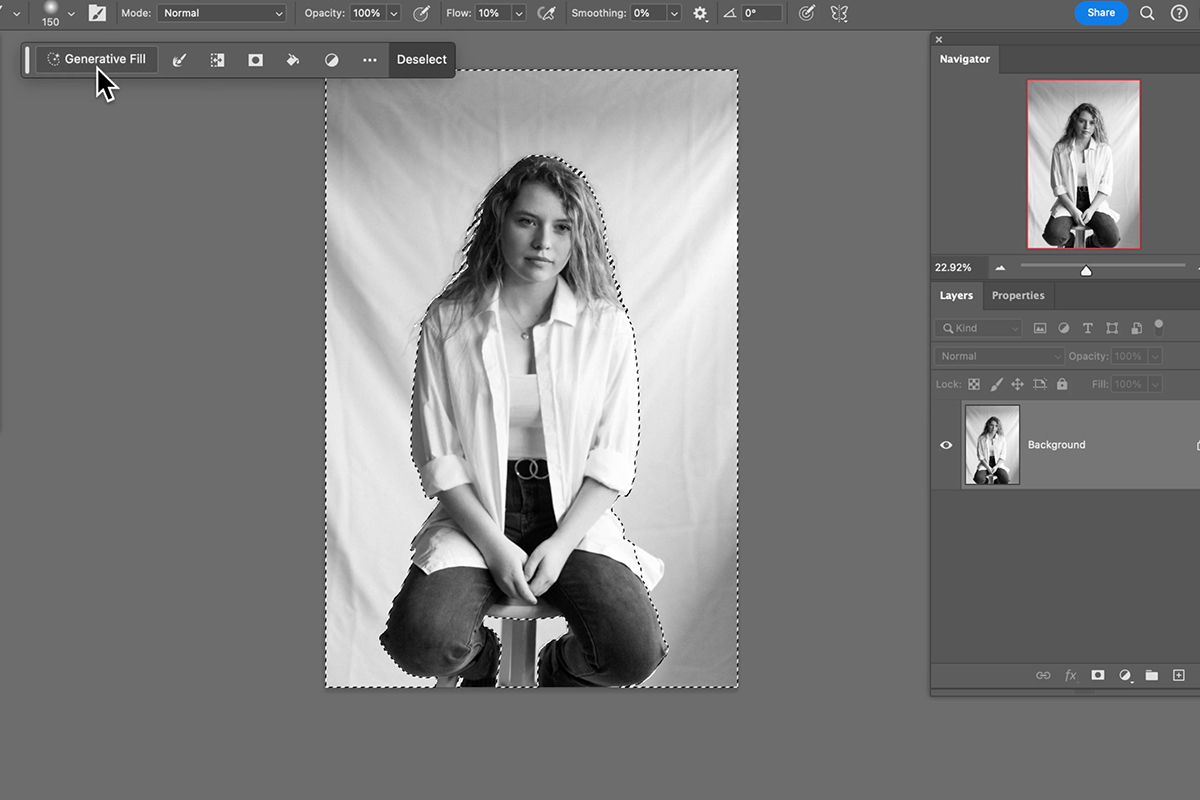
Make sure the contextual task bar is showing
If it is not on screen, turn it on under Window, then Contextual Task Bar.
-
Click Select Subject
Photoshop isolates the person or product automatically.
-
Refine with the Lasso Tool
Press L, then hold Shift to add to the selection or Alt or Option to subtract. Check the edges — hair especially.
-
Expand the selection slightly before inverting
Go to Select, then Modify, then Expand, and add a few pixels. The reason for this is covered below and it matters.
-
Inverse the selection
Select, then Inverse. You now have the backdrop selected instead of the subject.
-
Click Generative Fill and generate
With or without a prompt — both are useful, see below.
Why you expand before inverting
This is the tip most worth taking away. A selection that sits exactly on the subject’s outline leaves a one-pixel fringe of old backdrop color hugging them once you invert — and that fringe survives the generation, showing as a faint halo around the subject against the new clean backdrop.
Expanding the subject selection by a few pixels first means the inverted selection starts slightly further out, so the generated backdrop replaces that fringe rather than working around it. It costs one menu command and removes the most common flaw in this whole technique.
Prompt or No Prompt
Both work, and they do different things.
Leave it empty to clean up what is there
An empty prompt tells Photoshop to remove and extend rather than invent. It will smooth out creases, remove a stand leg, and even out the falloff while keeping the backdrop essentially the one you shot — same color, same character, just without the problems.
This is the right choice when the backdrop is fundamentally fine and you are fixing imperfections.
Use a prompt to change the backdrop
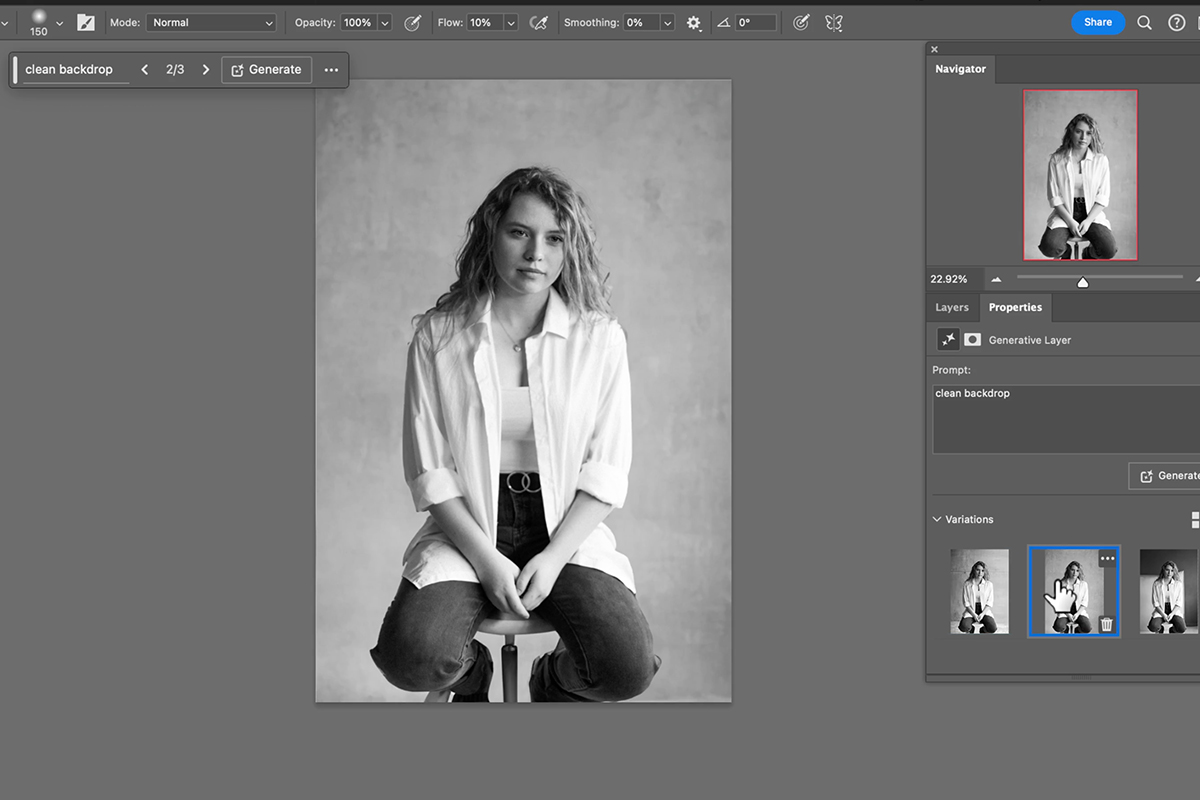
Short and concrete works best: clean backdrop, plain background, studio backdrop, dark studio backdrop. Naming the tone — dark, light, gray, warm — gives you real control over the result, and it is how you turn a mid-gray seamless into something closer to what the shot needed.
It is worth generating several times. Backdrops are large, smooth areas where small differences in gradient and tone matter a lot, and the variations can differ more than you would expect.
Extending the Backdrop with Generative Expand
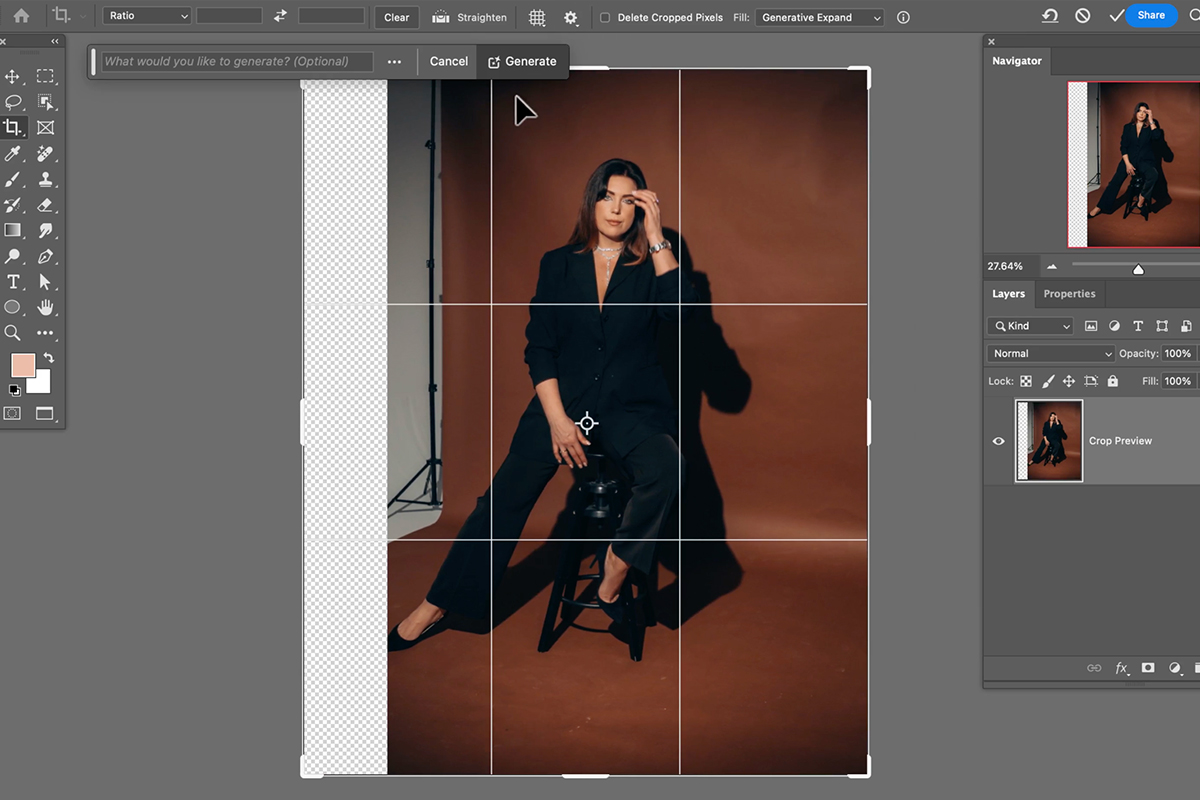
The other common backdrop problem is running out of it — the paper does not reach the edge of the frame, or you need a wider crop than the set allowed.
Press C for the Crop Tool, set the Fill option to Generative Expand, and drag the crop boundary out past the edge of the image. Photoshop builds backdrop into the new space, matching the tone and gradient of what is already there.
Two settings to get right: leave Delete Cropped Pixels unchecked so the crop stays adjustable, and make sure the Fill dropdown is actually set to Generative Expand rather than left empty.
Smooth backdrops are the ideal case for this. There is no complex detail to reconstruct, so the AI mostly has to continue a gradient — which it does reliably.
Refining With Layer Masks
Every generation arrives on its own layer with a mask, and that mask is the tool for anything the AI did not get quite right.
If a generation cleaned the backdrop beautifully but slightly softened an edge of the subject, paint black on the mask over that area to bring the original back. If it fixed one crease and missed another, you can stack a second generation over the top rather than redoing the first.
This layered approach is generally faster than chasing a single perfect generation, and it leaves you with a file you can still adjust.
More Free Compositing Tutorials
If this was useful, these go further in the same direction:
- How to Create a Composite in Photoshop — building the layered file first.
- Compositing Highlights, Shadows and Reflections — making an added element sit in the scene.
- How to Use the Select and Mask Workspace — cleaner cut-outs, which compositing depends on.
- How to Create and Use Layer Masks — confining an effect to exactly where it belongs.
- How to Make Realistic Shadows in Photoshop — the shadow that anchors an object.
- How to Use Select Subject in Photoshop — the selection engine behind most cut-outs.
Practical Notes
Work in sections on large backdrops
Selecting an entire large backdrop and generating it in one go asks the AI to produce a lot of area at its capped resolution, and the result can come back softer than the rest of the file. Generating in two or three overlapping sections keeps the detail up.
Watch the shadow
If your subject casts a shadow onto the backdrop, decide deliberately whether to keep it. Generating the whole background usually removes it, and a subject with no shadow against a studio backdrop can look oddly detached. Masking the original shadow back in is often the better result.
Check the gradient at 100%
Smooth tonal transitions are where generated content most often shows banding. Zoom in and check, particularly on dark backdrops, and add a small amount of noise to the generated layer if you see stepping.
Why This Is Worth Doing
Backdrop cleanup is not creative work, and it used to consume a real share of the time on every studio shoot. Getting it down to a selection and a click changes what is worth shooting — a slightly creased backdrop or a set that is a bit too narrow stops being a problem to solve on the day.
The one habit to keep is checking the result properly rather than trusting it. Large smooth areas are exactly where a generation can look fine at fit-to-screen and show banding or a soft halo at full size.







Enjoying This Free Tutorial? Go Further with PRO.
Unlock Full Sample Files, PSDs, and Hundreds of Masterclasses!

Download full project assets, original PSDs, and RAW images for every lesson
Unlimited access to our complete library of PRO Photoshop & Lightroom courses
Instant 4K Ultra HD streaming on all devices, anytime, anywhere
Full access to our entire library of Photoshop Actions, Presets, and LUTs
Flexible monthly and annual membership plans
Cancel anytime with zero hassle or commitments