Download Assets
description
Learn how to fix color casts in portrait photos using Photoshop! In this tutorial we’ll show you how to use Color Balance adjustment layers to achieve natural-looking skin tones in your portraits in a few easy steps.
Go PRO:
Take your portraits to the next level with our in-depth PRO tutorial The Beginner’s Guide to Portrait Retouching Using AI & Traditional Tools.
Artist Credit
- Athena
- Umutcan
- Onur Bahadir
- Collis
Images sourced from Pexels.
Share
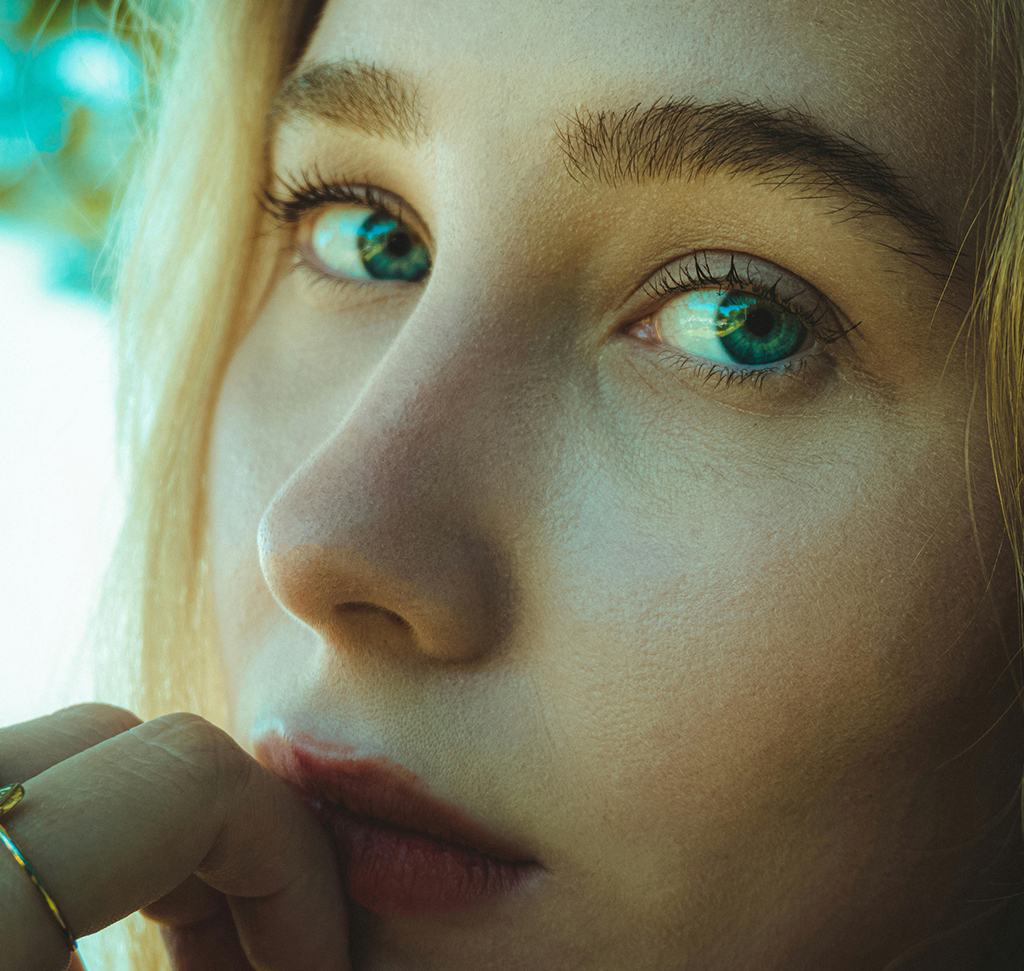
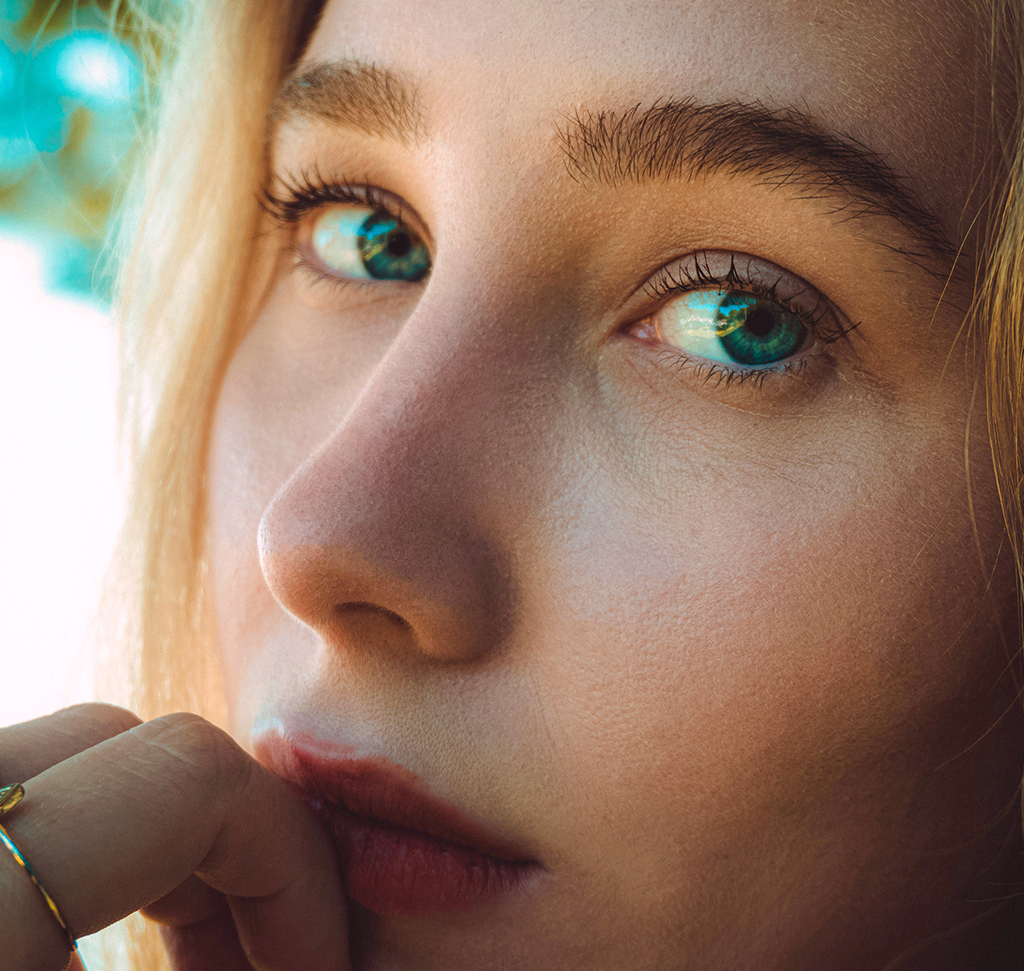
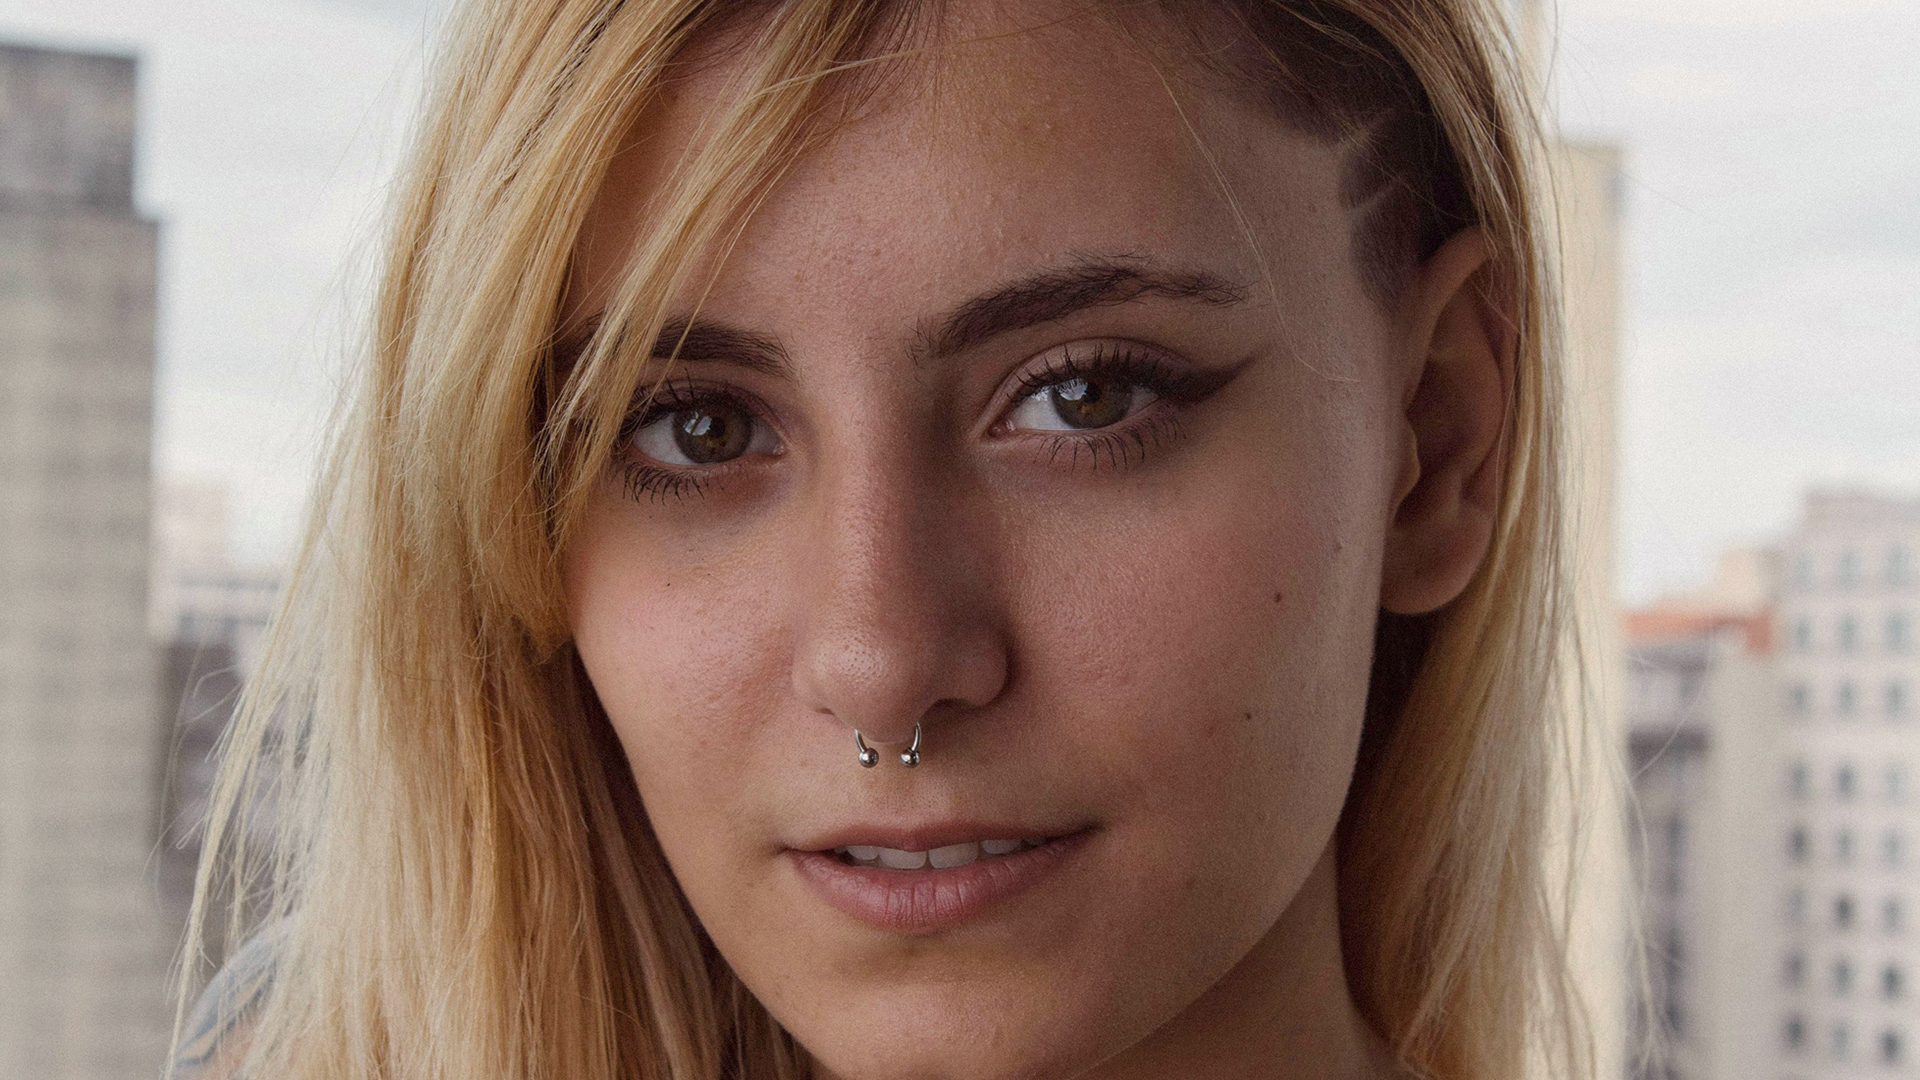
AFTER
BEFORE
Balanced Colors, Every Time!
In this tutorial we’ll walk you through using Color Balance Adjustment Layers in Photoshop to enhance your portrait images by creating natural-looking skin tones.
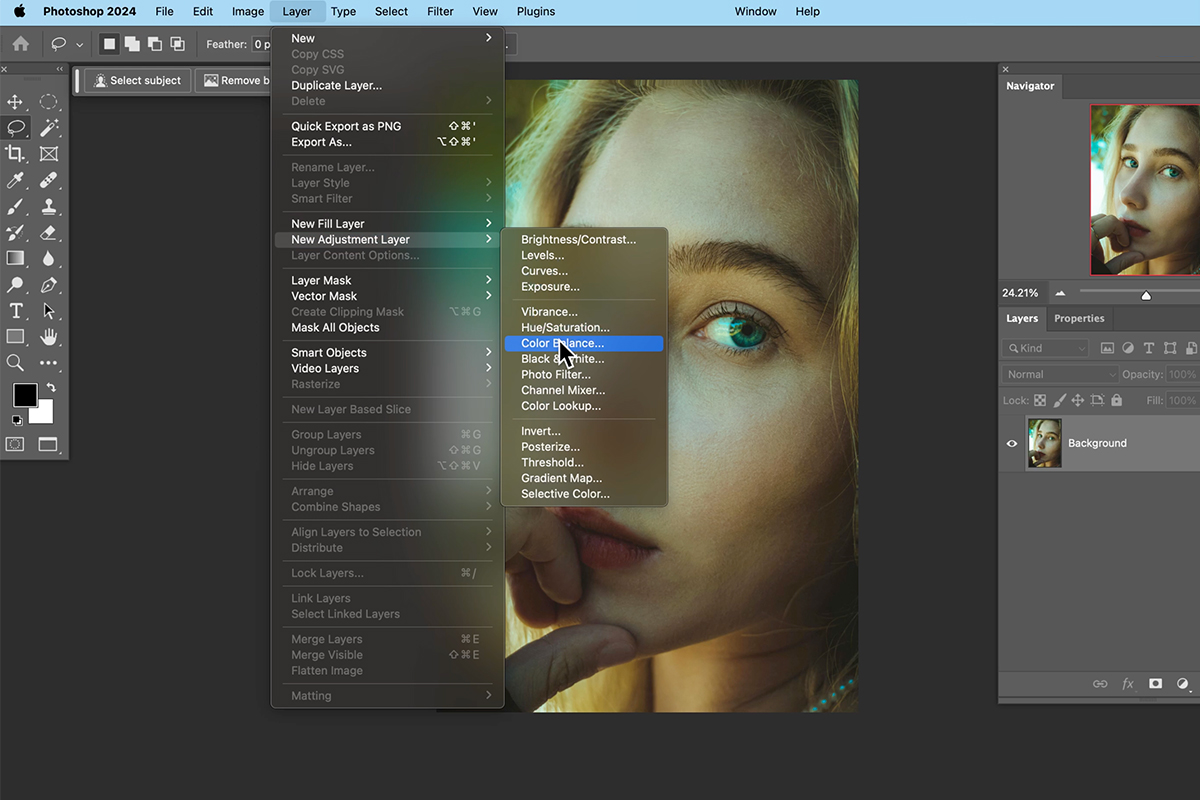
Adding a Color Balance Adjustment Layer
1. Open your portrait photo in Photoshop.
2. Zoom in on your subject’s face for better precision while adjusting colors.
3. In the Layers panel, click the “Create a new adjustment layer” icon.
4. Select “Color Balance” from the menu. This creates a new adjustment layer specifically for color balancing.
Making Adjustments for Natural Skin Tones
Throughout this process, focus on your subject’s skin tone on the image, not the specific slider values.
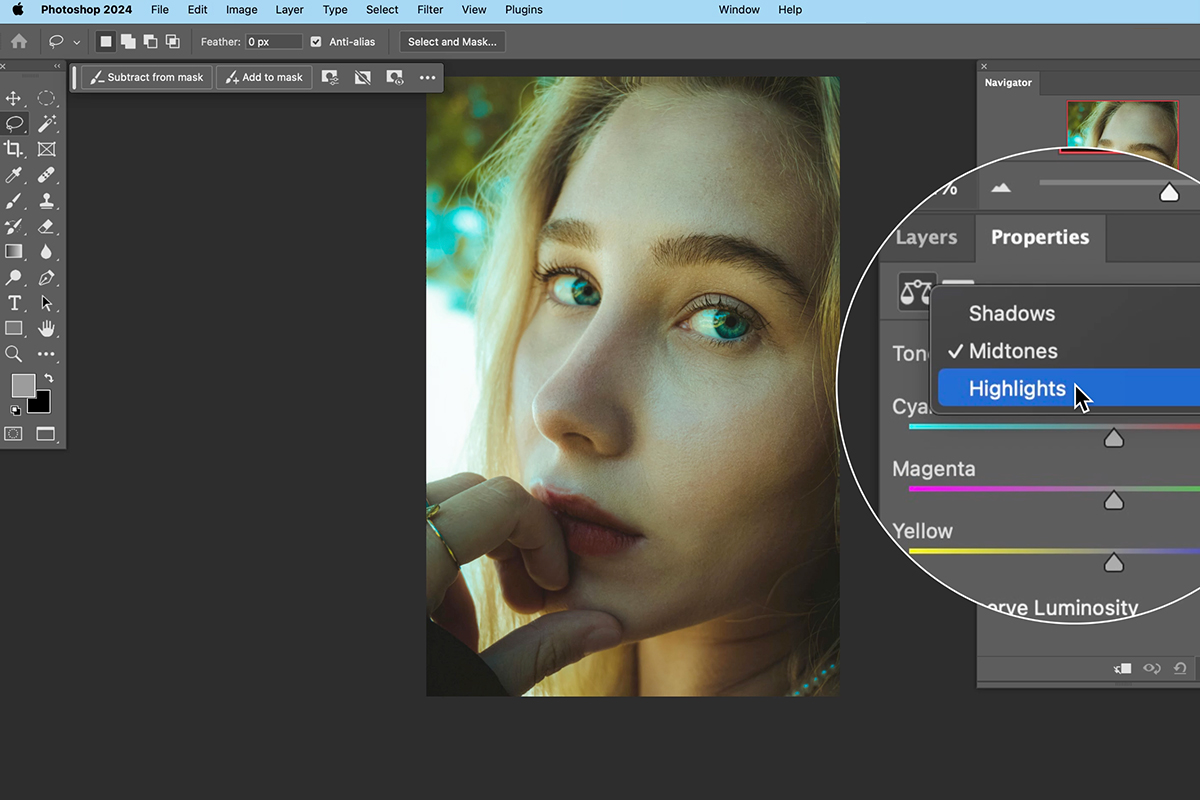
5. In the “Properties” panel, locate the sliders under “Highlights.”
6. Click on a slider and drag it left or right while observing the impact on your subject’s skin.
7. Aim for natural-looking skin tones. Avoid going too far in either direction, which can create unnatural colors.
Repeat these steps for Midtones and Shadows if needed. Always pay close attention to how color casts affect the shadows on your subject’s face. Aim for a neutral and natural look.
To assess the effectiveness of your edits, the Layers panel provides a handy trick. Click the eyeball icon next to the Color Balance Adjustment Layer. This lets you toggle its visibility on and off, allowing you to easily compare the adjusted version with the original image.
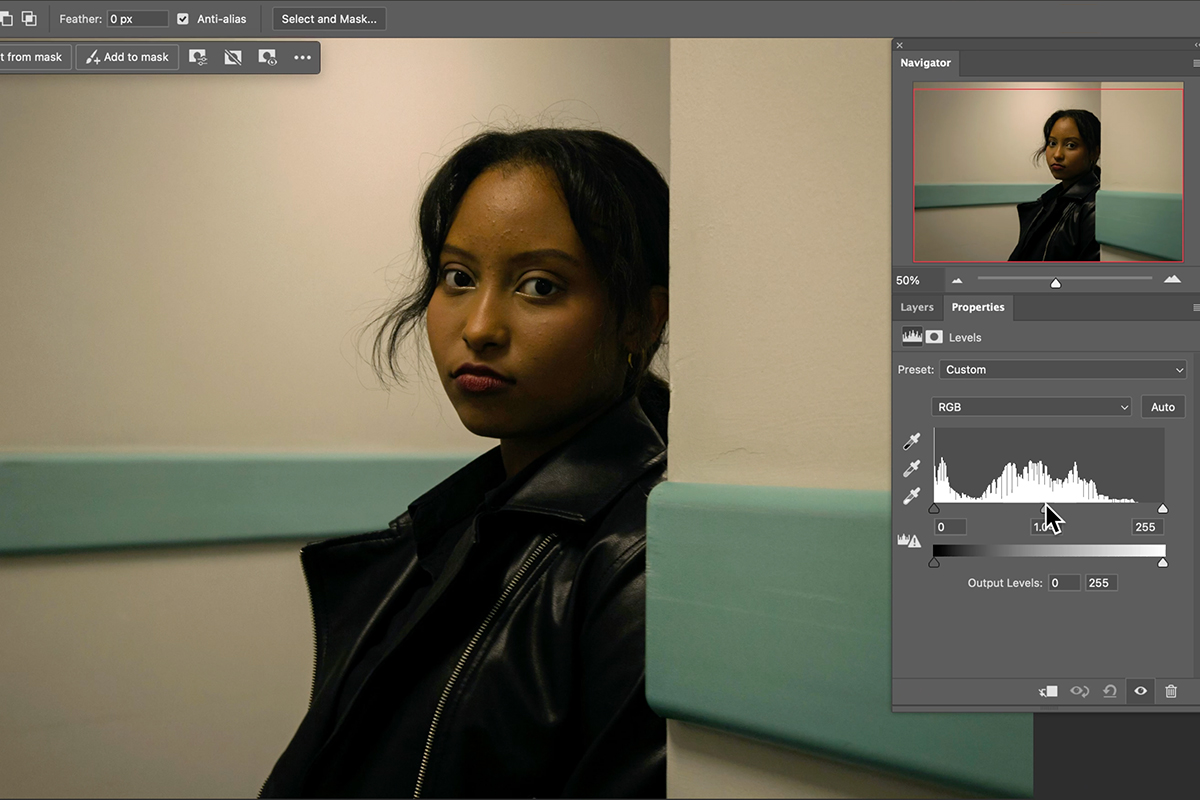
Using Levels Adjustment Layers
Sometimes your image might require additional adjustments beyond Color Balance. In these cases, Levels Adjustment Layers can be a helpful next step. They provide precise control over the overall brightness and contrast of your image. Think of Levels as a histogram that shows the distribution of light and shadows in your photo. By moving the sliders, you can target specific areas:
Brighten shadows: Move the black input level to the left to recover detail in dark areas.
Darken highlights: Move the white input level to the right to reduce blown-out highlights.
Adjust midtone contrast: Move the middle gray slider to control the overall image contrast.
Additional Tips
With practice, using Color Balance Adjustment Layers will become second nature, allowing you to consistently achieve natural-looking skin tones in every portrait.
Embrace Experimentation: Remember, color correction is subjective. Feel free to experiment with the sliders to achieve the look you prefer, while keeping natural skin tones in mind.
Temperature Control: You can create a warmer or cooler image by adjusting the sliders accordingly.
Correct Lighting First: If the image has a strong color cast throughout, consider using Levels Adjustment Layers before Color Balance to address the overall lighting first.
Fight Color Fatigue: Take breaks while editing to avoid color fatigue, which can affect your judgment of the colors you see on screen.
Revisit and Refine: The Color Balance Adjustment Layer is always editable. You can revisit it later and make further adjustments if needed.


