Download Assets
description
Learn to automate your Photoshop workflow with Actions! This tutorial will teach you how to create and customize actions to streamline your editing process. As a bonus, you’ll learn to create a stunning split color effect and receive a free downloadable action.
Go PRO:
Interested in learning more about Photoshop? Explore our exclusive Photoshop Learning Path. From the fundamentals to advanced techniques, this comprehensive guide will help you make the most of this powerful software and bring your creative vision to life.
Image Source
- Cotton Bro
Images sourced from Pexels.
Share
AFTER
BEFORE
Automate Your Workflow
Photoshop Actions offer a myriad of benefits for photographers and creatives alike. By automating repetitive tasks, you can significantly reduce editing time and increase productivity. Following this guide, you’ll gain a clear understanding of the process and even learn to create a Split Color Effect Action.
Getting Started
1. Open the Actions panel by clicking Window > Actions.
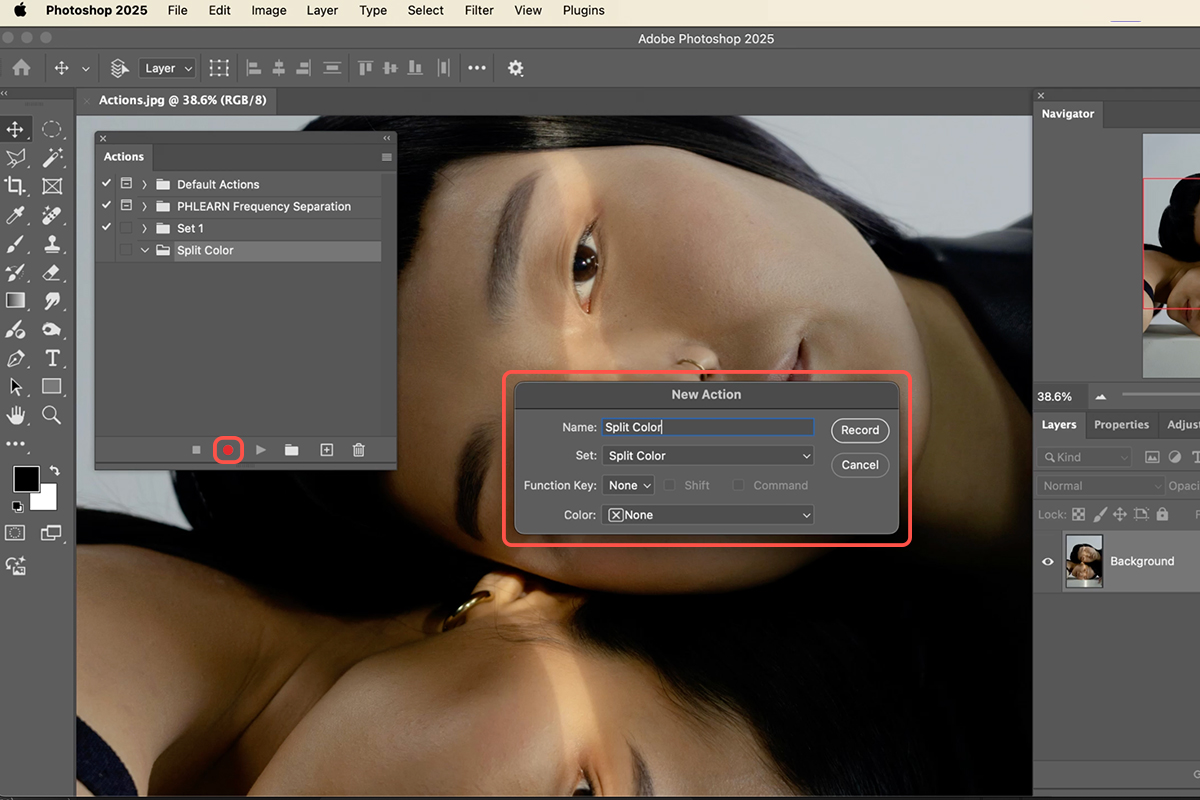
2. Create a new folder and action. Click the folder icon, name it “Split Color”, then click the “+” icon and name it “Split Color”.
3. Click the “record” button (red circle) to start recording your actions.
4. Create a new layer above your background. Go to Layer > New > Layer.
5. Go to Image > Apply Image to copy the background content to the new layer.
Define the Split Color Effect
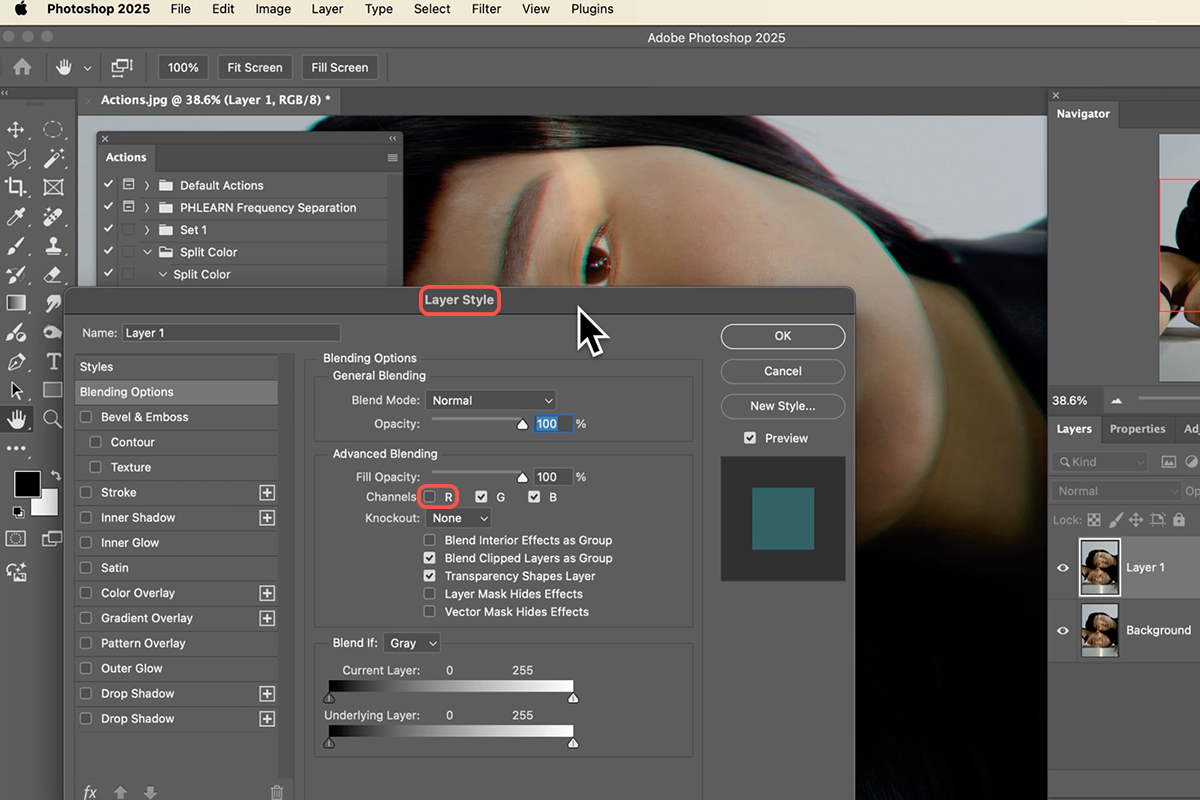
6. Double-click the new layer in the Layers panel.
7. In the Layer Style settings, uncheck the “Red” channel under Blending Options > Channel. This hides the red channel, creating the initial split color effect.
8. Click “OK” to save the changes.
9. Stop recording the action.
Add Movement with Optional Blur
To add dynamic movement, follow these steps:
10. Resume recording.
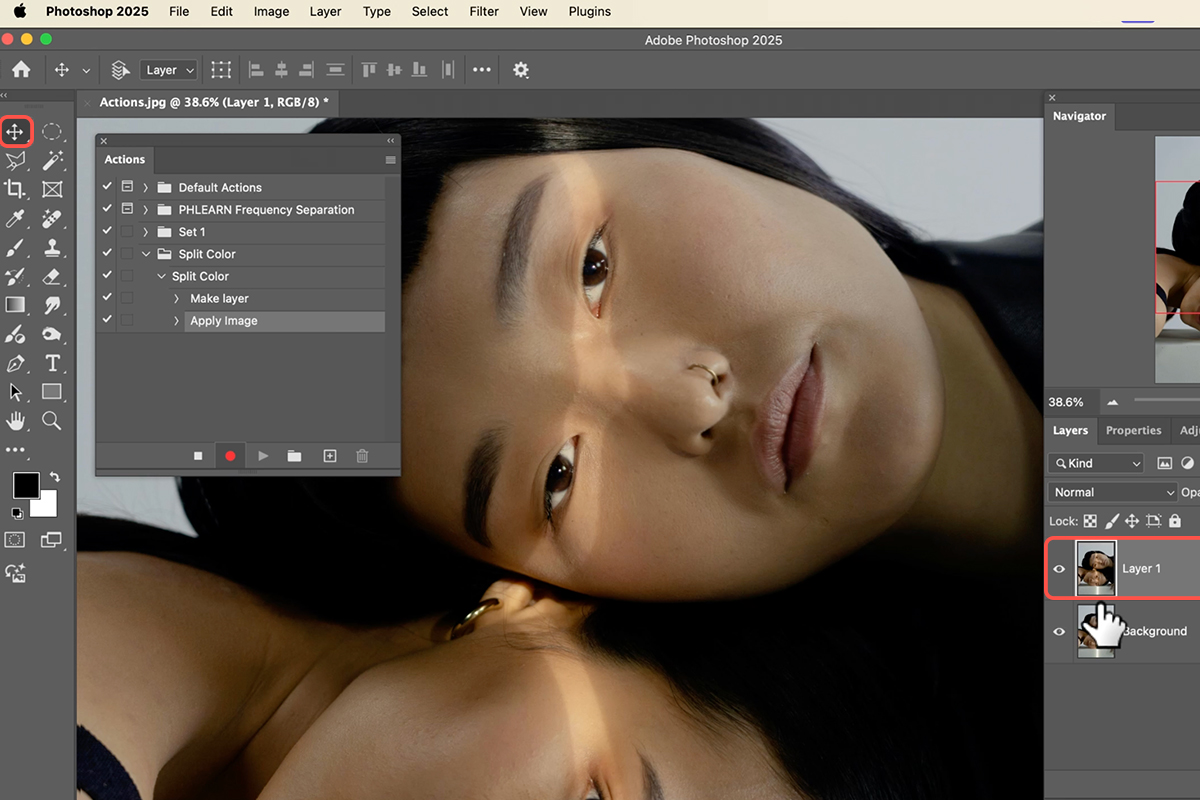
11. Shift the copied layer a few pixels to the right using the Move Tool (hold “Shift” and use the right arrow key).
12. Stop recording.
13. Click “record” again.
14. Go to Filter > Blur > Motion Blur. Adjust the blur amount (e.g., 290 pixels) and angle.
15. Click “OK” on the Motion Blur dialog box.
16. Stop recording.
Duplicate and Adjust the Other Side
17. Click “record” again.
18. Duplicate the layer you just moved (Keyboard Shortcut “Ctrl/Command + J”).
19. Move the duplicated layer a few pixels to the left using the Move tool (hold “Shift” and use the left arrow key).
20. Stop recording.
21. Repeat steps 6 through 16 (double-click, uncheck “Green” channel instead of red, apply blur if desired) for the duplicated layer.
Testing Your Action
To test your action, delete all the layers you created during recording. Then, click “play” on the “Split Color” action. The action should automatically recreate the split color effect on your image.
Save and Share Your Action
To save your action, go to File > Actions > Save Actions. Select a desired location for your action and give it a name. Finally, click “Save” to finalize the process.


