
Download Assets
description
Learn how to create a perfect carousel for social media in Photoshop!In this tutorial we’ll show you how to calculate the dimensions, slice the image, load your images, and export the final product. We’re even including a free carousel template, so you can start creating stunning visuals without any hassle!.
Go PRO:
Discover Photoshop’s full potential with our in-depth PRO Photoshop Learning Path. From the fundamentals to advanced techniques, this comprehensive guide will help you make the most of this powerful software and bring your creative vision to life.
Image Source
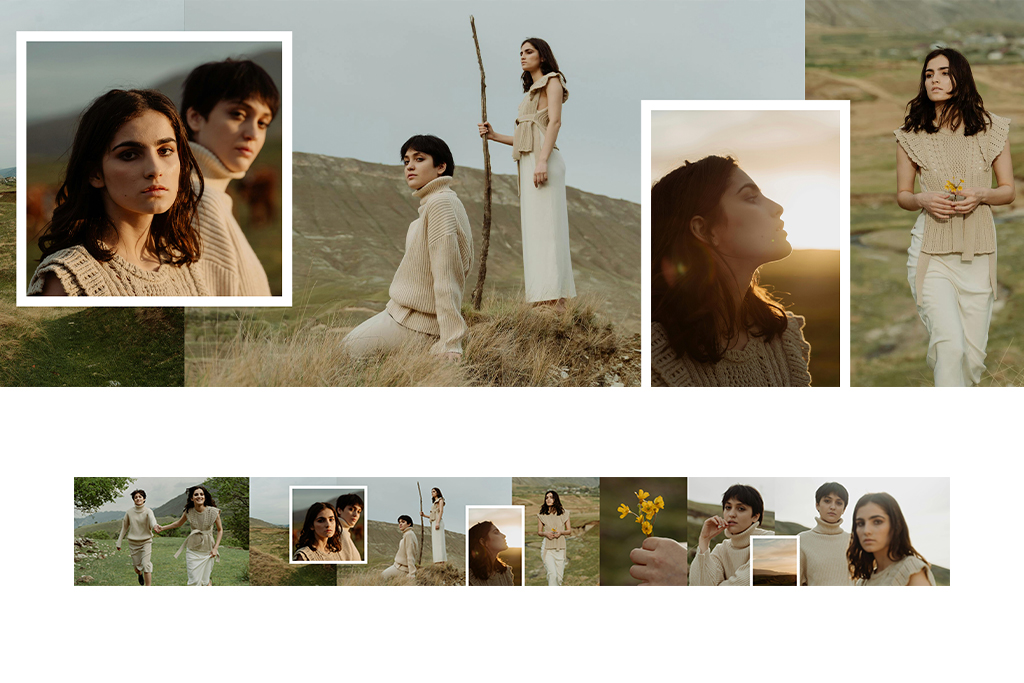
- Cotton Bro
Images sourced from Pexels.
Share
Create The Perfect Carousel
This step-by-step guide will teach you how to design and export visually appealing carousels that grab attention and drive engagement. From choosing the right images to optimizing your content, this tutorial has everything you need to create successful carousels for your brand!.
Determine Image Size
To create visually appealing Instagram carousels, start by ensuring your images adhere to the platform’s recommended dimensions. Instagram has specific guidelines for single images and carousels. Calculate the total width for your carousel by multiplying the single image width (typically 1080 pixels) by the desired number of images. This will ensure your images display seamlessly and maintain a consistent look within the carousel format.
Create a New Document
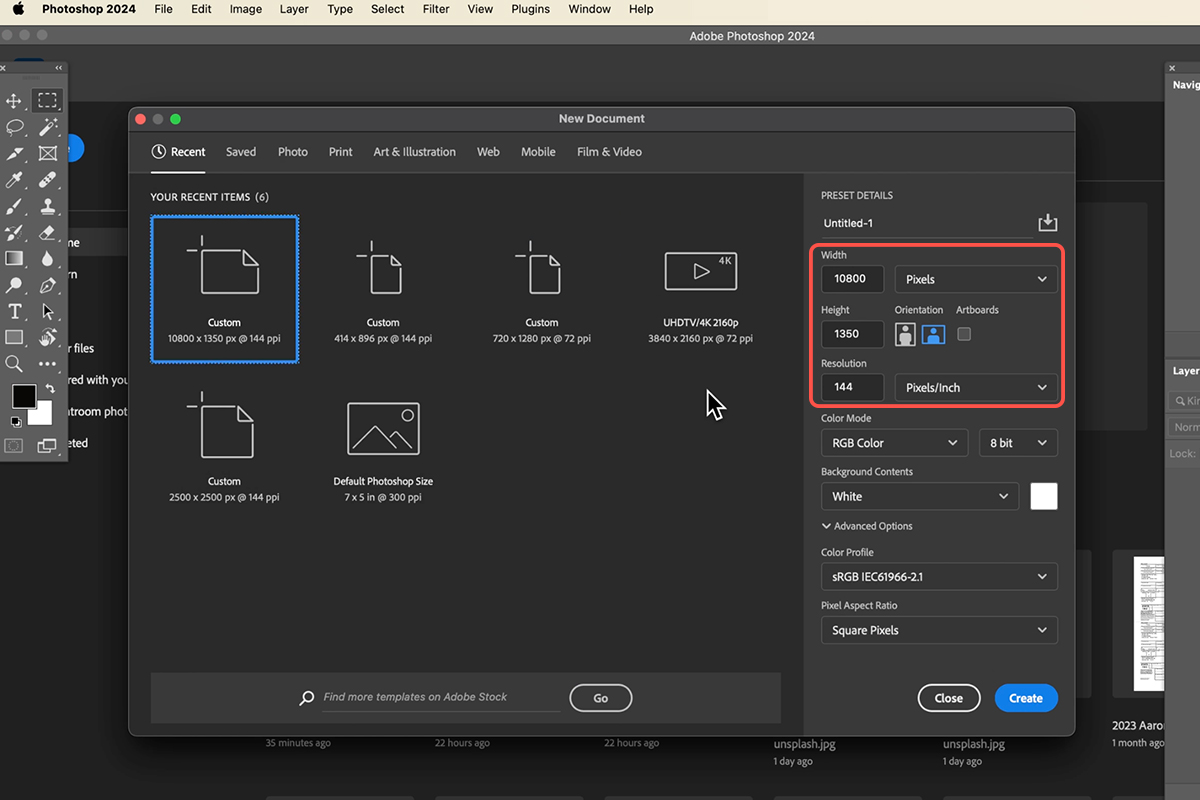
1. Open Photoshop and go to File > New (Keyboard Shortcut “Ctrl+N”).
2. Set the width to the calculated value (e.g., 10800 pixels) and the height to the single image height (e.g., 1350 pixels), and click Create.
Creating Guides
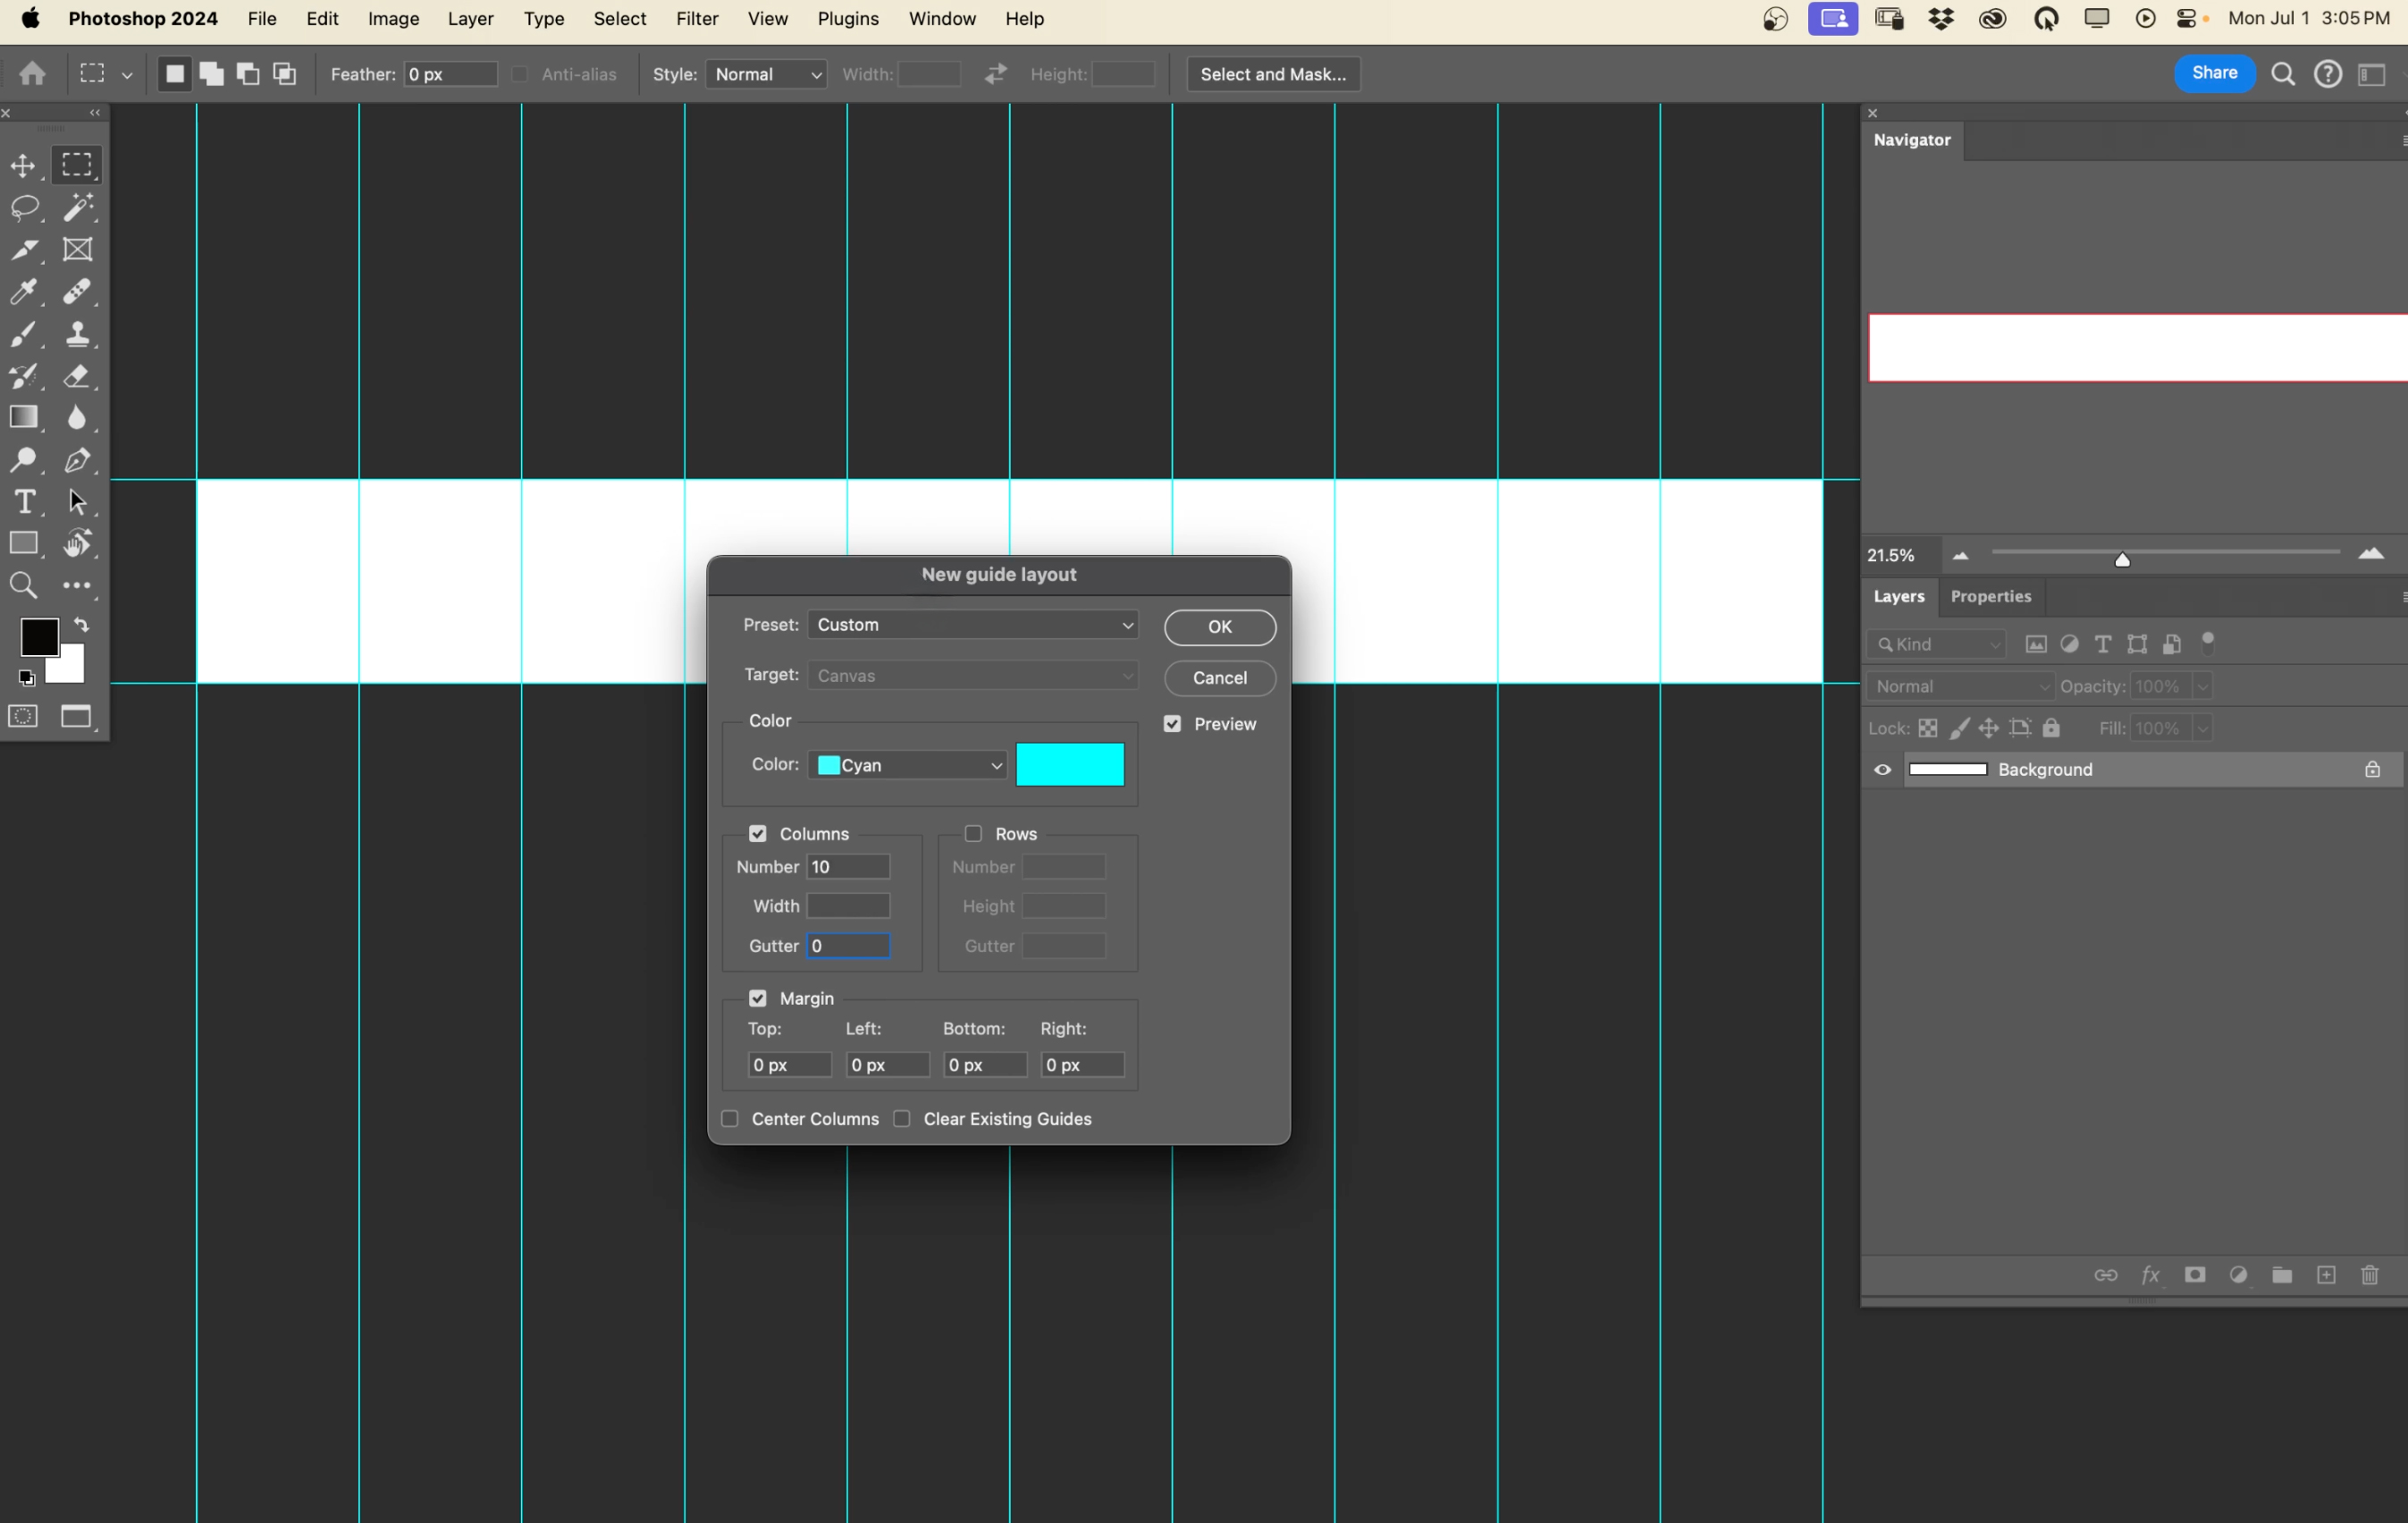
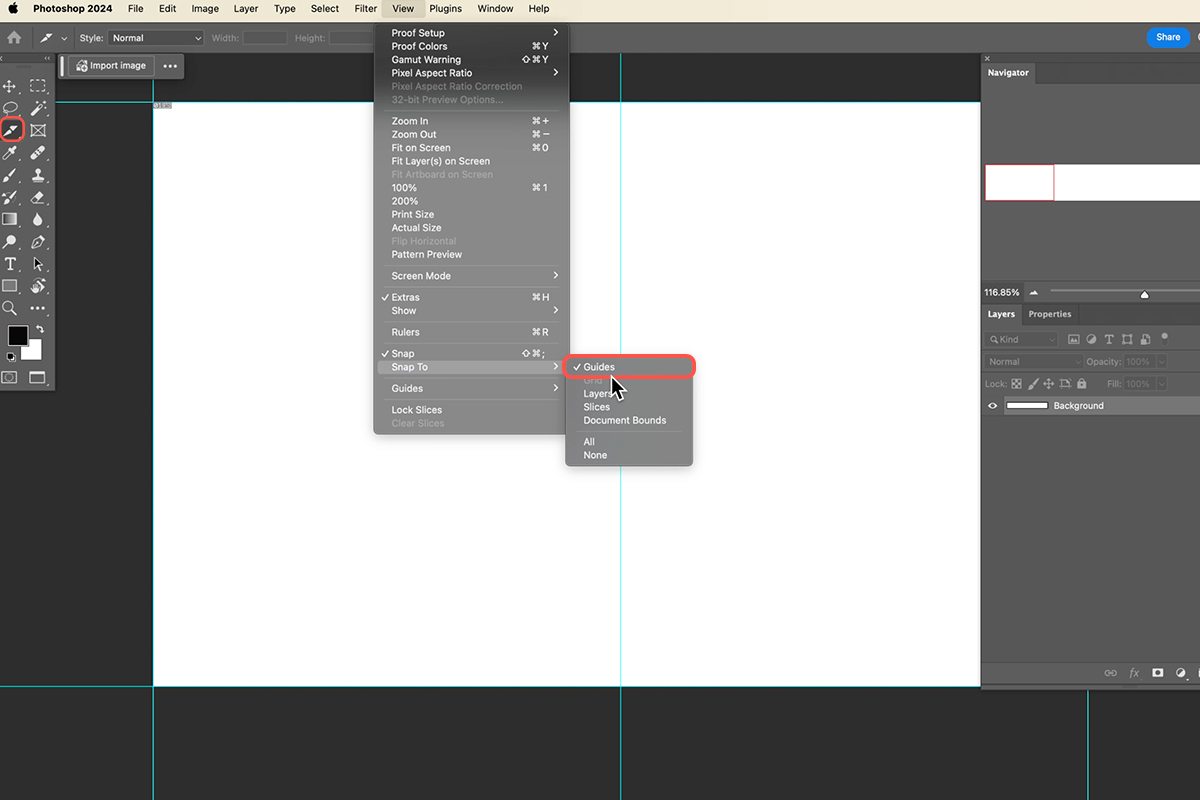
3. Go to View > Guides > New Guide Layout.
4. Set the number of columns to match the desired number of images (e.g., 10).
5. Ensure the Margins are set to 0 to avoid extra space at the edges.
Creating Slices
10. Select the Slice Tool (Keyboard Shortcut “C”).
11. Snap the slice tool to the guides to create evenly sized slices.
12. Hold Spacebar to move the slice while drawing.
Adding & Arranging Images
6. Go to File > Scripts > Load Files into Stack.
7. Select the images you want to use and click Open.
8. Grab the Move Tool (Keyboard Shortcut “V”) and drag the images from the Layers panel into your main document.
9. Use the Transform Tool (Keyboard Shortcut “Ctrl+T”) to resize and reposition the images within their respective guides.

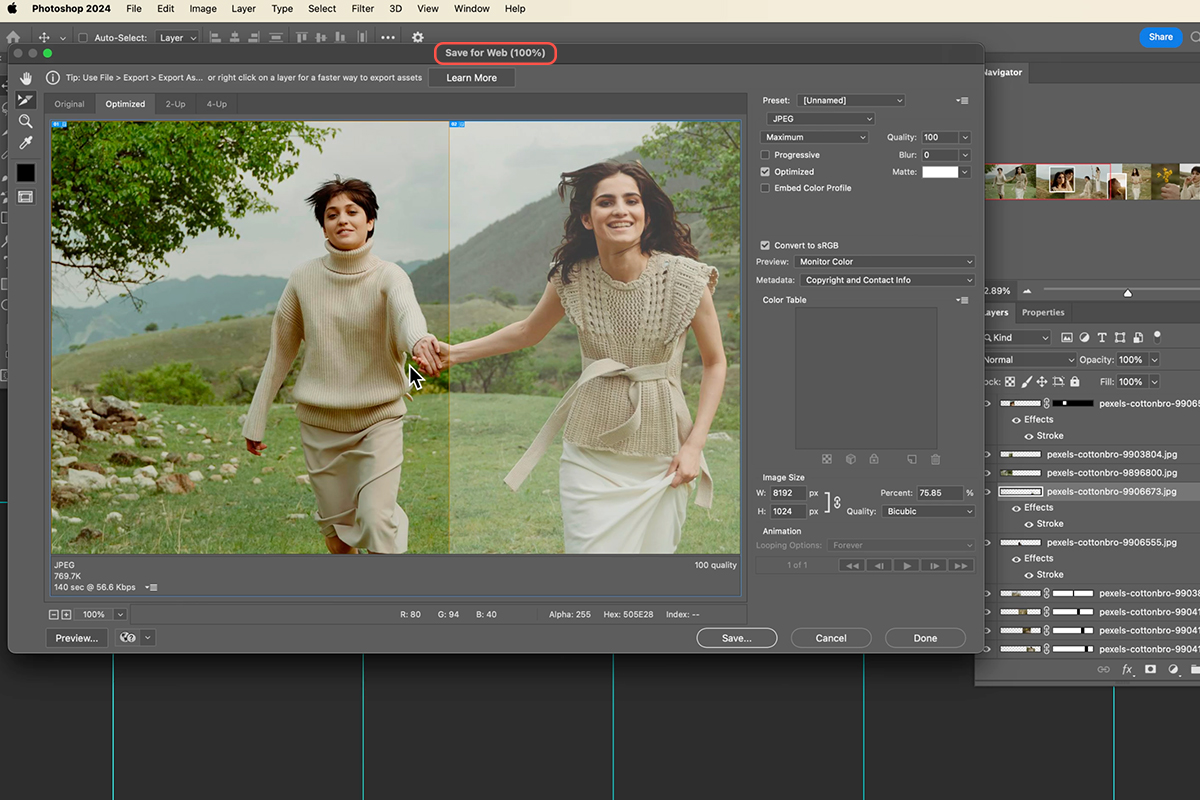
Exporting Images
13. Go to File > Export > Save for Web (Legacy).
14. Ensure the slices are visible in the preview.
15. Adjust settings like Image Size and Quality as needed.
You’re all set! You’re now equipped to create visually stunning and engaging social media carousels. Remember you can always experiment with different layouts, images, and content to find what resonates best with your audience.


