
Download Assets
This tutorial includes 2 sample images and 1 PDF guide. Downloads are free with a PHLEARN account.
- Download the sample images and PSDs from every free tutorial on PHLEARN
- New free tutorials published every week
- One free account — sign up once, then download anything
Free PDF Guide · 2 Pages
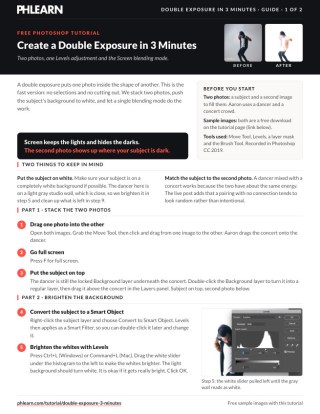
This Tutorial as a Step-by-Step PDF
The guide walks through the fast version: drag the concert onto the dancer, double-click the Background layer and put the subject on top, convert it to a Smart Object, brighten the whites with Levels, set the subject to Screen, move the second photo, mask the face and paint white on a new layer. Keep it next to your keyboard.
description
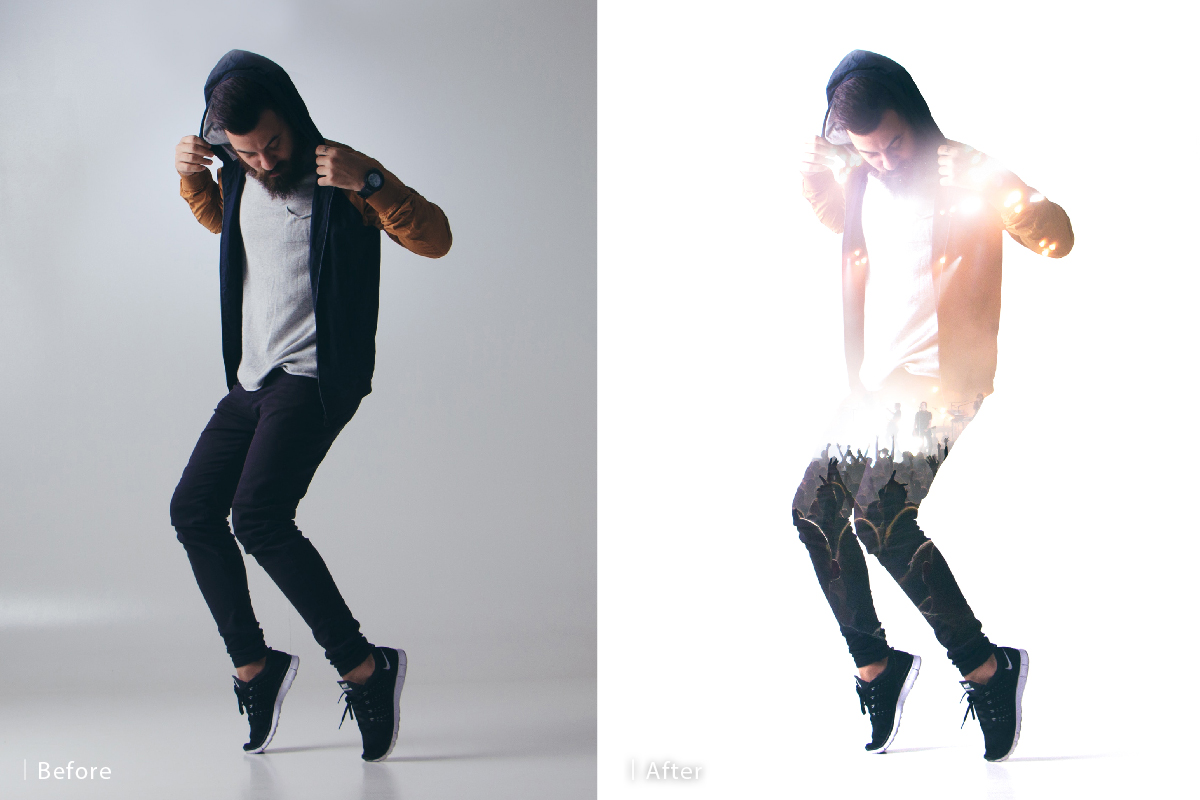
A convincing double exposure comes down to two decisions made before Photoshop is even open: shoot the subject on a plain white background if you can, and pick a second image whose energy actually matches them. From there the blend takes a few minutes with one blending mode and a levels adjustment. Covers brightening the subject’s background, blending in Screen mode, positioning the second image inside the silhouette, and bringing facial detail back with a mask.
Enjoying This Free Tutorial?
We publish a new free tutorial every week, each one with sample images and PSDs you can download and follow along with. Sign up and they land straight in your inbox, along with early word on sales, events and subscriber-only offers.
How to Create a Double Exposure Effect in Photoshop
A convincing double exposure comes down to two decisions made before you even open Photoshop: shoot your subject on a plain white background if possible, and choose a second image whose energy actually matches your subject. From there, the blend itself takes only a few minutes using one blending mode and a simple levels adjustment.
Getting Started: Choosing Images That Work Together
A double exposure reads as intentional, rather than random, when the two images share some kind of visual or emotional connection.
-
Pick a Subject and a Background with Matching Energy
Choose a second image whose mood or subject matter complements your main subject — a dancer paired with a concert crowd, for instance, works because both carry similar motion and energy. A mismatched pairing tends to feel arbitrary rather than intentional.
-
Bring Both Images into One Document
Use the Move Tool to click and drag your second image into the same document as your subject, then press F for full screen. Your subject is still the locked Background layer underneath, so double-click the Background layer to turn it into a regular layer, then drag it above the second image in the Layers panel.
Brightening the Subject’s Background
Because the blend relies on hiding dark tones and revealing light ones, the subject’s background needs to be as close to pure white as possible before moving on.
-
Convert the Subject Layer to a Smart Object
Right-click the subject layer and choose Convert to Smart Object, so the brightness adjustment that follows stays editable afterward.
-
Brighten the Whites with Levels
Press Ctrl + L on PC (Cmd + L on Mac) and pull the white point up until the subject’s background reads as close to pure white as possible — it’s fine if it gets very bright, since that’s exactly what the next step needs.
Blending the Two Images with Screen Mode
With the background pushed toward pure white, the Screen blending mode does the actual work of combining the two images.
-
Change the Subject Layer’s Blending Mode to Screen
Change the subject layer’s blending mode from Normal to Screen. This hides the layer’s dark tones completely while keeping its light tones visible, letting the second image show through wherever the subject layer is dark. The white background stays white.
Why Screen Mode Is the Key to This Effect
Screen mode compares the subject layer and the layer beneath it, keeping the subject’s light areas visible and making its dark areas invisible, so the layer underneath shows through. Because the subject’s background was pushed to near-white, that background simply stays white, while the subject’s own dark areas, like hair and clothing, give way to the second image underneath.
Positioning the Background Image Within the Subject
Once Screen mode is active, moving the background layer around changes exactly what part of it appears within the subject’s silhouette.
-
Reposition the Background Layer
Select the background image layer and use the Move Tool to reposition it until the most interesting or relevant part of that image lines up with the subject. The second image only shows up inside the subject, so slide it until the best part sits inside the figure. On screen, Aaron also scales the concert down with Free Transform to fit the lights into the torso.
Bringing Back Facial Detail with a Layer Mask
Screen mode alone can leave a subject’s face too transparent or washed out, so a targeted mask brings key detail back.
-
Add a Layer Mask and Paint Black Selectively
Add a layer mask to the second-image (concert) layer and paint black with the Brush Tool over areas — typically the face — where you want the original subject to show through more solidly, completing the illusion without losing the double-exposed texture everywhere else.
Masking Works the Same Way for Any Feature, Not Just the Face
While the face is the most common area to bring back, the same masking approach works for any part of the subject you want to read more solidly — hands, a logo on clothing, or any other detail that matters to the final composition.
Filling In Any Remaining Gaps
Depending on how evenly lit the original subject photo was, a few small areas may not have picked up the Levels adjustment evenly.
-
Paint White on a New Layer for Missed Spots
Create a new layer above everything, press B for the Brush Tool, and paint white over any area that didn’t get filled in properly by the earlier Levels adjustment. If your subject was photographed on a fully white background to begin with, this step usually isn’t needed at all.
Trying This on More Elaborate Double Exposures
Once this quick version feels comfortable, the same Screen-and-Levels foundation extends to more elaborate double exposures with several blended layers, additional color grading, or more deliberate masking — the core mechanism stays the same even as the complexity increases. How to Master Double Exposure in Photoshop covers that more advanced version in depth.
Common Mistakes to Avoid With This Technique
The most common mistake is pairing two images with no real connection to each other — a double exposure works best when the two images share some kind of visual or thematic link, not just because they happen to be on hand. The second is skipping the Levels adjustment and applying Screen mode directly to a subject photographed on a gray or off-white background, which lets the second image show through the gray instead of leaving a clean white background. If your subject’s face reads as too faint after applying Screen mode, that’s exactly what the layer mask step is for — don’t try to fix it by lowering the layer’s opacity, which would fade the whole effect rather than just the face.
Why This Technique Works
The reason this effect comes together so quickly is that Screen blending mode does almost all of the heavy lifting on its own — once a background is pushed close enough to pure white, it simply stays white under Screen mode while the second image fills the subject’s dark areas, without any manual selection or masking required. That’s a very different approach from manually selecting and compositing a subject onto a new background, and it’s specifically well-suited to double exposure because the goal isn’t a clean cutout at all; it’s a partial, textured blend where both images remain visible at once. The layer mask used to bring back facial detail is really the only manual selection work in the whole process, which is part of why this effect can come together in just a few minutes once you understand what How to Master Blending Modes in Photoshop actually does under the hood.
Final Thoughts
A well-chosen pairing of images matters just as much as the technique itself — Screen mode and a Levels adjustment will blend any two images together, but only a thoughtfully matched pair will look intentional rather than random. Once this quick version feels comfortable, it’s worth exploring more advanced double exposure work that builds in additional masking, color grading, or multiple blended layers for a more elaborate result.
Quick Reference: Keys, Menus and Settings
- Stack the photosMove Tool, drag the concert onto the dancer; F for full screen
- Subject on topDouble-click the Background layer, then drag it above the second photo
- Brighten the whitesRight-click > Convert to Smart Object; Cmd/Ctrl + L, white slider to the left
- BlendSubject layer blending mode: Normal > Screen
- Bring back the faceLayer mask on the concert layer, paint black with the Brush Tool
- Fill the gapsNew layer on top, B for the Brush Tool, paint white
No selections and no cutting out: Levels and Screen do the work.
Free Downloads
Follow Along on the Same Photos
Get the dancer and the concert crowd photos used in the video, plus the 2-page PDF guide with every step. Free with a PHLEARN account.
Double Exposure in Photoshop: Common Questions
What background works best for a double exposure?
A completely white one, if possible. The dancer in the video is on a light gray wall, so Aaron brightens it with Levels and paints white over whatever is left.
How do I choose two photos that work together?
Match the subject to the second photo. A dancer mixed with a concert works because the two have about the same energy; unrelated photos tend to look random.
Which photo goes on top?
The subject. If it is still the locked Background layer, double-click it to turn it into a regular layer, then drag it above the second photo in the Layers panel.
Why convert the subject to a Smart Object first?
Levels then applies as a Smart Filter, so you can double-click it later and change it. Right-click the subject layer and choose Convert to Smart Object.
How do I make a gray background white?
Press Cmd/Ctrl + L for Levels and drag the white slider to the left until the light background turns white. It’s okay if it gets really bright.
What does Screen blending mode do in a double exposure?
Screen keeps the lights of the subject layer visible and makes its dark areas invisible, showing the layer underneath. The white background stays white, and the second photo shows up where your subject is dark.
How do I change which part of the second photo shows?
Select the second photo’s layer and move it with the Move Tool. It only shows inside the subject, so slide it until the best part sits in the figure. Aaron also scales the concert down with Free Transform.
My subject’s face is too faint. How do I bring it back?
Add a layer mask to the concert layer and paint black over the face with the Brush Tool, so the face shows through. Don’t lower the layer’s Opacity, which fades the whole effect.
How do I clean up gray corners Levels missed?
Create a new layer on top of everything, press B for the Brush Tool and paint white over them. If you photographed your subject completely on white, you can skip this step.
Are the sample files free?
Yes, with a free PHLEARN account. You get 2 sample images and 1 PDF guide: the dancer and the concert crowd from the video, plus the 2-page guide.
Master Photoshop, Lightroom and Photography
Join PHLEARN PRO for $12.99 a month or $99.99 a year. Cancel anytime, with a 100% money-back guarantee.





