Download Assets
description
Learn how to use Adobe Camera Raw to add premium color grading presets for stunning results. In this tutorial we’ll show you how to turn your image into a Smart Object, explore different cinematic and seasonal presets, and even adjust how strong the effect is.
Go PRO:
Explore more on coloring with our PRO tutorial Advanced Color Grading in Lightroom & Adobe Camera RAW . Learn to color correct, color tone, and add your own unique style in no time!.
Image Source
- Aliona Barsukova
Images sourced from Pexels.
Share

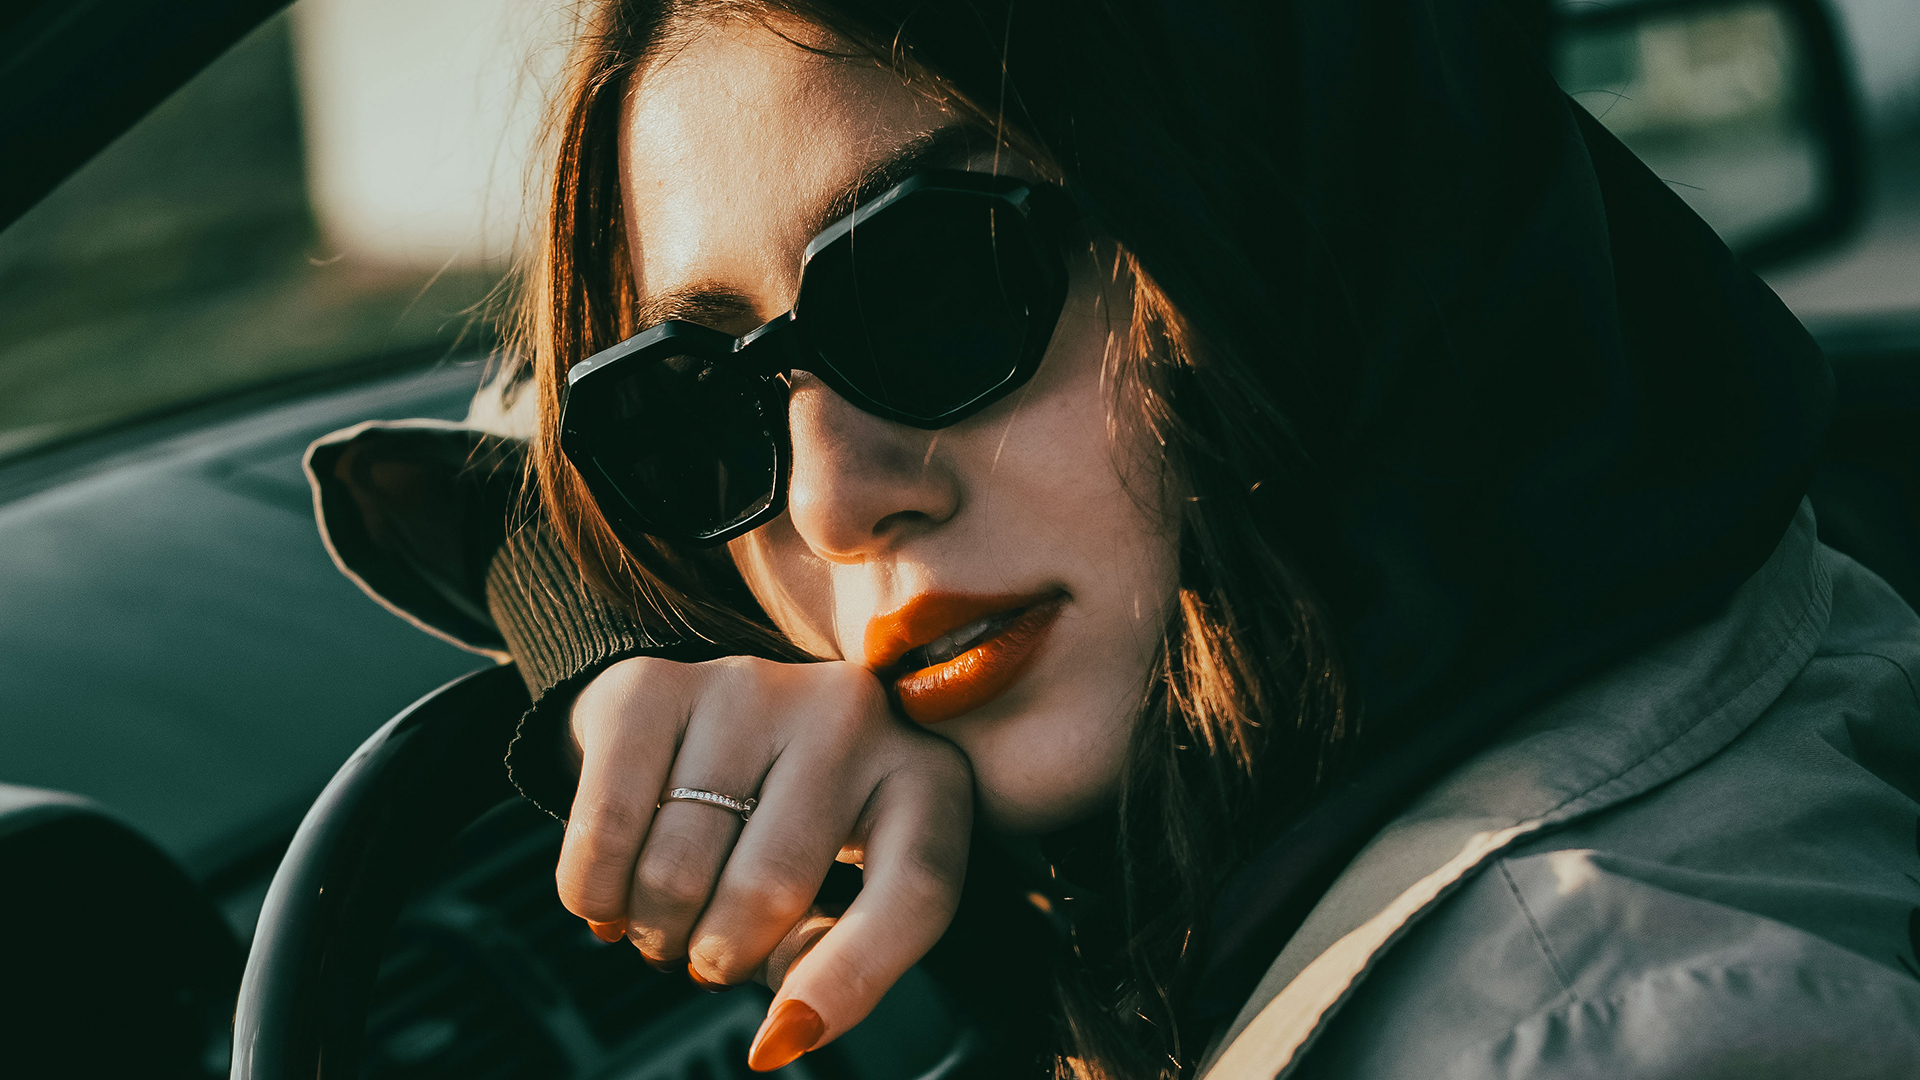
AFTER
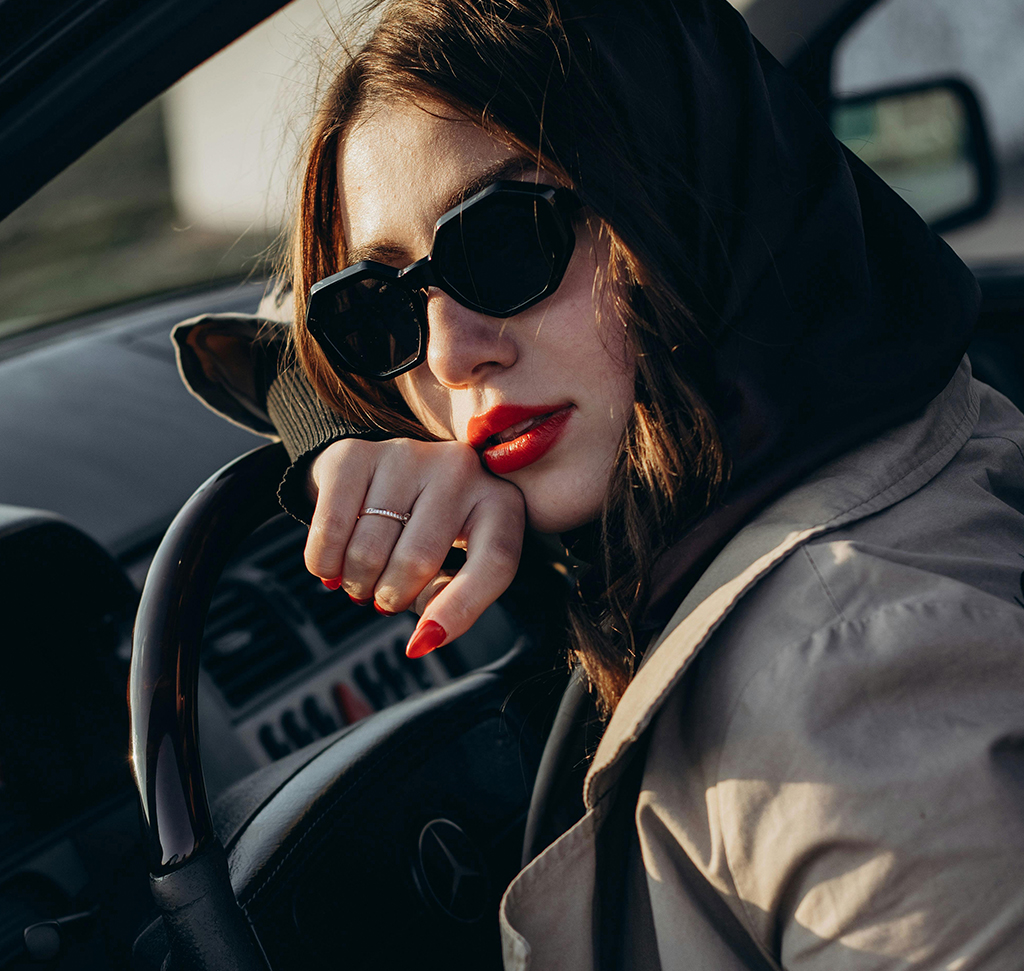
BEFORE
Easy Colors, Instant Impact!
Knowing how to leverage color grading presets in Photoshop offers a powerful advantage for any image editor. These presets provide a rapid and effective way to dramatically enhance the mood, atmosphere, and overall visual appeal of your photographs. Instead of tedious manual adjustments, you can achieve professional-grade cinematic, seasonal, or stylistic looks in just a few clicks, saving significant time while ensuring consistent and stunning results across your work.
Convert to Smart Object
1. Open your image in Photoshop.
2. To enable flexible, non-destructive editing, convert your background layer into a Smart Object. With your background layer selected, go to Layer > Smart Objects > Convert to Smart Object. You’ll see a Smart Object icon appear on the layer thumbnail, indicating successful conversion.
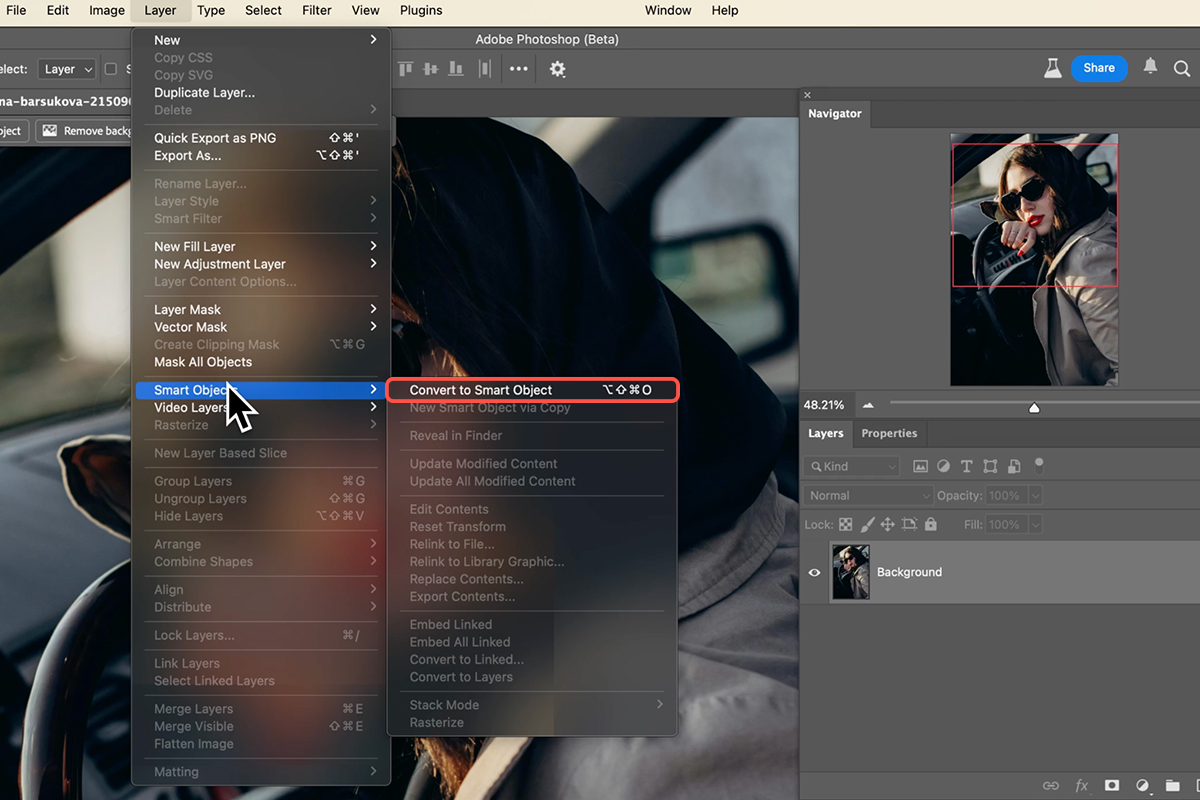
Alternatively, you can right-click on the background layer in the Layers panel and choose Convert to Smart Object.
Select & Apply Presets
Next, you’ll apply the Camera Raw Filter.
3. With your Smart Object layer still selected, navigate to Filter > Camera Raw Filter at the top of your Photoshop interface. This will open the Adobe Camera Raw interface, where you’ll find a wealth of powerful editing tools, including the presets we’ll be using for color grading.
4. Locate the Presets panel on the right-hand side.
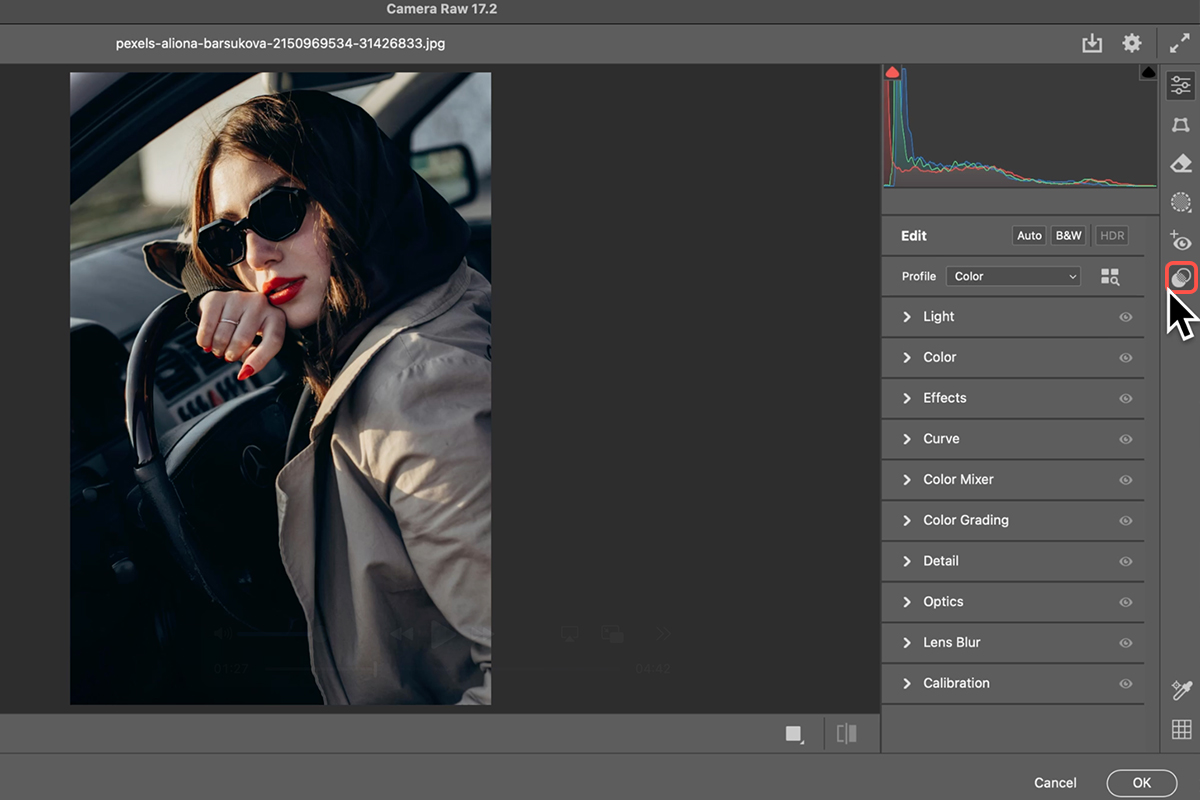
5. Open this panel to reveal various preset categories, including “Seasons” and “Styles.” For stunning color grading, explore options like “Cinematic.” Simply hover your mouse over different presets to see a live preview of how they’ll affect your image.
6. Once you find a preset you like, click on it to apply it. You can then adjust the intensity of the preset by dragging the slider at the top of the preset panel left or right.
Finalize & Adjust
7. After selecting and adjusting your desired preset, click OK in the bottom right corner of the Camera Raw interface. This will apply the color grade as a Smart Filter to your image.

The beauty of this method is that you can easily toggle the effect on and off by clicking the eye icon next to the “Camera Raw Filter” in the Layers panel. To re-edit the color grading at any time, simply double-click on the “Camera Raw Filter” in the Layers panel, and it will reopen the Camera Raw interface with your previous settings.


