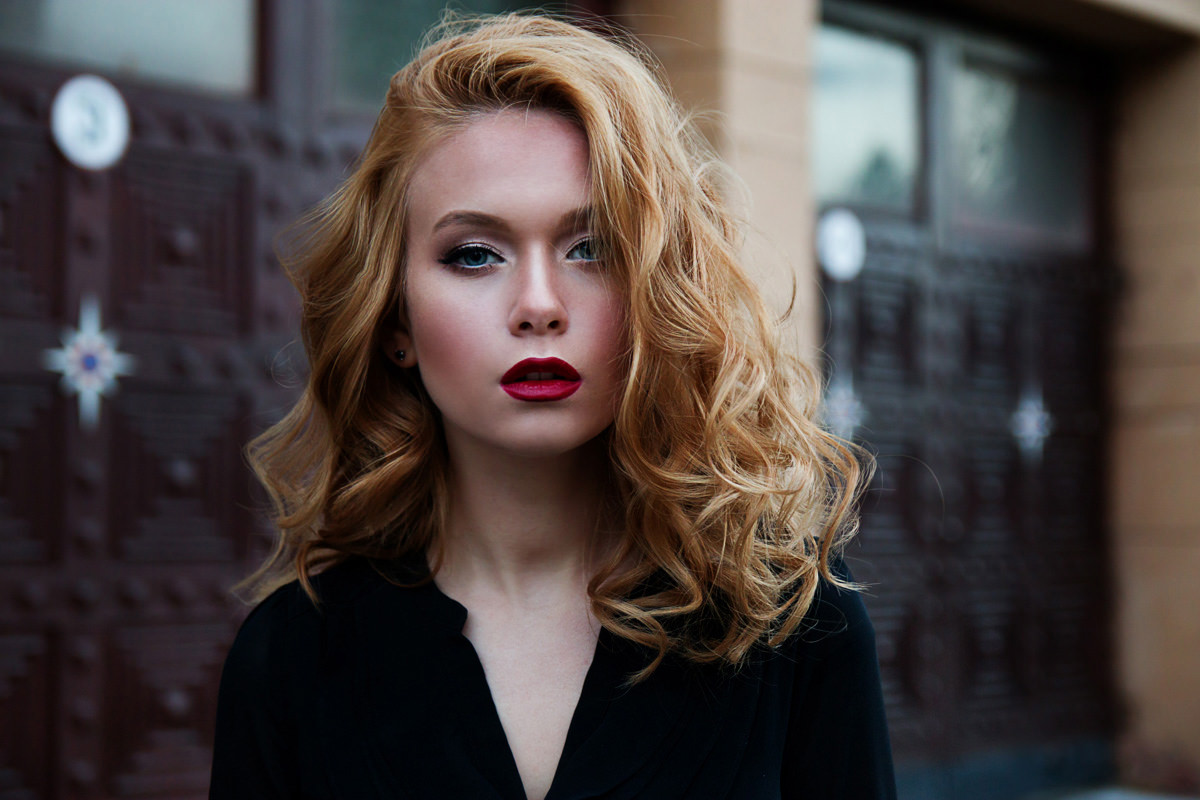
ORIGINAL
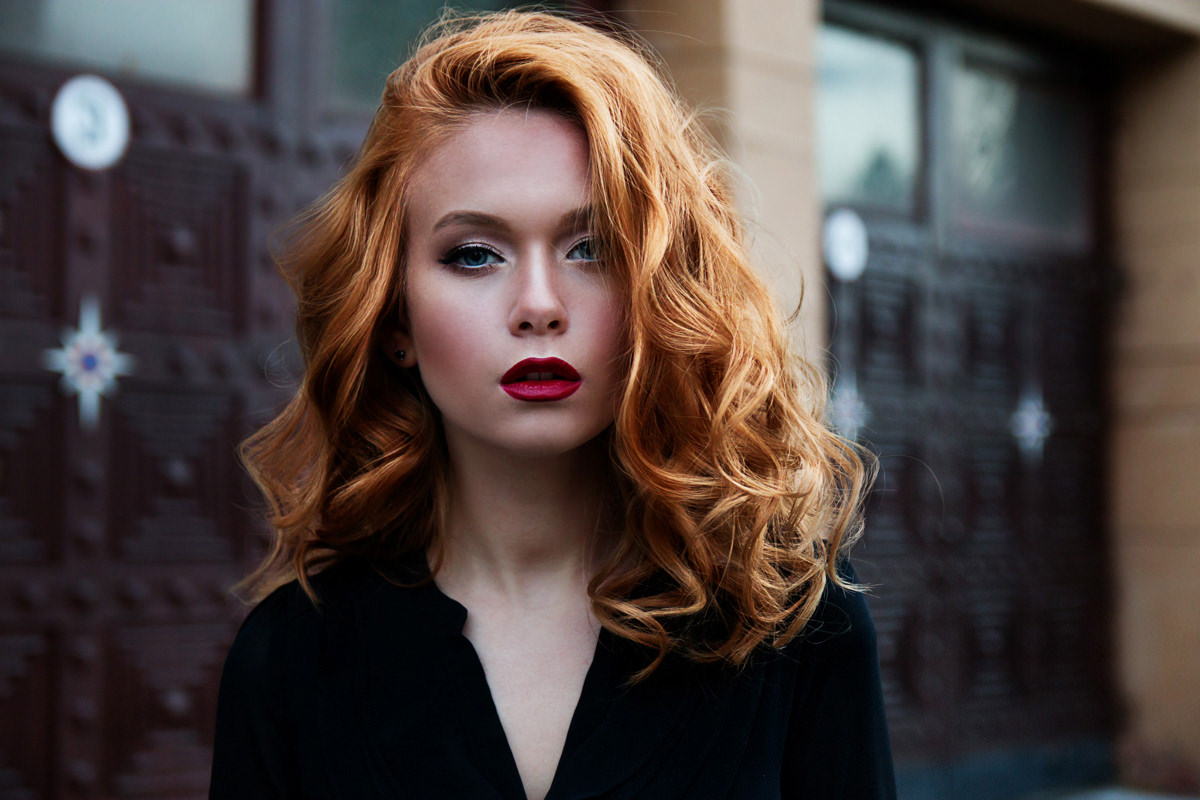
AFTER PHOTOSHOP
Download Sample Images
Click the link below to download the sample images and follow along with this tutorial.
DownloadAdd Volume, Color, Shine and Definition to Any Head of Hair
Hair will always be one the most challenging areas to retouch and enhance. That doesn’t mean that there aren’t some quick tricks to help give it volume and pop with color. In this tutorial, we’ll show you how to increase the volume of hair using the Liquify Tool and color it with one of Aaron’s favorite methods, a Gradient Map.
Like Ice Cream in the Summer
Liquify.
Get it?
Nevermind.
After opening up our sample image, let’s start with the Liquify Tool to help give the hair some shape and volume. The Liquify Tool is extremely powerful and it works by giving you the ability to “push and pull” pixels around an image. Before you begin, be sure to keep these few things in mind:
Always check the background behind your subject wherever you’re using the Liquify Tool. It’s easy to nudge what was once a straight line – like the edge of a building, for example – and make it look uneven and fake. You’re not just affecting your subject, but everything around them as well, so make sure to pay attention to those details.
You also have the ability to freeze any areas that you don’t want to be affected. In this case, our subject’s face is perfect for this option. No matter how slight, any amount of pushing and pulling can make a face look, well, weird. Before you get started, select the Freeze Mask tool and paint over any areas that you want to preserve.
The last key to using the Liquify Tool is to use a large brush size. Large broader strokes will make sure that any curves are soft and subtle, not jagged.
Once you’re ready to go, make short, gentle strokes along areas that you want to appear expanded, in this case, around our subject’s hair. As you work around the head, be sure to compensate for any distortions you make in the rest of the image. For example, if you cause a slight bend in the corner of a building, straighten that bend all the way to the edge of the image.
Keep it subtle and pay close attention to the background and this should give you quick and effective results!
Gradient Maps
If you know anything about Aaron Nace, it’s probably that he wears a onesie to bed, he has hair like a chameleon, and his favorite Star Wars character is Jar Jar Binks. He also really likes Gradient Maps which, I guess, is more relevant here.
Gradient Maps are an amazing way to quickly and effectively color an image. A Gradient Map Adjustment Layer will allow you to independently color the highlights, midtones, and shadows. This creates a natural looking depth and texture.
In this case, we want to only apply the Gradient Map to the subject’s hair. Let’s start by creating an area within the hair where we can test out some gradients. Create a new layer and select the Rectangular Marquee Tool. Create a small rectangular selection within the subject’s hair – large enough to see what the coloring will look like. Next, go to Layer, then New Adjustment Layer, and select Gradient Map. You’re selection should now be the only area colored by the Gradient Map.
Change the Blending Mode for the Gradient Map to either Overlay or Soft Light. In our example, we chose Overlay. Click on the gradient bar in the Gradient Map dialogue. Here you can adjust the colors of the gradient, add additional color, and control what colors affect shadows, midtones, and highlights.
Begin by setting the colors you want for the brightest highlights and darkest shadows. Be sure to keep your highlights bright and your shadows dark! For example, if you color your highlights black, you’ll end up with a very unnatural-looking effect. We made our highlights a bright yellow and our shadows a dark brown. We then added some red and gold shades to our midtones and adjusted them until we got a result we liked.
Have fun with this part! Feel free to experiment with different colors and intensities to see what you come up with. Just remember to keep it looking as realistic as possible.
Once you’ve got something that you like, select the Layer Mask of your Gradient Map Adjustment Layer, fill it with black, and, using the Brush Tool, paint with white (with a soft brush and low flow) over the subject’s hair. From here, you can change the Blending Mode, adjust opacity, or modify the colors of your gradient at any time.
High Definition
We’ve done great so far but we can really make the hair pop with a bit of dodging and burning. Dodging and burning is the process of sculpting and enhancing the highlights and shadows of an object, giving it more shape and dimension.
Go to Layer, New Adjustment Layer, and to Curves. Pull the center of the curve up until the highlights look exaggerated but not blown out. Then hit CTRL or CMD + I to invert the layer mask. Switch back to your Brush Tool and, using white with a Flow of about 10%, paint along strands and curves in the hair where you want to add highlights. Again, subtlety is key so that it doesn’t look Photoshopped. Pay close attention to the natural highlights and shadows in the image and try to replicate and accentuate the their behavior.
Once you’ve finished the highlights, it’s time to do the same with shadows. Follow the same steps as above but rather than drag the curve of your adjustment layer up, you’ll drag it down.
Remember, you can always go back and adjust the colors of your Gradient Map and the opacity of any of your adjustment layers. This is incredibly handy if you find that the changes are a little overdone.