

Download Assets
Download Assets
This tutorial includes 1 sample image, 2 sample PSDs and 1 PDF guide. Downloads are free with a PHLEARN account.
- Download the sample images and PSDs from every free tutorial on PHLEARN
- New free tutorials published every week
- One free account — sign up once, then download anything
Free PDF Guide · 3 Pages
This Tutorial as a Step-by-Step PDF
Walks through cutting out the subject with Select > Subject and Select and Mask, sliding the graphic behind him, then one Drop Shadow at Blend Mode Normal, full Opacity and low Size in a color sampled from the photo, two lighter ones stacked with the plus button, and Alt/Option-dragging the fx badge. Keep it next to your keyboard.
description
Create dynamic drop shadows in Photoshop by stacking three of them on one layer, each at a different distance and softness, and letting Global Light keep them consistent. In this tutorial, we’ll teach you how to give your text depth and dimension with cool text effects using multiple drop shadows. It’s a fantastic skill for graphic designers and creative folks looking to boost their work’s visual appeal!
Enjoying This Free Tutorial?
We publish a new free tutorial every week, each one with sample images and PSDs you can download and follow along with. Sign up and they land straight in your inbox, along with early word on sales, events and subscriber-only offers.
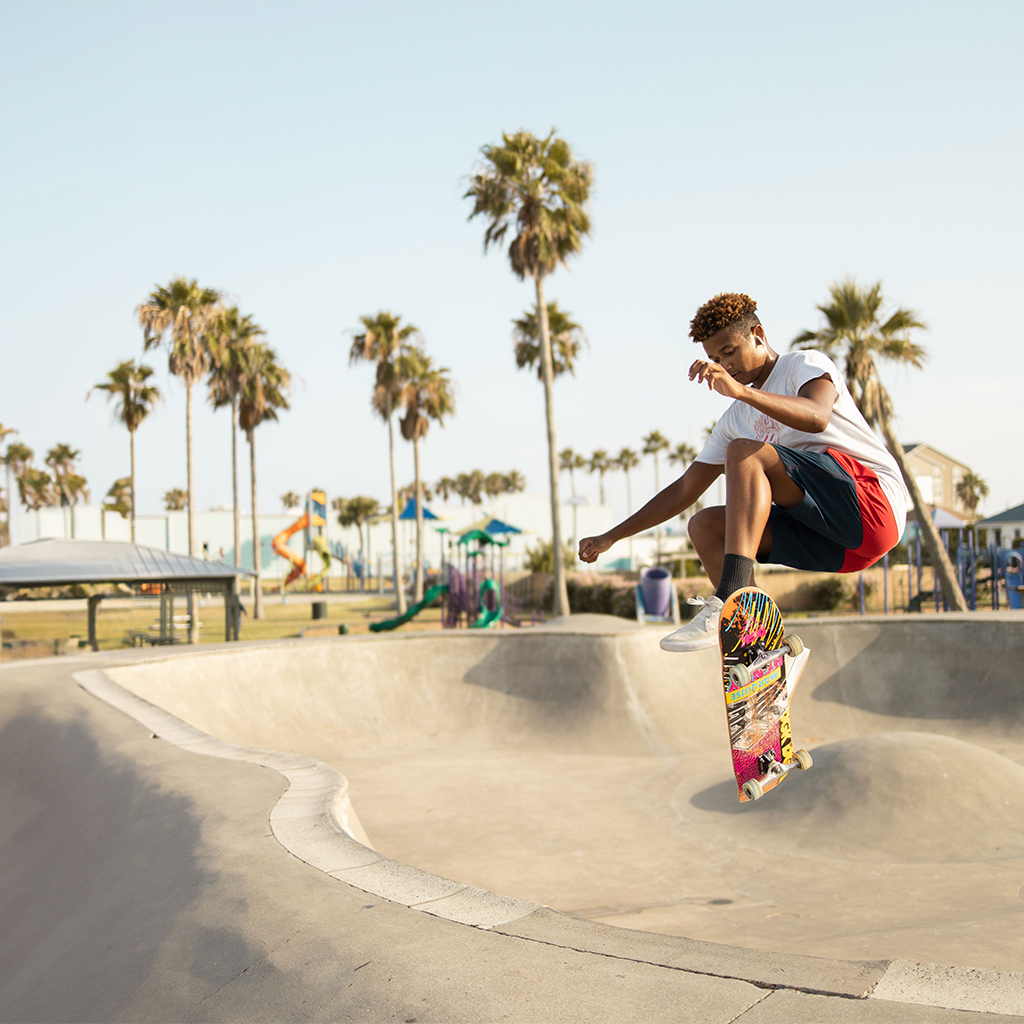

How to Create Dynamic Drop Shadows in Photoshop
You have probably used a drop shadow before. What is easy to miss is that one layer can carry several of them at once.
Stack three on a graphic, give each its own color, from dark to really light, and step each one farther out, and flat text turns into a bold, layered text effect. Tuck the graphic behind your subject and it looks like it belongs in the photo. The same stack can also build realistic composite shadows, covered as a variation below.
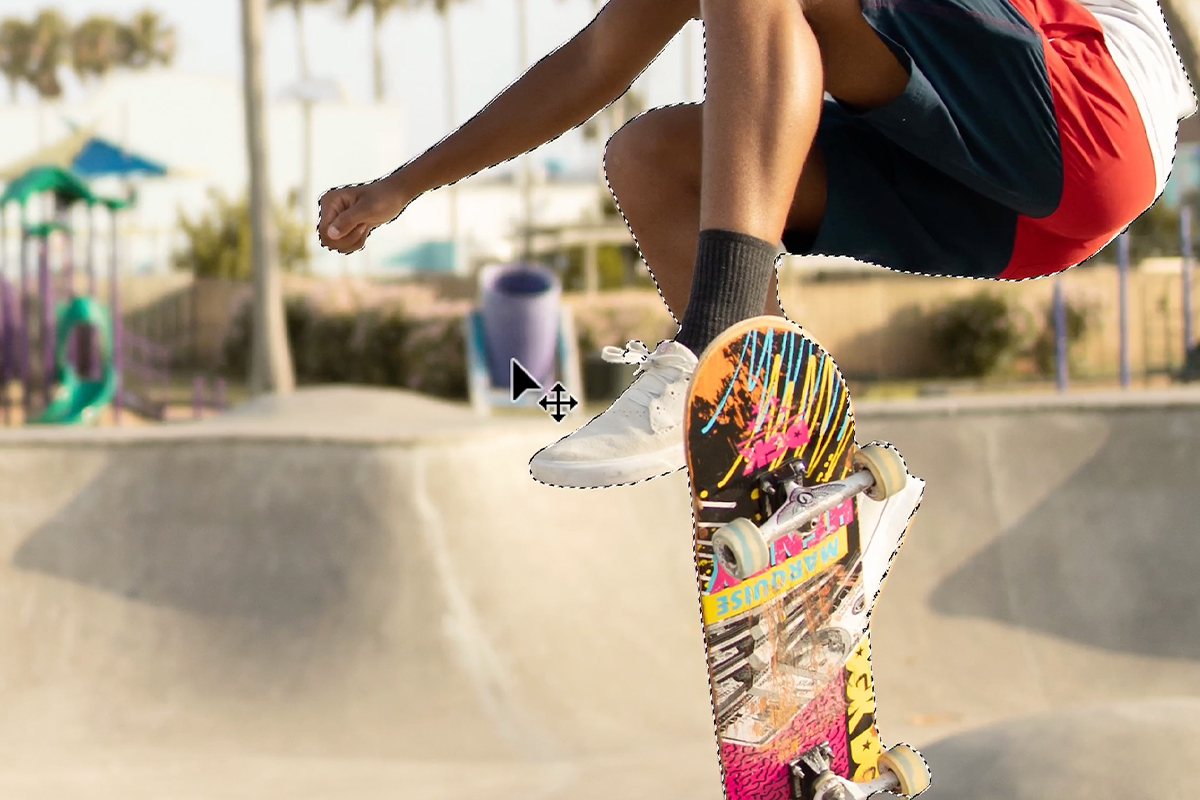
Isolating the Subject
The graphic goes behind the subject, so start with a cutout. With the Move Tool, drag the graphic from its document into the photo, then hide that layer for now and click the Background layer.
-
Run Select, then Subject
Photoshop finds the main subject automatically. This gets you most of the way in one click. Here it missed part of one shoe, which is easy to fix.
-
Refine in Select and Mask
Paint over anything the selection missed, like the shoe, with the round brush. Hold Alt or Option to switch from plus to minus and paint away extras, and resize the brush with the [ and ] keys. For a sharp corner, paint straight over it with minus, then come back with plus and paint the part you want back in. It does not have to be perfect, because the subject only sits in front of the text. At the bottom of the right-hand panel, set Output To to Selection and click OK.
-
Clean up with the Lasso Tool
If the mask in the next step catches a stray area away from the subject, draw a quick Lasso selection around it, click the layer mask and choose Edit > Fill with Black to hide it.
-
Duplicate the background layer and apply the selection as a mask
Drag the Background layer onto the plus icon to duplicate it, then click the layer mask icon. The copy now shows only the subject. Always mask rather than delete, so the edge stays adjustable.
Then turn the graphic back on and drag it below the subject layer. You can move it anywhere without masking, because the subject is already on top. Double-click the layer names and call them Subject and Graphic.
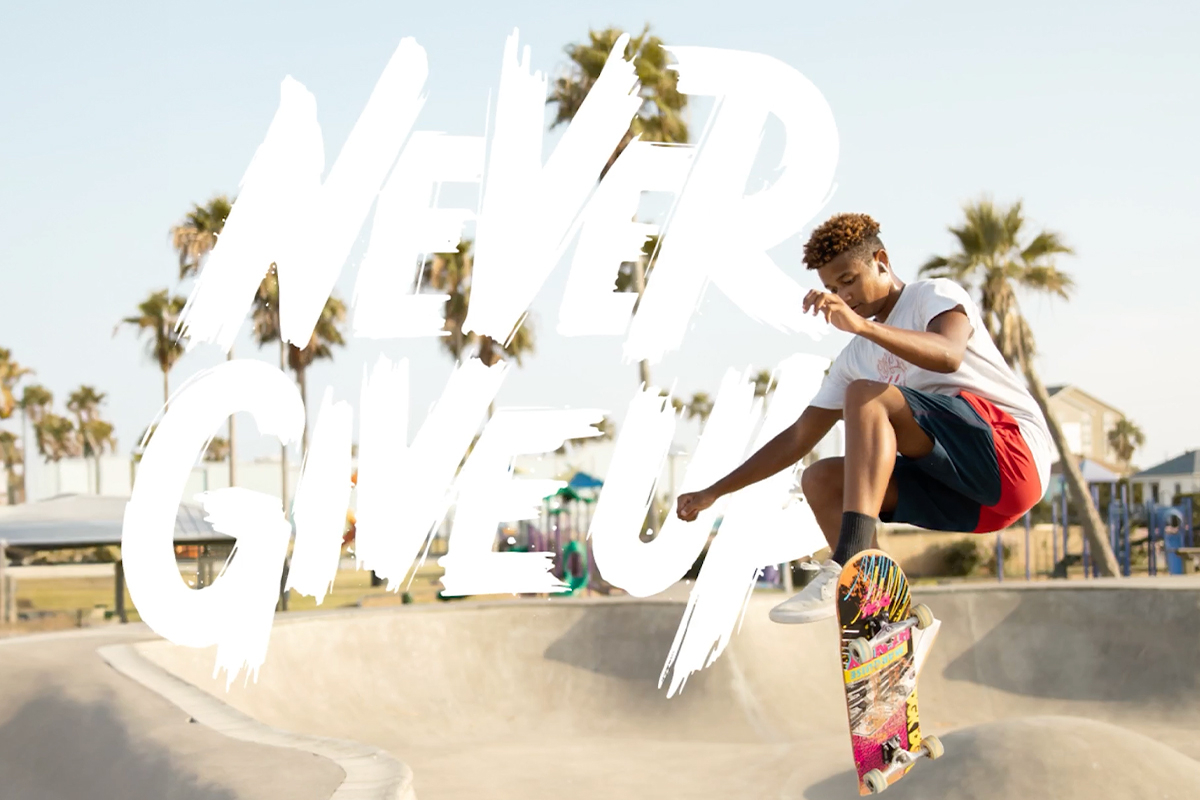
The First Shadow
Double-click the gray area next to the Graphic layer’s name to open Layer Style, or click the fx icon at the bottom of the Layers panel and choose Blending Options, then turn on Drop Shadow at the bottom of the list. The controls are Blend Mode, Color, Opacity, Angle, Distance, Spread and Size.
For this effect, set Blend Mode to Normal, bring Opacity all the way up and raise Distance so the shadow steps out from behind the graphic. Then bring Size down. With Size up the edge goes fuzzy, and this is a graphic, so you want it crisp.
Never use pure black
The default is always black, and shadows are pretty much never black. A color taken from the photo itself works a lot better with it, and the change takes five seconds.
Click the color swatch in the Drop Shadow panel and then, with the picker open, move your cursor out onto the image and click to sample a color directly from the photograph. In the video Aaron clicks a palm tree and gets a dark, yellowish brown. Everything that follows will sit better because of it.
Position by dragging on the canvas
With the Layer Style dialog open, you can click and drag directly on the image to move the shadow. Photoshop updates the Angle and Distance values as you go. This is far more intuitive than typing numbers, because you are judging the result rather than the parameters.
Spread and Size do different jobs
Size controls how far the blur extends. Spread controls how much of that distance stays solid before it starts to fade — raise it and the shadow gets a harder, more defined edge; leave it at zero and the falloff is entirely gradual.
For this text effect, keep Size down so every step stays crisp. Low Spread and a generous Size belong to the realistic variation below.
Stacking Two More
Next to Drop Shadow in the Layer Style dialog is a plus icon. Click it to add another drop shadow on the same layer, with its own settings, and give it a color a little lighter than the first. At first you cannot see it, because it sits exactly where the first one is, so drag on the image to push it farther out. As the angle changes, the first shadow moves with it.
Click the plus again, choose a really light color and drag this one out the farthest. Dragging changes the angle of all three at once; then set each Distance, or click any Drop Shadow in the list to move that one on its own. Dark, lighter and really light, each stepped farther out, is the whole effect.
If dragging on the image does nothing, you are not doing it wrong. Click OK, double-click the effect again, select the Drop Shadow in the list, and now it will move.
Variation: the same stack can build realistic shadows for a composite instead of three crisp steps. A useful way to think about those three:
The contact shadow
Small distance, small size, low or no spread, high opacity. This is the tight dark line right where the object meets what is behind it. It is the shadow that tells the eye two things are actually touching, and leaving it out is why floating-cutout composites look wrong.
The mid shadow
Moderate distance and size, medium opacity. This is the shadow most people think of — it establishes the direction of the light and gives the object a sense of position.
The ambient shadow
Large size, low opacity, minimal distance. A broad soft darkening spreading well beyond the object. Individually it looks like almost nothing; remove it and the composite immediately flattens.
The reason to build all three rather than compromise with one is that no single set of values can be both tight and broad at once. Real light produces both simultaneously, and stacking is the only way to reproduce that.
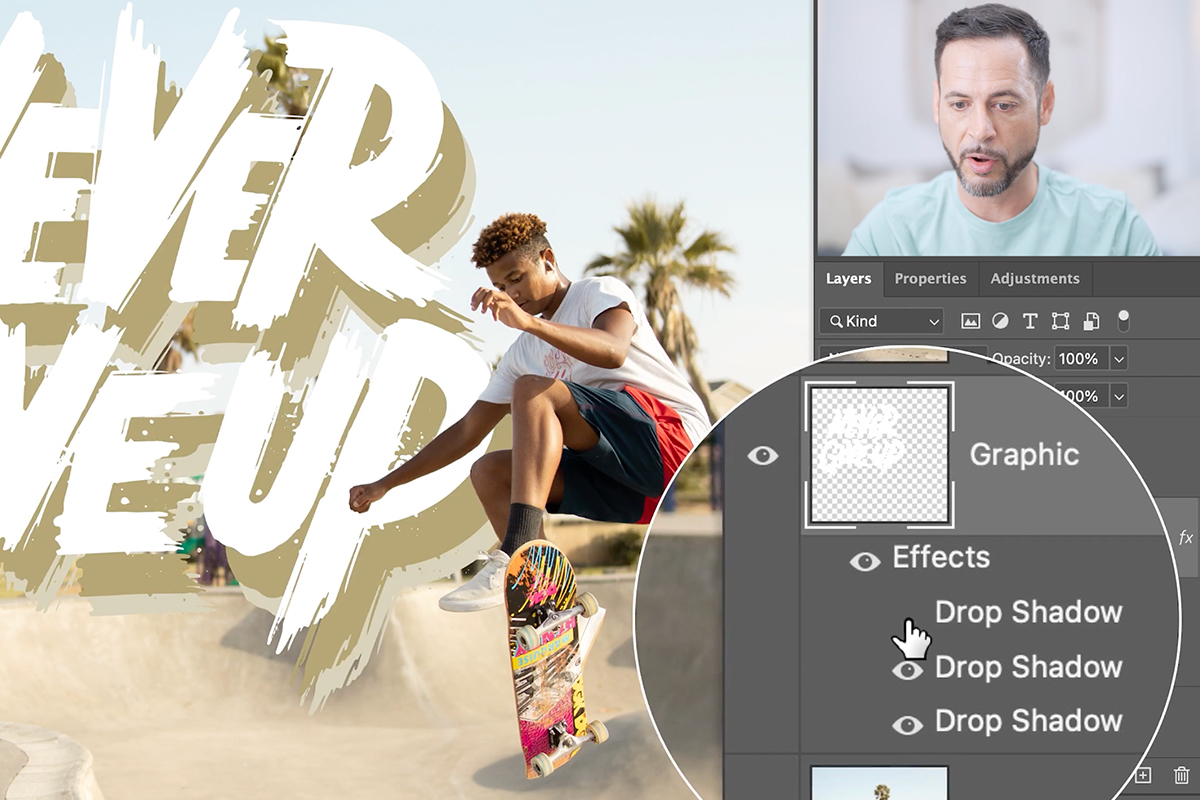
Global Light
Each shadow has a Use Global Light checkbox. When ticked, changing the angle on one shadow changes it on every shadow using Global Light — across every layer in the document.
Leave it on. A single scene has a single light source, and shadows falling in different directions on different elements is one of the most obvious composite errors there is. Global Light makes that mistake structurally difficult, and it means you can adjust the lighting direction of the entire piece from any one dialog.
The exception is when you deliberately want a second light source. In that case, untick it for the shadows belonging to that light and set their angle independently.
Copying the Effects to Other Layers
Once you have a set of shadows you like, you do not have to rebuild them.
Hold Alt or Option and drag the fx badge from one layer onto another, and the entire layer style is copied across. Dragging without the modifier key moves the effects instead of copying them, which is worth knowing before it happens to you unexpectedly.
You can also right-click the fx badge and choose Copy Layer Style, then select several layers at once and use Paste Layer Style — useful when a set of graphic elements should all share the same lighting.
Adjusting for Different Elements
Copied effects are a starting point, not a finished result. Distance stays separate on each layer, so the subject can carry a smaller version of the stack at the same angle. In the video Aaron tries it on the subject, is not in love with it there and turns it off, because it looks best on the text. For realistic composite shadows: An element further from the background should have a larger, softer shadow at a greater distance; something close to it needs a tighter, darker one. Varying the shadows according to how far each element sits from the surface behind it is what creates a sense of actual depth rather than a set of objects at the same distance.
Flat graphics and photographic subjects also want different treatment. A graphic sitting parallel to the background can carry a crisper shadow with more spread. A person has volume, and their shadow should be correspondingly softer and less uniform.
Checking Your Work
Two habits catch most problems. Toggle the effects off and on to see what the shadows are actually contributing: in the Layers panel, click the eye next to Effects to hide all of them, or the eye next to a single Drop Shadow to check that one step.
And zoom out. Shadows that look correct at 100% often turn out to be far too dark or too tight when seen at the size the image will actually be viewed. The eye judges depth at a glance, so judge your shadows the same way.
Quick Reference: Keys, Menus and Settings
- Cut out the subjectSelect > Subject, then Select > Select and Mask; hold Alt/Option to subtract, [ and ] resize the brush; Output To: Selection
- Put the subject on topDuplicate the Background, click the layer mask icon, Edit > Fill with Black on the mask for strays; drag the Graphic below
- Open Layer StyleDouble-click beside the layer name, or fx > Blending Options > Drop Shadow
- First shadowBlend Mode Normal, Opacity all the way up, Distance up, Size down, color sampled from the photo
- Stack two morePlus icon next to Drop Shadow, lighter then really light; drag on the image to step each one out
- Copy the effectAlt/Option-drag the fx badge onto another layer
- Unlink the anglesUncheck Use Global Light on each shadow; Esc cancels the dialog

Free Downloads
Follow Along on the Same Photo
Get the skateboarder photo, the two PSDs with the Never Give Up graphic and the finished cutout, and the 3-page PDF guide. Free with a PHLEARN account.
Dynamic Drop Shadows: Common Questions
Can one layer have more than one drop shadow?
Yes. In the Layer Style dialog, click the plus icon next to Drop Shadow. A second Drop Shadow appears in the list on the same layer, with its own color and distance.
Where do I find Drop Shadow?
Double-click the gray area next to the layer’s name, or click the fx icon at the bottom of the Layers panel and choose Blending Options. Drop Shadow is at the bottom of the list on the left.
How do I make a crisp, solid drop shadow?
Set Blend Mode to Normal, bring Opacity all the way up and raise Distance. Then bring Size down; with Size up the edge goes fuzzy.
Why not leave the shadow black?
The default is always black, and shadows are pretty much never black. Click the color swatch, move your cursor over the image to get the eyedropper and click to sample a color from the photo.
Can I move a drop shadow without the sliders?
Yes. With the dialog open, move your cursor onto the image. It looks like the Move Tool, and you can click and drag to place the shadow.
Why won’t my drop shadow move when I drag on the image?
Sometimes it just does not work, and you are not doing it wrong. Click OK, double-click the effect again, select the Drop Shadow in the list, and now it will move.
How do I put the text behind the subject?
Use Select > Subject on the Background, refine it in Select and Mask and output to Selection. Duplicate the Background, click the layer mask icon, then drag the graphic below that masked copy.
How do I copy the shadows to another layer?
Hold Alt/Option, click the fx badge on the layer and drag it onto the other layer. Without the key, the effects move instead of copying.
Why do all my shadows change angle together?
Use Global Light is checked, so moving one shadow changes the angle of every shadow that uses it, even on other layers. Uncheck it on each shadow you want to place freely.
Are the sample files free?
Yes, with a free PHLEARN account. You get 1 sample image, 2 sample PSDs and 1 PDF guide: the skateboarder photo, the Never Give Up graphic, the finished cutout and a 3-page step-by-step guide.
Master Photoshop, Lightroom and Photography
Join PHLEARN PRO for $12.99 a month or $99.99 a year. Cancel anytime, with a 100% money-back guarantee.





