Download Assets
description
Learn the basics of of dodging and burning in Photoshop! This tutorial will guide you through a non-destructive technique using curves adjustment layers and layer masks to subtly enhance your images. Discover how to add depth, dimension, and a polished look to your photos without overdoing it.
Go PRO:
Interested in learning more about retouching? Our in-depth PRO tutorial Advanced Retouching in Photoshop is your ultimate guide!. Learn advanced techniques, including frequency separation and color correction, to achieve flawless results. This tutorial includes the perfect retouching toolkit: 5 high-quality RAW files, our exclusive Frequency Separation Action, and a versatile Retouching Brush.
Image Source
- John Verhoestra
Images sourced from Unsplash.
Share
AFTER
BEFORE
Dodge & Burn Like a Pro
Dodge and burn are techniques used to selectively lighten or darken areas of an image. Traditionally, these techniques were done in the darkroom using photographic paper and light. In Photoshop, we can achieve similar results and in this guide we’re going to show you exactly how.
Using Curves Adjustment Layers
Instead of using the traditional Dodge and Burn tools, we’ll be using Curves adjustment layers. This non-destructive method allows us to adjust the brightness and contrast of specific areas without affecting the original image.
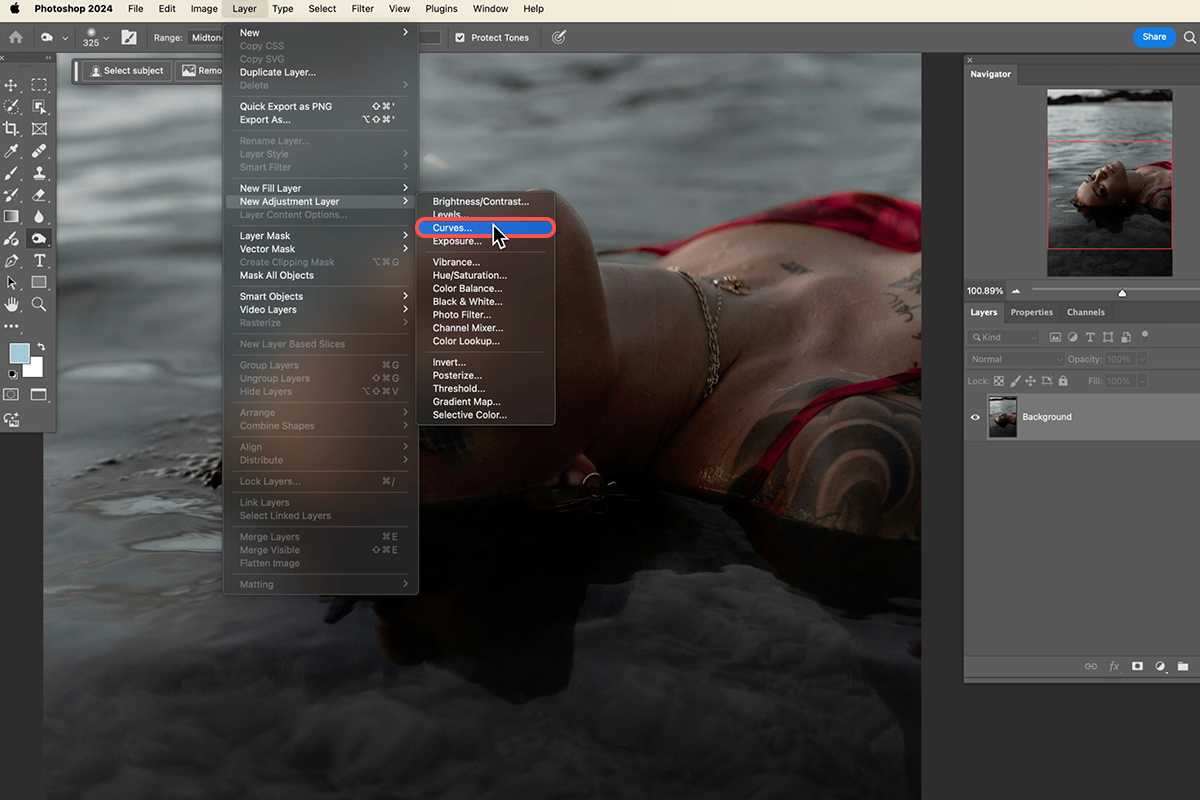
1. Go to Layer > New Adjustment Layer > Curves.
2. Adjust the curve to make the overall image brighter or darker.
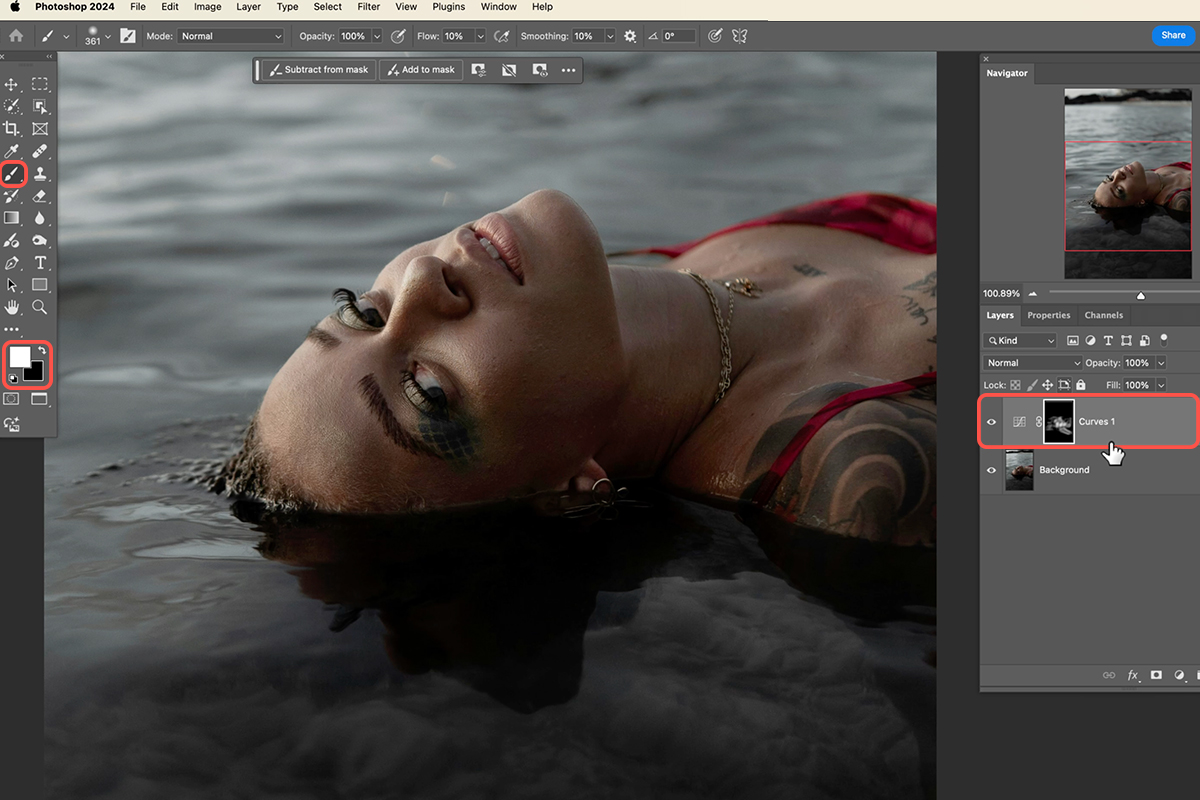
3. Add a layer mask to the adjustment layer by clicking the Add Layer Mask button at the bottom of the Layers panel.
4. Invert the layer mask by pressing Ctrl+I on PC or Cmd+I on Mac, to hide the effect initially.
Painting with Light and Shadow
5. Select a soft-edged brush to avoid harsh edges in your adjustments.
6. Lower the brush opacity to 10% or less to build up the effect gradually.
7. Paint with white on the layer mask to reveal the brightening effect.
8. Paint with black on the layer mask to reveal the darkening effect.
To achieve a more three-dimensional look, focus on selectively adjusting the highlights and shadows of your image. Highlight areas like cheekbones, the bridge of the nose, and the forehead to draw attention and add a sense of brightness. Conversely, darken areas such as the eye sockets, under the chin, and hair shadows to create depth and contrast.
Creating Subtle Effects
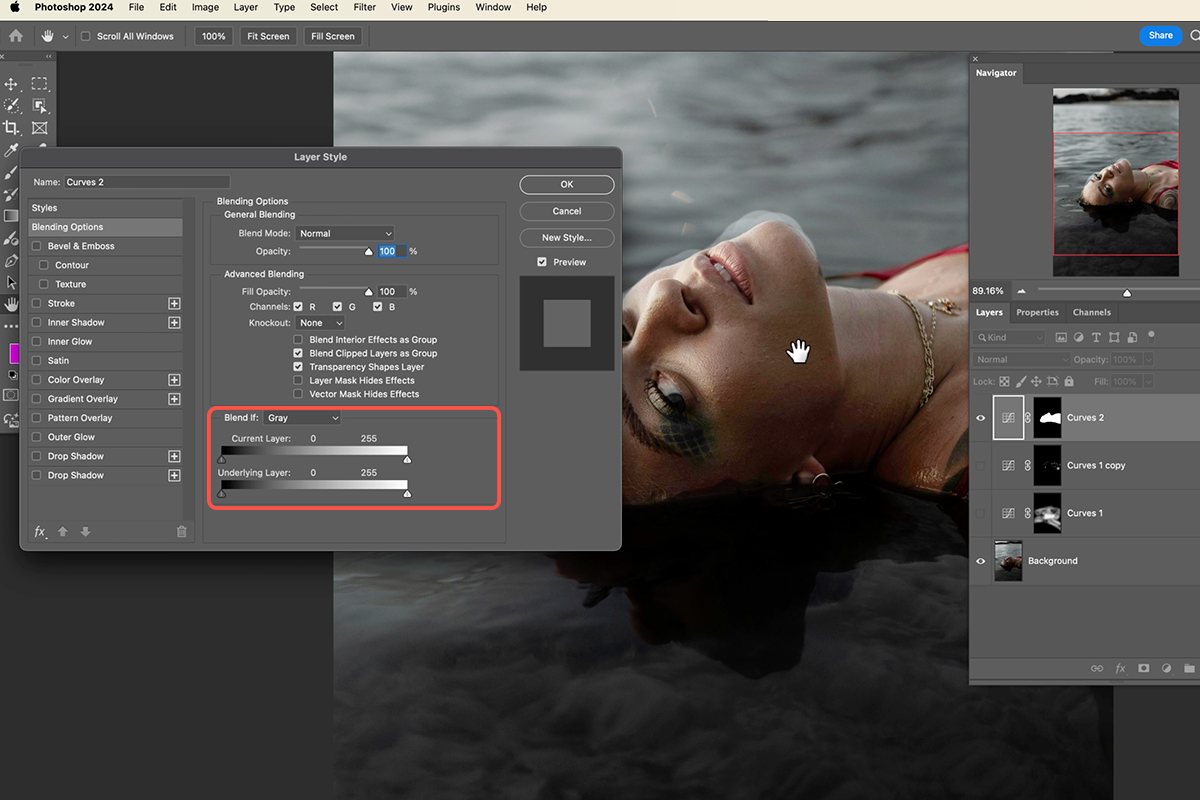
9. Double-Click the Layer Mask. This opens the Layer Style dialog box.
10. Use Blend If and adjust the sliders under the “This Layer” section to control the visibility of the layer based on the underlying image.
11. Hold Alt on PC or Option on Mac and drag the sliders apart to create a range of tones where the effect is visible.
Additional Tips
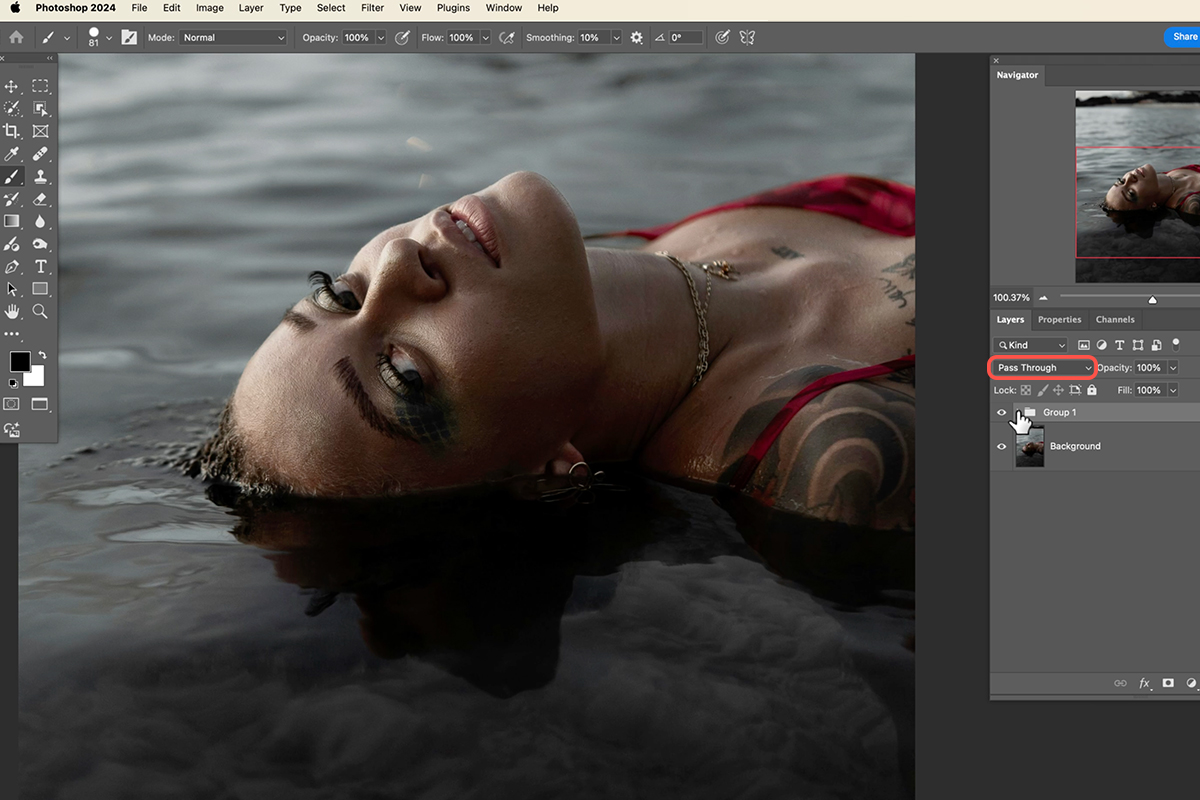
If you want to target specific areas more precisely and avoid over-processing, consider using multiple adjustment layers. You can use different blending modes like Pass Through, Soft Light and Overlay to create unique and creative looks.
Remember that the order in which you apply your adjustment layers can significantly impact the final outcome of your image. You can experiment with different layer orders to achieve your desired effects.


