
Download Assets
description
Learn how to dramatically improve your Generative Fill results in Photoshop Beta! In under 10 minutes, we’ll show you how to remove objects, expand backgrounds, and enhance detail using the new AI Enhance feature.
Go PRO:
Learn the ins and outs of AI with our in-depth PRO tutorialThe Ultimate Guide to AI in Photoshop: Generative Fill & More.
Share


AFTER
BEFORE
Enhance Any Image
The feature you’ve been waiting for is here! In this tutorial, we’ll show you how to leverage the new AI Enhance feature to significantly improve the quality of your Generative Fills in Photoshop Beta. Follow the steps below to get started.
Remove Objects and Expand Backgrounds
First thing first! Let’s clean up the image and get rid of any possible distractions:
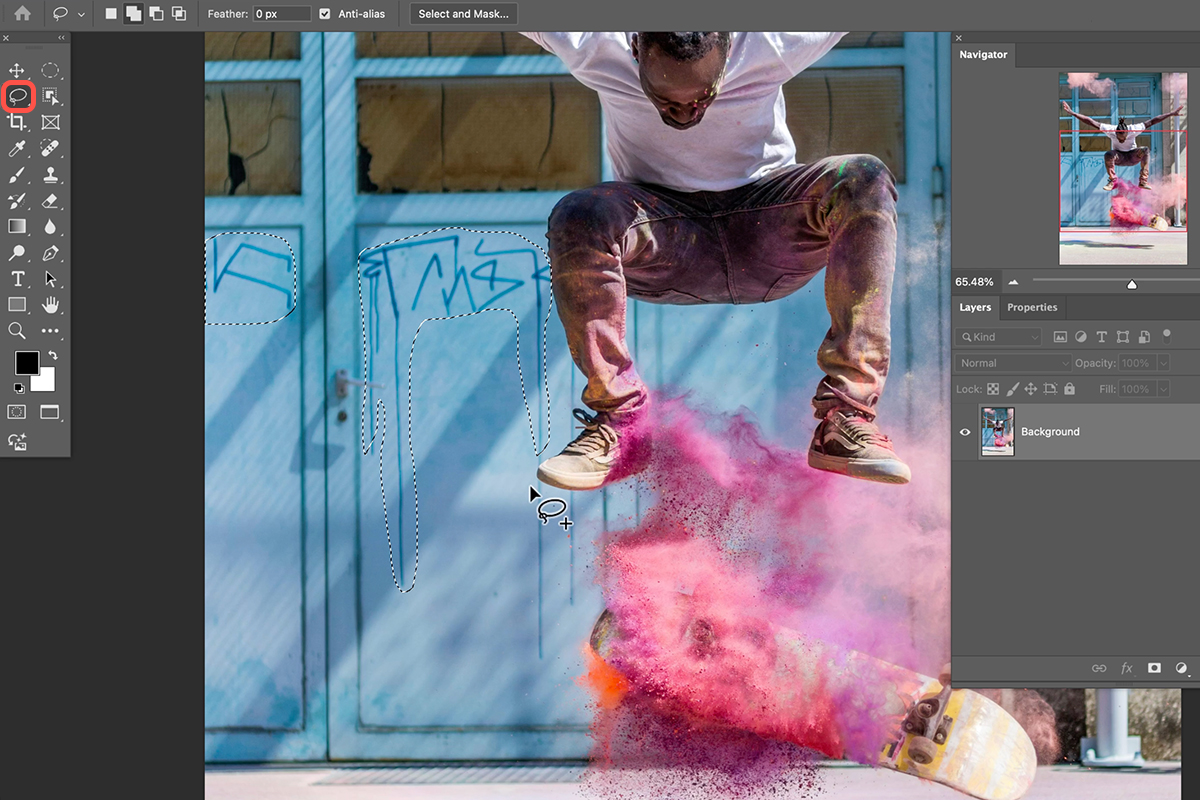
1. Select the unwanted object with the Lasso tool (Keyboard Shortcut “L”). Hold Shift to add to your selection.
2. Click “Generative Fill” in the Contextual Taskbar (or go to Edit > Generative Fill).
3. Leave the prompt blank (since you’re removing objects).
4. Click “Generate.” The selected object will be removed, and the background will be seamlessly expanded.
Enhance Detail in Generative Fills
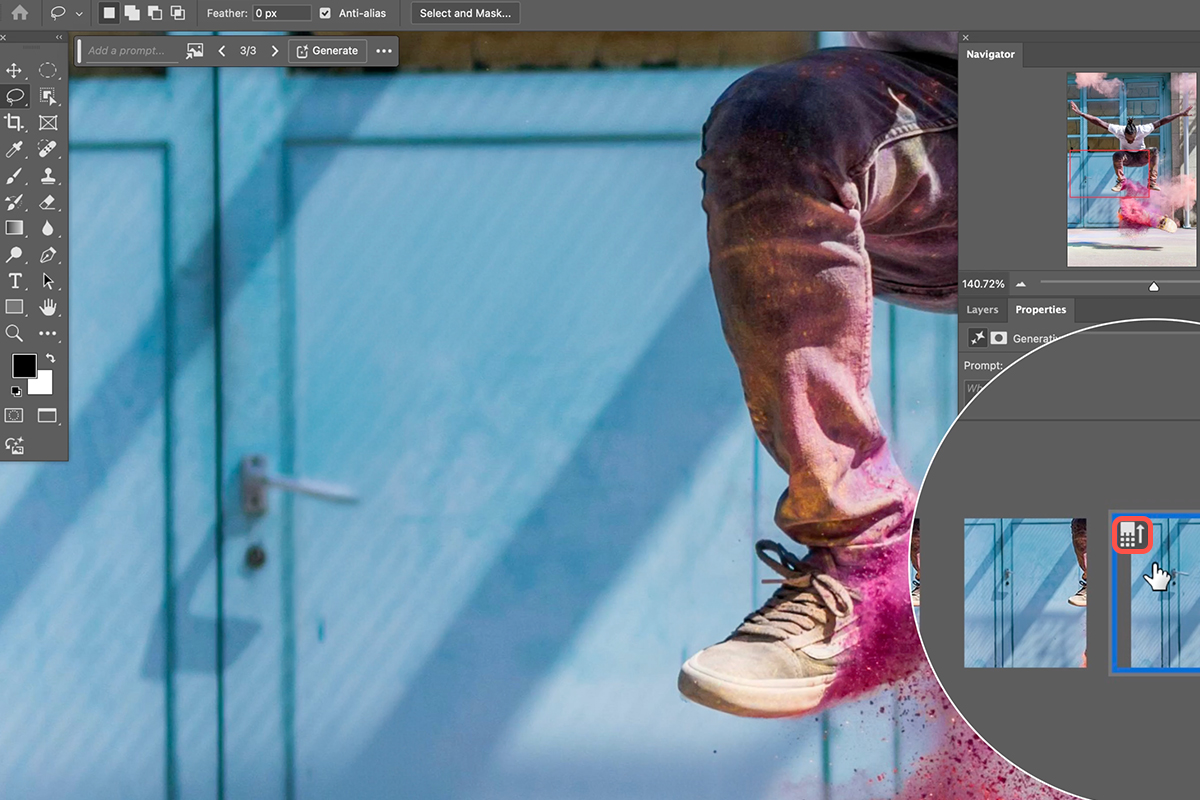
5. Open the Properties window (Window > Properties).
6. Click on the specific variation of the Generative Fill you want to improve.
7. Click the “Enhancing Detail” icon in the Properties window.
This will double the resolution of the selected area, creating a sharper and more realistic Generative Fill.
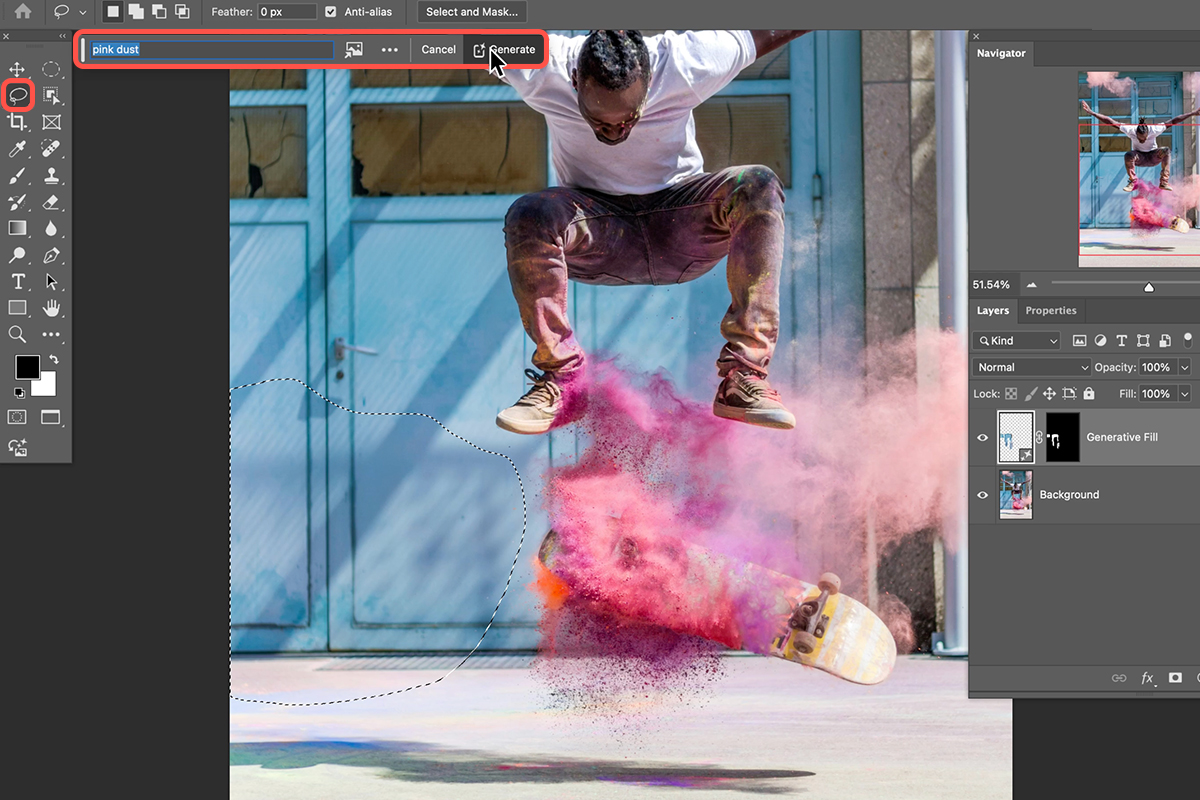
Add Creative Elements
Now that you’ve boosted the quality of your Generative Fills, you can focus on adding new elements! Simply select the area where you want your element to appear, then click “Generative Fill.” In the prompt box, type your desired element description (e.g., “pink dust”). Click “Generate” and watch your image come alive with your creative touch! The beauty is, you can copy and paste the text prompt to quickly add the same element in different areas of your image, saving you time and effort.
Using Generative Expand
You can also use Generative Fill to expand your image and create a whole new canvas! Here’s how:
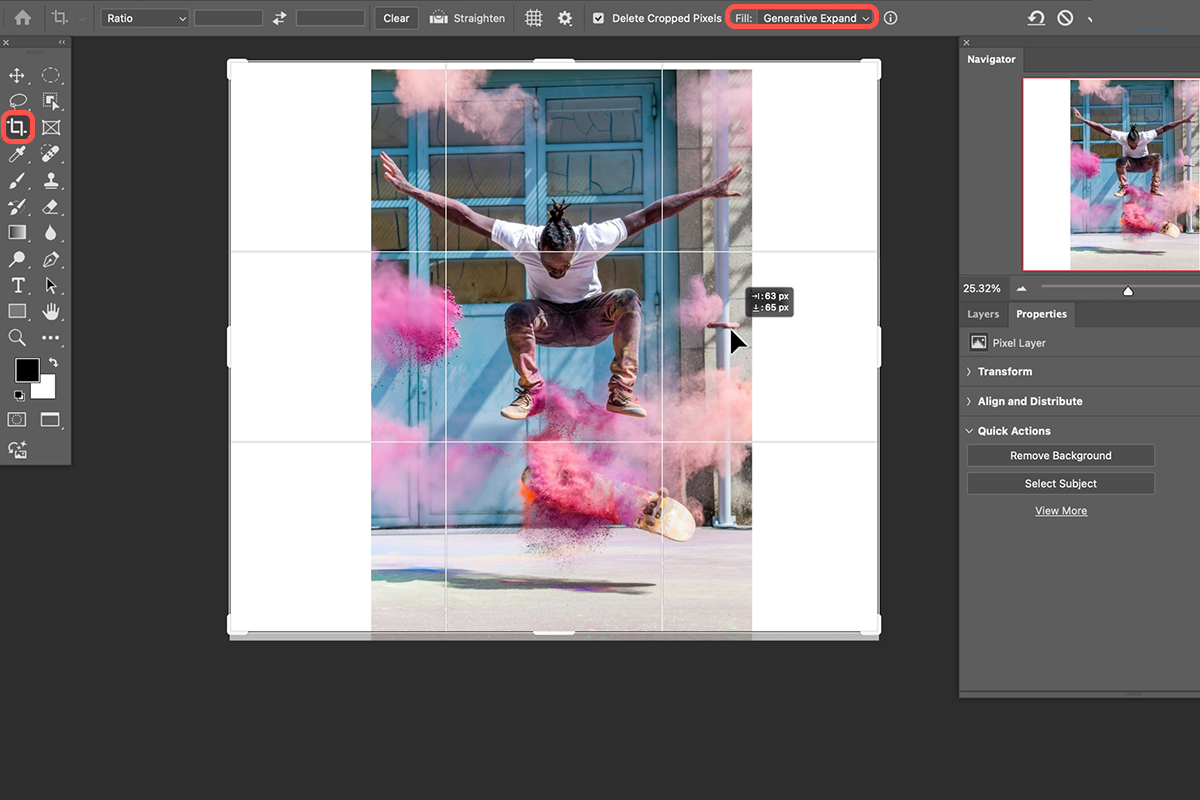
1. Select the area you want to expand using the Crop tool (Keyboard Shortcut “C”).
2. In the Crop tool options bar, ensure “Fill” is set to “Generative Expand.”
3. Click and drag to define the new canvas size, or hold Alt/Option to expand from both sides evenly.
4. Click “Generate.” Generative Fill will use AI to fill the expanded area, incorporating existing elements like your pink dust.
For flawless results with Generative Expand, make sure you’re working on the topmost layer – this avoids any layering mishaps. Once you’ve expanded your image, don’t forget to revisit the newly created Generative Fill. Head to the Properties window and use the “Enhancing Detail” feature to give it a final quality boost. This step ensures a consistently high-quality finish throughout your entire image


