
description
Sky replacements were once tricky business. You either had to go through the process manually which could take a lot of time and require a lot of surprisingly detailed compositing. Or you could have simplified the process using a third-party plug-in , but that still required you to find tools that exist outside of Photoshop. But luckily, times have changed and sky replacements are now easier than ever!
Learn all about Photoshop’s new automated Sky Replacement Tool which allows you to quickly swap a sky while adjusting things like exposure and color temperature to get a seamless composite. We even take it step further, showing you how to analyze the lighting in a photo so that you can choose a sky that will fit realistically into the scene.
Share
Quick & Easy Sky Replacements
How to Replace the Sky in Photo
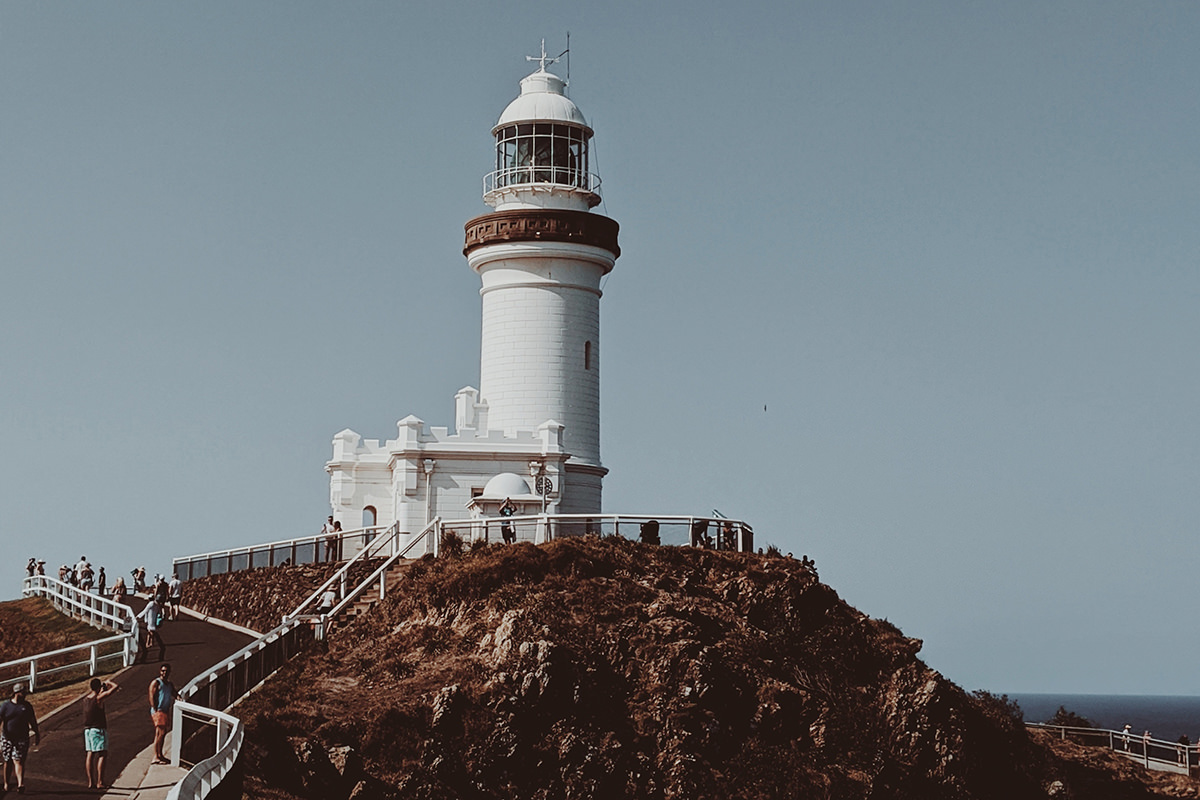
Sky replacements may seem pretty simple, and sometimes they are, but differences in lighting, color, and color temperature can make compositing a sky much more challenging than expected.
Before we go any further, let’s take a moment to talk about how to find photos of skies and landscapes that will work well together. No matter how good our editing tools are, if the photos don’t match up properly, the end result is going to look weird and unrealistic.
Lighting Direction
The single most important thing to look at when analyzing images of skies and landscapes is the direction and intensity of the lighting. Most outdoor landscapes use the sun as the main light source, and you should try to match the sun’s position in the photos you want to composite together.
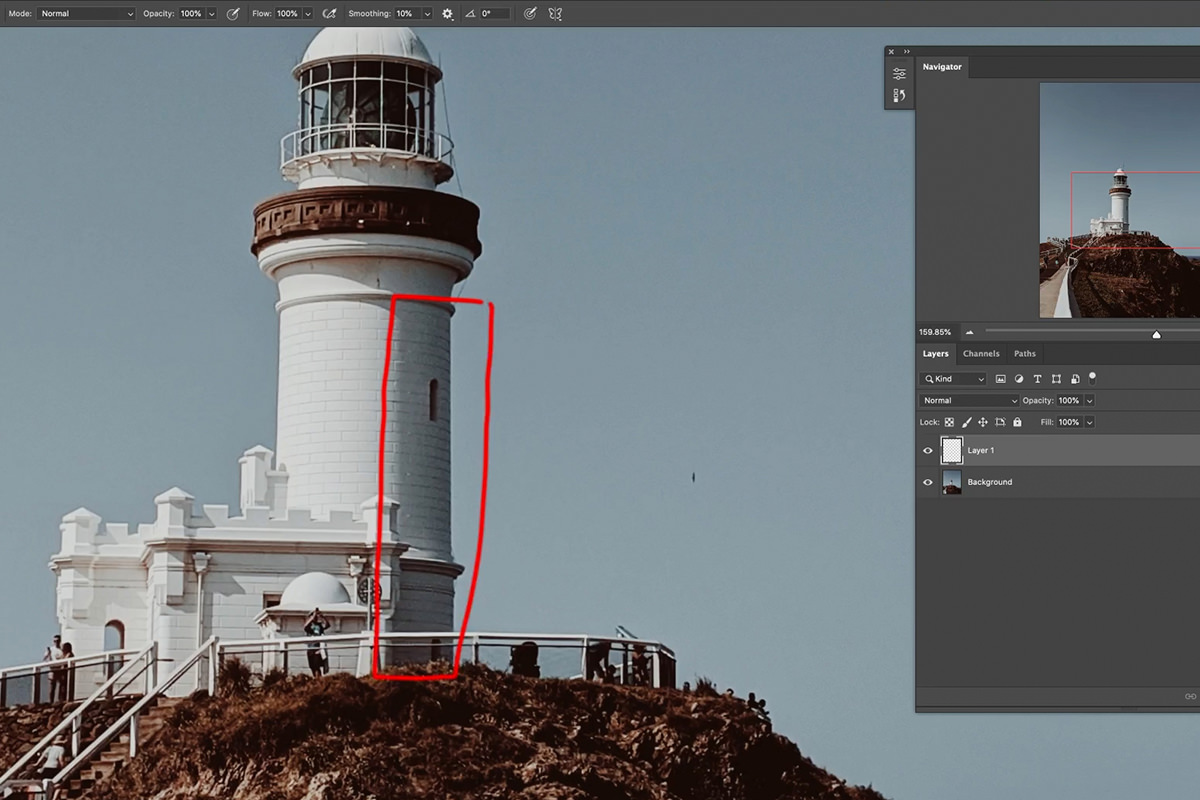
Not sure where the sun is? Then look closely at the shadows in the image and make a note of their direction. It often helps to create new Layer and use the Brush Tool to make a diagram of the lighting and shadow direction as you do this.
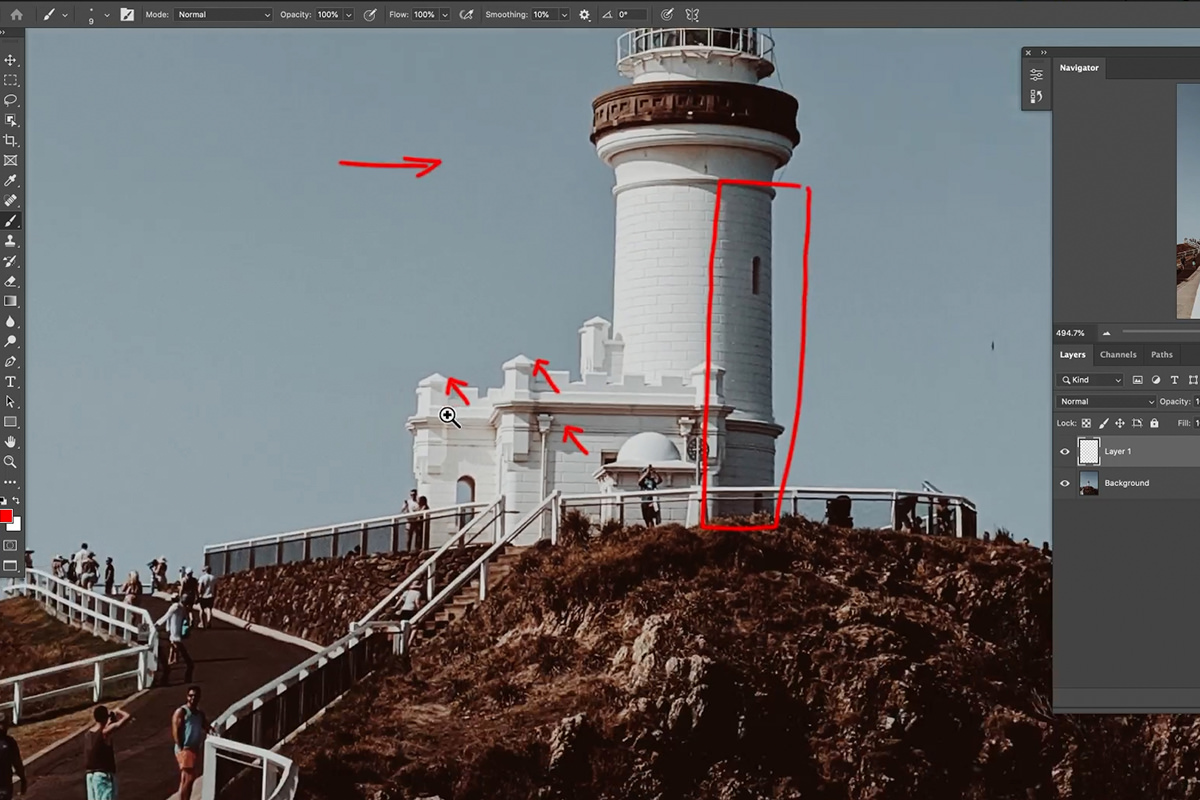
Simply follow the angle of shadows in a straight line into the sky and out of frame, and that’s where the main light source (the sun) is sitting.
So if you’re choosing a new sky to place in the scene, you’re going to want to use an image that has the sun in roughly the same position. You can even cheat sometimes by flipping the image!
Lighting Quality
There’s also the issue of light quality. If you’ve heard the terms ‘hard’ and ‘soft’ lighting, this is what we’re referring to. For example, if the sky is clear and sunny, you’re looking at an image with hard lighting. This means the shadows will be sharp, dark, and well-defined. If it’s a cloudy day, then the shadows will be much softer, with undefined edges and appearing as more of a gradient.
Like we did with lighting direction, it’s important to match the quality of the lighting between images. If you’re replacing a boring overcast sky, make sure to replace it with a sky that still has some clouds. If you’re replacing a clear blue sky, make sure to use an image that is still relatively cloud free.
The main point is that even though the goal is to replace a sky, you still need to be careful to match up certain characteristics between the new image and the old one. No matter how good your compositing skills are, they won’t be able to overcome images that couldn’t possible exist in the same scene.
Compositing a sky with totally different lighting quality and direction will ultimately lead to a poor composite. Keep these characteristics in mind when choosing a new sky and the rest of the work will be easy!
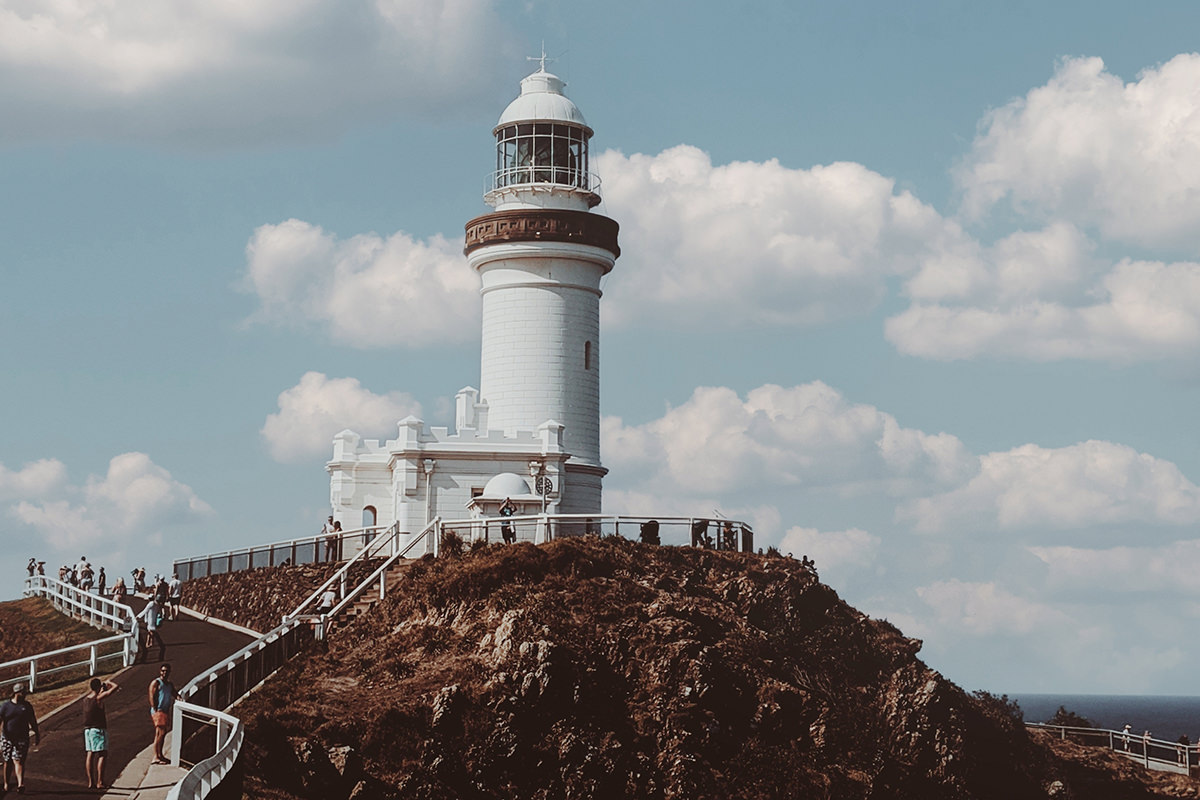
How to Use the Sky Replacement Tool in Photoshop
Adobe continues to add powerful automated tools to Photoshop, allowing creatives to get their work done faster with the accuracy and professional finish they expect. The new Sky Replacement Tool is very much part of that initiative, making it faster and easier than ever to swap the sky in a landscape photo with realistic results.
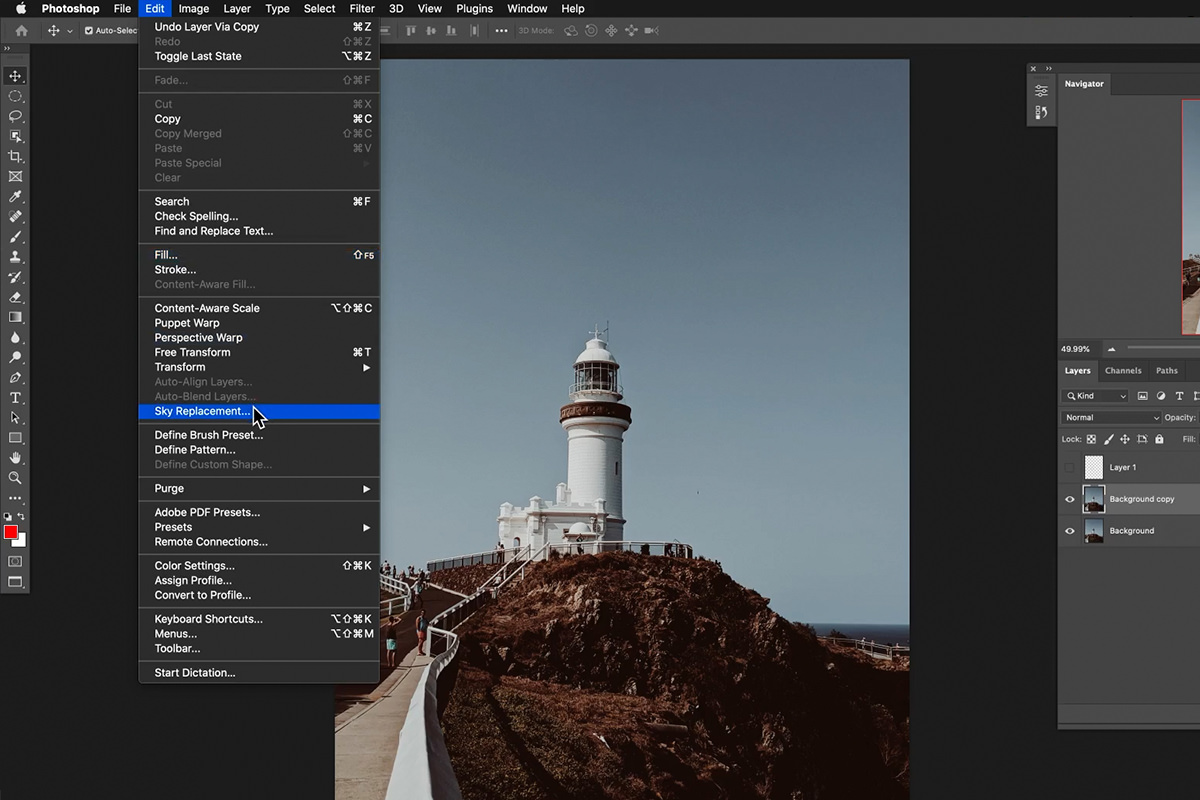
Let’s take a look at how it works! We recommend making a copy of your background Layer before starting, just to make sure that the original image isn’t affected in any way. Once you’ve Duplicated the main image, go to the Edit menu and select Sky Replacement.
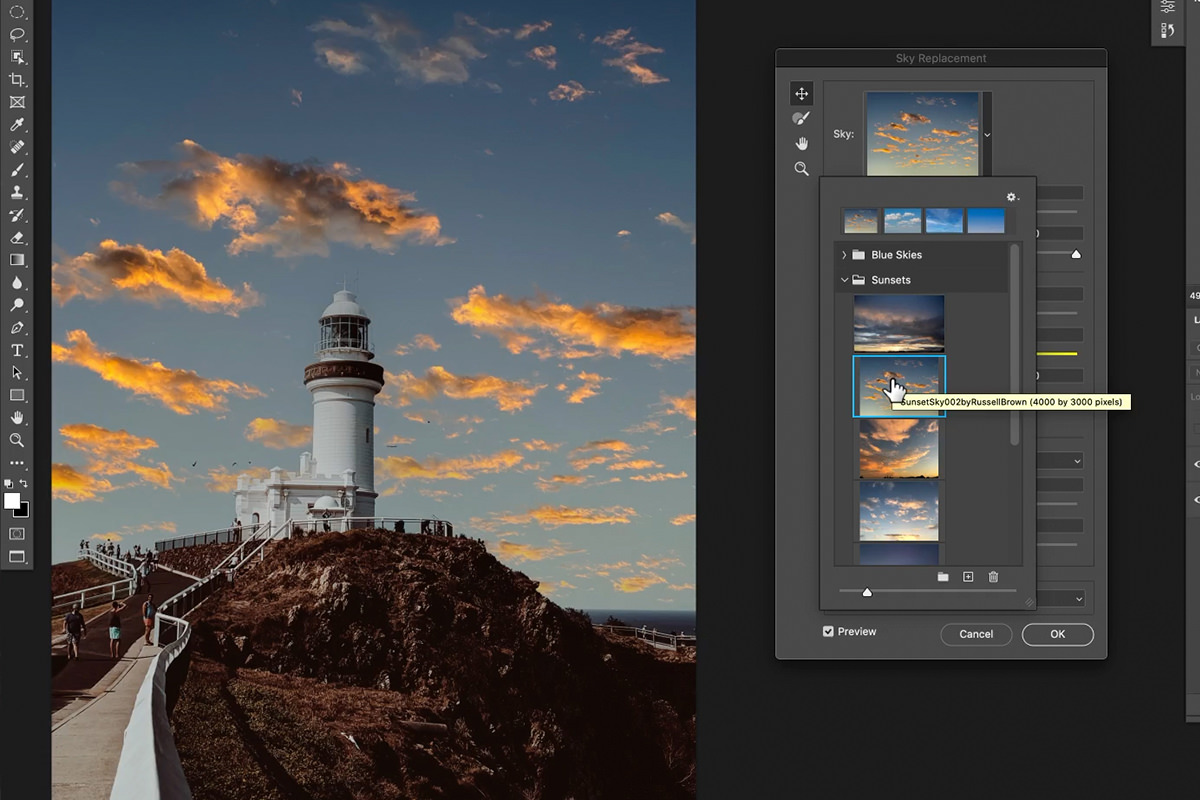
The Sky Replacement dialog will open. At the top you can start by choosing a new sky from the options that come included with the tool. With options for spectacular skies, blues skies, and sunsets, there’s plenty available to try without having to search a second image.
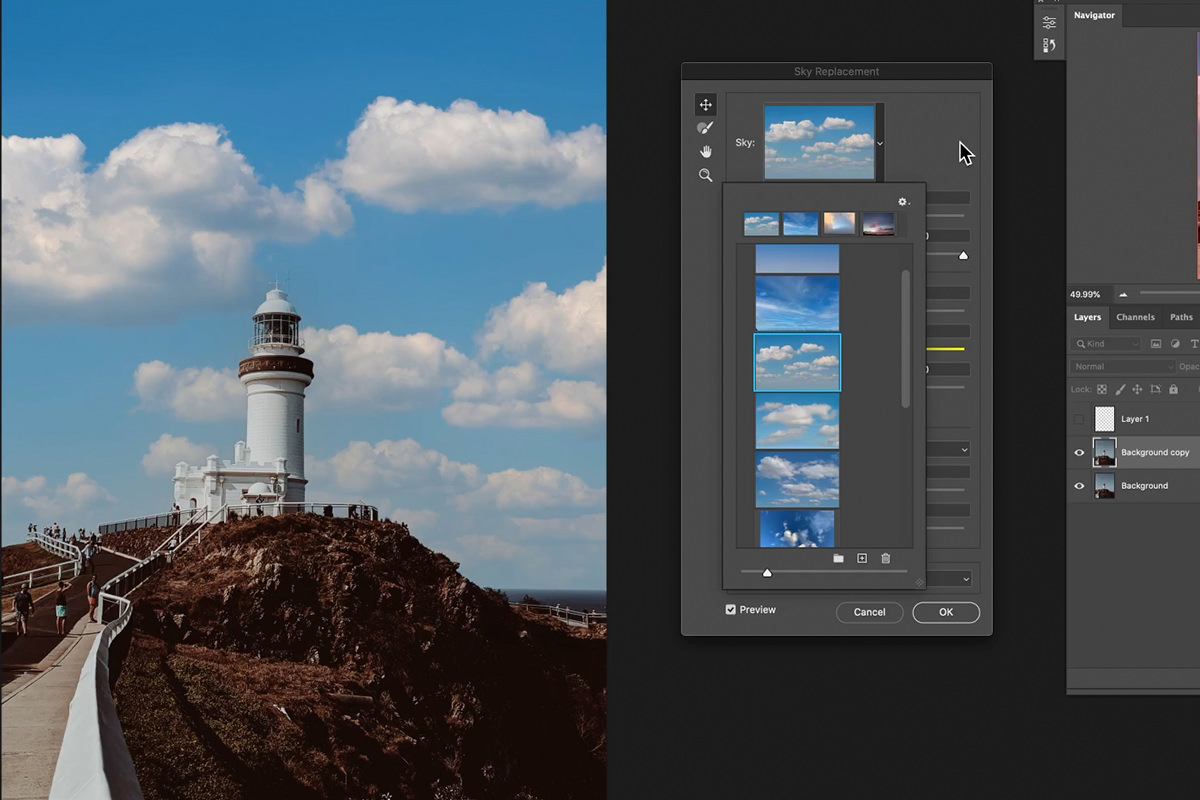
And if they don’t work, you can always add your own sky images using the ‘+’ at the bottom of the sky selection drop-down.
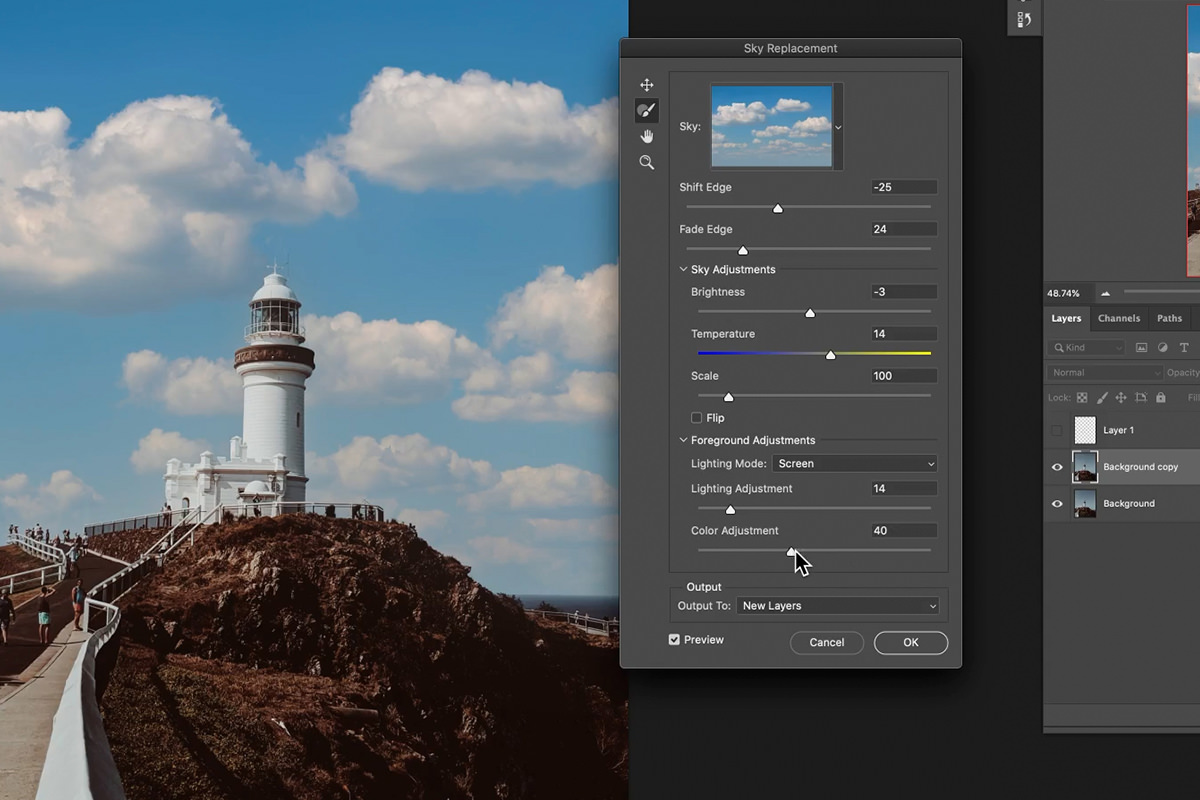
Once you’ve chosen a sky from the list (remember to use one that will match the lighting quality and direction from your original image), simply click on it and Photoshop will take care of the rest. Once the new sky is in place, there are a number of options that allow you to customize the overall look of the image to help integrate the new sky into the original photograph.
You can adjust the edges of the composite, the overall brightness and color temperature of the sky, the lighting of foreground elements, and more! The goal is to push and pull the settings of both the new sky and the original landscape until they match as closely as possible, making it look like they were photographed in the same scene.
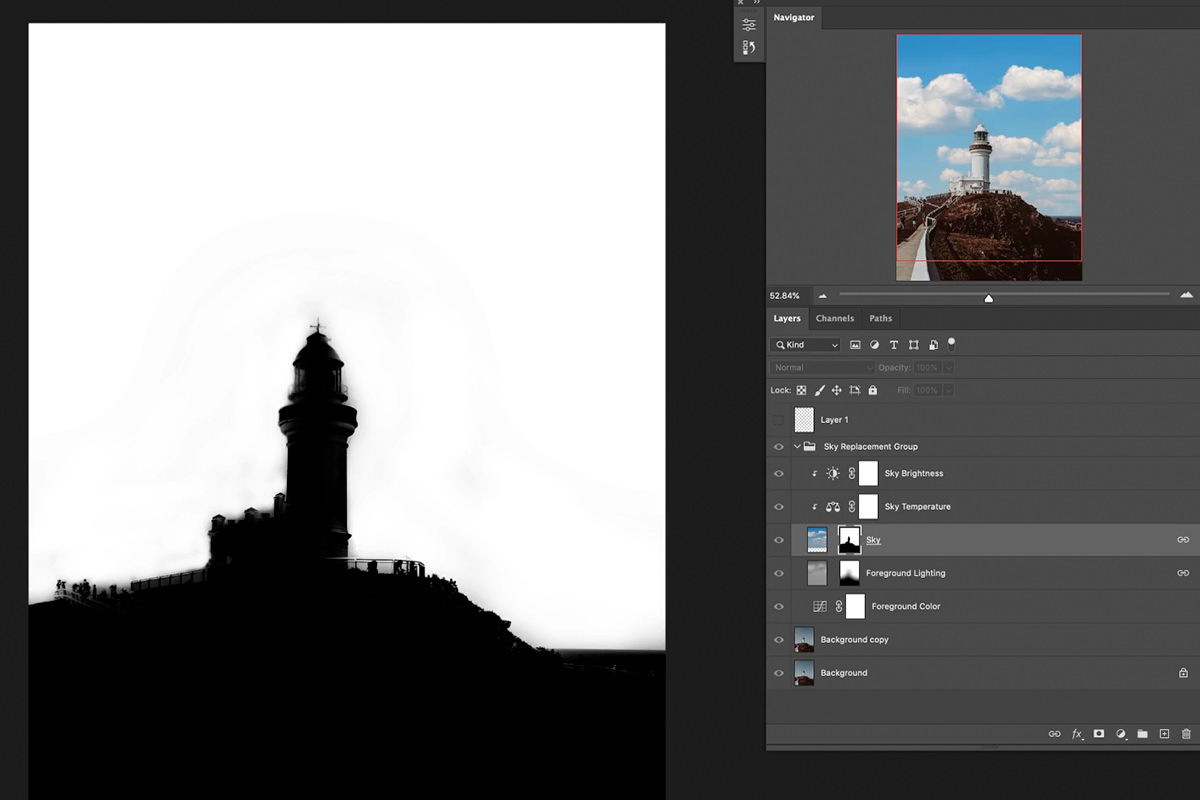
Layers & Adjustment Layers
We’ve seen how easy the new Sky Replacement Tool is to use, but that’s not even the best part! Layers and Adjustment Layers are the backbone of editing in Photoshop, and using them wherever possible allows you to edit more cleanly and flexibly. The Sky Replacement Tool gives us the option to output the new sky and the settings we chose as a collection of new Layers and Adjustments!

That means we can get even more detailed with our edits once the tools is closed, using Layer Masks and additional Adjustment Layers to fine-tune the overall effect.
Photoshop continues to make complex tasks like compositing easier than ever before. Automated tools that allow for additional, flexible adjustments ensure composites look realistic while saving the editor valuable time. The new Sky Replacement Tool is well worth checking out if you ever need to take your landscape photos to the next level.


