Download Sample Images
description
Automated tools powered by artificial intelligence are becoming much more common in creative editing programs and apps. If you know PHLEARN, you know how much we tend to stick with manual processes and techniques in Photoshop, especially when it comes to tricky work like compositing. A.I. and automated tools usually aren’t on our radar.
Until now!
Learn how to replace a sky in any landscape photo using Luminar 4, a creative editing program powered by artificial intelligence! Luminar caught our attention for a couple of different reasons. While its automated tools are impressive, it also allows for a lot of fine-tuning and customization, giving us the control we want while still saving us a ton of time. And Luminar isn’t meant to compete with Photoshop or any of the other tools we know and love. In fact, Luminar 4 is available as a Photoshop plug-in, allowing for seamless integration into our normal workflow. Follow the link below to check it out!
This video is sponsored by Skylum. Get $25 off Luminar 4 here: https://l.skylum.com/PHLEARN
Share
USING LUMINAR 4
QUICKLY REPLACE ANY SKY
The A.I. Power of Luminar 4
Sky Replacements in Photoshop
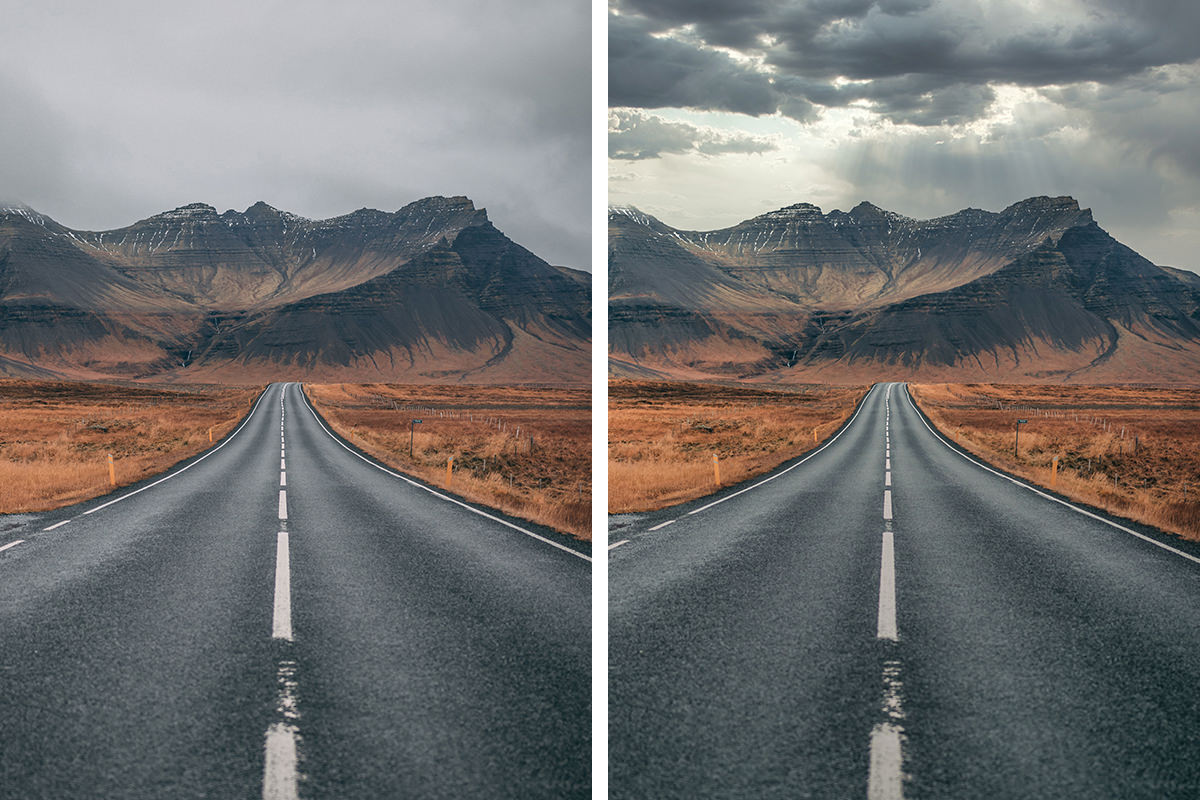
Sky replacements may seem pretty simple, and sometimes they are, but differences in lighting, color, and color temperature can make compositing a sky from one image to another much trickier. That’s where Luminar 4 promises to save us time while delivering the same results we could expect from doing the process manually.
But before we go any further, let’s take a moment to talk about how to find photos of skies and landscapes that will work well together. No matter how good our editing tools are, if the photos don’t match up properly, the end result is going to look weird and unrealistic.
Light Direction
The single most important thing to look at when analyzing images of skies and landscapes is the direction and intensity of the lighting. Most outdoor landscapes use the sun as the main light source, and you should try to match the sun’s position in the photos you want to composite together.
For example, if you have a desert landscape with the sun high overhead, you will see shorter shadows cast in all directions. If you try and combine that landscape with a sunset sky, you’re going to run into some issues.
Why? In a photograph of a sunset, the light direction will be off in the distance coming towards the camera. That would mean objects and features in the landscape would be backlit, casting long shadows towards the camera. That’s pretty far off from the lighting and shadows present in our mid-day desert landscape.
So before you try compositing a landscape with a new sky, pay close attention to the lighting and lighting direction in both images. If the landscape is bright and sunny, match it with a sky that’s bright and sunny. If the landscape is gray and overcast, grab a sky that’s darker and a little more dramatic. And pay close attention to the direction of the light in each to make sure they match. Taking the time to find the right images will help any compositing techniques shine when you get into the editing process.
Getting Started with Luminar 4
Luminar 4 is available as a standalone software as well as a handy plug-in for Photoshop. The best part is, functionality between the two is identical! That means you can take full advantage of their a.i. tools within your normal Photoshop workflow. Once installed, you can find the Luminar plug-in under the Filter menu, but first, let’s convert our landscape image to a Smart Object.
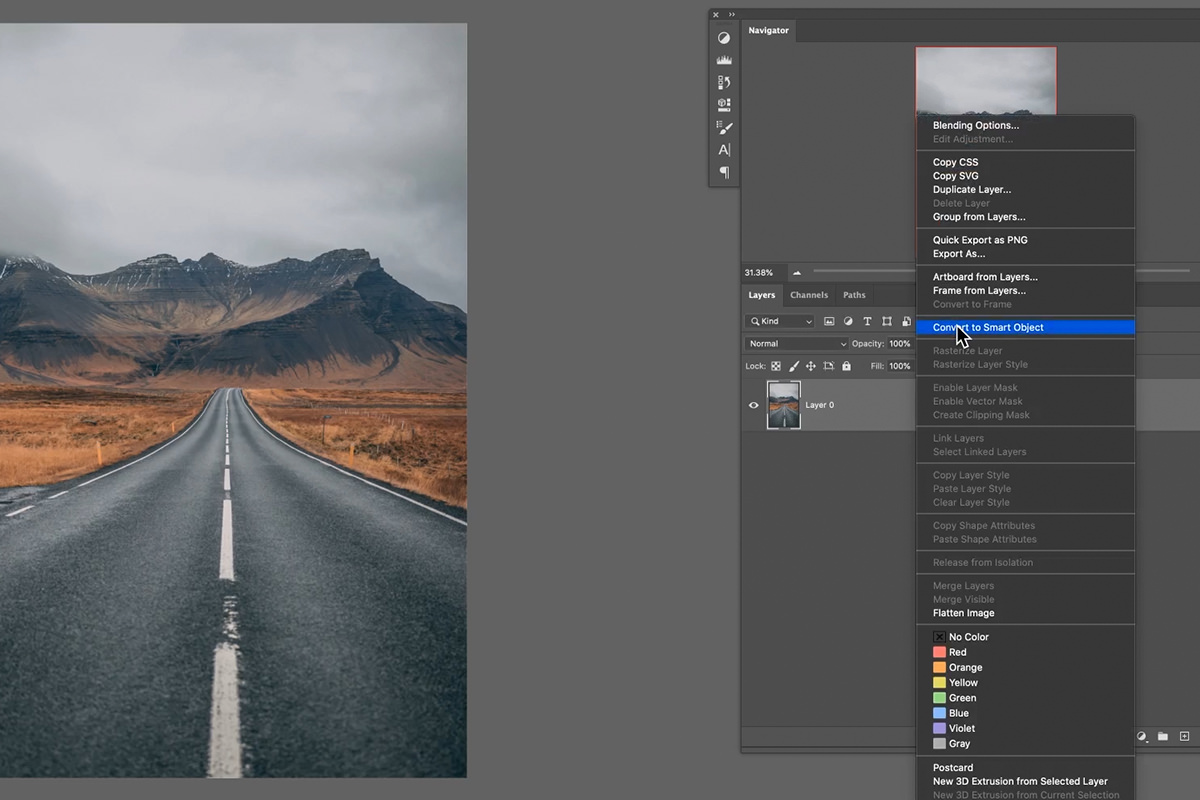
Not only do Smart Objects allow us to work non-destructively, they will automatically turn any Filters we apply into Smart Filters. That will allow us to apply our Luminar 4 edits, turn them on or off, and go back into the plug-in to make changes later on.
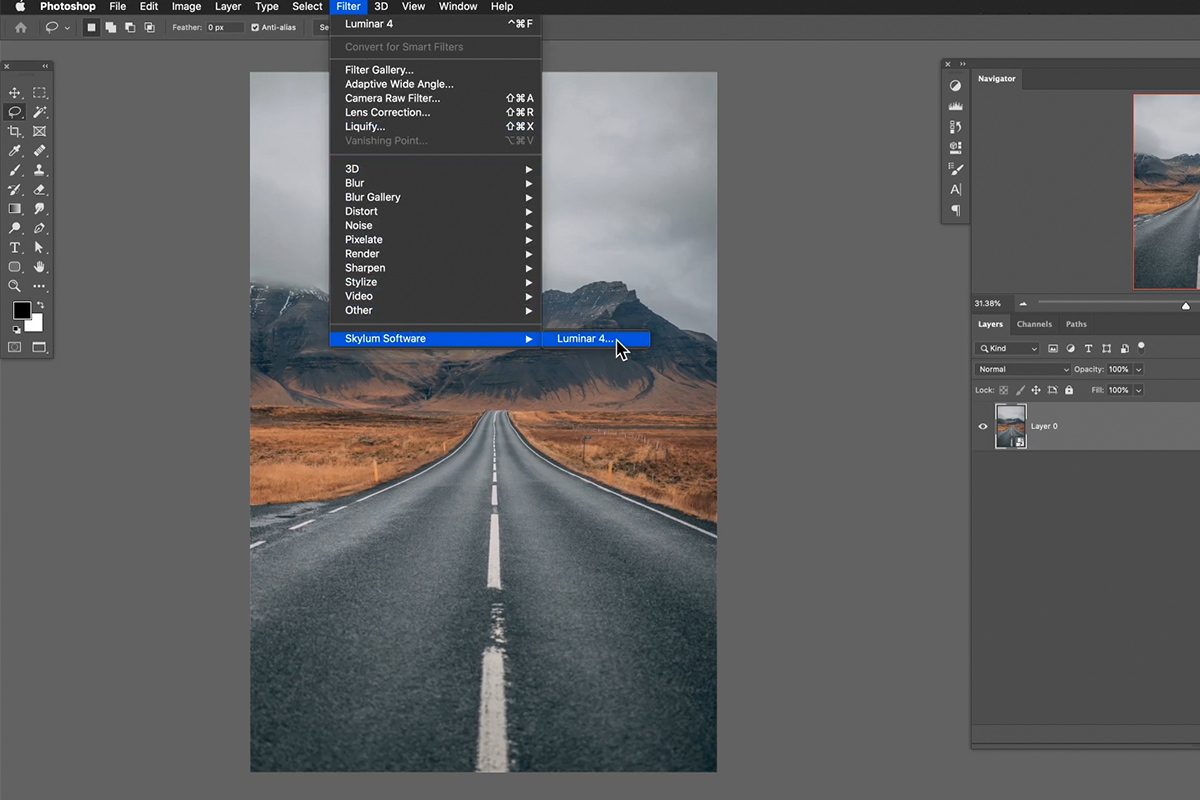
Once the background image is converted to a Smart Object, you can load the Luminar 4 plug-in by opening the Filter menu, selecting Skylum Software, and then Luminar 4.
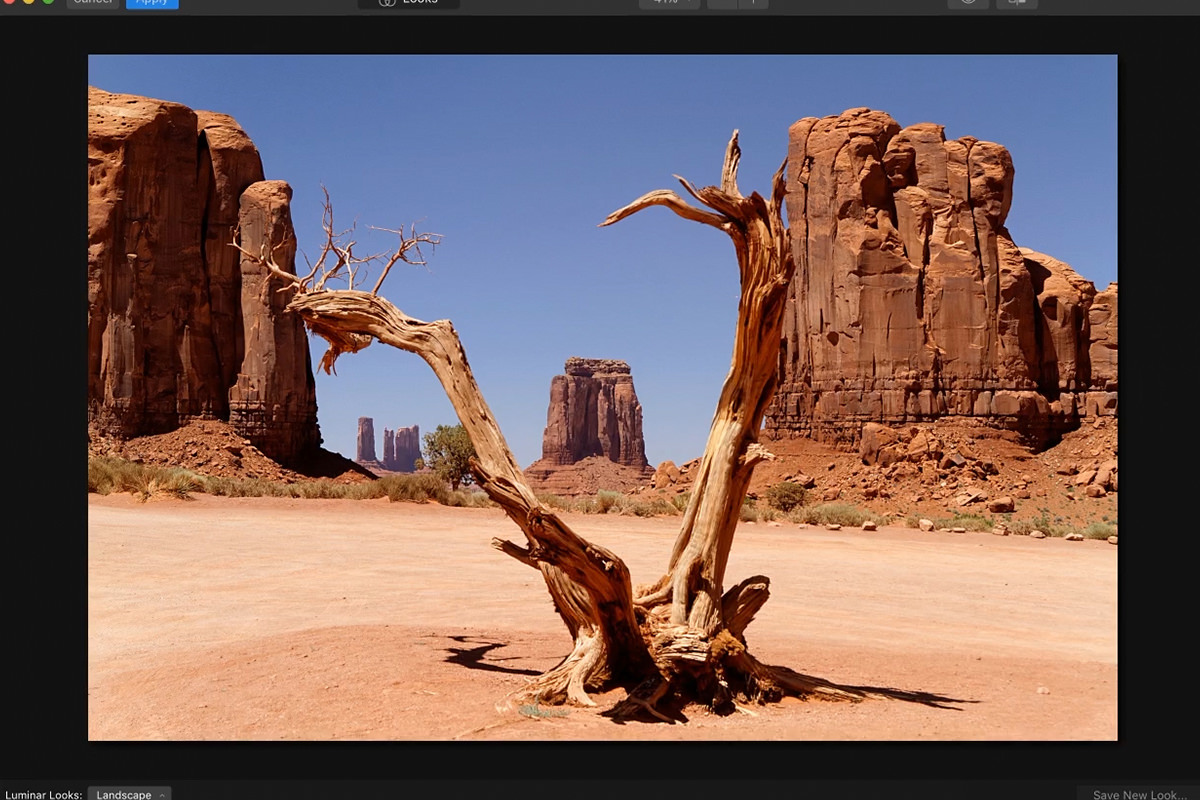
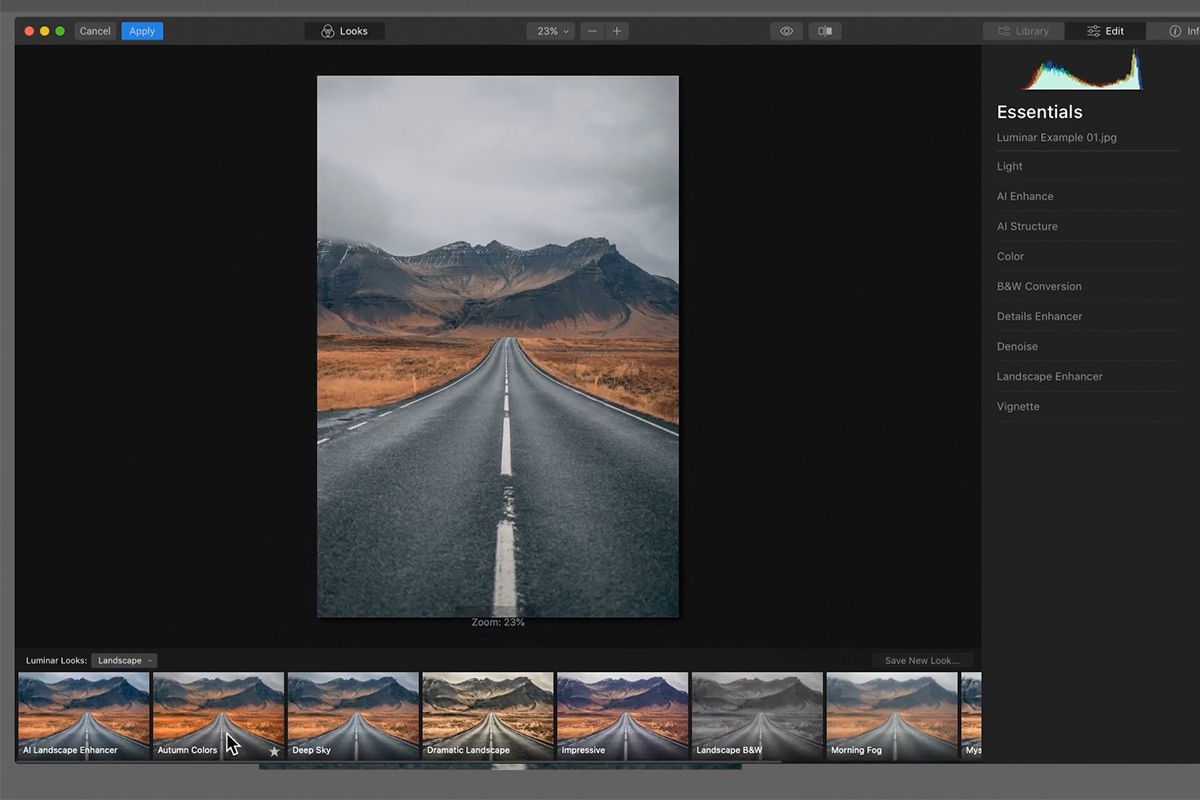
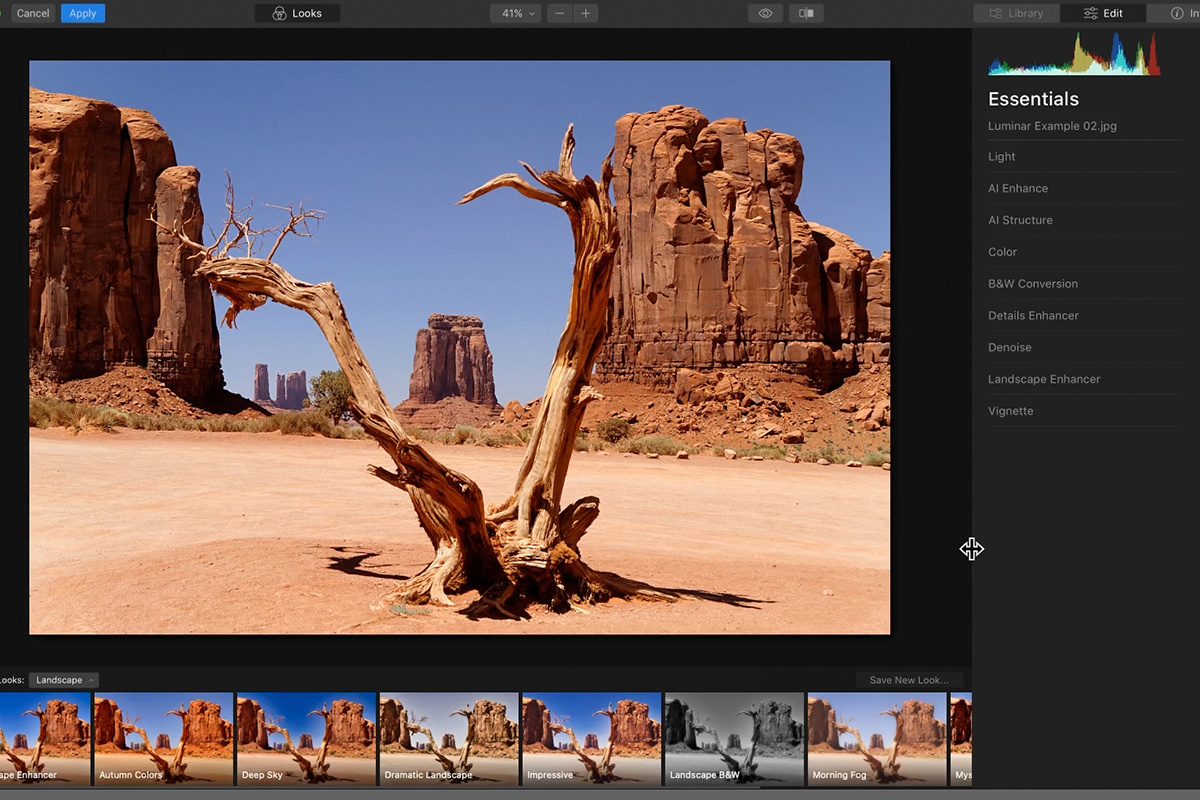
A Quick Tour of Luminar
When you first open the Luminar dialog you’ll see a preview of the landscape image, all of the editing tools in the panel on the right, and a strip of Luminar Looks along the bottom. The Luminar Looks give you the ability to apply color and lighting effects to an image with impressive detail and care. The Amount of each Look can be adjusted as well, giving you control over how strong the effect is.
In the right-side panel there are a wide variety of editing tools, from the powerful AI Enhance to Color adjustments, to Details Enhancements and Vignette options. The AI Enhance was the first to catch our attention.
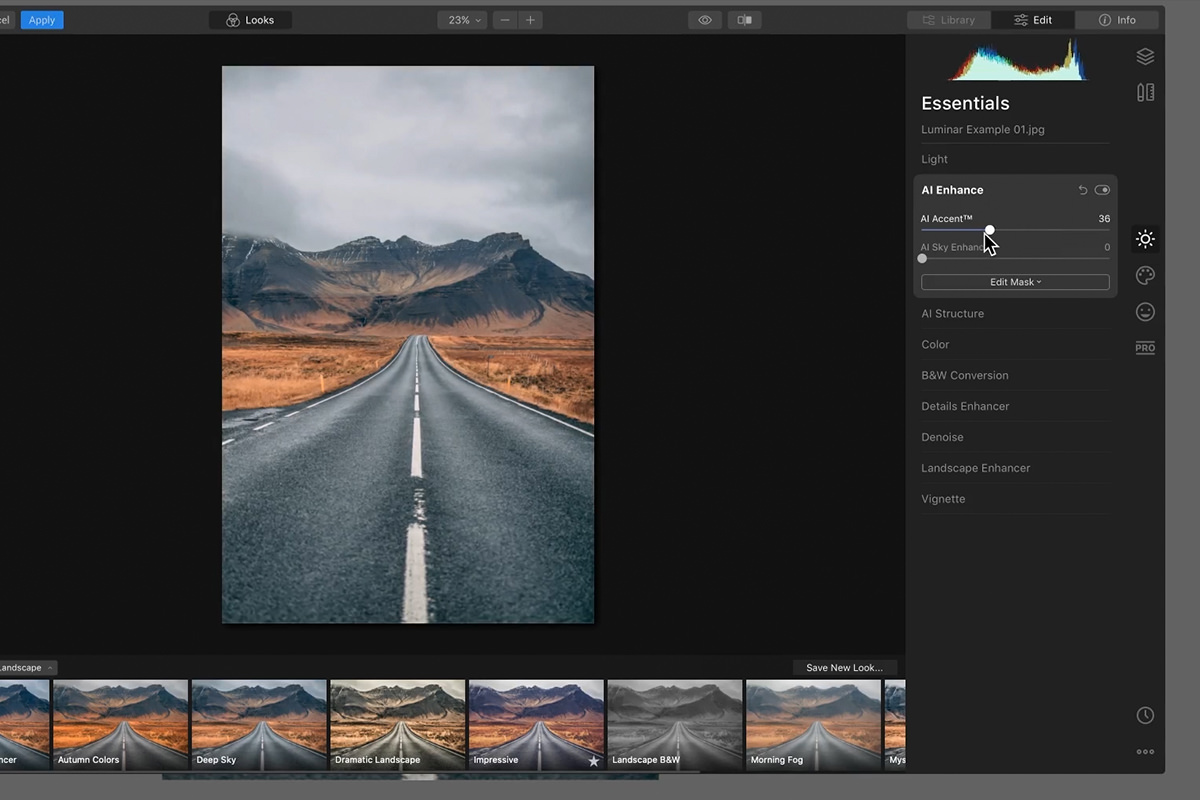
We normally try and avoid tools that apply broad, automatic enhancements, but this one allows for just the right amount of fine-tuning and control, and the overall effects look great. The artificial intelligence under the hood analyzes the image and adds sharpening, contrast, color, and lighting adjustments to improve the overall look of the photo.
If you’re trying Luminar 4 for the first time, we recommend going through each of these automated tools to see what sort of amazing looks you can create!
How to Replace a Sky with Luminar 4
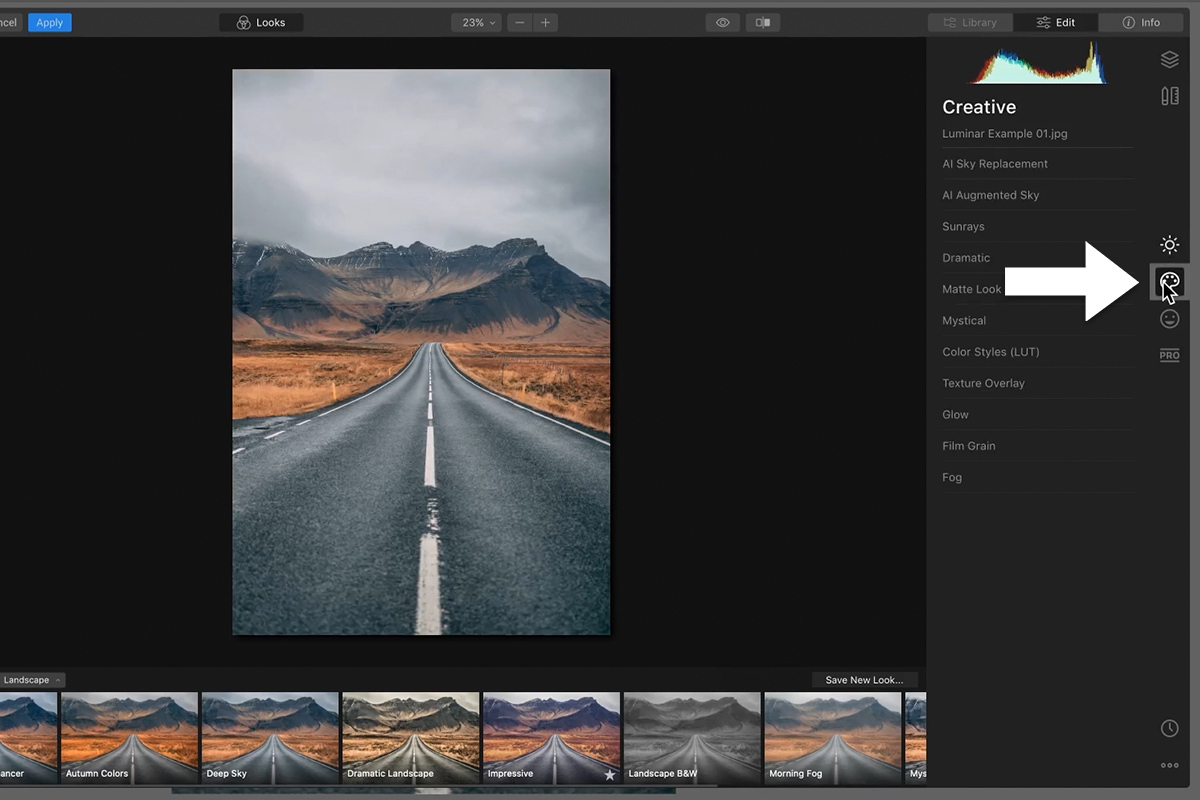
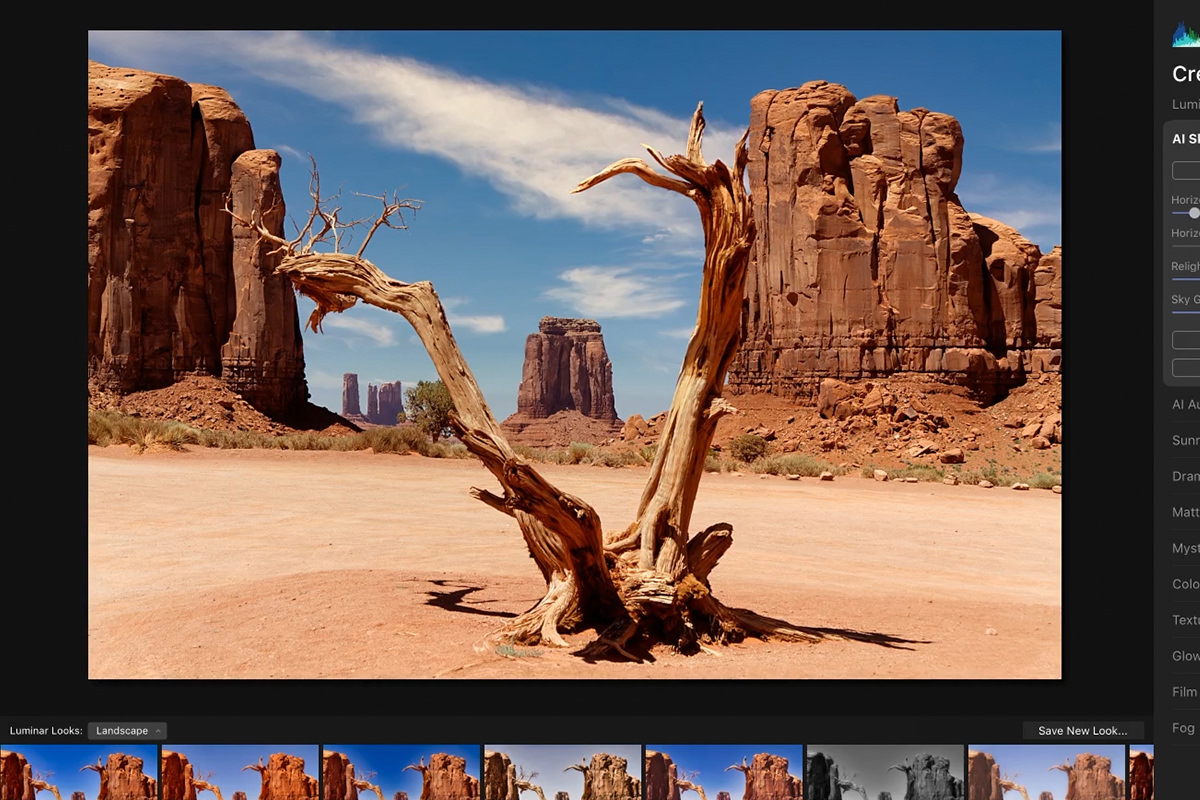
Time to put Luminar to the test! You can find the sky replacement tools by clicking on the Creative Tab on the right side of the dialog. We’re going to be using the top option, AI Sky Replacement.
Now remember, sky replacement normally isn’t very easy. Matching the color and lighting between a landscape and a sky can be a lot of work if you’re doing it manually. And this is where Luminar 4 impressed us the most.
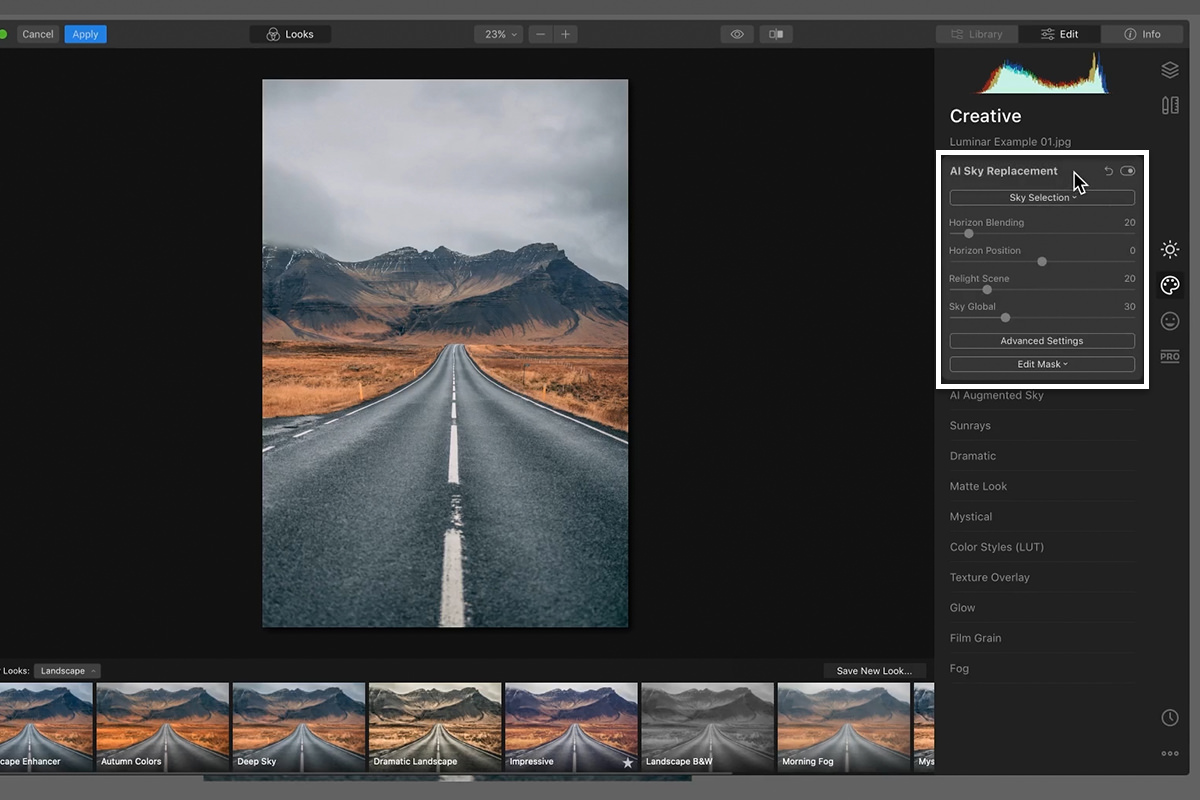
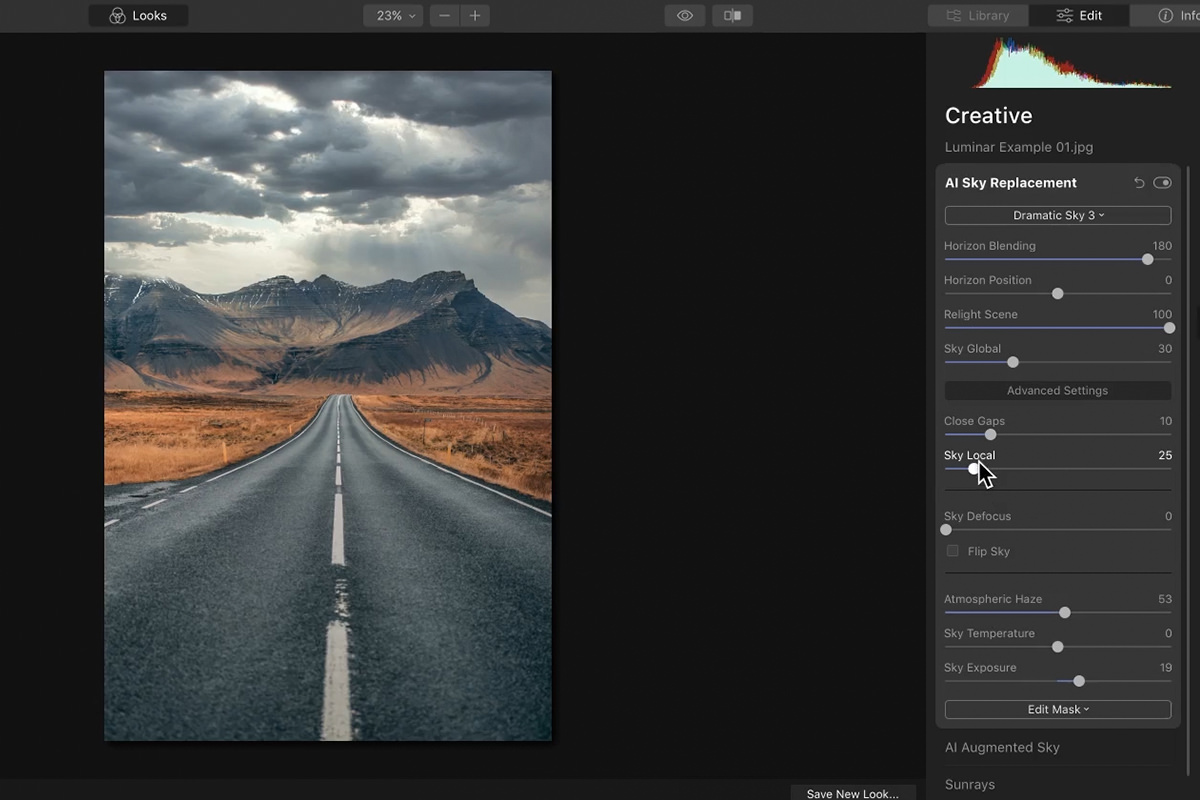
Click on the AI Sky Replacement menu and then on the Sky Selection drop-down. Go ahead and try a few of the skies to get a feel for just how quick and easy this process is. Once you have a good idea for how it works, try and match the image to a sky that fits the scene. Since the original landscape has a darker, overcast sky, we chose to replace the original with one of Luminar’s dramatic sky options.
Lighting & Color
You’ve probably noticed by now that as you place new skies into the scene, Luminar automatically analyzes and adjusts the lighting to be a better match. Not only that, but there are a ton of options and sliders that help you dial in the perfect look. For example, the Relight Scene slider does a pretty impressive job of changing the overall lighting, color, and exposure of the image so that the new sky and the original landscape look like they were captured in the same photograph.
There are also tools like Horizon Blending, which helps to soften the transition between the horizon and the sky; Horizon Position, which helps you line up the natural horizon lines in each photo for a more realistic perspective; Sky Defocus, which will help you match any depth-of-field effects in the landscape; and Flip Sky, which will flip the sky image horizontally if you need to match the lighting direction.
Once you’ve gone through all of the settings and made the adjustments you want, hit the Apply button in the top left to apply the edits and return to the main Photoshop workspace. Notice that since we’re working with a Smart Object, the Luminar 4 adjustments were applied as a Smart Filter.
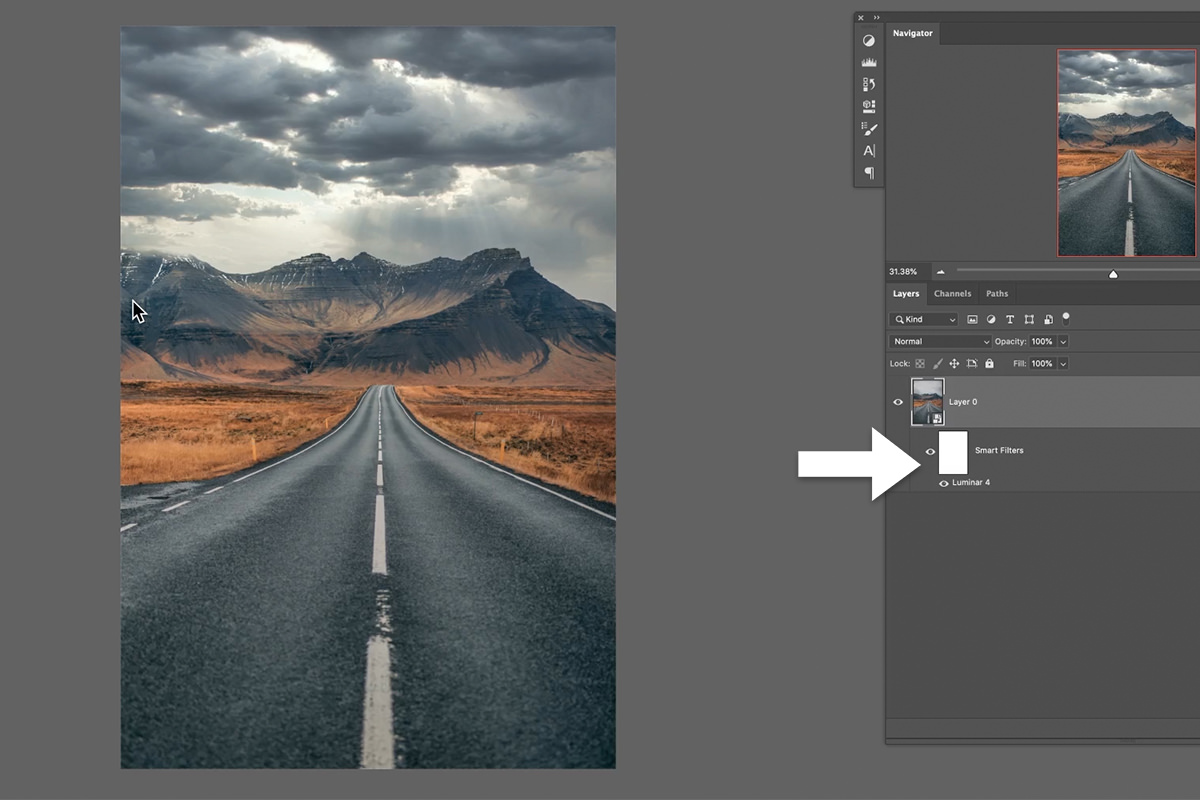
You can click the small eye icon next to the Filter to hide it, or double-click it to return to the Luminar 4 dialog to make more adjustments.
More Detailed Landscape
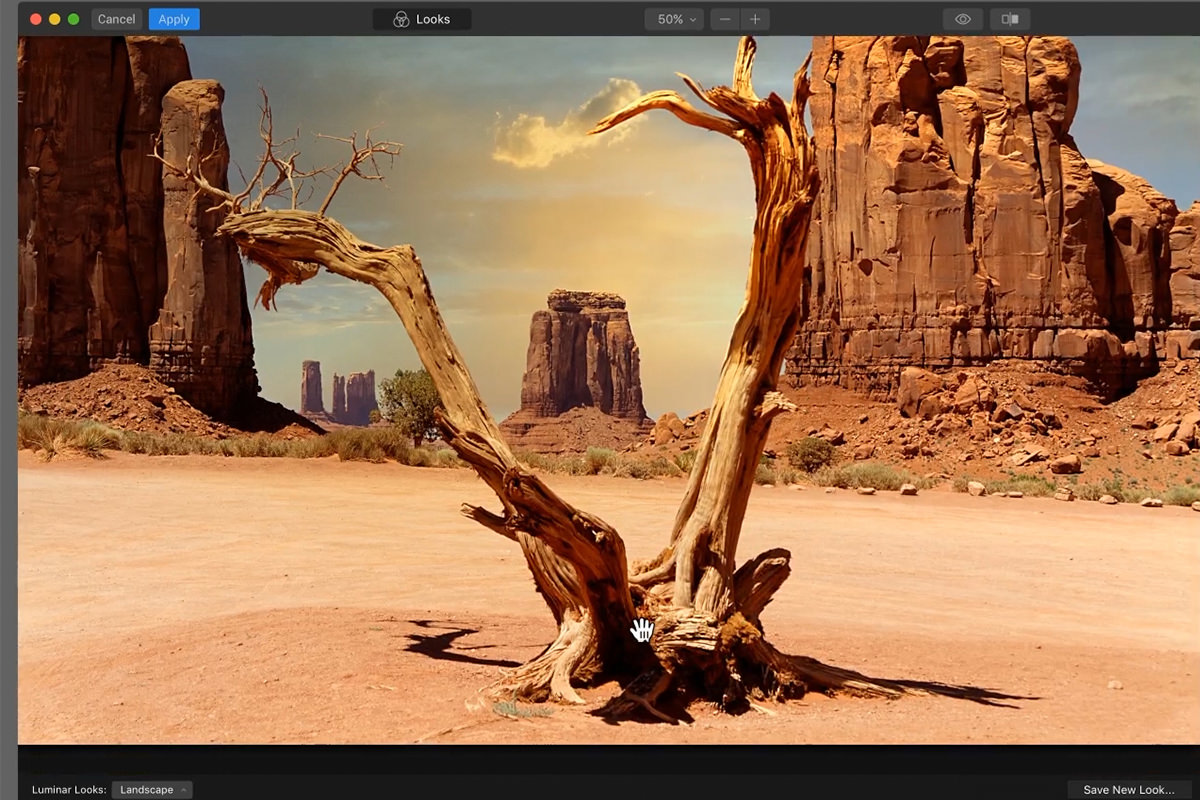
The first example went great! But what if we tried the same thing on a landscape that has more objects and detail along the horizon. Rock structures and trees can make sky replacements a chore, forcing you to make super-detailed selections to realistically place the sky behind and in-between them. Let’s see how Luminar 4 does with a trickier example image.
This landscape has more depth, rock structures that create an uneven horizon, and a tree in the foreground that has a lot of little details in the branches where the sky needs to appear around. Follow the same process as the first example, converting the background image to a Smart Object before opening Luminar 4.
Once Luminar 4 is open, try a couple of skies to see what happens. The results are pretty impressive, especially considering that this process is entirely automated. The sky replacement looks natural, and you can still make all the adjustments you want to the lighting and the color to help the two images match.
There are some additional options under the Advanced Settings tab that are designed to help us with situations just like this. We found that it did a great job, even without trying to fine-tune the effect. However, the Close Gaps and Sky Local options will help to fill in holes and gaps and try to make sure the sky texture is consistent throughout the entire photo.
The Power of A.I.
We have always been a little skeptical of artificial intelligence and automated tools in the editing process, but Luminar 4 is the best application and execution of these time-saving tools that we’ve seen. The results are near seamless, it fits right in with our typical Photoshop workflow, and it has the potential to save us boat-loads of time.
Luminar 4 is an impressive creative tool and we couldn’t recommend it more. Try it out for yourself on your own images!