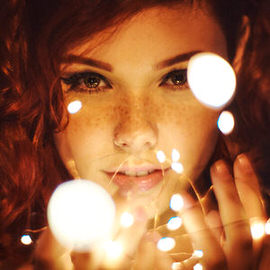
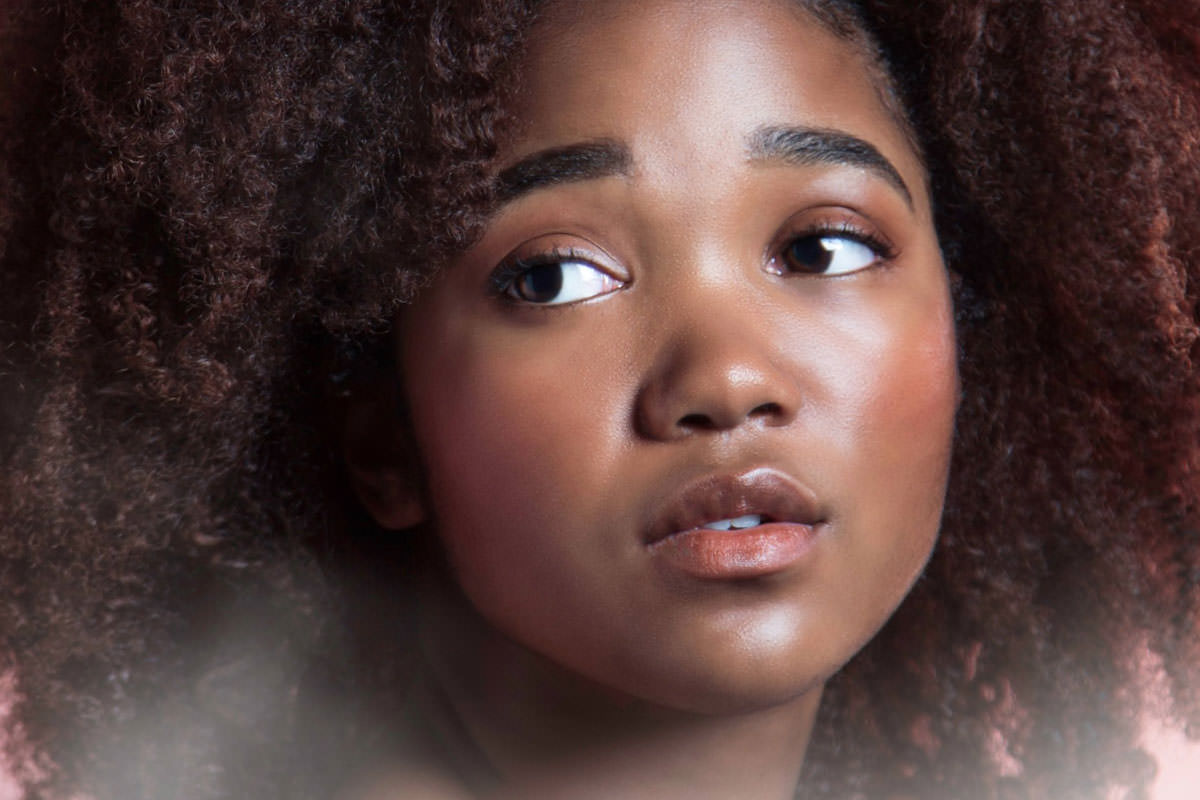

ORIGINAL
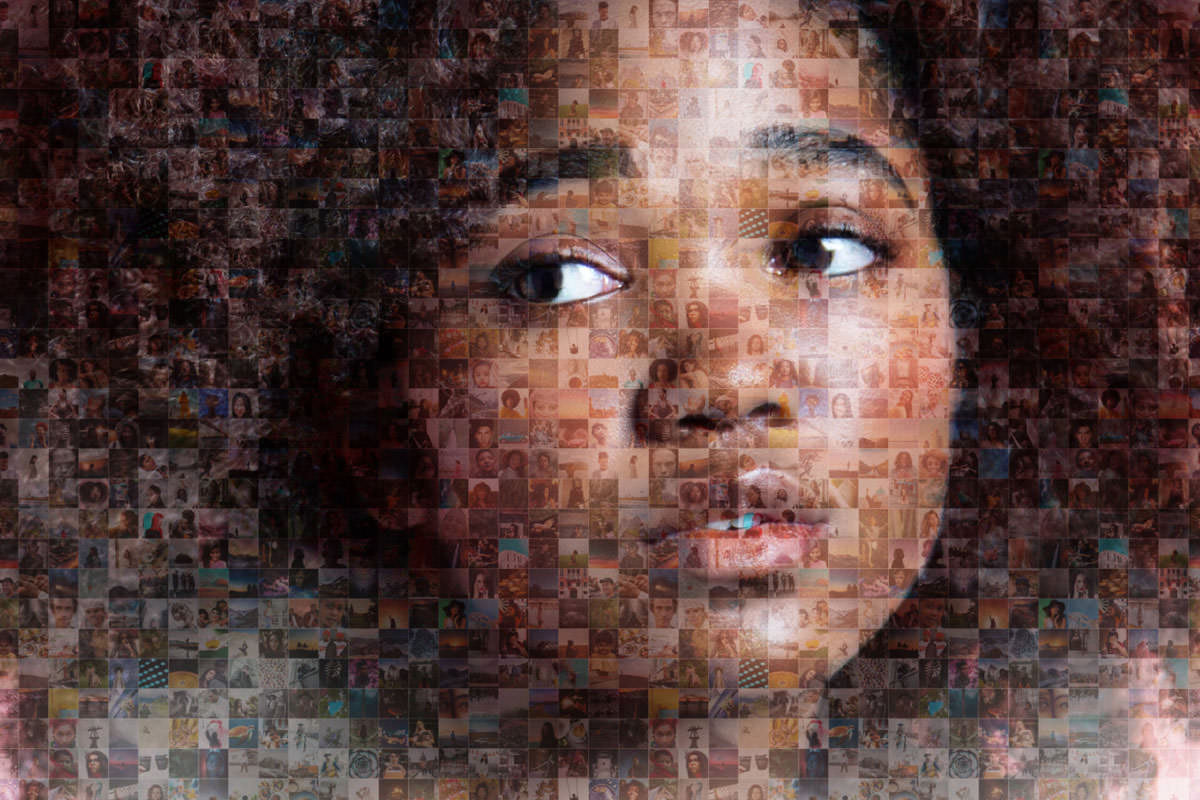
MOSAIC
Download Sample Images
Click the link below to download the sample images and follow along with this tutorial.
DownloadTutorial Description
In this tutorial, we’ll show you how to easily create a beautiful photo mosaic effect that is the perfect finishing touch for those occasions where you’ve taken photos of a group of people or an event. Combine all the images taken at a wedding and match them with the best picture of the bride and groom. Or create a mosaic of all of the employees at a company and overlay them over an image of the main product or service that they offer. There’s countless ways to creatively and effectively use this technique, so be sure to follow along and try it for yourself!
A Beautiful Way to Summarize and Event or an Idea
All you need to make this effect work is a lot of photos and strong theme. The theme can simply be built around where all of the images were taken (think an event, like a wedding or concert). It can also be an idea, like in our sample, where we chose images that celebrate diversity.
Once you’ve gathered all of the images (we recommend using at least 300), the rest is fairly easy to accomplish using a few of the automated tools built within both Lightroom and Photoshop.
Step-by-Step Tutorial
Download the Sample Images
DownloadOpen the Samples Images in Lightroom
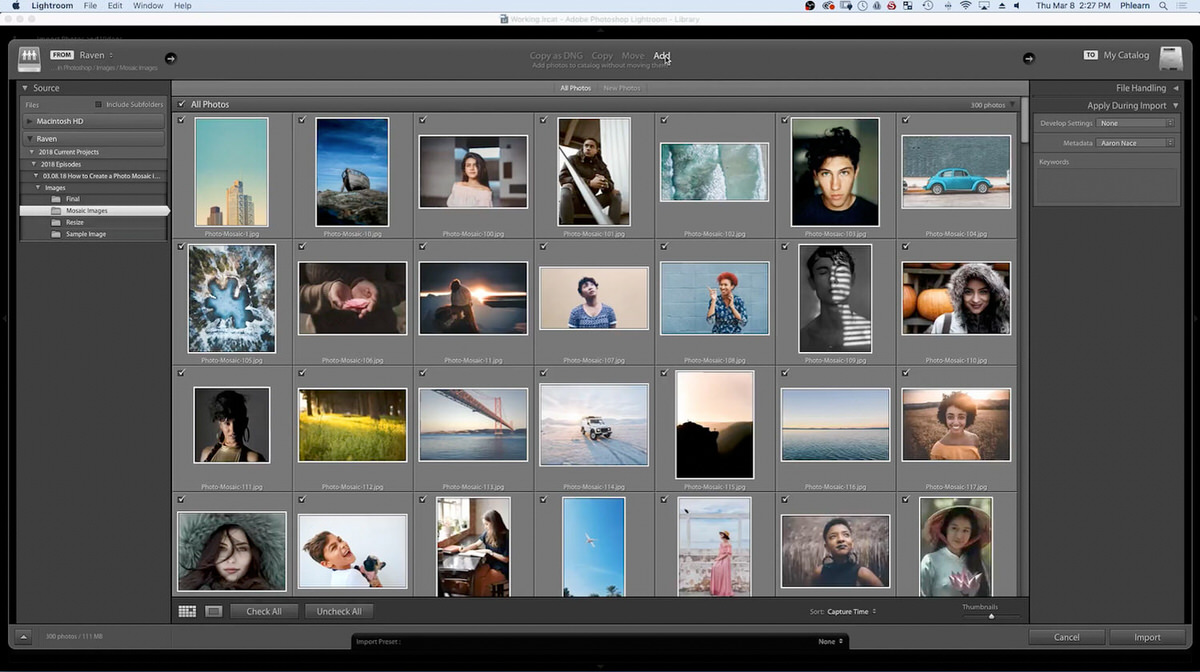
First place the Mosaic Images folder into Lightroom by going to File and Import Photos and Videos… or by dragging and dropping the files into the workspace.
The Import Dialog will appear, which reveals all of the images in the Mosaic Images folder.
At the top of the window, select Add and click on Import. Notice how all of the images selected are now imported into the Library.
Cropping An Image Into A Square Format
Select #27 photo in the Library and hit R, which is the shortcut for the Crop Tool.
Notice that instead of being in the Library tab, the photo is now in the Develop tab. The Develop tab is where images can be modified.
On the right side of the workspace, there are different options to customize the image.
In this case, underneath Crop & Straighten, change the Aspect from Original to the 1 x 1 aspect. This will crop the image into a square format.
Position the image as desired and hit ENTER on the keyboard.

Sync Settings to Multiple Images
Now, go back to the Library and notice how the main image is still selected.
Hit CMD or CTRL + A on the keyboard to Select All of the images in the Library. Notice how the main image is slightly lighter then the rest of the images selected.
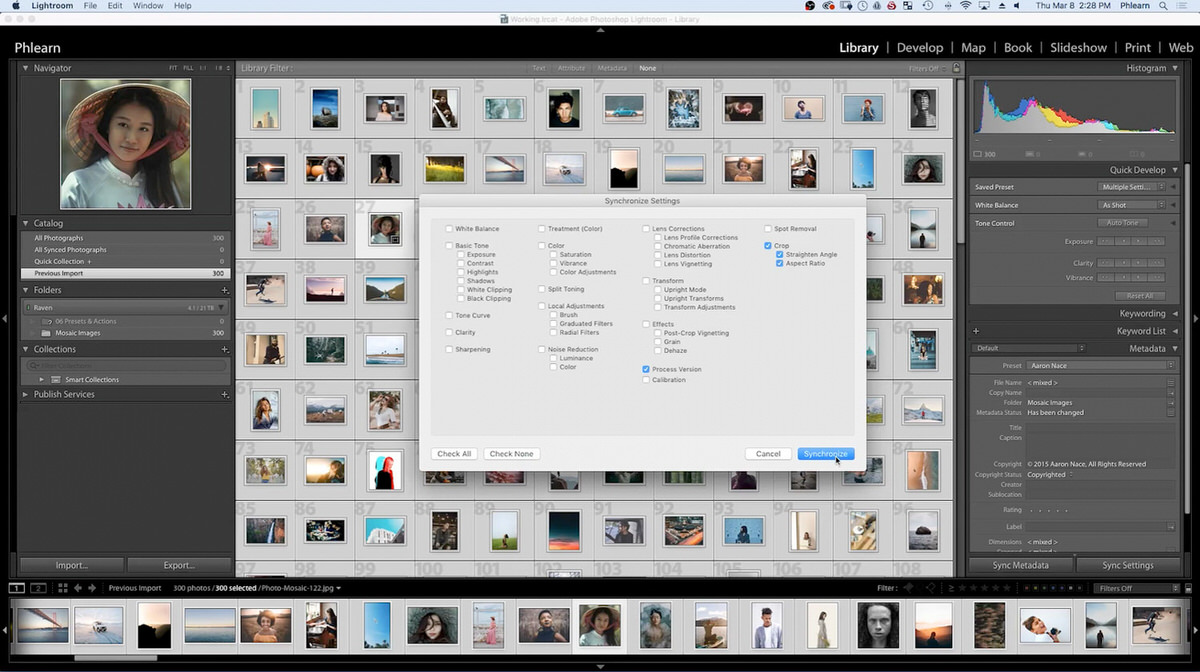
In the right bottom corner of the workspace locate and click on Sync Settings.
Once selected, the Synchronized Settings window will appear.
Select the Check None button on the bottom left of the window.
Although Check None was selected, the Process Version box will still be selected. Select Crop, which will then automatically select Straighten Angle and Aspect Ratio, which is located underneath Crop.
Once the settings are selected, hit Synchronize in the bottom right corner of the window. By selecting these settings, all of the selected images will have a square crop.
Adjusting Automatic Crop
All of the images are synchronized with the same 1 x 1 aspect crop but because the sync setting automatically cropped each image, there is a possibility that the crop will need adjustments.
Notice how photo #232 needs cropping adjustments. To make those adjustments, select the image and hit R on the keyboard for the Crop Tool. To adjust the crop, simply click and drag the mouse to move the image around or scale the image large or smaller. Once the image is cropped to the desired position, hit ENTER on the keyboard.

An easy way to go through all of the images is to go to the bottom of the workspace where the Timeline is located. Once each image is cropped as desired, hit ENTER, and select the next image by either clicking or hitting the left or right arrow on the keyboard.
Exporting Images
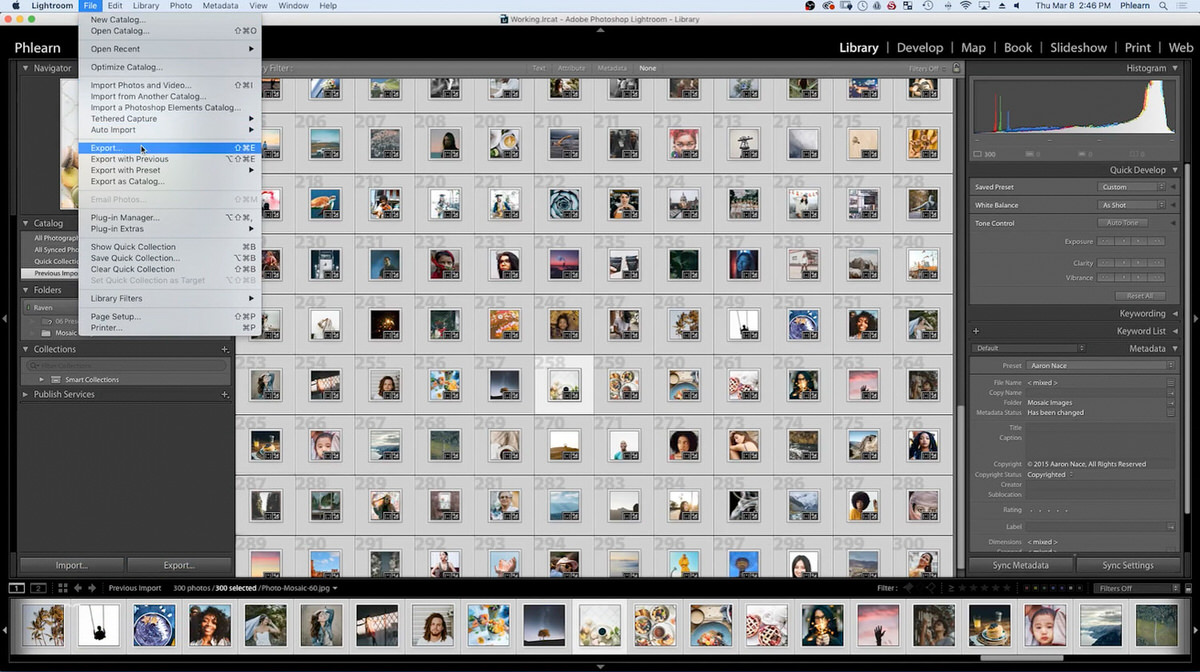
Once all the images are cropped as desired, hit CMD or CTRL + A on the keyboard to Select All of the images. Go to the top of the workspace and select File and go down to Export….
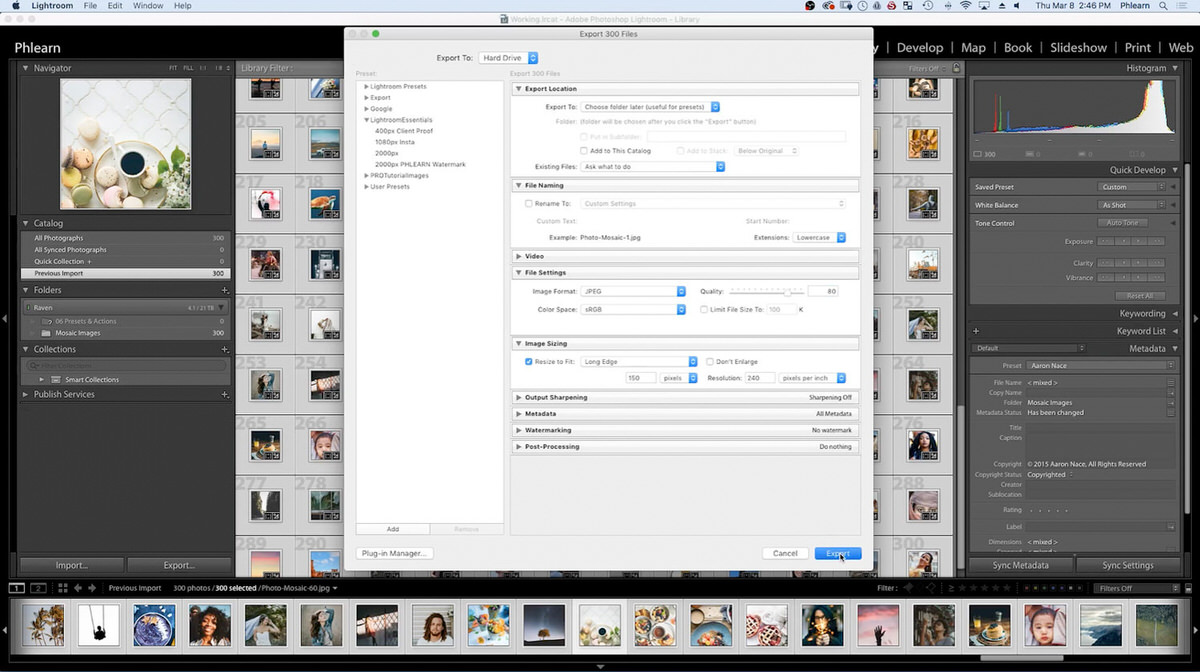
The Export window will appear with different exporting options to choose from. Select the arrow next to Image Sizing to expand the window.
Select the Resize to Fit option and change the option to Long Edge.
Verify that the sizing is set to 150 pixels. The images should be set to a smaller size in order for all of the images to fit in the photo mosaic.
Verify that the Rename To check box, which is under File Naming, is not selected.
Under File Settings, set the Image Format to JPEG, Color Space to sRGB and Quality to 80%.
Under Export Location, set the Export To to Choose folder later (useful for presets).
Once all of the settings are set, click on the Export button on the bottom right corner of the window.
Creating A Export Folder
A window will appear asking where the desired location will be for the export.
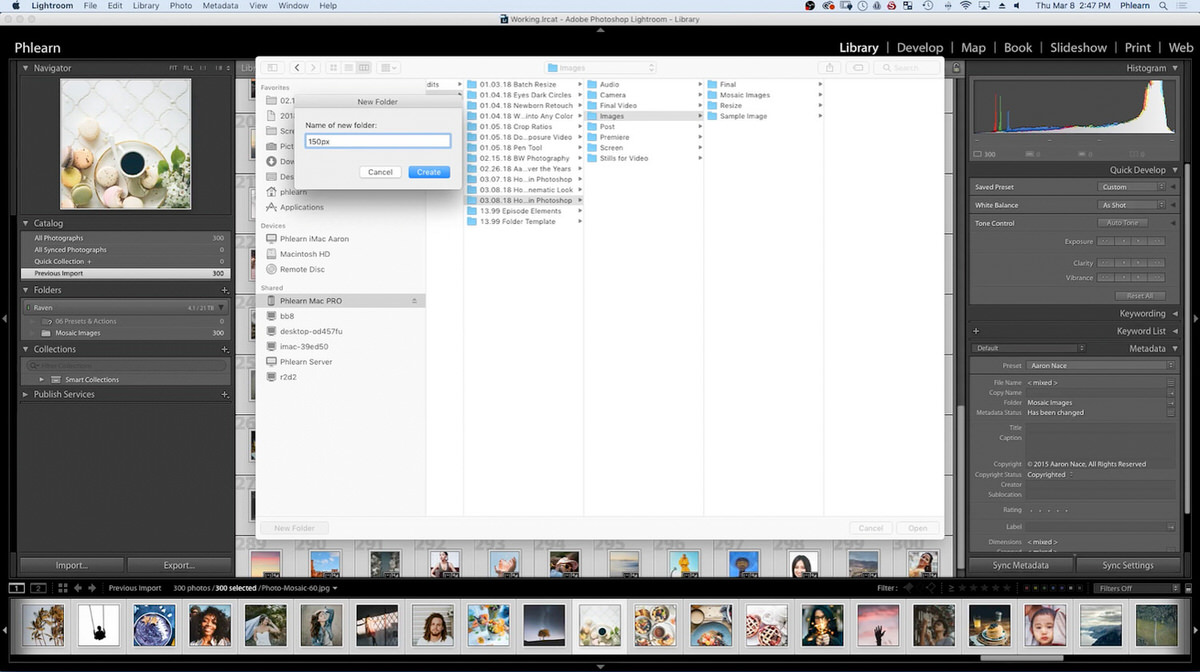
In this case, create a new folder for the exported images by hitting CMD or CTRL + SHIFT + Non the keyboard to create a new folder.
Name the new folder 150px and select the Create button.
The 150px folder will be the new location for the square cropped images.
Select the folder in the window and click Open in the bottom right corner.
A window will appear showing the preparation of the export and then notice at the top left corner of the workspace the progress of the 300 file export.
Creating A Contact Sheet In Photoshop
Now, open Photoshop and locate the top of the workspace.
Click on File, go down to Automate and select Contact Sheet II….

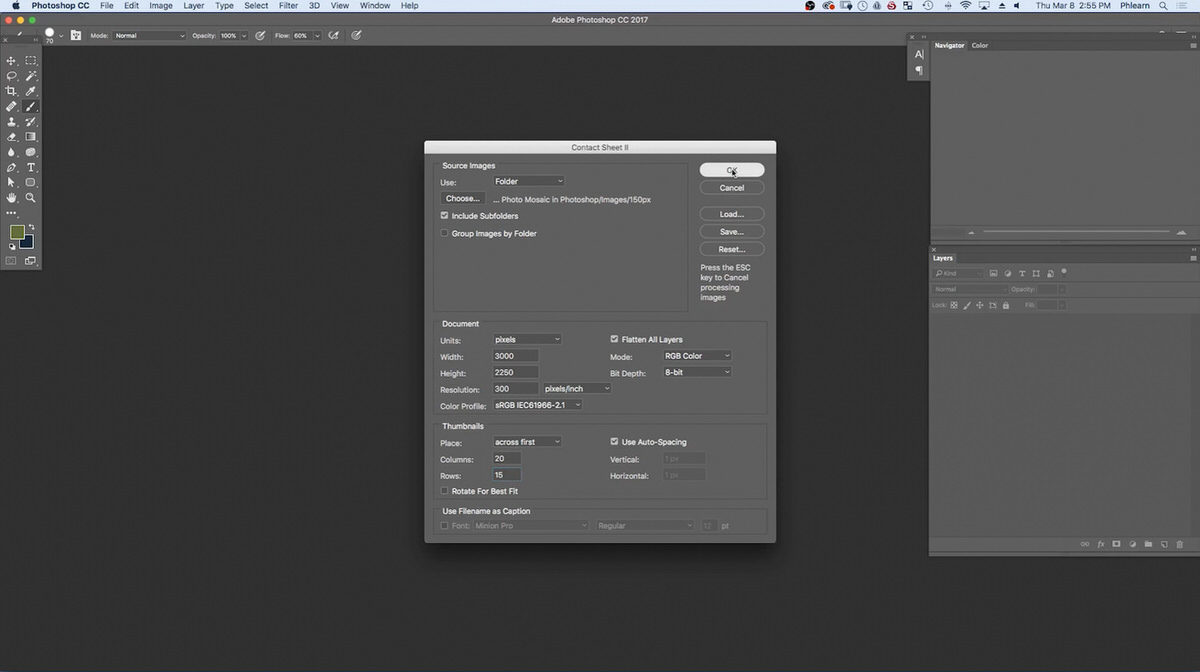
In the Contact Sheet II window, locate Source Images and next to Use set to Folder.
Click on Choose… to select the image folder 150px.
All 300 of the images should appear in the window and select Open in the right bottom corner. By doing this, all of the images in the 150px will load into the contact sheet.
Now that the images are selected for the contact sheet, the size of the document needs to be set.
Remember that the images are each 150 pixels squared and for this contact sheet there will be 20 images wide. To figure out the dimensions, multiply 150 pixels x 20, which equals 3000. 3000 pixels will be the width of the contact sheet. For the height, it will be 15 tall which means 15 needs to be multiplied by 150 to figure out the height. The height of the contact sheet will be 2250 pixels.
Underneath the Document section in the Contact Sheet II window, set the Units from inches to pixels, Width to 3000, and the Height to 2250.
For the Thumbnails, set the Columns to 20 and the Rows to 15.
Verify that the Use Filename as Captions box is unchecked.
Then click OK in the top right corner.
With these settings, Photoshop is going to calculate the mosaic forming.
All of the images that were selected in Lightroom will now appear on a contact sheet.
Create An Overlay
One way to take the mosaic one step further is by overlaying an image overtop the contact sheet so it appears to be made of small images.
To create an overlay with the photo mosaic, go to the top of the workspace and click Edit and down to Define Pattern….

Once the Pattern Name window appears, name the pattern Photo Mosaic and click OK.
The photo mosaic is now stored into Photoshop as a pattern that can be applied to any image.
Open Provided Image In Photoshop
Minimize the photo mosaic pattern in the workspace.
Now to apply the photo mosaic pattern on top of a selected photo, go to File and Open…
Select the sample image How-to-Create-a-Photo-Mosaic-in-Photoshop.jpg and click Open.
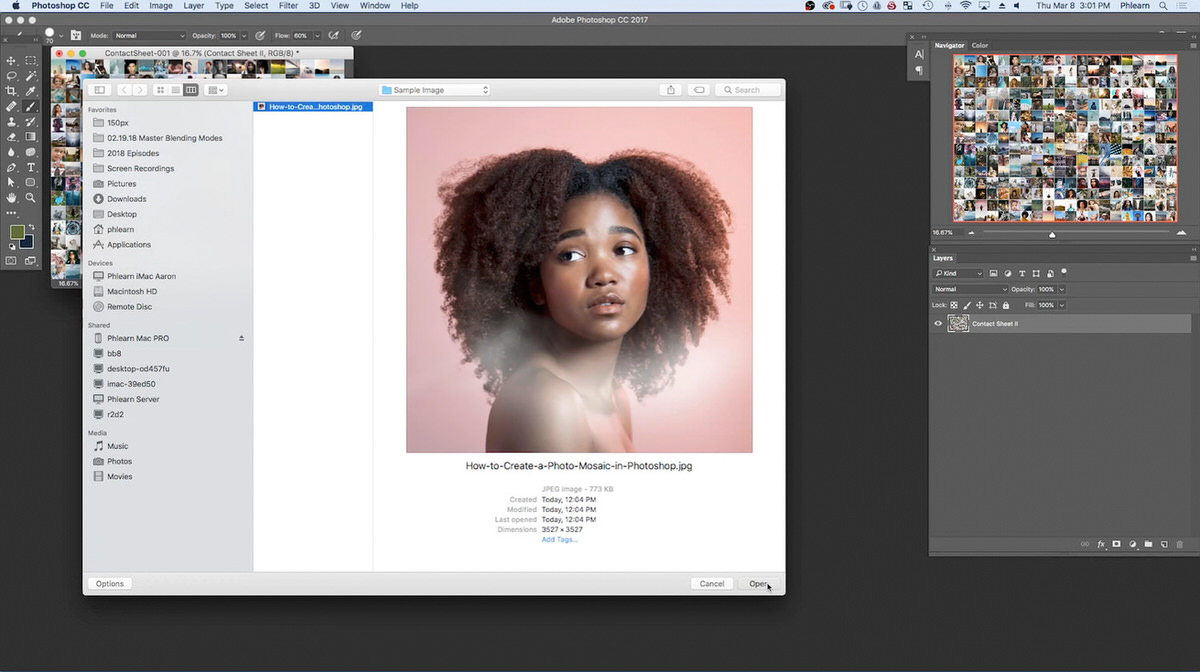
If there are several documents open in the workspace, select the How-to-Create-a-Photo-Mosaic-in-Photoshop.jpg image and hit F on the keyboard for Full Screen.
Apply the Photo Mosaic Pattern To The Main Image
Go to Layer at the top of the screen, go down to New Fill Layer, and select Pattern…
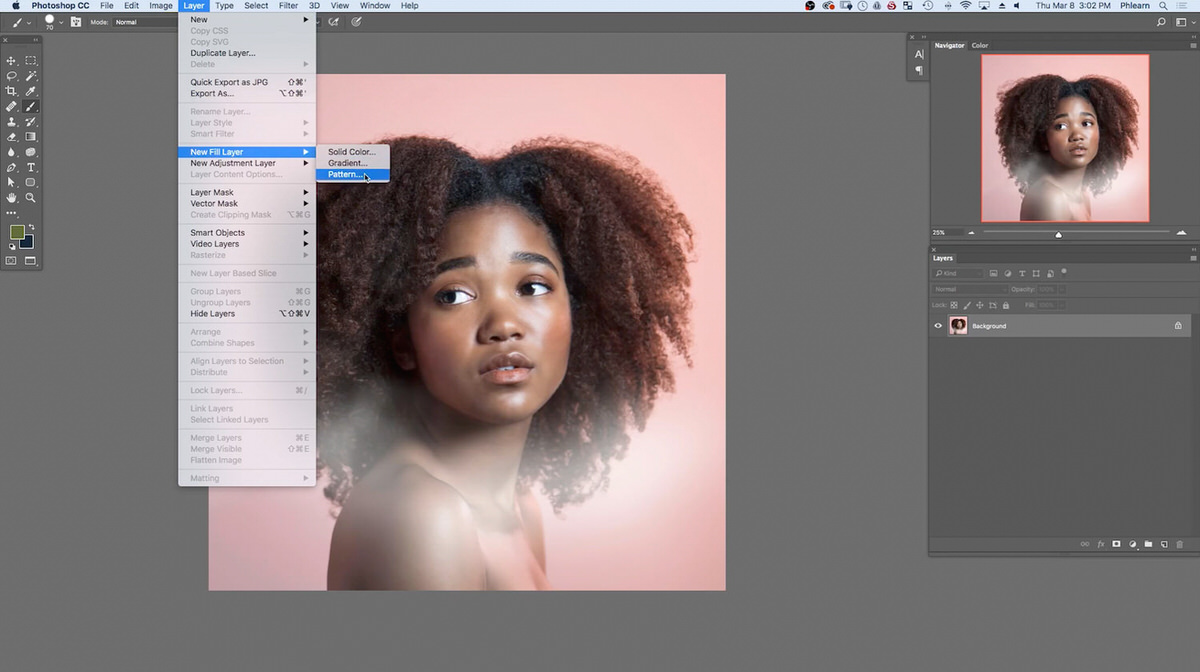
By selecting these options, the photo mosaic pattern will be applied to the main image.
The New Layer window will appear asking to name the new layer. Leave the name Pattern Fill 1 as the layer name and hit OK. The photo mosaic pattern will then load overtop the main image.
Adjusting The Scale
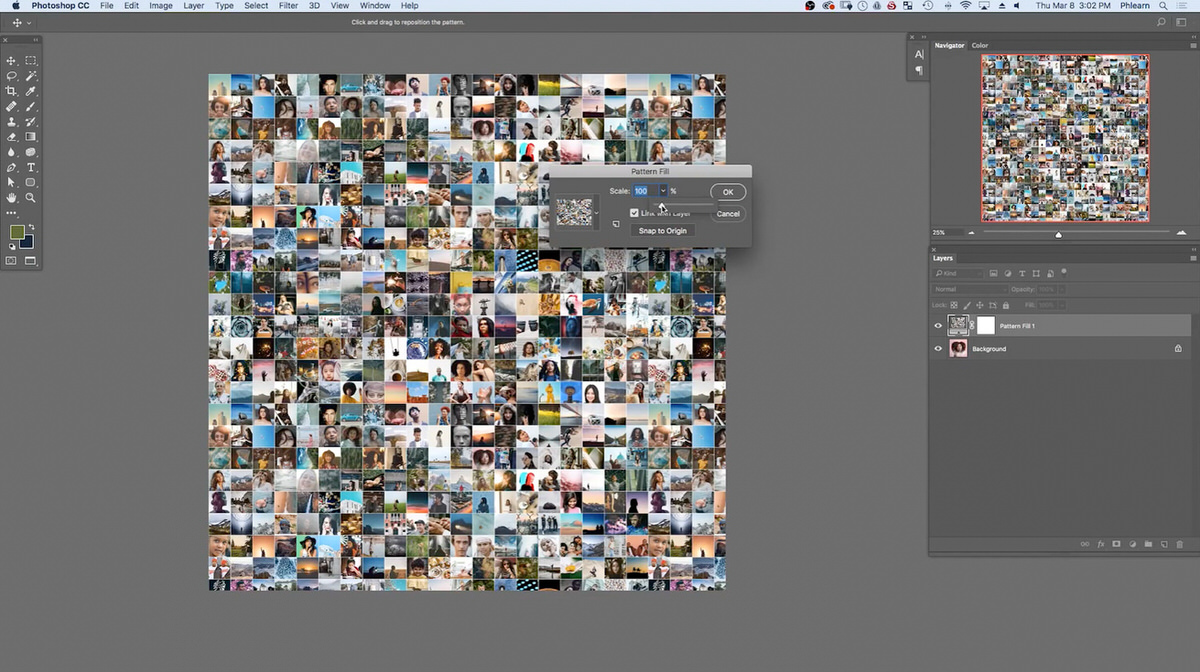
The Pattern Fill window will appear which allows the pattern scaling to be adjusted.
Click on the arrow next to Scale and move the slider left and right.
When changing the Scale, notice how the images are more or less included with a larger or smaller percentage.
In this case, make sure the Scale is set to 100%, verify that the Link with Layers option is selected, and click OK.
Change the Blending Mode to Soft Light
Now, notice on the right side of the workspace, that the Pattern Fill 1 is overtop the Background image in the Layers Panel.
To blend the two layers together, locate the Layers Panel on the right side of the workspace.
Go to the Blending Mode and change the Blending Mode from Normal to Soft Light for Pattern Fill 1 layer.
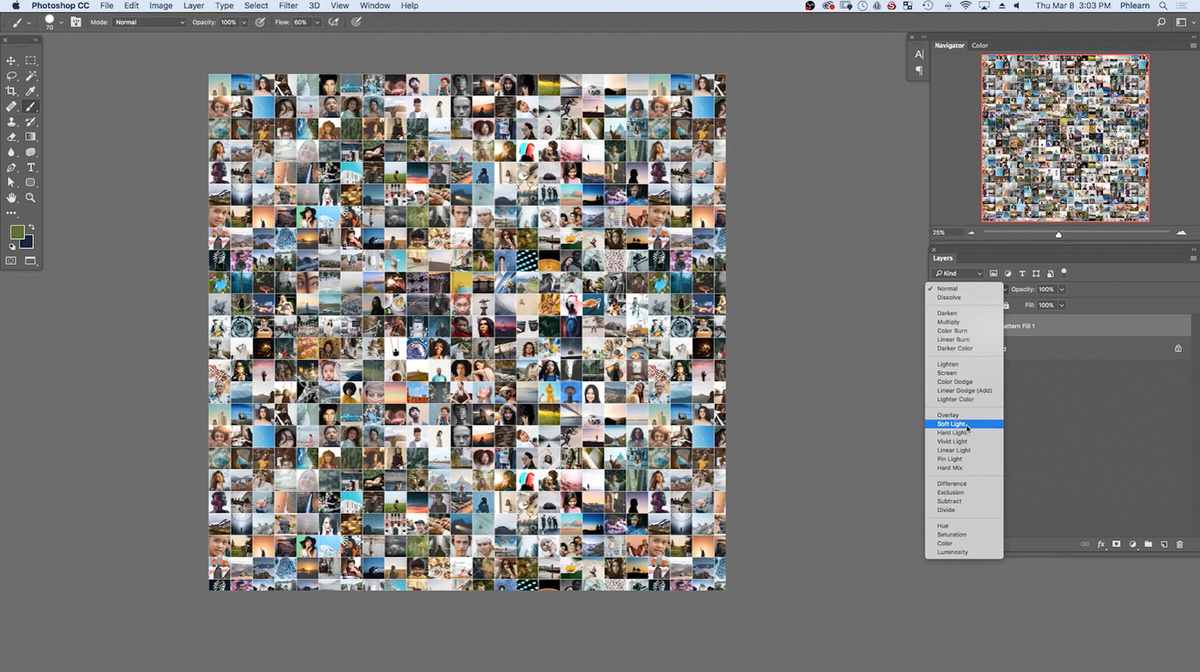
Now, the photo mosaic looks as if it is creating the main image.
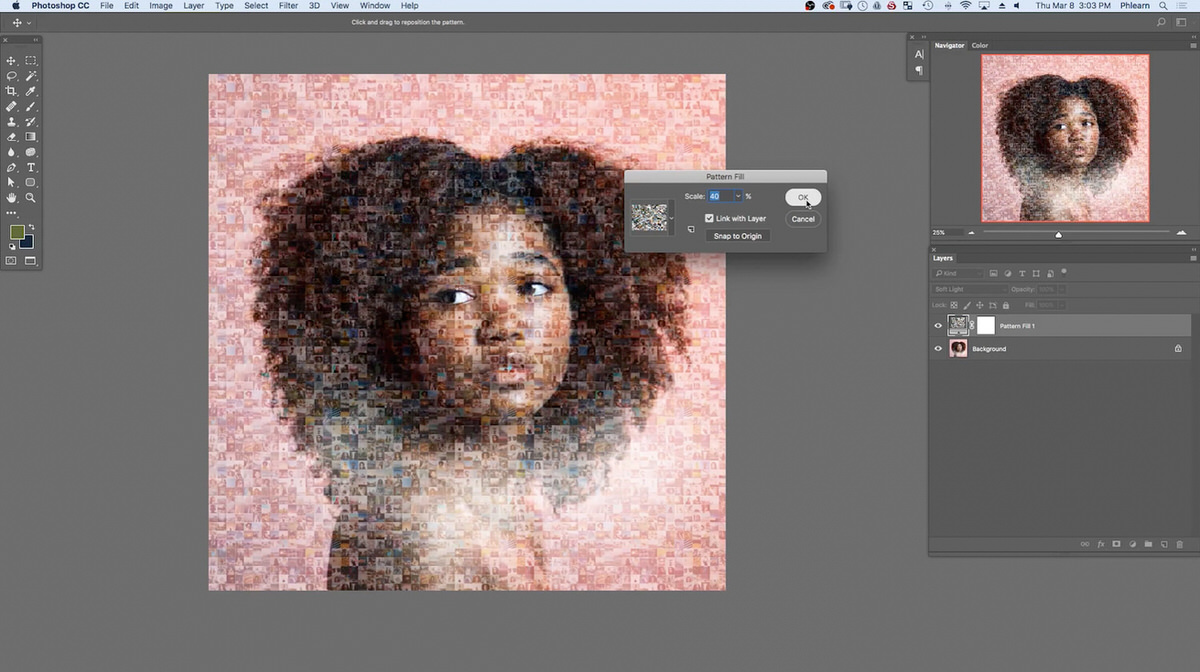
Adjust Scale to 40%
At any time, double-click on the left box of the Pattern Fill 1 layer in the Layers Panel to adjust the Pattern Fill. Each image is going to have its own appropriate scale for applying a pattern.
For this image set the Scale to 40% and click OK.
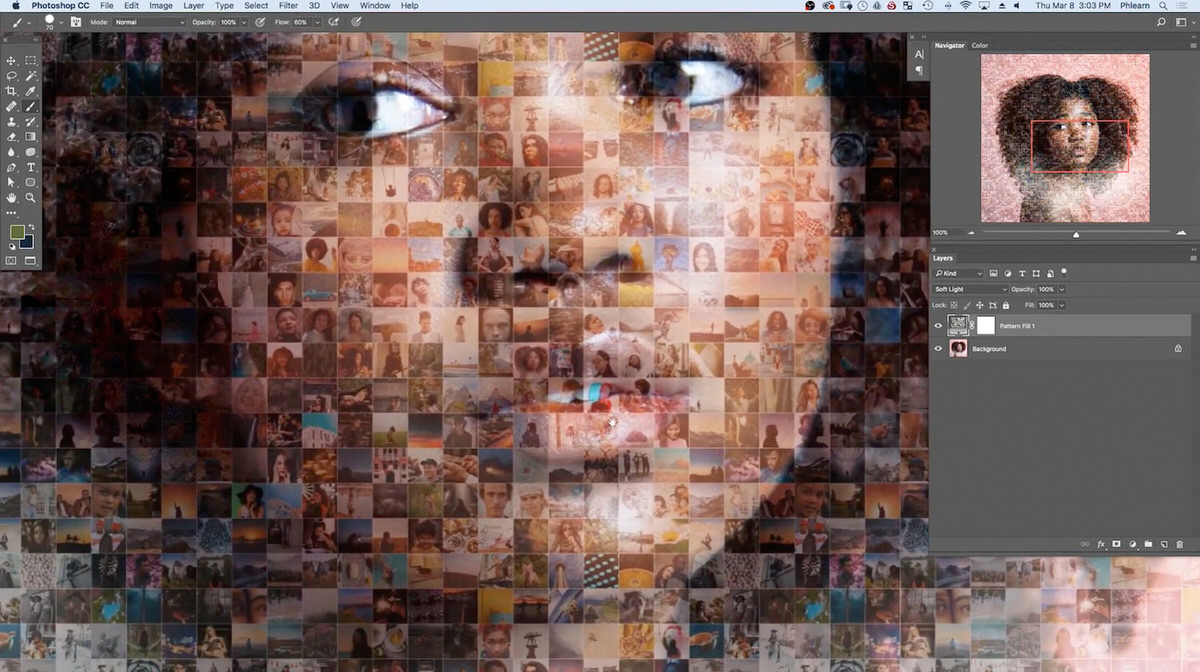
To zoom closer to the image to view the photo pattern, hit Z on the keyboard to select the Zoom Tool. Simply click to zoom in and ALT or OPTN and click to zoom out.
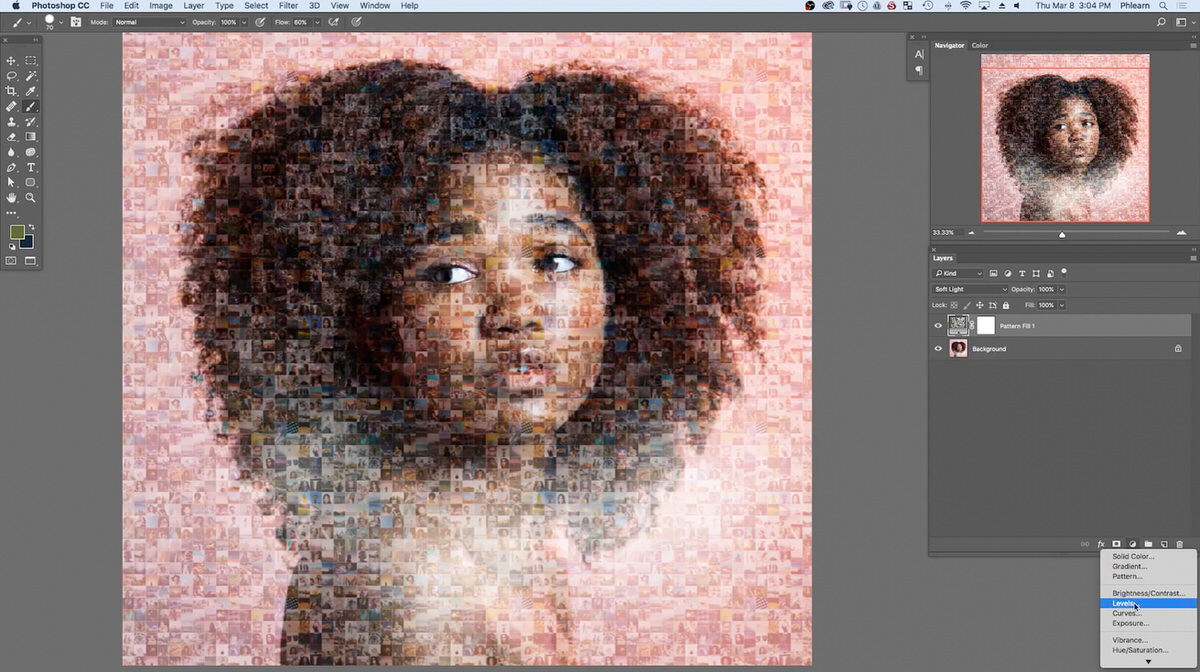
Adjusting Contrast with Levels
If less contrast is desired in the photo pattern, locate the bottom of the Layers window where there are a few different tabs to choose from. The half-filled in circle, which is located in the middle, represents the Adjustment Layer. Select the small arrow below the Adjustment Layer and click on Levels.
Notice the Levels window reveals how much light and dark aspects are in the image.At the bottom of the window, notice the symbol with the arrow and square, which allows a layer to be clipped with the Levels layer.
Locate Output Levels, which is located underneath the Levels Histogram. Notice how there are two sliders on either side of the Output Levels gradient. The slider on the left controls the dark levels and the right slider controls the white levels in the image. In this case, bring the black levels to the right and the white levels to the left slightly. The Output Levels should be 64 and 202.
The Levels can be turned on or off at any time in the Layers Panel.
Now the photo mosaic pattern is added overtop the main image.