
AARON INTERVIEWS XANDER FROM PRINTLAB CHICAGO
LEARN ABOUT PAPER TYPES, COLOR SPACE & MORE!
Download our Photo Printing Help Doc!
Click the link below to download the help doc for your next printing project.
DownloadTutorial Description
Curious about the printing process? Want to know the best way to get your photos from screen to paper?
We’ve taken some of your top printing questions to the professional print technicians at Printlab in Chicago. They break down everything, from myths about CMYK and monitor calibration, to explaining how to optimize for images for the printing process.
Be sure to follow them and send them your print questions on their Facebook and Instagram!
Screen vs. Paper
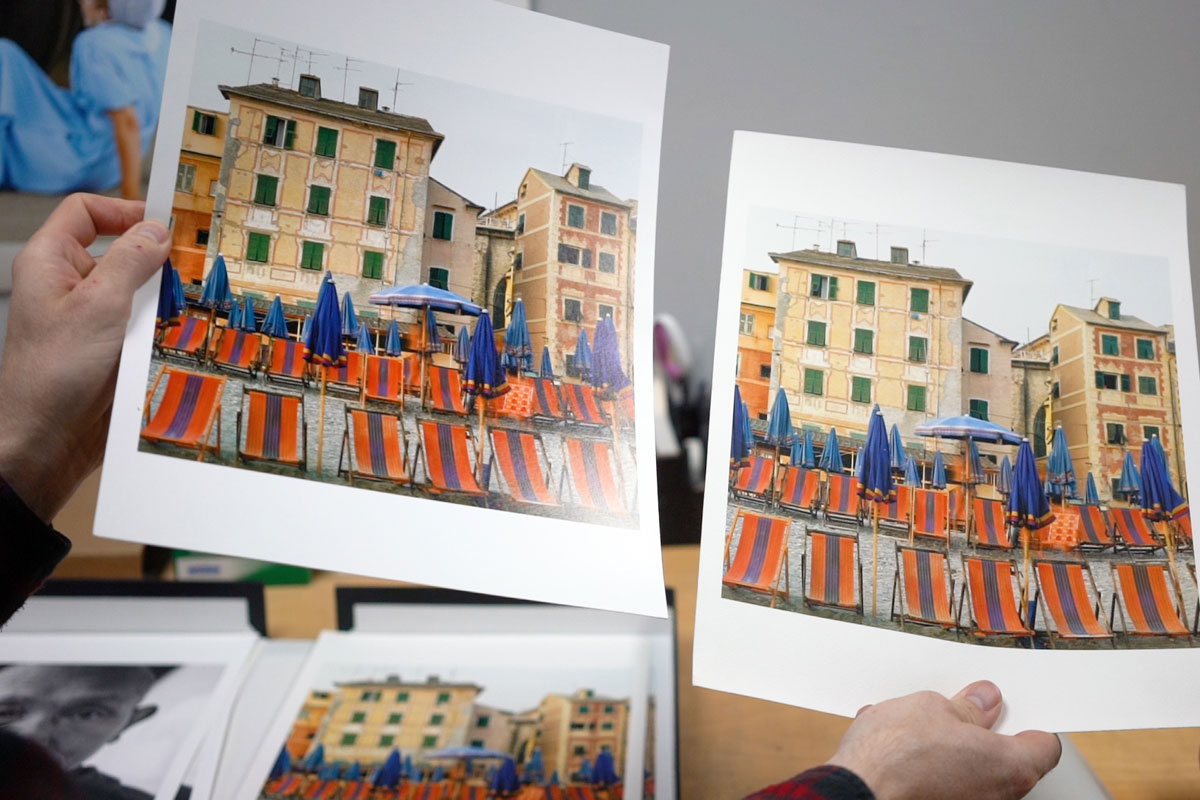
One of the biggest obstacles you might face when printing is getting your prints to look they did on your computer monitor. The most important thing to remember when preparing an image for print is that your computer screen is backlit and paper is not. Images will always appear darker in print than they did on your computer.
You can fix this in two ways.
First, try and get your computer monitor to more closely match the look of a print. While monitor calibration is a term that’s most often thrown around, it actually doesn’t do much to help you see what your prints are going to look like unless you’re using a specialized print monitor. Instead of worrying about expensive monitors and calibration equipment, simply lower the brightness (and, if possible, the backlight) of your monitor. Then lower the overall contrast of your monitor as well.
While it’s not a perfect representation of what to expect from print, it will certainly give you a much closer approximation.
The second fix is to brighten up your image to compensate for the transfer to paper. Printlab recommends using Curves Adjustment Layers or Adobe Camera RAW (with a Smart Object workflow) to get the most precise control.
Learn how to use the power of Curves in our PRO tutorial How to Master Adjustment Layers in Photoshop! And if you prefer Adobe Camera RAW, check out How to Master Adobe Camera RAW in Photoshop!
CMYK
Don’t convert your images to CMYK before printing! CMYK is a smaller color space compared to the print-optimal Adobe RGB 1998 or even web-optimal sRGB. While you might have heard that CMYK should be the go-to color space for printing, that’s just not the case anymore. By converting to CMYK, you risk your image printing with much less color detail.
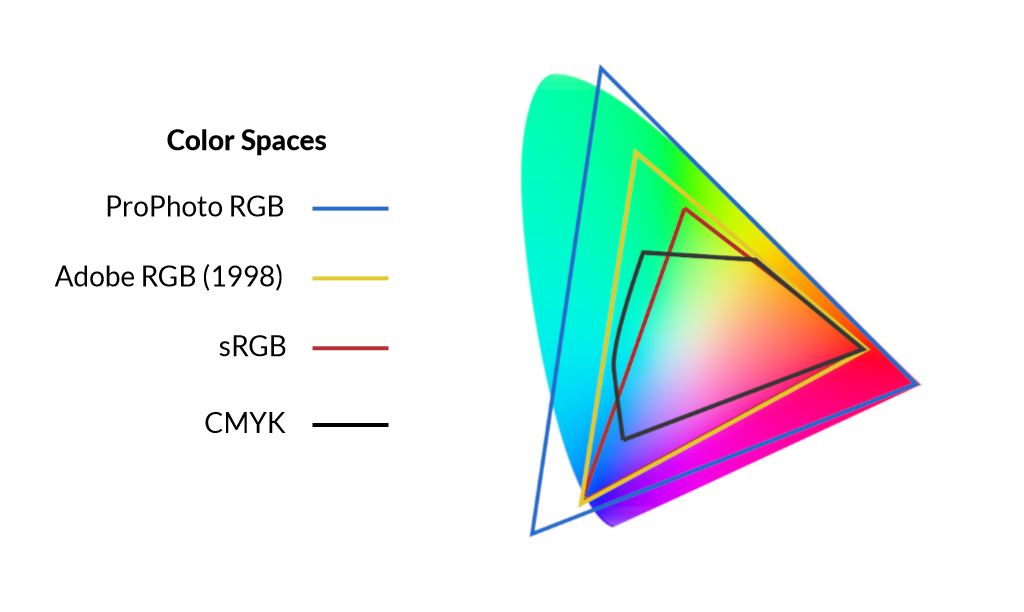
Image Resolution, DPI & Print Size
The most important factor to consider when determining print size and DPI is where and how the image will be viewed. If your prints are going to be viewed up close, 150-300 DPI will ensure all of those fine details are visible. If it’s going to be viewed from several feet or more away, a DPI of 100 is totally acceptable in most cases.
If you ever need to make a print larger, Printlab recommends lowering the DPI rather than using any upsampling processes to do so. Upsampling relies on whatever program you’re using to analyze and add more pixels to an image, which can yield unexpected or undesirable results. Typically a lower the DPI will result in a slightly softer image, but it likely won’t be noticeable if the print is being viewed from several feet away (which is often the case for large prints).
Download our help doc above for some tricks to determine the ideal print size and DPI for your photos!