
How to Master Adobe Camera RAW (ACR) in Photoshop
-

-
Add to
favorites
-
DifficultyEasy
-
Length4 hours
-
Software
Description
Processing RAW files require specific software that will allow us to interpret the complex information within. Think of Photoshop as your photo editor, and Adobe Camera RAW as your photo developer.
In this tutorial, you’ll learn to use Adobe Camera Raw to adjust white balance, recover details in the highlights and shadows, remove minor distractions, create HDR images, and to work seamlessly with Photoshop so that you can go back at any time to make changes or adjustments.
THIS COURSE INCLUDES
- 15 Sample Images
SHARE
Table of contents
-
01 - Introduction to Adobe Camera RAW2:23m
-
02 - ACR Settings & Saving for the Web10:03m
-
03 - RAW vs. JPEG7:38m
-
01 - Adobe Camera RAW Tools (Part 1)15:16m
-
02 - Adobe Camera RAW Tools (Part 2)25:59m
-
03 - Basic Adjustments9:02m
-
04 - Tone Curve6:19m
-
05 - Detail8:11m
-
06 - Color5:00m
-
07 - Split Toning3:52m
-
08 - Lens Corrections5:37m
-
09 - Effects4:59m
-
10 - Camera Calibration3:01m
-
11 - Presets5:42m
-
01 - Portrait Adjustments and Retouching (Example 1)19:34m
-
02 - Portrait Adjustments and Retouching (Example 2)14:04m
-
03 - Portrait Adjustments and Retouching (Example 3)24:49m
-
04 - Landscape Adjustments (Example 1)8:21m
-
05 - Landscape Adjustments (Example 2)9:53m
-
06 - How to Create Manual HDR14:40m
-
07 - How to Correct Underexposure10:16m
Course Downloads
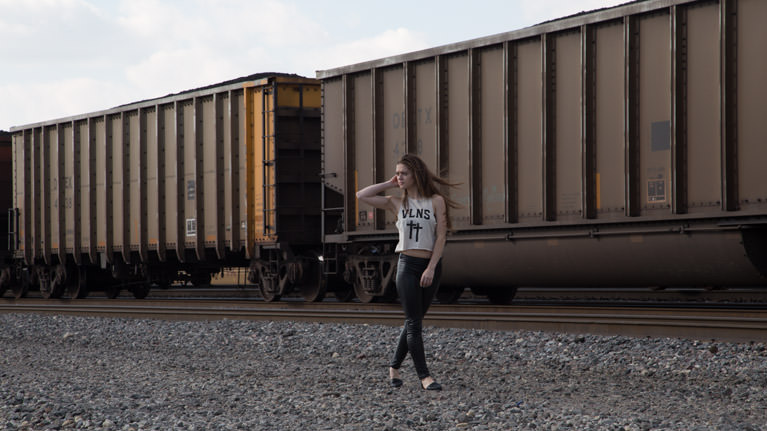
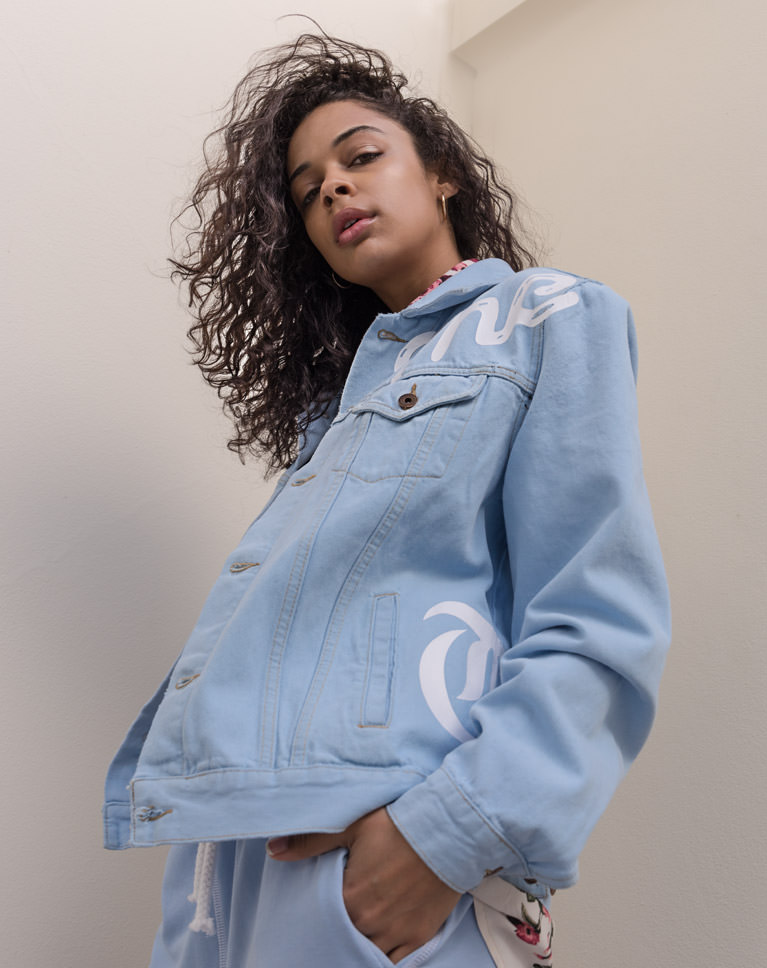
MASTER ENVIRONMENTAL PORTRAITS WITH ADOBE CAMERA RAW
ORIGINAL

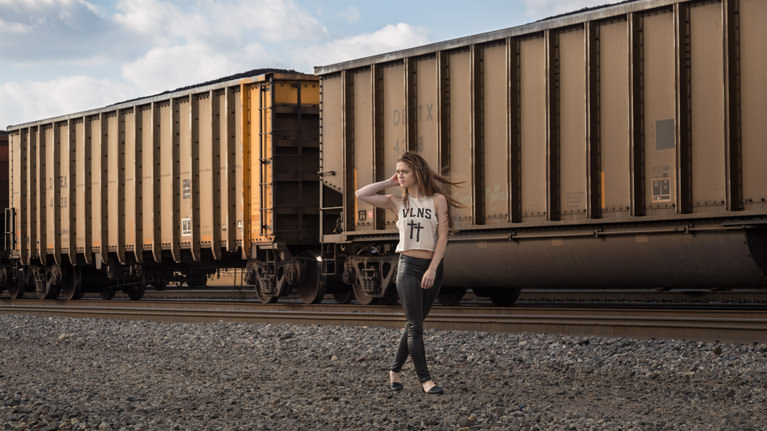
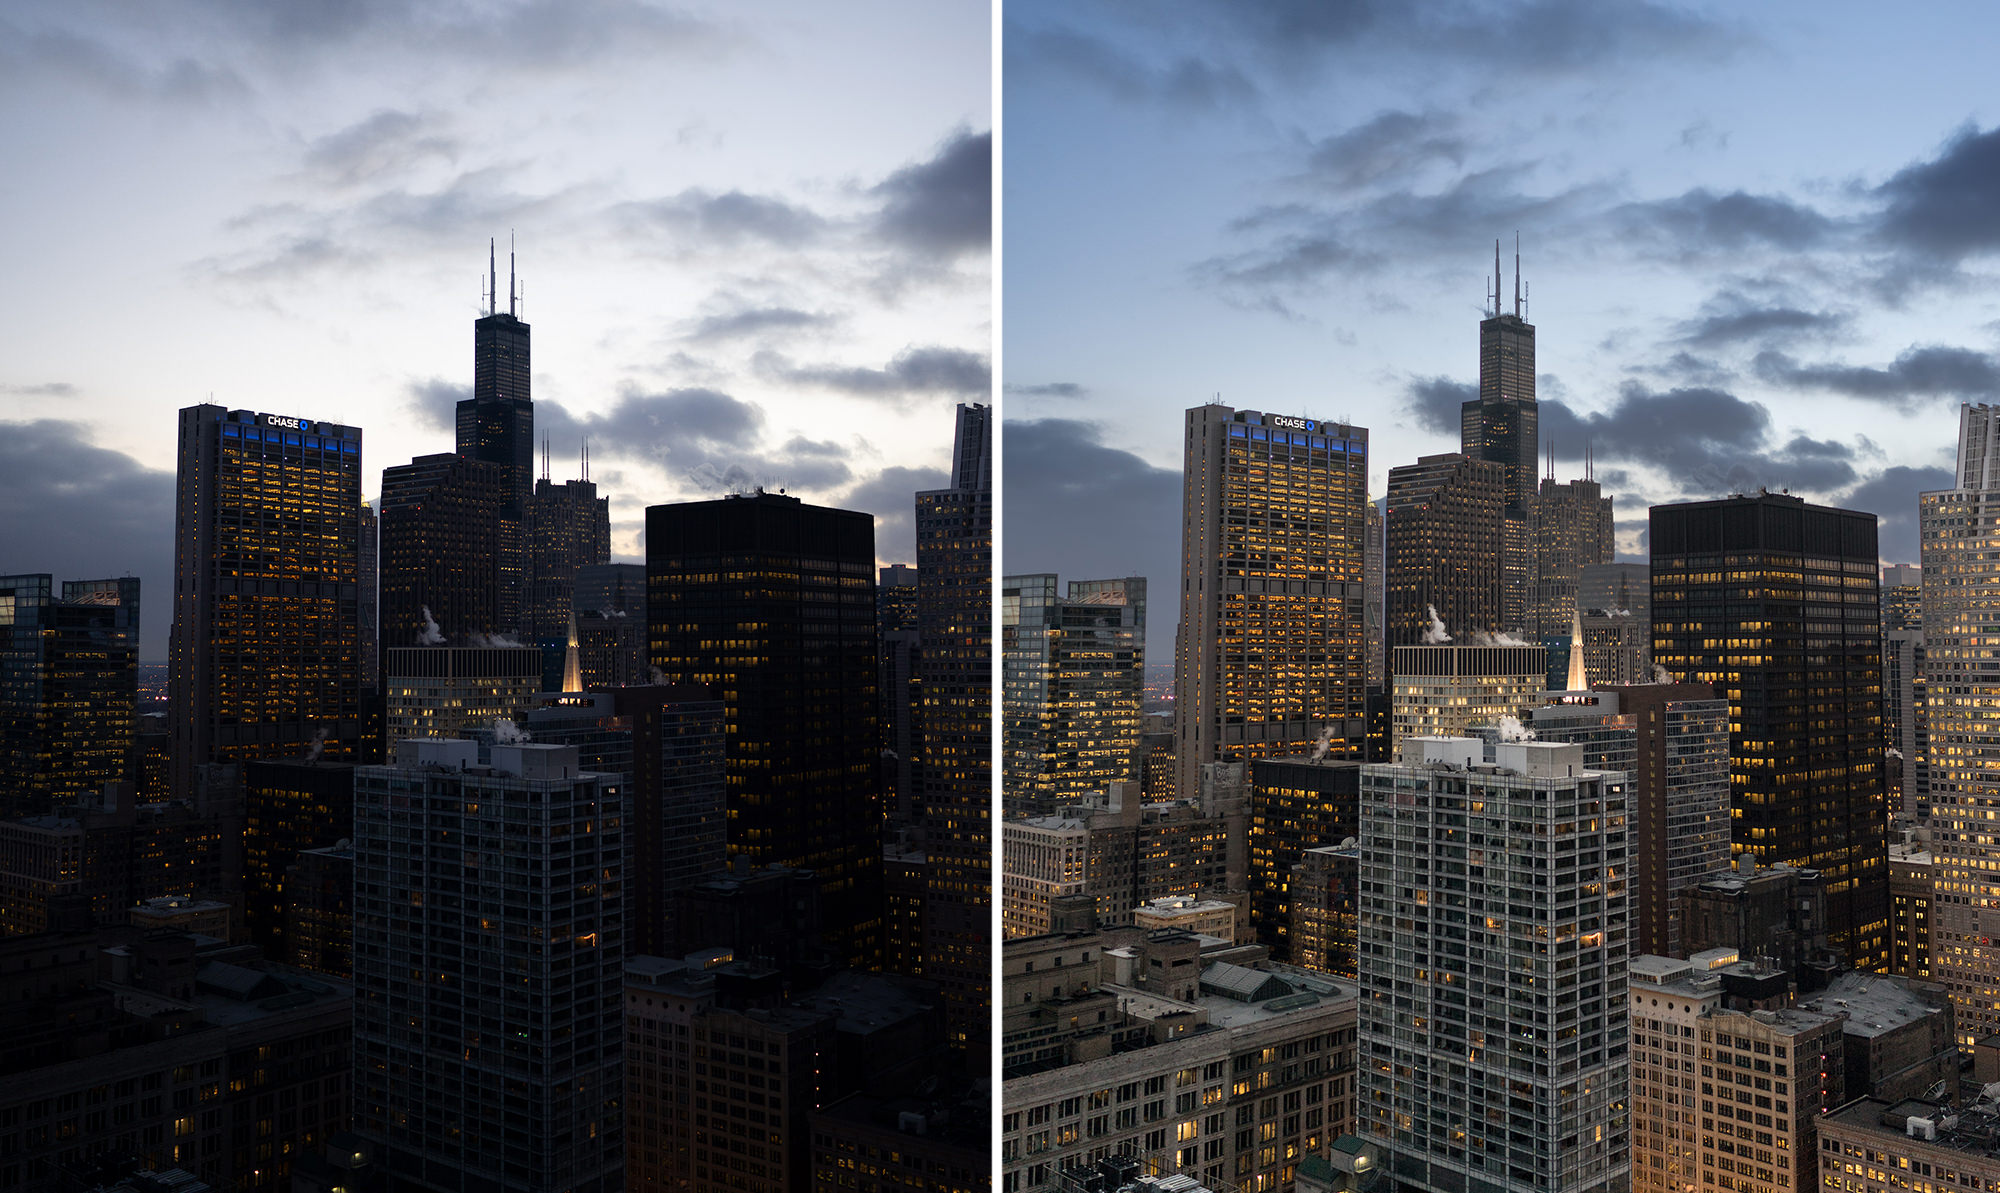
CORRECT SHADOWS AND COLOR WITH ADOBE CAMERA RAW
ORIGINAL
Create Manual HDR Images
We’ll show you how to manually create HDR images using the basic adjustment tools in Adobe Camera RAW and the magic of photoshop to combine multiple exposures. Maximize every bit of color and detail in your shadows, midtones, and highlights.
Camera RAW Workflow
Think of Adobe Camera RAW as a photo processing lab and Photoshop as a tool for in-depth coloring, retouching, and compositing. Both are incredibly important to the process of creating a stunning final image. We’ll show you the best way to help them work together. k!
Photoshop, Lightroom & Bridge
Adobe Camera RAW is a free plug-in that comes with Photoshop, Lightroom, and Bridge. While we focus on how it interacts with Photoshop in this tutorial, the features and capabilities are exactly the same no matter what software you find yourself using.
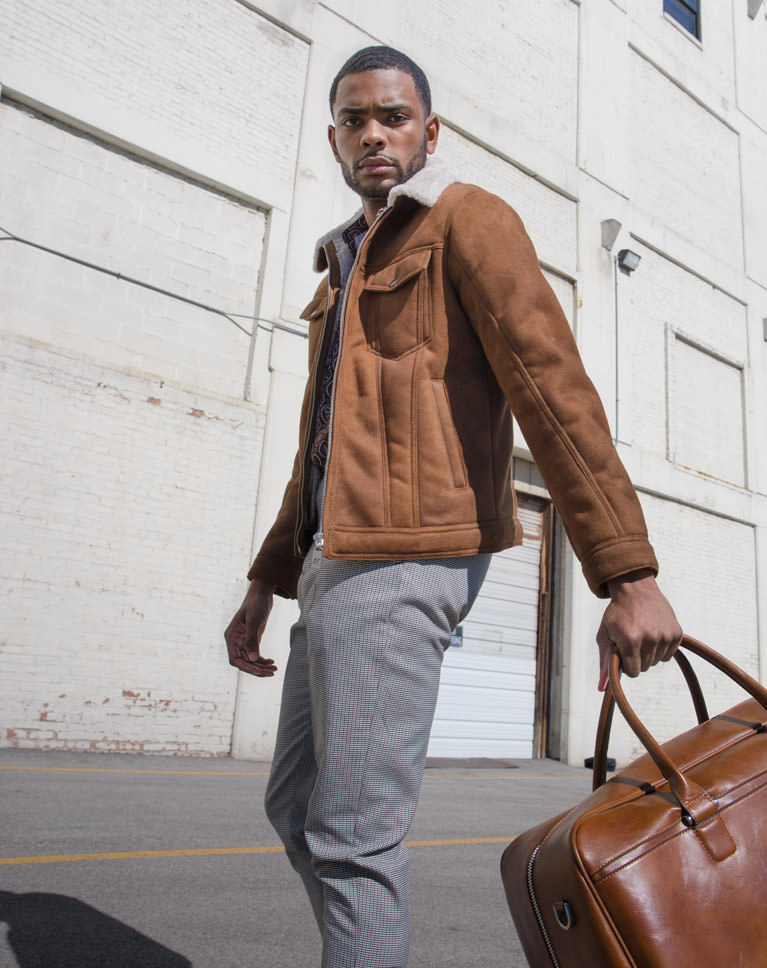
ADOBE CAMERA RAW IS PERFECT FOR PORTRAITS
ORIGINAL
White Balance
RAW images give you complete control over adjusting white balance in your images as if you were back taking the picture for the first time. Warm up skin tones or cool down an environment without losing any image quality.
Highlights & Shadows
Aside from White Balance, the most common adjustments you’ll find yourself making in Adobe Camera RAW will be to the highlights and shadows in your images. Bring out the detail in the shadows of a subject’s face or rescue details lost in the highlights of a bright sky.
Fix Exposure
Unless you’re shooting in a controlled studio environment, chances are your camera can’t capture an image the same way you saw it with your eye. Learn to use Adobe Camera RAW to fix exposure, white balance, color, and more!
More Information, More Control
Learn to use Adobe Camera RAW to fix exposure, white balance, color, and more!

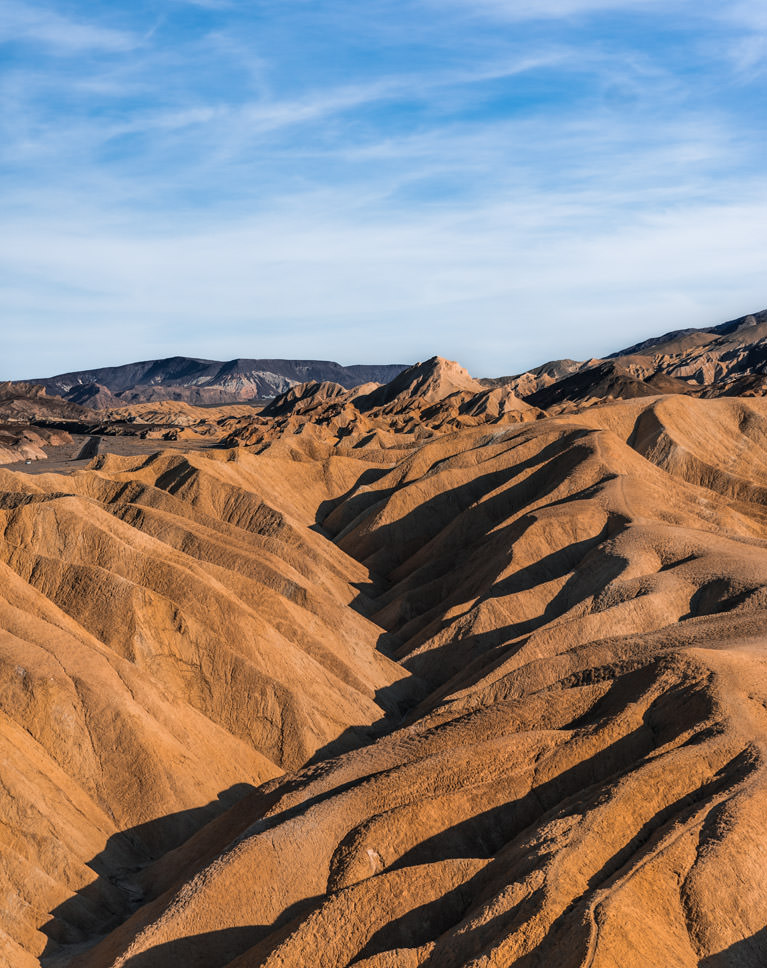
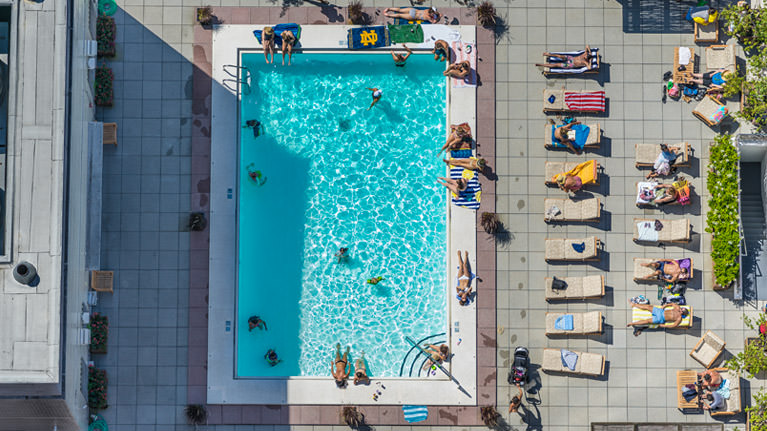
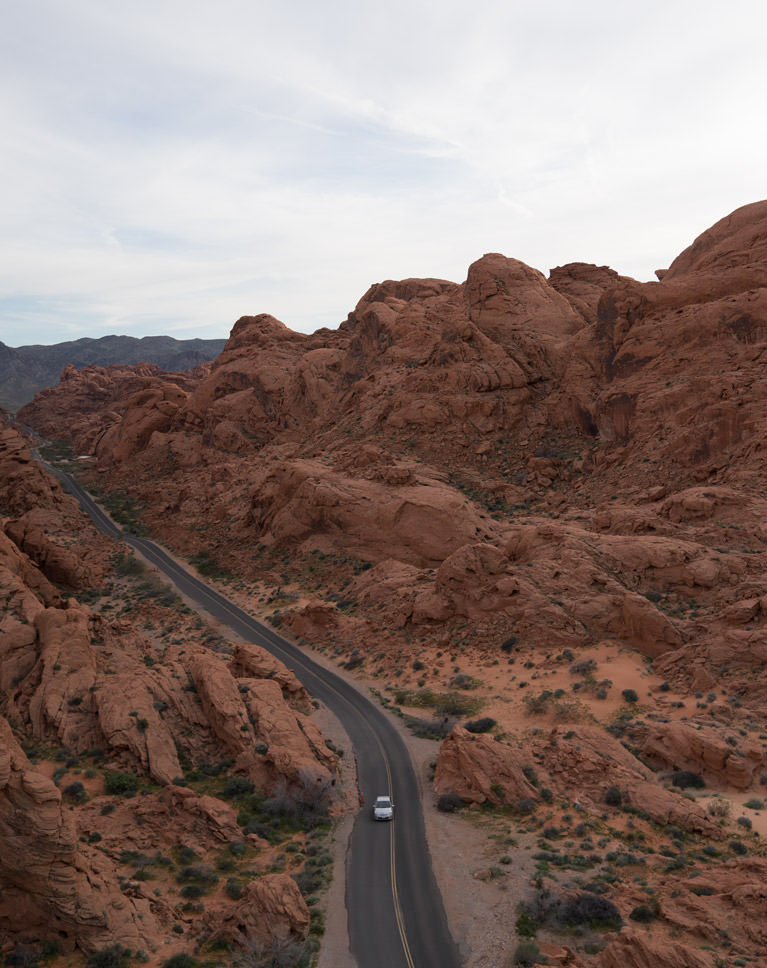
BRING TRUE COLOR TO YOUR LANDSCAPES
ORIGINAL
Local & Global Editing
Most of the time, you’ll only want your edits to affect just a portion of a photo. For example, adjusting exposure on just your subject without changing the exposure of the background. Adobe Camera RAW offers several precision tools to ensure you have control over every pixel.
Spot-Healing
While Photoshop is ideal for major object removal, Adobe Camera RAW is equipped with tools for smoothing and removing minor blemishes and distractions from a photo. Learn to get the most out of this retouching tool in ACR.
Vibrance & Saturation
Learn the difference between the Vibrance and Saturation sliders. Rescue color from underexposed areas and make colors pop while preserving natural-looking skin tones.
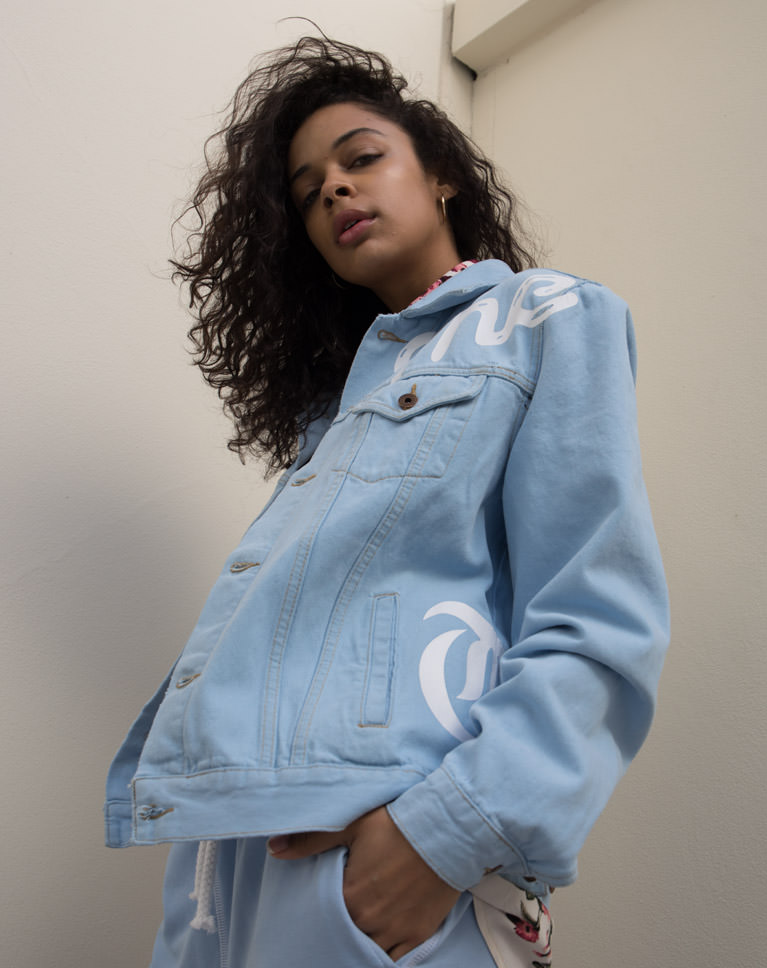
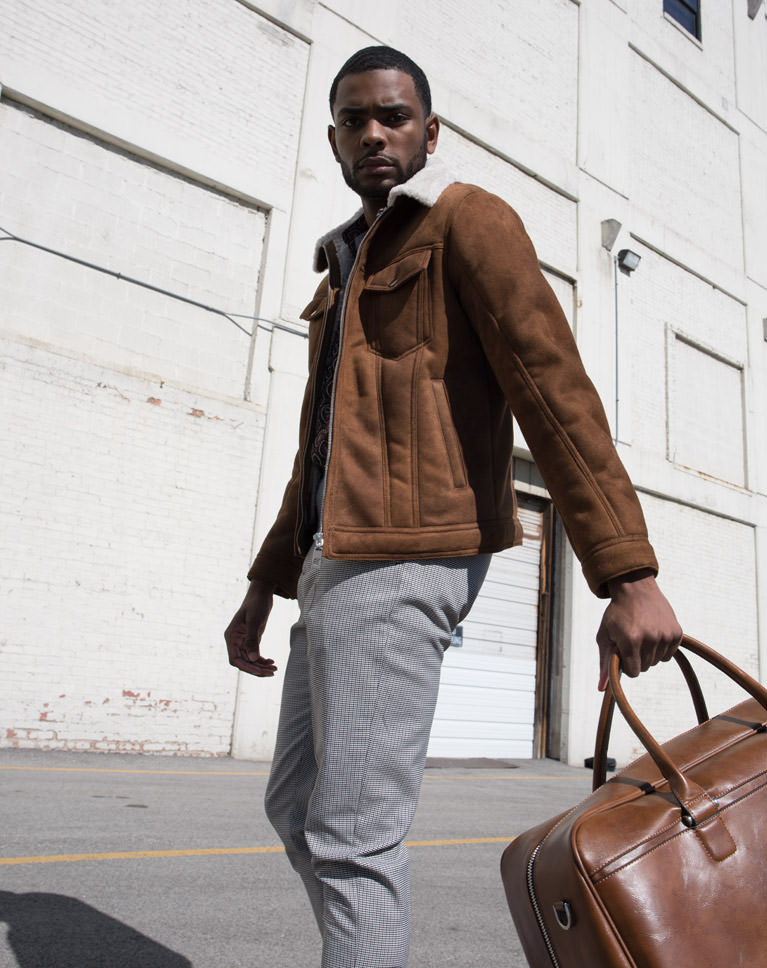
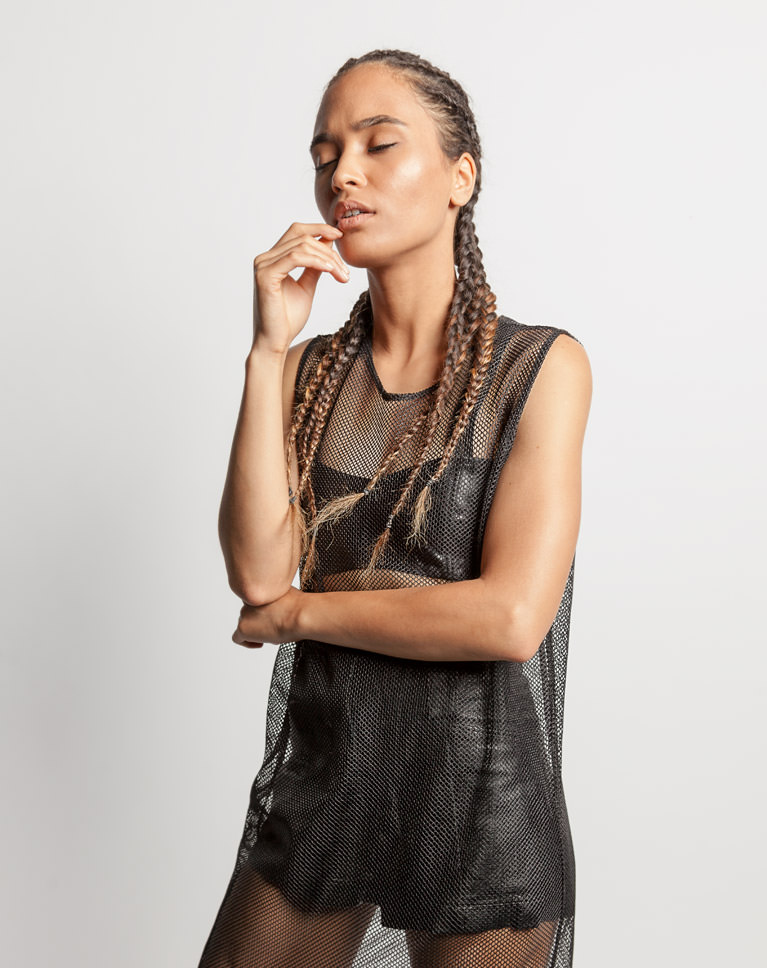
RECOVER SHADOW DETAIL IN PORTRAITS
ORIGINAL
Lens Correction
No matter what lens you shoot with, chances are there will be a bit of distortion present in any images you take. Thanks the smart tools within Adobe Camera RAW, you can automatically reduce and eliminate any warping caused by any lens.
Chromatic Aberration
Depending on the lens, both the amount and character of chromatic aberration will vary. Learn to reduce or completely remove any green or magenta fringing that would normally distract the viewer and take away from the overall impact of an image.
Smart Objects
A non-destructive workflow is incredibly important for the working professional. Learn how to process your RAW images and then bring them into Photoshop as Smart Objects so that you can go back and make any changes or adjustments that you need.

ENHANCE COLOR WITH ADOBE CAMERA RAW
ORIGINAL
Why Adobe Camera RAW?
Photoshop doesn’t open RAW files natively so Adobe Camera RAW is here to fill in the gap. Get the absolute most out of your images by editing in full 16-bit RAW before bringing an image into Photoshop for further refinement and retouching.
RAW & JPEG
We break down the differences between working with RAW and JPEG files. See a side-by-side comparison of similar edits that demonstrate how much more flexible RAW files are in post-production.
ProPhoto RGB & sRGB
Understand the differences between ProPhoto RGB and sRGB. Make sure you’re working with the largest color space possible when you’re editing. Maintain accurate colors when you’re exporting and uploading images the web and social media.

RECOVER HIGHLIGHT & SHADOW DETAIL IN PORTRAITS
ORIGINAL
Basic Adjustments
Working in Adobe Camera RAW is like working in your own photo processing lab. RAW allows you to see all of the information captured by your camera, whether or not it was visible in the original image. Fix white balance, exposure, color, and rescue details that you didn’t even know were there.
Export for the Web
Being able to accurately display your work on the internet and social media is an important part of modern day photography. Learn how to go from a massive 16-bit RAW image to a small JPEG while preserving all of the changes you made in post-processing.
The Tone Curve
Once you’ve finished with any basic adjustments, learn to use the Tone Curve to further refine your lights and darks and make edits to individual color channels. Advanced tools like this will show you the true power and potential of working with RAW.


RECOVER DETAIL WITH ADOBE CAMERA RAW
ORIGINAL
Effects and Presets
Working photographers will often find that they take dozens of photos in the same environment using the same camera, lens, and settings. Creating presets in Adobe Camera RAW will significantly speed up your workflow, allowing you to apply the same lens corrections and adjustments across any number of photos.
Adjustment Brush
When the Radial or Graduated Filters won’t cut it, make more precise selections with the Adjustment Brush. We’ll show you how to make adjustments in complex areas like hair and hands.
Benefits of RAW
If you’re serious about photography, shooting in and working with RAW files is key to getting the absolute most out of your images. Fix exposure issues, perform local and global edits, adjust color temperature and more without sacrificing picture quality.

Aaron Nace
PHLEARN Founder
Aaron Nace is a photographer, Photoshop artist and founder of PHLEARN. He is the #1 Photoshop instructor in the world with millions of YouTube subscribers.

Anthony Treviño
Photographer – Featured Artist
Anthony Treviño is a fashion photographer that has worked with some of the most respected brands in the industry. He has created visuals for a variety of platforms including: fashion editorials, advertising campaigns, concert coverage and fashion e-commerce.
View Anthony’s Portfolio
Justin Missner
Photographer – Featured Artist
When I was 12 years old, my next door neighbor handed me a 35mm Nikon film camera and said “learn how to shoot with this and then we can talk.” From that day on I absolutely fell in love with photography and the power that a single image can convey to someone. Since then I have grown as a photographer. Dipping my hand into something other than film photography I decided to grab a digital camera during college. I started documenting my everyday explorations in the street, on roofs and wherever else I would find myself.
View Justin’s Portfolio


Reviews
New & Popular Tutorials


Training Site in
the World
Tutorials!
Ratings
and Counting
Subscribers
Great tutorial. Super easy to follow and very comprehensive. Thankyou.
absolutely loved this tutorial I learned so much. Even though I have a later version I was, with a little digging, able to follow along.
Unfortunately I have to agree with the previous comments, as a returning customer I had hoped to find the current version of Camera Raw being discussed, not updates from 2018
I agree with b.moody143, please do an update for this for the new version of ACR.
The problem with the Camera Raw tutorials is that they don’t use the most up to date version and at times are difficult to follow. The features appear to be there but not as Aaron demonstrates. I am using photoshop CC21.
Excellent tutorial! Aaron provides a very comprehensive, easy to understand approach. Much of what I learned is immediately applicable to so many images and in so many ways
Awesome as always, always surprised how much new stuff I learn, really recommend!
It very great ❤️️❤️️😍
Learned a lot in a short time. On to the next. Thank you. I really should be ashamed, so much information for so little money. Roel
Aaron while using apply image to top layer mask which is inverted it is supposed to be applied at bottom of city how its takes the top sky also could u explain
Amazing as always!
Awesome tutorials Aaron, learned alot! Thanks Robt
Excellent Series. Though I don’t use all the functions, it’s good to know what it can do in the future. Thanks.
What a great course…I have been using acr for 10 plus years…now I know I haven’t been using it to its full potential…never knew what apply image was good for…great her and underexposed portrait tutorials…Mercibeaucoup
The way this tutorial is set up is a giant time saver. The videos are concise! I have learned so much in such a short span of time. Keep them coming!
Great tutorial! I enjoy it a lot!
Wow! what a great class on ACR! lots of information and new tools for me to use now, Thanks!
This is an excellent tutorial on Adobe RAW. It is very comprehensive and covers topics way beyond my previous knowledge. I now understand how to apply the tools within Camera Raw which makes a tremendous difference in how my processed images look.
Yeah, I really like how Aaron does his tutorials. He is very through with out being overly complicated. Always just used light room but hated going back and forth between LR and PS so wanted to know more about how ACR worked, and this was a great tutorial to learn from. Thanks Aaron!
Excellent tutorial! I heard about ACR in a few other videos but none of them contained very much detail. For those like myself that not only want to photograph well, but learn the tools that can make my photos really pop, this tutorial is an excellent source to do just that.
Another great tutorial! I already worked with ACR but learned a ton of new options with combining then 😀 Impressed in special with the last two lessons. I’m sure I will use that for sure in some situations.
Wow, greate tutorial on ACR would recomend to anyone. Thanks
Thank you for the full story on ACR. I feel way more comfortable with its capabilities now.
ACR has always been a mystery to me in several areas. This tutorial has cleared those mystery areas for me…could not have ever found the answers on my own…Thanks to Aaron Nace and Phlearn for such clear and concise examples of ACR for me…William
I thought I knew ACR pretty well, but Aaron brought me up to a whole new level! I may have to watch this tutorial several times before I really get it all, but now I need to see what I can do with my own images! Thanks Aaron! Peter
It’s a real pleasure to be taught by someone who really loves what he does . Instead of the ‘ take your two sandwhiches for lunch and spend the rest of the day eyeballing the clock’, Aaron’s enthusiasim for his work rubs off.
It says that Lightroom and ACR are the same tool OK, but why do the graduated filter 3 lines in LR and only 2 in PS? What I like with the one in LR are that’s really graduated. Or could I change it i ACR?
I already worked with in Camera Raw but got quite a few tips on this video that I didn’t know. Thank you
This tutorial transformed ACR from mostly a mystery to an understandable and fantastic tool. Loved the HDR segments. Greatly appreciated.
Excellent.
Brilliantly done, as always. Super, super thorough…Aaron even goes back to some of the basics, making this a must-see tutorial for any and all Phlearners.
Joined yesterday and just finished How to Master Adobe® Camera Raw (ACR) in Photoshop. You are a master teacher. There are areas in ACR that had never known about until now. Thank you for this series and all of the others that I get to watch in the coming days and weeks…William
I enjoyed learning about ACR, but in addition, extra tools like Apply Image in the HDR chapter brings so much more value to these tutorials. This approach ties the entire process together from start to end. By the way, I work in LR all the time and then edit in PS, so I apply the ACR processing in LR.
Absolutely loved this tutorial! It has helped me so much with over and under exposed areas, works like magic 🙂
One of the easier to follow in the Pro Series. I learned a lot although my raw processing has been in Lightroom for a long time now, it’s very relevant whether you use Lightroom or Camera Raw. Thanks again and keep up the great work.
Excellent
another fab load of excellent work done by you, loved the manual HDR
Even though I’ve been using Adobe Camera Raw for a while, I still learned a ton of stuff from this tutorial. 5 stars.
Great tutorial. I especially loved the last video using apply image as a mask and then blending. Keep those tutorials coming. I am always on the look out for a new one.
WOW ! You need to go through this tutorial. Its the foundation of any image shot in raw. After watching this tutorial its making me think why use lightroom ?
Excellent tutorial and I learned a lot. However you lost a star for not using the latest version of Camera raw. I understand this was obviously started before the latest version so a lot is missing such as Dehaze, and missed out completely on the new Profiles that have been added.
Great tutorial especially using apply image to mask out selected areas using smart objects. Gave me a few more tricks to use in my post-processing. Thanks!
Wow! What a brilliant tutorial. There is so much information there I’m going to have to go over it again and again. I’ve been playing with Lightroom for a few years but now I know how to be its Master. And do you know? I’ll probably use ACR from now on. Thanks again.
OMG! Previously, I spent many hours trying to blend 3 images in HDR with different exposure and was never able to reach anything near this. Thank you so much, Aaron and PHLEARN team! Love the outcome, also with my own images.