
Download Assets
description
Tattoos are beautiful expressions of individuality, but sometimes they need to be removed for professional projects or brand requirements. In this tutorial we’ll show you the easiest way to remove them using Generative Fill in Photoshop.
Go PRO:
Explore AI’s full capabilities with our in-depth PRO tutorial The Ultimate Guide to AI in Photoshop: Generative Fill & More.
Image Source
Images sourced from Pexels.
Share


AFTER
BEFORE
Easy Removal with AI
Looking to remove unwanted tattoos from your photos without the hassle of complicated editing? Our easy-to-follow guide will show you how to do it in just a few simple steps using Photoshop’s Generative Fill feature.
Select & Remove
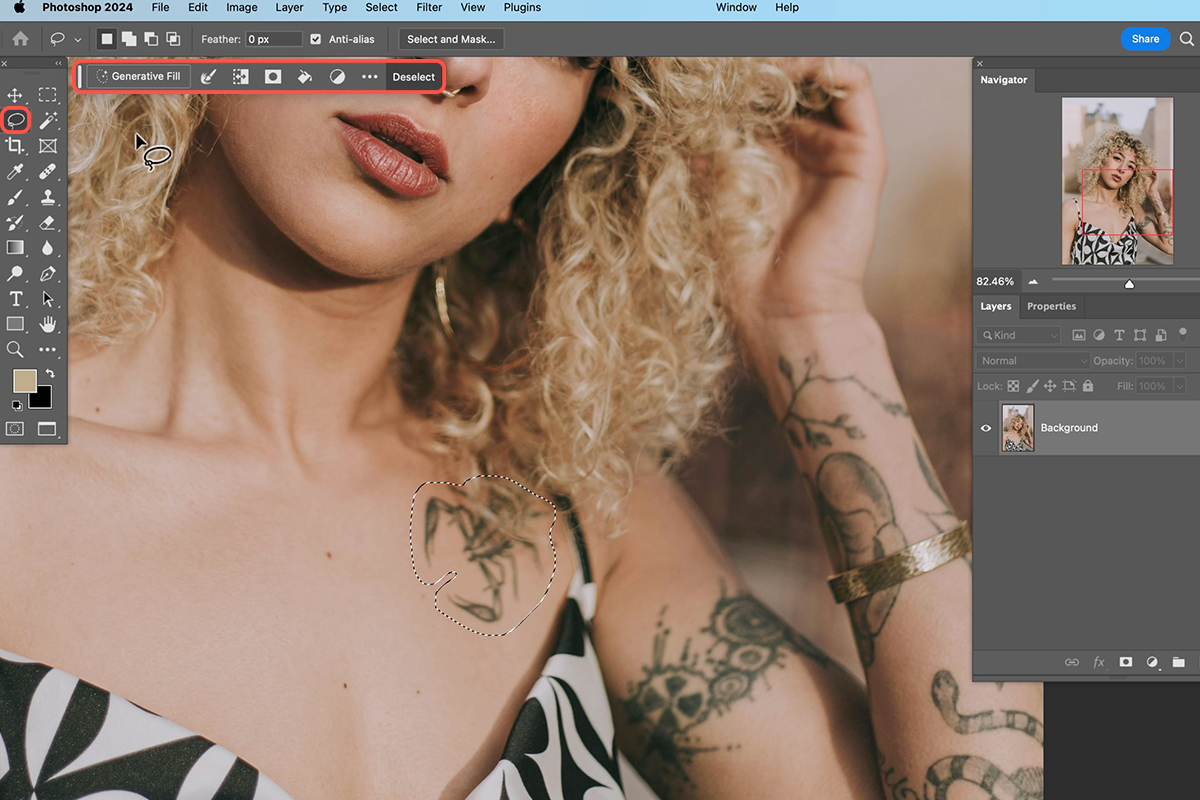
1. Import the image you want to edit in Photoshop.
2. Use the Lasso Tool (Keyboard Shortcut “L”) to create a selection around the tattoo you want to remove.
3. Make the selection slightly larger than the tattoo to ensure complete removal.
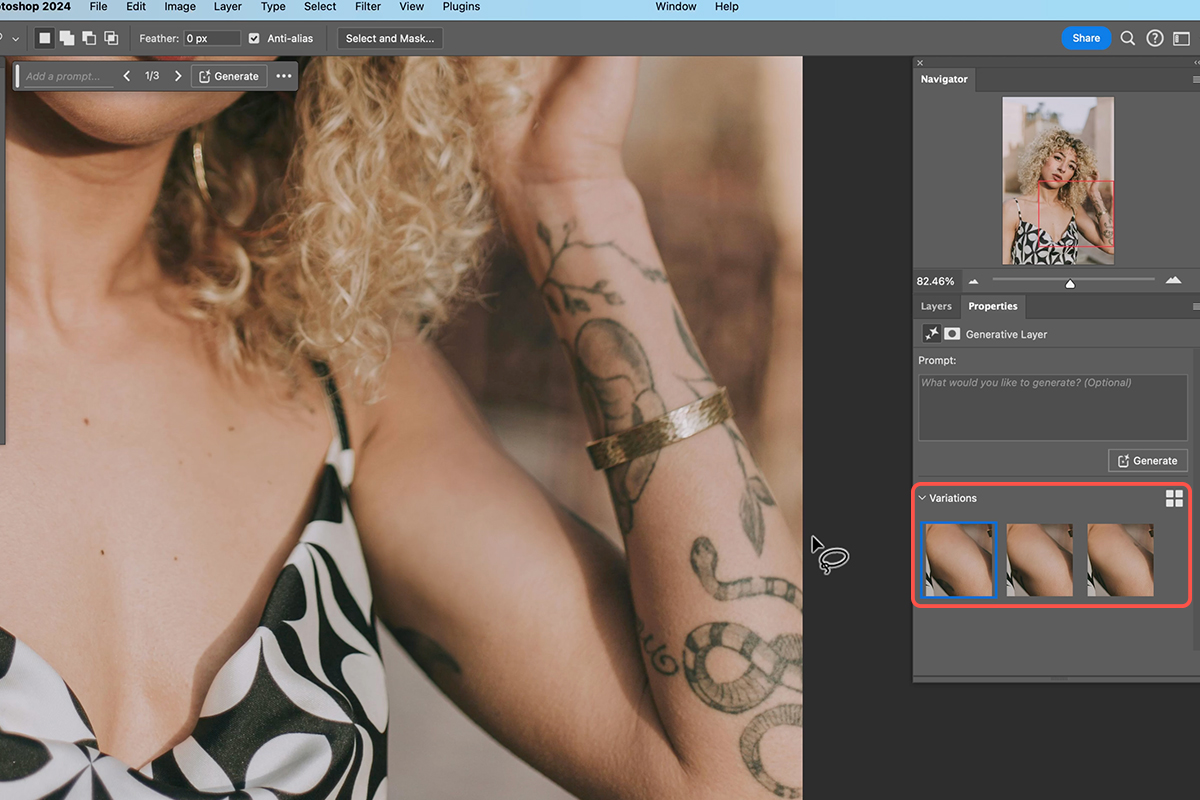
4. Go to Edit > Fill > Generative Fill. Leave the content field blank and click Generate. Photoshop’s AI will analyze the surrounding area and create a new, realistic region to replace the tattoo.
Repeat Process
You can repeat steps 1 through 4 for any other tattoos you want to remove in the image. For better results, we recommend removing tattoos individually rather than all at once. If the initial result isn’t satisfactory, explore the variations provided by Generative Fill to find a more suitable option.
Additional Tips
For more precise selections, hold Shift while drawing with the Lasso Tool to add to existing areas. If the selection isn’t perfect, refine its edges using the dedicated tool. And don’t be afraid to experiment with different settings and techniques to achieve the best possible results!


