Download Sample Images
description
Risograph art is a decades-old style of printing that creates spontaneous and unpredictable effects. Perfect for posters, ads, zines, and abstract work, it’s fun medium for anyone that has access to a Riso printer. Oh, you don’t have a Riso printer? Well, then let’s see what we can do in Photoshop!
Learn how to create a realistic Riso print effect in Photoshop. Complete with bold colors, paper textures, and the inconsistent print effects of the real thing. Download the sample textures and the complete PSD to follow along!
Share
Realistic Print Effects & Textures
What is Risograph?
In the mid-1980s the Riso Kagaku Corporation released a new model of digital duplicators to the public. Designed for office copying and administrative use, unexpectedly, their Riso digital duplicators became a wonderful new tool for artists to create and share their work at low costs and with a look that couldn’t be achieved through any other medium.
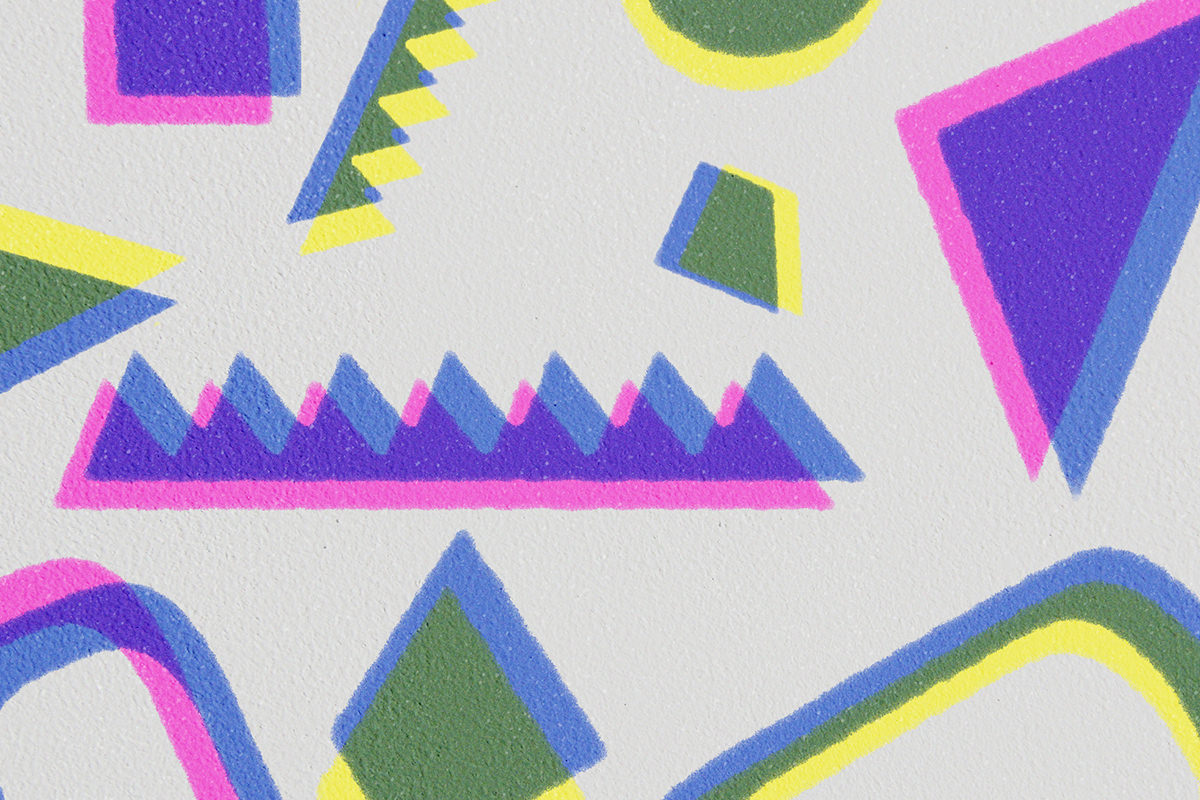
Defined by bold and vibrant colors and slightly inaccurate and imperfect prints, risograph art became a style all its own. Perfect for ads, zines, posters, and abstract artwork, it’s a look that’s sure to turn heads.
If you don’t have access to a Riso digital duplicator, don’t worry! We’re going to show you how to recreate the distinct look of the Riso style in Photoshop.
Risograph Effects in Photoshop
As we mentioned, risograph prints are often defined by their imperfections. Off-kilter print alignment, color inconsistencies, ink bleed, and rough textures are all characteristics that might sound undesirable, but they can lead to some beautiful and unpredictable results when you’re looking to get creative.
To get things started in Photoshop, we need elements that are well-suited for a riso-style effect. We recommend sticking with shapes and text since those elements are the easiest to work with in this format, and are a perfect fit for posters, zines, and ads.
Creating Abstract Shapes
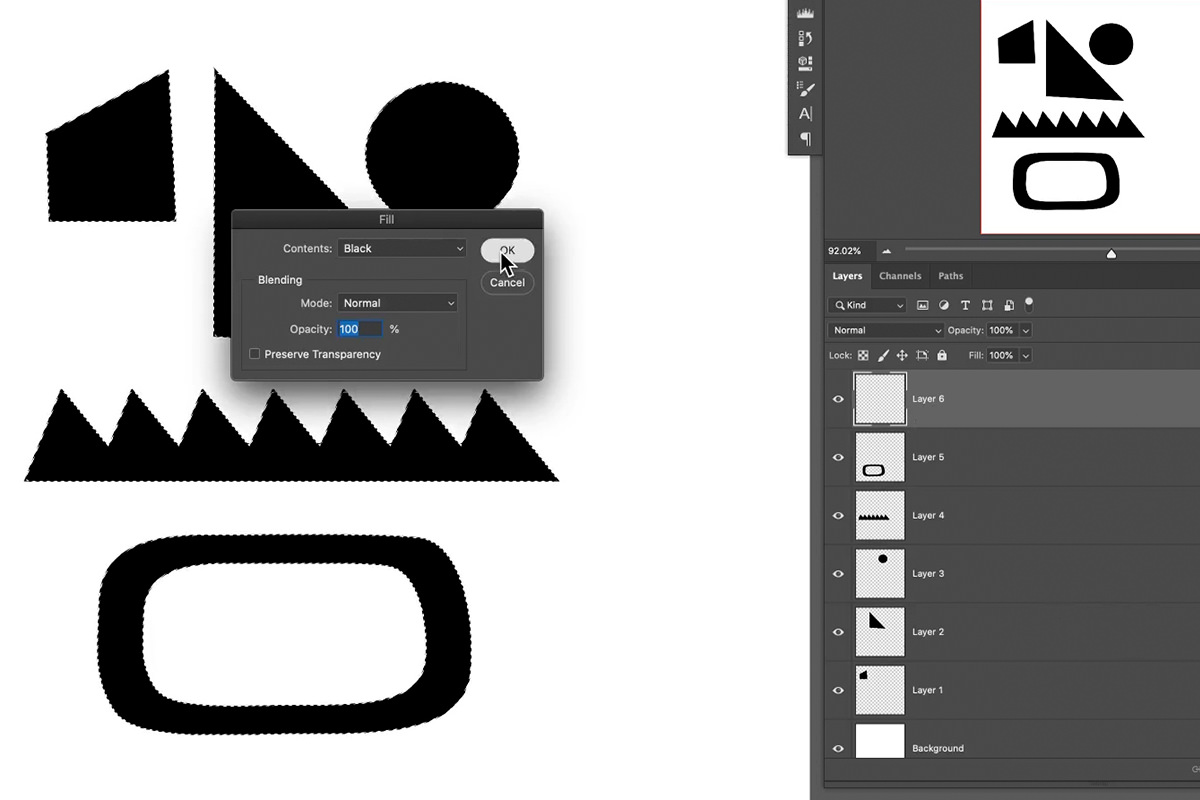
We’re going to focus on creating some unusual shapes for our print effect. And since risographs are all about imperfections, we want to make sure our shapes are a little unusual as well. Rather than using the typical shape tools, we recommend using the Polygonal Lasso Tool to create your own. Create a new Layer and then click on the canvas with the Polygonal Lasso Tool to create the corners and edges of your design.
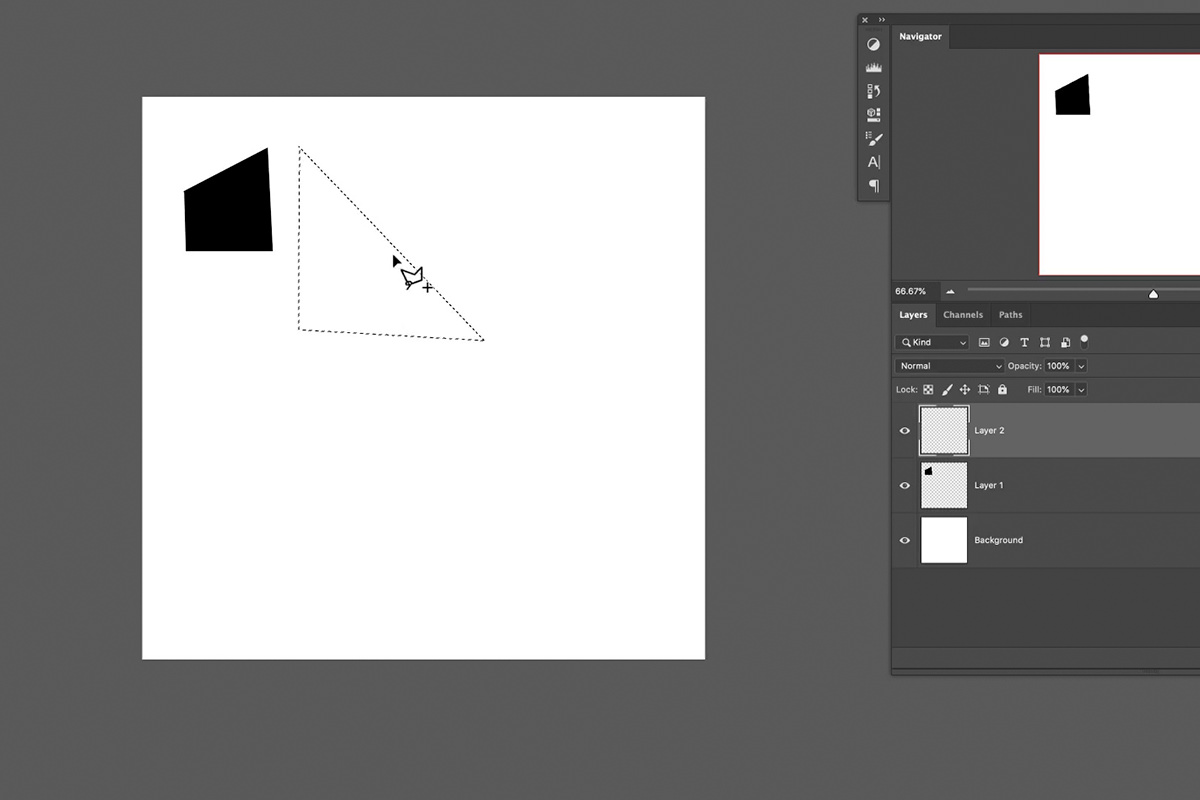
Once you’ve created a unique shape you like, just hit SHIFT + DEL to fill that selected area with black.
Go ahead and create a variety of shapes for the risograph effect (Make sure to place each on its own Layer!) And feel free to get creative! Try and use a few different tools to create interesting designs and unusual geometric figures.
Create Irregular Textures & Edges
With the shapes ready, we can start creating our riso print effect. The first thing we want to do is make the shapes look a little more irregular, as if they were painted by hand rather than drawn with an ultra-precise Photoshop tool.

In order to do this, we’ll need to select all of the shapes so we can apply any effects to them all at once. To do this, hold CTRL or CMD and then click on one of the shape Layers. This will create a selection of everything on that Layer. Then, hold SHIFT + CTRL or CMD and click on the remaining shape Layers. This will add selections of the other shapes to the original selection we made.

We end up with several selections, each of one of the different shapes in our project. With everything selected, we can use a tool like Select and Mask to add some smoothing and feathering to the edges of the shapes.
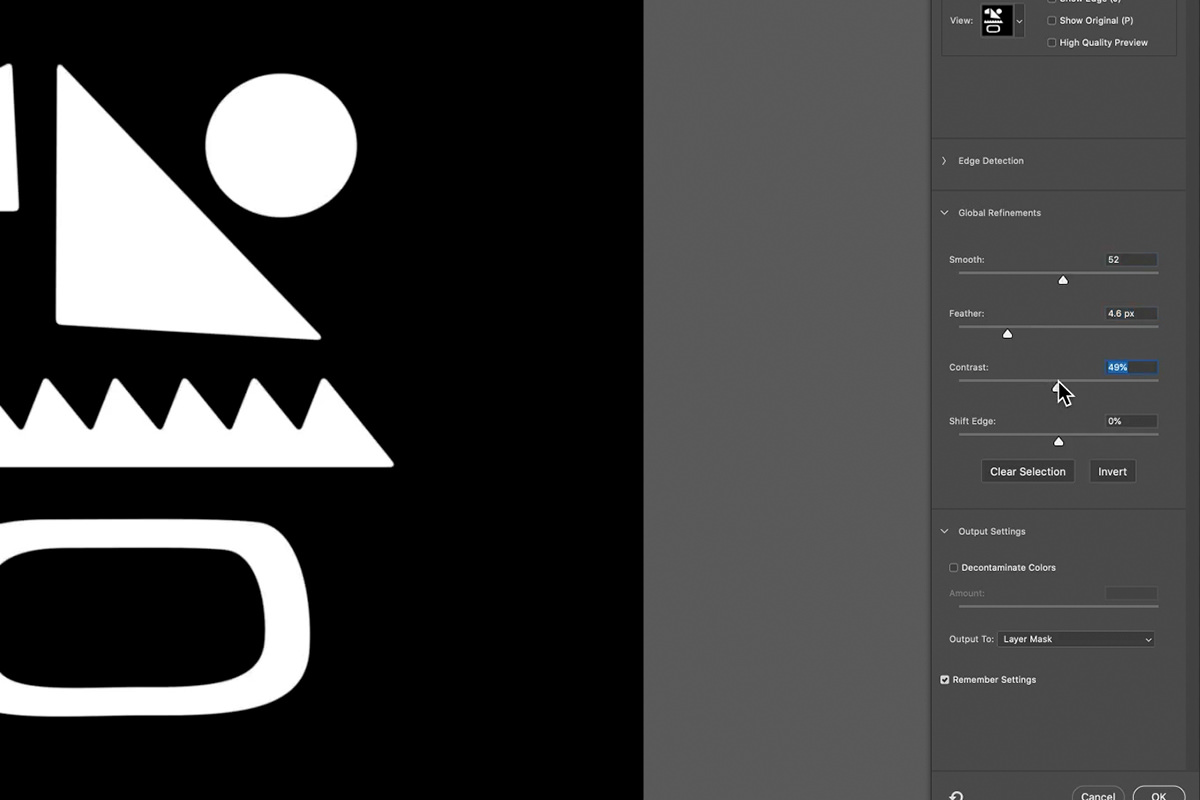
Increase the Smooth and Feather sliders and, once those are set, increase the Contrast slider to bring back some of the original definition. Now we have all of our shapes with the sharp points and edges removed.
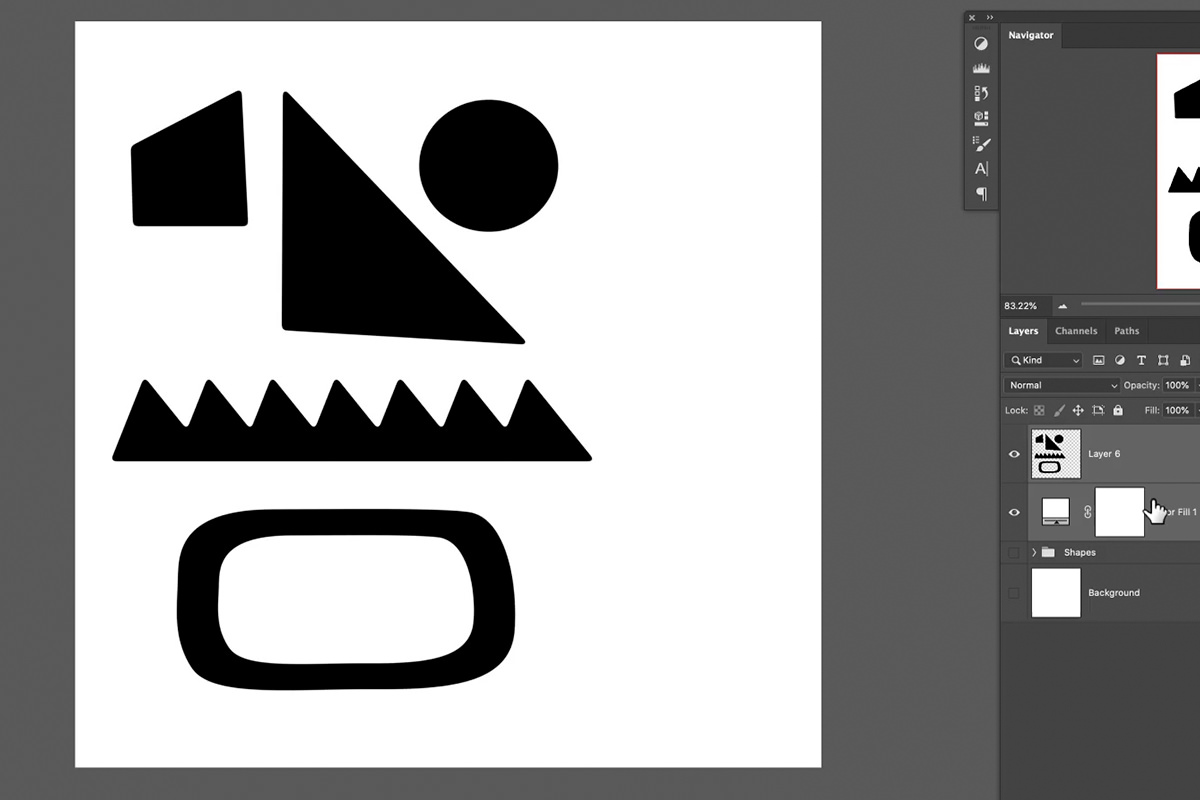
Locate the Output To drop-down in the bottom-right corner of the dialog and choose Selection. Hit OK. Create a new Layer and hit SHIFT + DEL to fill our new selection with black.
Hide the original shapes and then create a white Solid-Color Fill Layer underneath the new shape Layer. Then, merge the white background with the shape Layer.
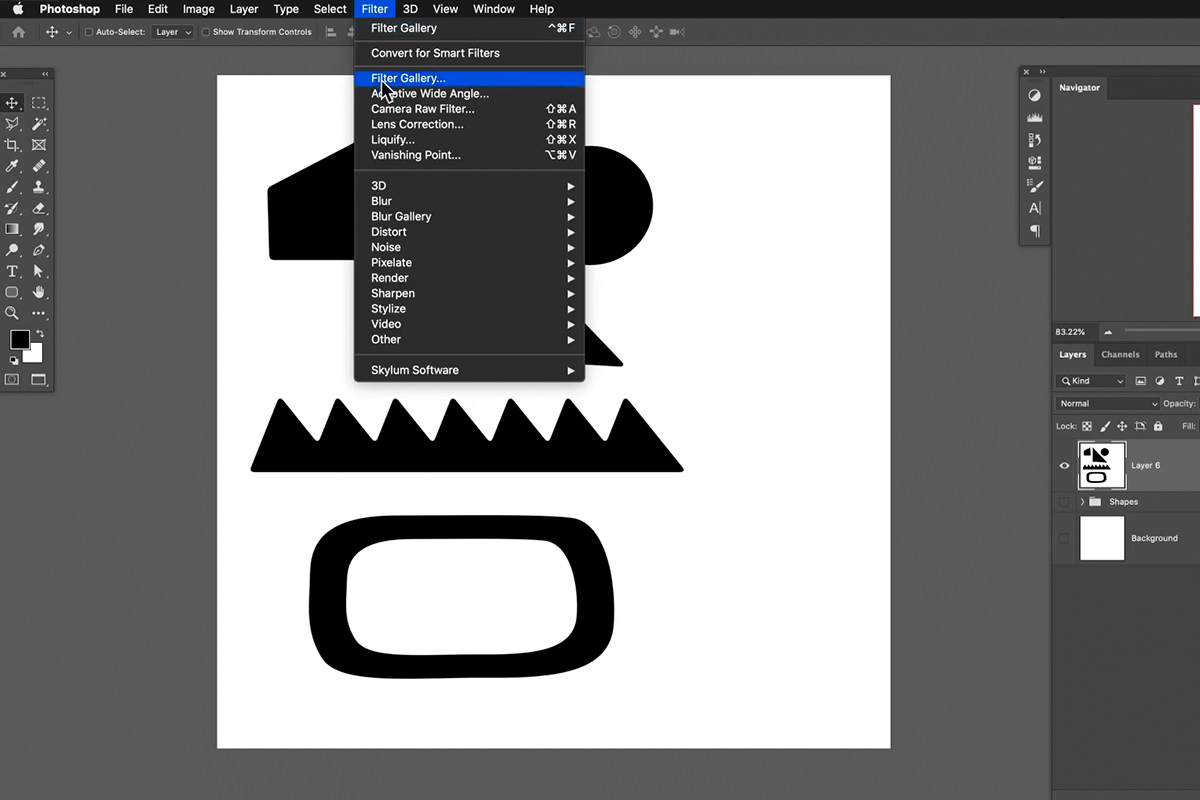
Adding Details with the Filter Gallery
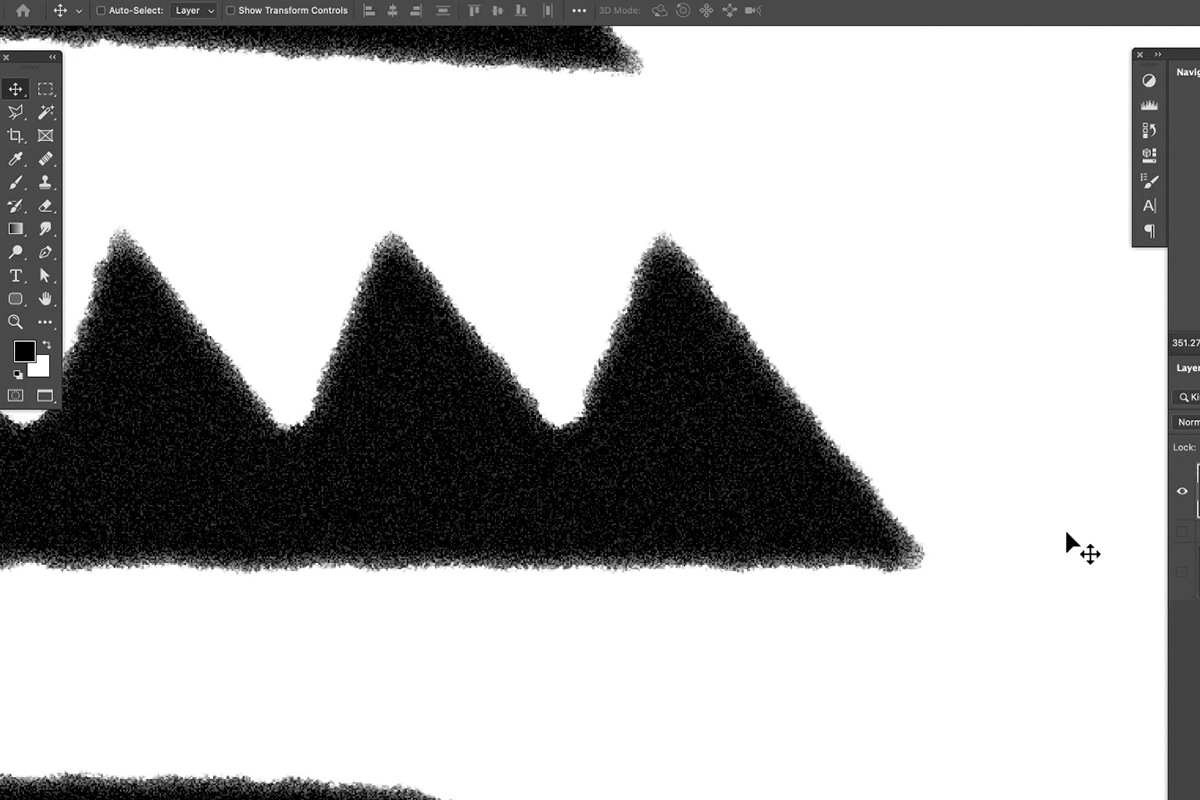
Now we want to add some imperfections and textures to the shapes to make them look they came out of an imprecise printer. Go to the Filter menu and select the Filter Gallery.
We chose to add some texture with the Rough Pastels Filter, the Diffuse Glow Filter, the Spatter Filter, and the Torn Edges Filter (make sure Diffuse Glow is on top).
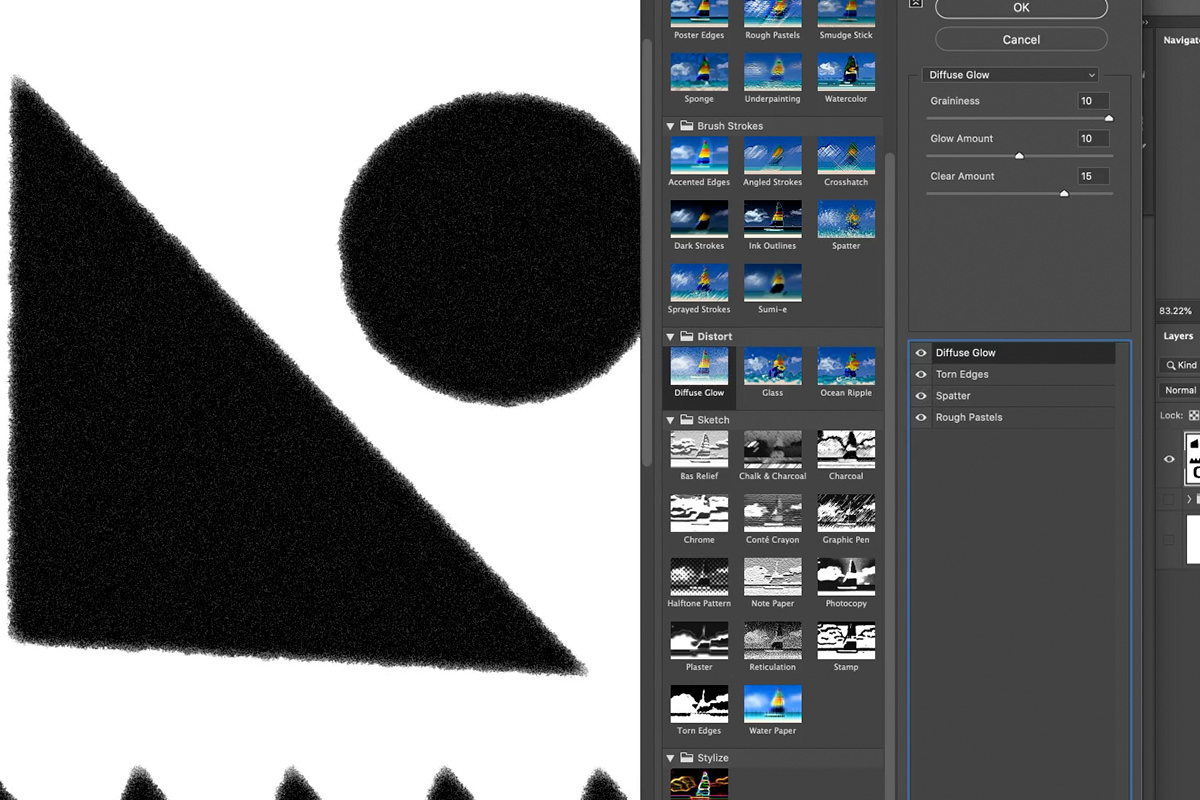
There are no rules for this, so experiment with a bunch of different textures and effects!
Now that our shapes have some beautiful textures and imperfection, we can start to duplicate them, add color, and create an overlapped printing effect.
Coloring the Shapes
We’ve got some irregular shapes with textures that make them look like they were printed. Now we need to make another selection so that we can edit each of them. Since we’re working with softer edges and finer details, Channels is the best tool for the job.
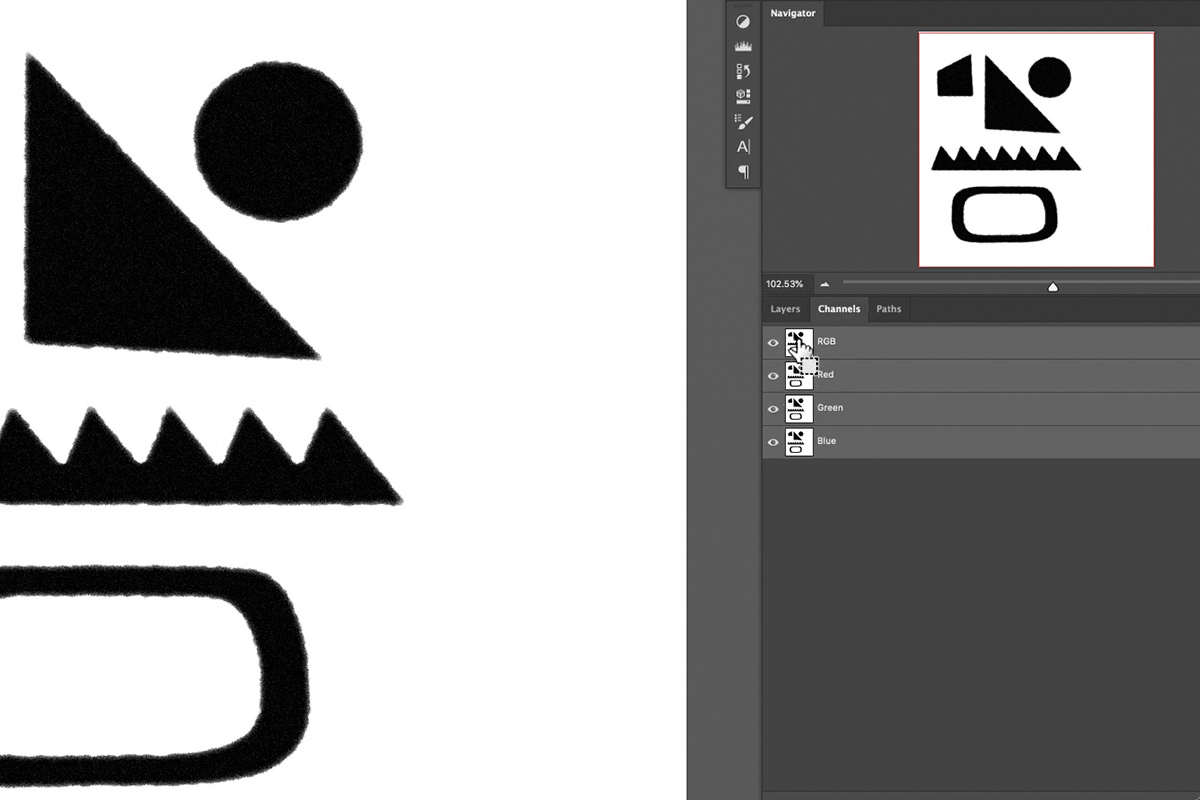
Click on the Channels Tab, then hold CTRL or CMD and click on the RGB preview thumbnail. This will create a selection of all of the lighter areas of the canvas. With the selection active, head back to the Layers Panel and create a new Solid-Color Fill Layer and Photoshop will automatically load the selection into the Layer Mask.
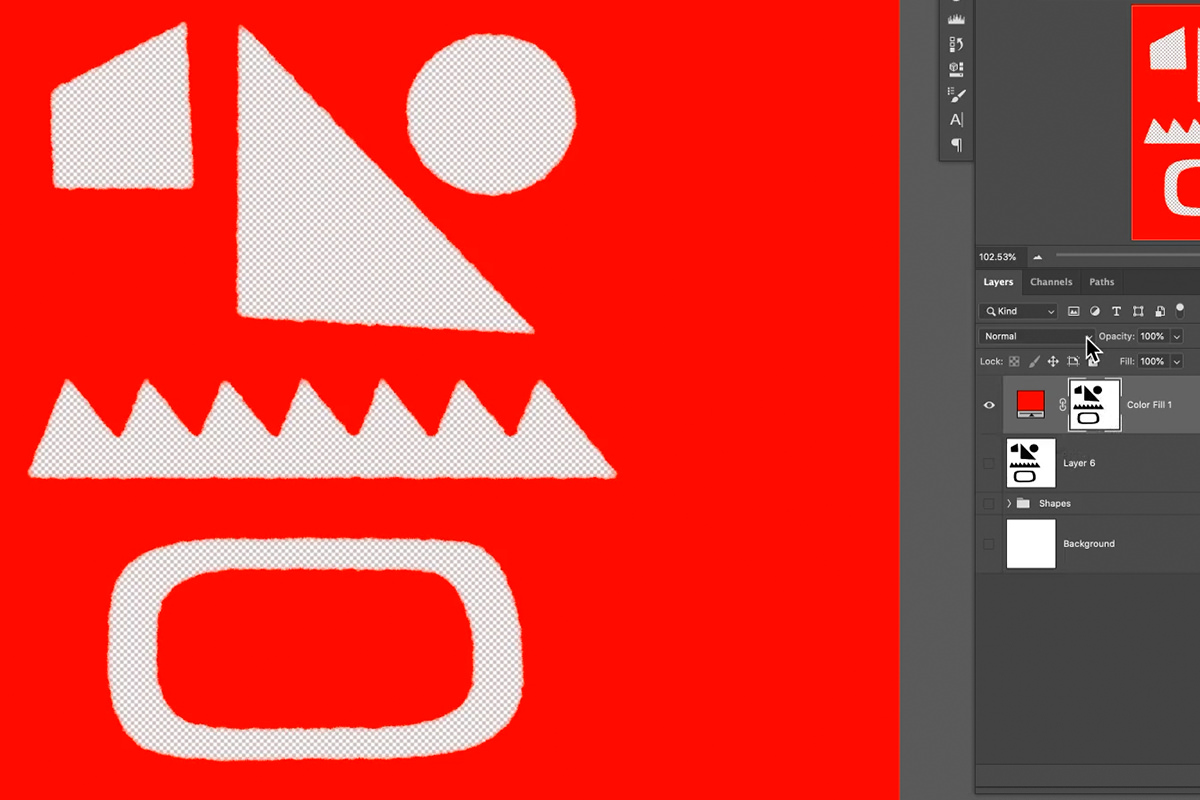
We’re almost there, but we have the opposite effect of what we want. The background is filled with color and the shapes are transparent. To fix this, simply click on the Layer Mask of the Solid-Color Fill Layer and hit CTRL or CMD + I to Invert the Mask.
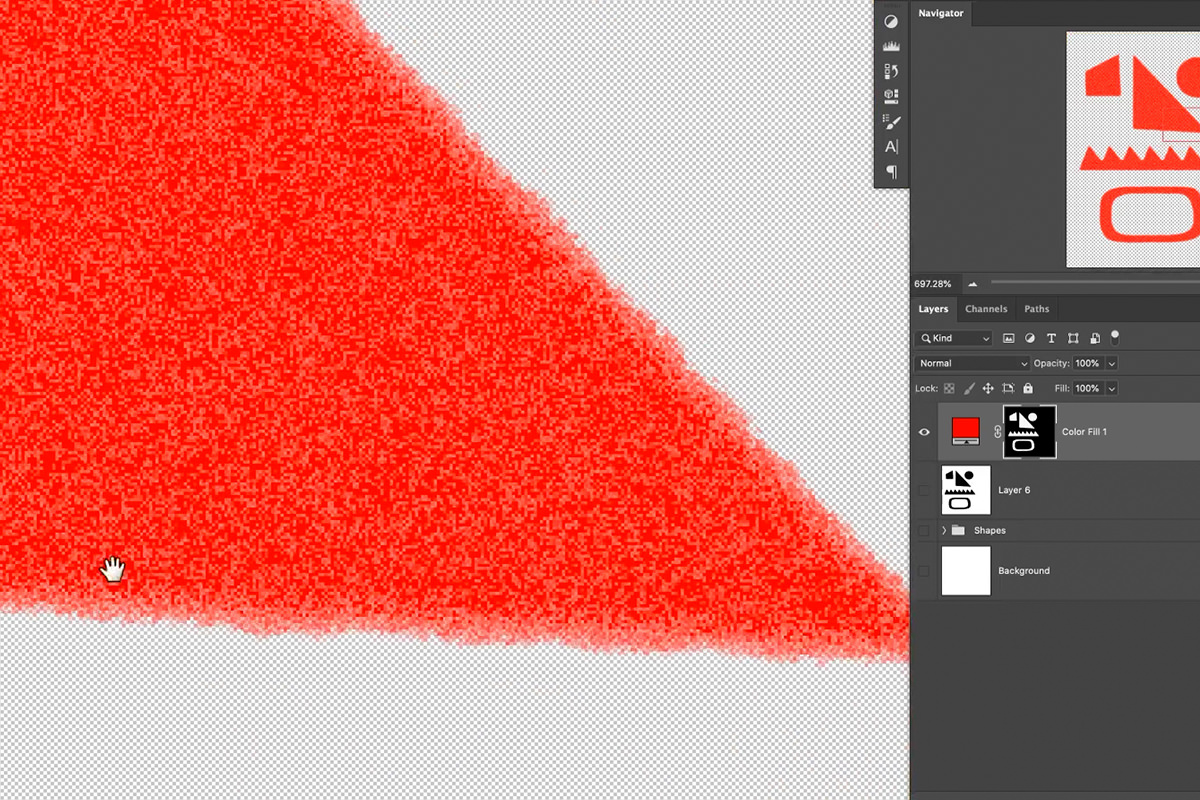
We’re left with our shapes, now in color, and with all of the texture and detail we created. Create a new Solid-Color Fill Layer to create a background.
Completing the Effect
We’re almost done! The rest is fun and up to you to decide on the effect. We have our shapes available to Duplicate and edit however we want. Changing the color is as easy as double-clicking on the Solid-Color Fill Layer icon.
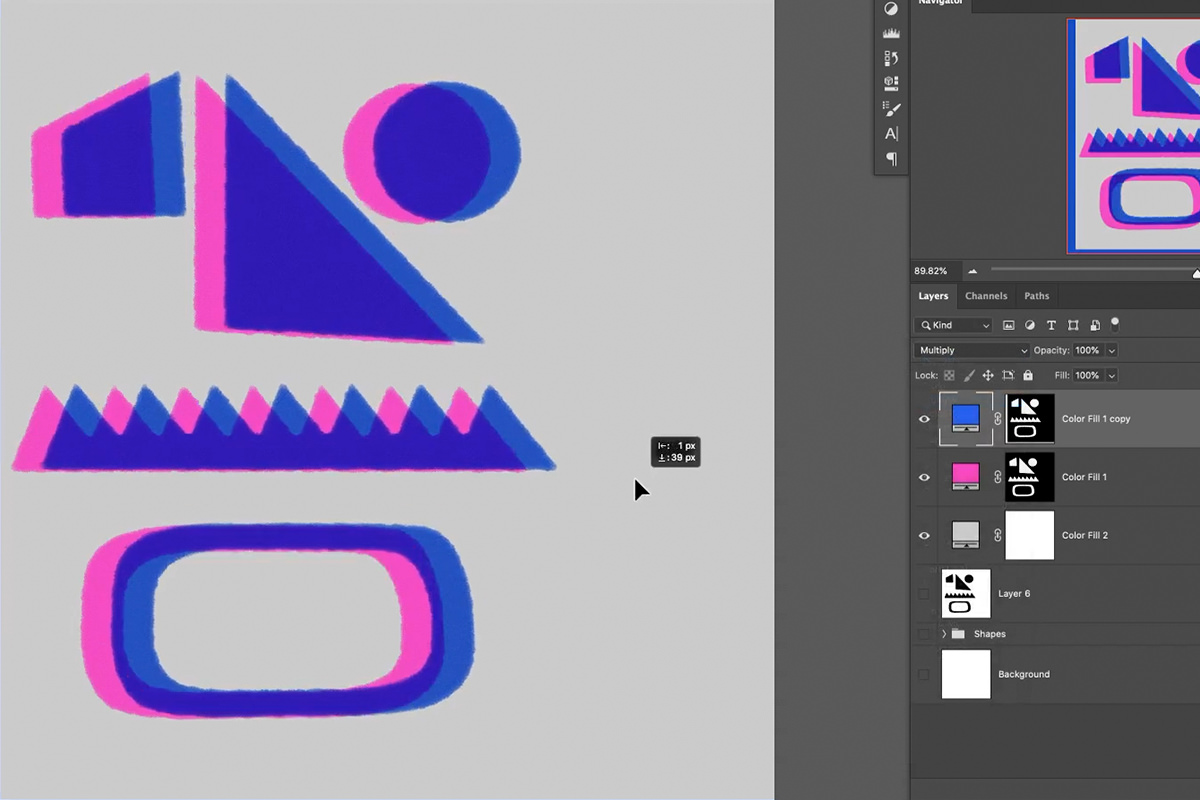
We decided to Duplicate our shape Layer, change the colors of each, and then set the Blending Mode of the shapes on top to Multiply. This creates a cool overlapping color effect that you might see on a printer that’s way out of alignment.

Now go and play with the position of the shapes and their colors! Remember that you can use the Layer Masks to hide or show any of the shapes at any time.
Adding Paper Textures
It wouldn’t be a convincing print effect without some realistic paper textures. And the best way to get a realistic paper texture is to use a photograph of paper. We’ve included a couple of paper samples in the download above, but you can find your own with an easy web search.
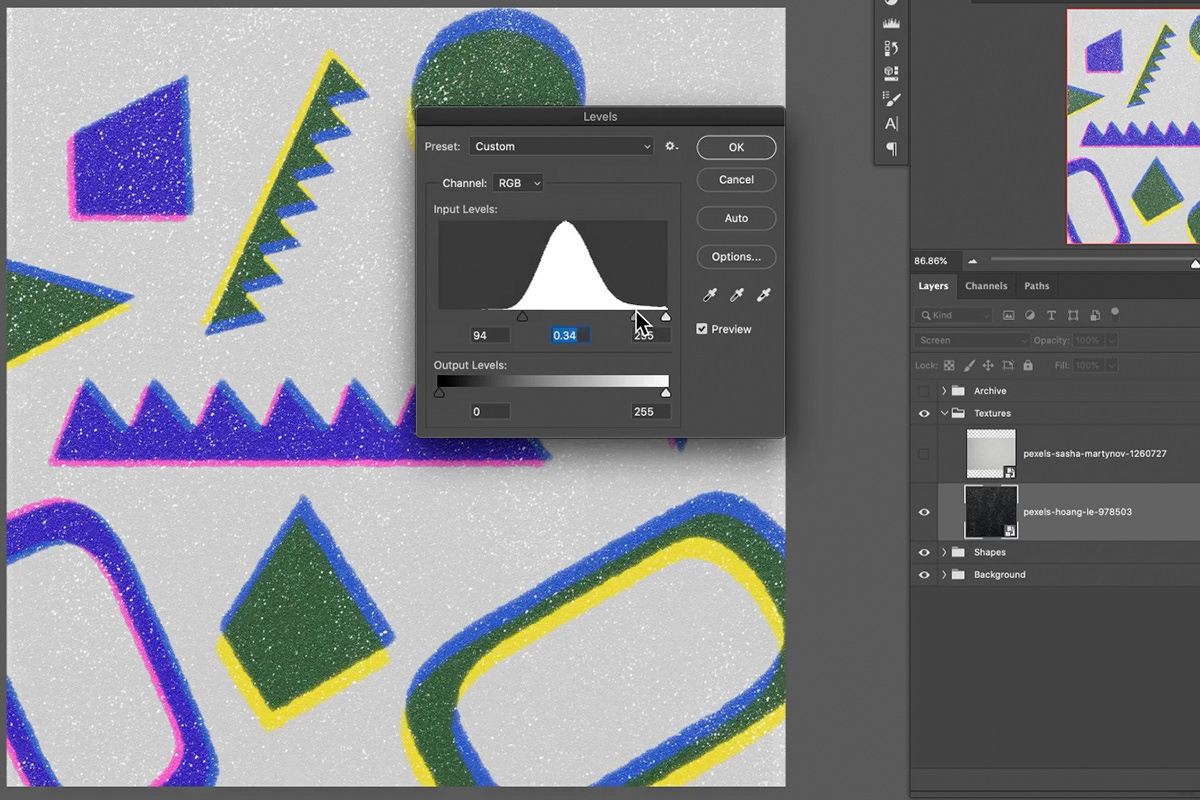
Drop a paper texture into the Layers Panel above all of your shapes. Set the Blending Mode to Screen, and use a Levels Adjustment Layer (clipped to the paper texture) to dial-in the visibility. We only want the highlights of the paper texture to show up so that our shapes are still bright and defined. You can also lower the Opacity of the paper texture to fine-tune the effect.
You can try multiple paper textures with different Blending Modes for a different effect.
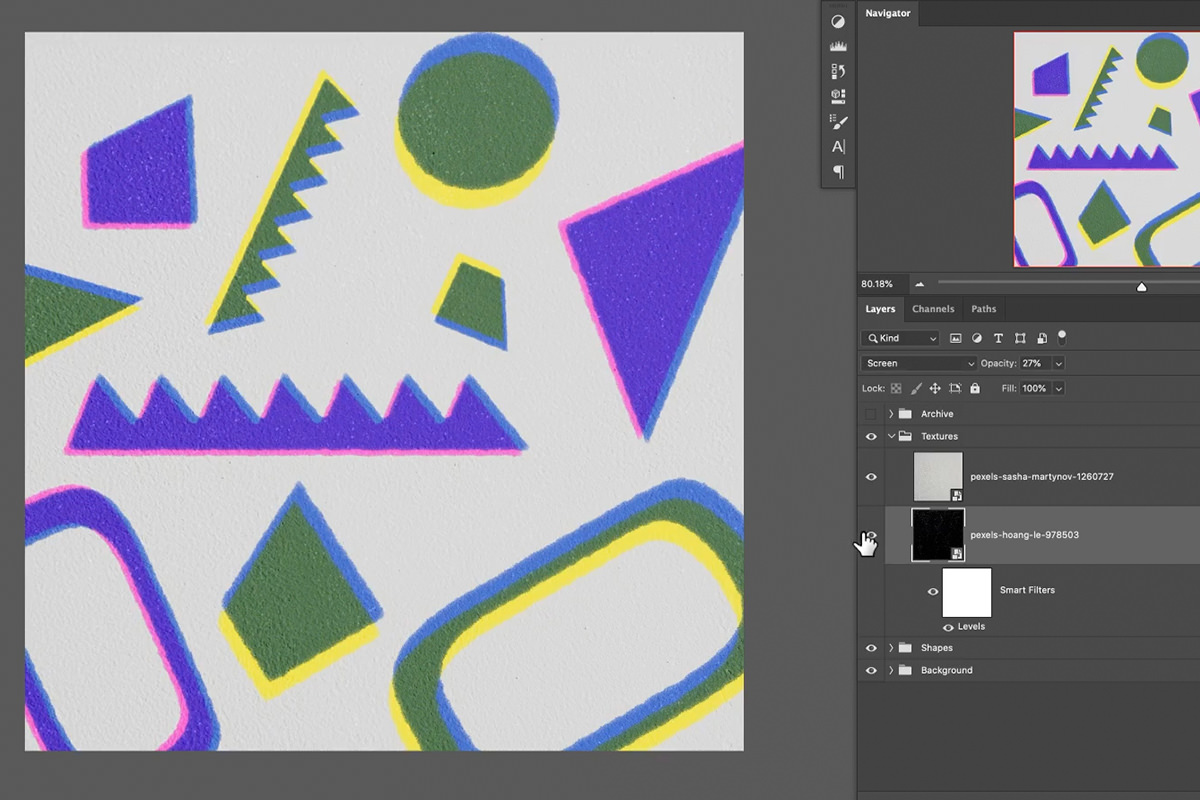
We’re done! Once you’ve completed all of the major steps, it’s pretty easy to go back and make adjustments to the shapes, color, and composition of your project as a whole. That means you can keep on experimenting until you get an effect you love!