


Download Assets
This tutorial includes 1 sample image and 1 PDF guide. Downloads are free with a PHLEARN account.
- Download the sample files from every free tutorial on PHLEARN
- New free tutorials published every week
- One free account: sign up once, then download anything
Free PDF Guide · 3 Pages
This Tutorial as a Step-by-Step PDF
This 3-page guide walks through Type > Match Font on a sign: sign in to Typekit and the Creative Cloud app with one login, type Dark Roast and center it, sample the color in Window > Character, match Espresso and then the banner line, and cover the old text with Edit > Fill. Keep it next to your keyboard.
description
Identifying an unfamiliar typeface used to mean guessing one font at a time. Match Font reads the letterforms in an image and suggests close matches from both your installed fonts and Adobe Typekit, previewing each one live on your own type layer. Aaron adds new text to a sign, aligns and color-matches it, then runs Match Font twice to find replacements for two different fonts already on the design.
Enjoying This Free Tutorial?
We publish a new free tutorial every week, each one with sample images and PSDs you can download and follow along with. Sign up and they land straight in your inbox, along with early word on sales, events and subscriber-only offers.

Matching an unfamiliar font from a client’s image or a design pulled off the internet used to mean guessing at typefaces one at a time, but Match Font analyzes an existing piece of type and suggests close matches from both an installed font library and Adobe Typekit. This tutorial adds new type to a sign image, aligns and colors it to match existing text, then uses Match Font twice to find a close approximation for two different existing fonts already on the sign.
Updating Photoshop and Signing Into Typekit
Match Font was added in Photoshop CC 2015.5, and it depends on being signed into both the Creative Cloud desktop app and Typekit under the same account to pull in additional fonts. The video shows this sign-in partway through, after the first match.
-
Confirm the Photoshop Version
Check that Photoshop is on version CC 2015.5 or newer, since Match Font isn’t available on older versions.
-
Sign Into the Creative Cloud App
Open the Creative Cloud desktop app and confirm it’s signed in under the correct account.
-
Add Fonts From Typekit
In the Creative Cloud app, go to Assets > Add Fonts From Typekit, and confirm the same account is signed in there as well.
Why Both Accounts Need to Match
Typekit fonts only sync into Photoshop when the Creative Cloud desktop app and the Typekit website are signed in under the exact same Adobe account. Being logged into two different accounts, or logged into only one of the two, prevents newly chosen Typekit fonts from actually becoming available inside Photoshop.
Adding and Aligning New Type on the Image
Typing new text directly onto the image, then centering it against a specific area using a selection and the alignment tools, positions it exactly where it needs to sit before any font matching begins.
-
Add a New Type Layer
Press T for the Type tool, click on the image, and type the new text that needs to be added. Any font will do for now: Aaron starts with Papyrus.
-
Center-Align the Paragraph
Open the Paragraph panel and click Center Align so the text is centered within its own text box. If the words change later, such as Light Roast instead of Dark Roast, the line stays centered.
-
Select the Target Area With the Marquee Tool
Use the Marquee tool to select the width of the area the text should be centered within, such as an icon or graphic above it.
-
Align the Type to the Selection
With the selection active, select the Move tool and click the middle one of the left, middle and right alignment buttons to center the type layer in that selection.
Matching Text Color With the Eyedropper Tool
Sampling an existing piece of text’s color directly with the eyedropper in the Character panel keeps new type consistent with the rest of the design before its font is even matched.
-
Open the Character Panel
Go to Window > Character to access font color and formatting options.
-
Sample the Existing Text Color
Click the color swatch, then use the eyedropper to sample the color from an existing piece of text on the image.
Matching an Existing Font With Match Font
Dragging the Match Font selection box over an existing piece of type analyzes its shapes and suggests both installed fonts and Typekit fonts that closely resemble it, previewed live on the new type layer.
-
Select the New Type Layer
Make sure the new type layer that needs a matching font is selected.
-
Open Match Font
Go to Type > Match Font to open the matching dialog.
-
Position the Selection Box Over the Reference Text
Drag the dialog’s selection handles over the existing text whose font needs to be matched.
-
Review the Suggested Matches
Look through the list of suggested fonts, which updates live on the selected type layer as each one is clicked.
Why Typing the Text First Gives a Better Preview
Running Match Font before actually typing out the intended words would leave no way to judge how a suggested font really looks in context, since a font can read very differently across different letters and word lengths. Typing the actual text first and matching against it afterward means every suggested font previews live using the real words that will end up in the final design.
Choosing Between Installed Fonts and Typekit Fonts
Suggested fonts already installed apply instantly with a single click, while Typekit fonts need to sync to the computer first before they can be applied and previewed.
-
Click an Installed Font to Preview It
Click any font already available in the installed library to apply and preview it immediately on the type layer.
-
Sync a Typekit Font
Click the cloud icon next to a Typekit font suggestion to sync it to the computer, making it available to apply.
-
Compare Several Suggestions
Click through multiple suggested fonts, both installed and synced, to compare which one looks closest to the original.
-
Confirm the Best Match
Select the closest-looking match and click OK to apply it to the type layer.
Why a Close Match Is Often Good Enough
Match Font is comparing letterforms algorithmically, so it won’t always locate the exact original typeface, especially for a custom or heavily stylized font. Choosing the closest available option, rather than holding out for a perfect match that may not exist in any accessible library, still produces a result that reads as consistent once it’s placed next to the original text.
Matching a Second Font Elsewhere on the Same Image
Duplicating the first type layer and repeating Match Font on a different piece of existing text finds an appropriate font for a second element on the same design.
-
Duplicate the Existing Type Layer
Press Cmd/Ctrl+J to duplicate the already-matched type layer as a starting point.
-
Edit the Text for the New Element
Change the text if the second area needs different words. In the video the copy still reads Dark Roast: it is moved down beside the 100% Premium line, matched to that line’s font and then used to replace it.
-
Run Match Font on the New Reference Text
Go to Type > Match Font again and drag the selection handles over the second piece of existing text, leaving the numbers out so only the letters are matched.
-
Choose the Closest Available Match
Compare installed and synced Typekit fonts again, choosing the closest match even if it isn’t a perfect one (Georgia in the video). Click OK, then set the text color to white in the Character panel and move the line straight up over the text it is replacing.
Covering the Original Text With a Sampled Color Fill
Sampling the background color behind the original text and filling a new selection with it hides the original type before the newly matched replacement is placed on top.
-
Select the Area Behind the Original Text
Create a new layer and use the Marquee tool to select the area covering the original text.
-
Sample the Surrounding Color
Press B for the Brush tool, hold Alt/Option, and sample the background color surrounding the original text.
-
Fill the Selection With the Sampled Color
Go to Edit > Fill, choose Foreground Color, and apply it to cover the original text.
-
Put the Fill Below the Type
Deselect, then drag the fill layer below the Dark Roast type layer so the new words show on top.
Why This Approach Works
Match Font is what removes the guesswork from finding an unfamiliar typeface, analyzing the actual shapes of existing letters instead of relying on someone recognizing the font by sight. Drawing from both an installed font library and Typekit, rather than one or the other, dramatically increases the odds of finding a genuinely close match instead of settling for whatever happens to already be installed. Live-previewing each suggestion directly on the type layer is what makes comparing several close options fast, rather than applying and undoing fonts one at a time to see how each one looks.
Final Thoughts
An exact font match won’t always be available, but Match Font consistently gets close enough that the difference becomes hard to notice once it’s applied and sitting alongside the original text. The same process works for matching any unfamiliar font on any image, whether it’s a single font or several different ones that all need to be identified on the same design.
Quick Reference: Keys, Menus and Settings
- New typeT, type the words, then Center Align in the Paragraph panel
- Center under a graphicMarquee across the graphic, Move tool, middle alignment option; Cmd/Ctrl + D
- Match the colorWindow > Character, Color swatch, eyedropper on the existing text
- Match the fontType > Match Font, drag the corners around the text to match
- Typekit fontsCloud icon to sync; same Adobe account in the Creative Cloud app (Assets > Add Fonts From Typekit) and Typekit
- Second lineCmd/Ctrl + J to duplicate the type, then Type > Match Font again
- Cover the old textNew layer, Marquee, B and Alt/Option-click to sample, Edit > Fill: Foreground Color
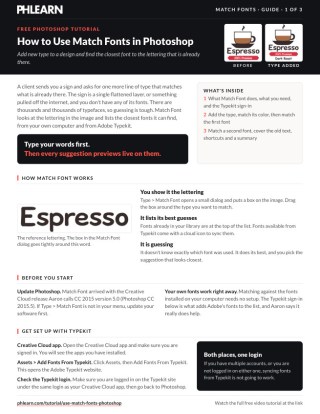
Free Downloads
Follow Along on the Same Sign
Get the espresso sign from the video, plus the PDF guide to Match Font: setting up Typekit, aligning and coloring new type and covering the old text. Free with a PHLEARN account.
Match Font in Photoshop: Common Questions
What does Match Font do?
It looks at type in an image and suggests fonts that look like it, from the fonts on your computer and from Typekit. It helps when a client sends an image, or you pull a design off the internet, and you don’t have the font.
Where is Match Font?
Select the type layer you want to change, then go to Type > Match Font. Drag the box’s corner handles around the text you want to match; the tighter the box, the better the suggestions.
Why type my text before running Match Font?
Each suggestion previews live on the selected type layer as you click it. With your real words already typed, you see how every font will actually look.
Why can’t I add Typekit fonts?
Sign in to the Creative Cloud desktop app and to Typekit with the same Adobe account. In the Creative Cloud app, Assets > Add Fonts From Typekit opens the site. Two different accounts, or not being signed in to both, won’t work.
How do I use a suggested Typekit font?
Click the cloud icon beside it. Photoshop syncs the font from Typekit and applies it to your type layer. Fonts already installed apply with a single click.
Will it find the exact font?
Not always. Neither line in the video gets an exact match: Comic Sans MS Bold comes closest for Espresso and Georgia for the Premium line. Pick the closest and it still reads as consistent.
How do I match the text color too?
Open Window > Character, click the Color swatch and use the eyedropper to click the existing text in the image.
How do I center new text under a graphic?
Click Center Align in the Paragraph panel, draw a Marquee selection across the graphic, then select the Move tool and click the middle alignment option in the options bar. Cmd/Ctrl + D deselects.
How do I hide the original text?
On a new layer, draw a Marquee selection over it, press B and Alt/Option-click to sample the color around it, then go to Edit > Fill and choose Foreground Color. Keep the new type above that layer.
Is there a free download?
Yes, with a free PHLEARN account. You get 1 sample image and 1 PDF guide with the steps from the video: the Typekit setup, Match Font on two lines of the sign and covering the original text.
From the Magazine View all
Stories, interviews and guides for photographers, new every week.
 BusinessHow to Compete With AI: Give Your Clients MoreEveryone has the same tools now, and your clients know it. The way to compete is to give them more.
 EditingLightCraft vs Lightroom: Is the Free Clone Any Good?The free clone on the same RAW files: what matches, what breaks and who should switch.
 EditingHow to Tell If a Photo Is AI, and Prove Yours Is RealThe tells that still work in 2026, why detectors disagree, and how to prove your own photos.
Master Photoshop, Lightroom and Photography
Join PHLEARN PRO for $12.99 a month, or $99.99 a year (save 36%). Cancel anytime, with a 100% money-back guarantee.





