Tutorial Description
More than any other Tool that we have at our disposal the liquify Tool has always been met with a special degree of ire. Liquify has been dubbed a great evil that has beset the foundations of society’s self esteem…
Of late I have begun encountering more and more photographers who fundamentally refuse to use the liquify Tool on principle. With great power comes great responsibility. Like many other Tools the liquify tool can be used effectively without crossing the rubicon into the lands of moral ambiguity.
Today we are going to take a look at a few examples of how you can use the Liquify Tool to fix important visual problems that have nothing to do with Body image or self esteem.
Fixing Optical Illusions
Take a look at the image below. Other than a Black and White conversion in Lightroom this image is right off camera. Do you notice something odd about it? The curve of her waist doesn’t seem to line up! It almost looks like someone tried to make her thinner above her hand but failed to make the same edit below so now it looks like one of those terrible liquify mishaps that you see finding their way into the rage of the masses.
Roll over the image to see arrows drawn to represent the issue.
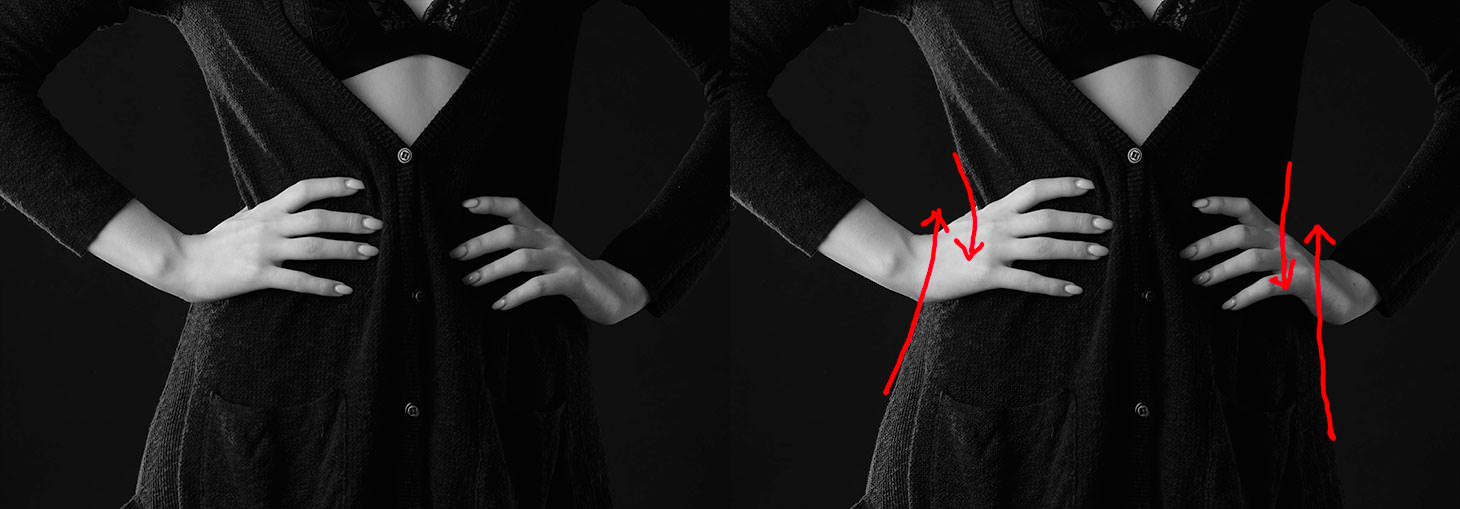
The model in this photo does not have broken or disfigured hips. Not even remotely. She is absolutely gorgeous and when standing in a different pose her form has an elegant and healthy Curve.
This visual trick is being caused by a number of things. The first being that cameras, unlike most humans it only has one eye. Cameras see in two dimensions and as a result sometimes this lack of Depth creates optical illusions that are only amplified by the focal length of the lens.
Thus, instead of adjusting a pose I really liked I opted to simply fix this optical illusion in Photoshop using liquify. The results of which you can see below.
Roll over the image to see arrows drawn to represent the fixed Curve.
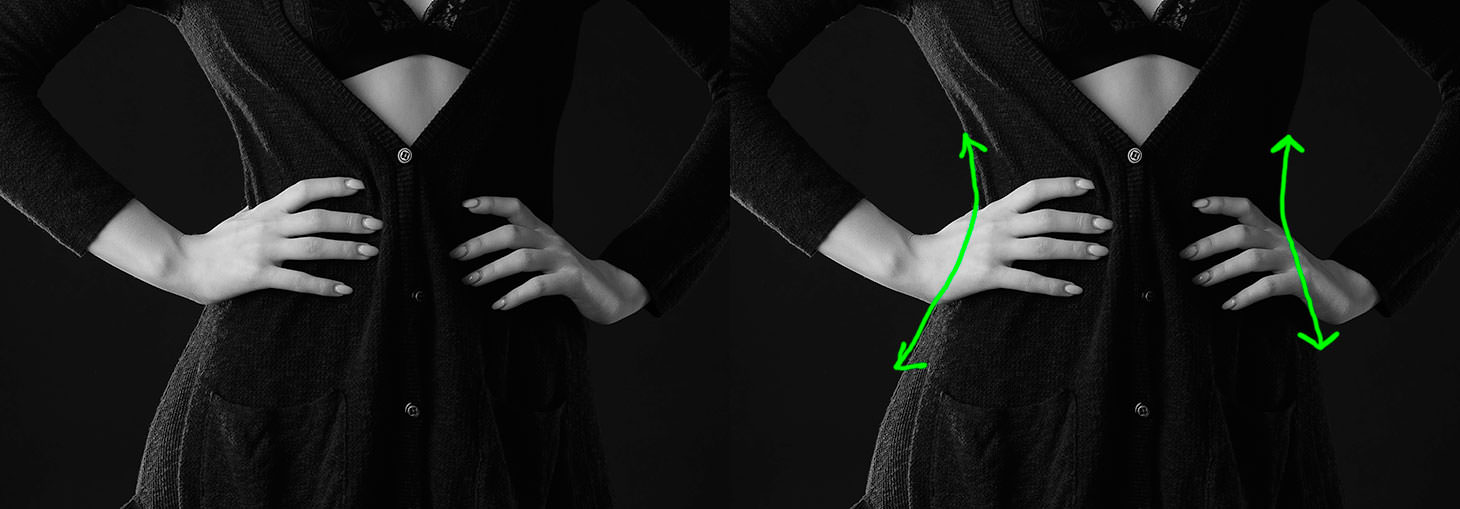
As you can see, all I did was adjust the Angle of her natural curve so that it look like her torso lined up. If you measure the thinnest part of her waist you will find that I didn’t make her thinner at all. In this case I have used liquify to fix an optical illusion caused by photography to make a photo of this model accurately represent how she looks in real life.
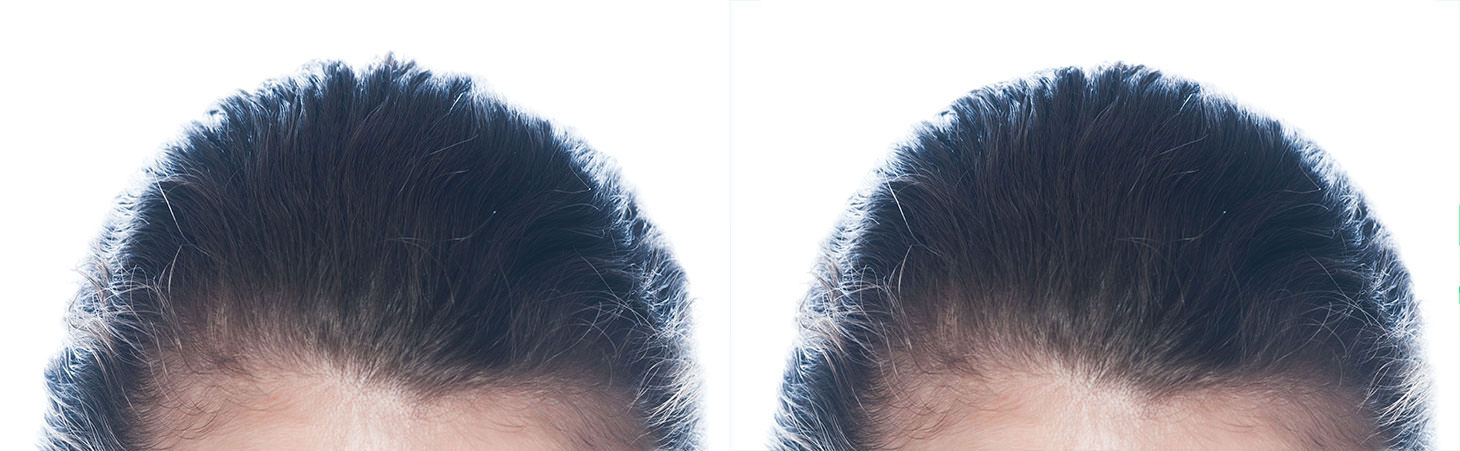
Fixing Bumpy Heads
Well… not really but again that cyclopean device we use to take pictures tends to make heads look bumpy because it lacks the ability to reveal the depth that shows the true shape of a model’s head. As a result tufts of Hair will always look like little bumps and even if your hairstylist pulls the model’s Hair to what seems like a perfect Level of tightness there will always be that hint of bumpiness.
You can fix this easily by using the liquify tool to smoothen out those tufts of hair giving the model’s head a fairly smooth curvature.
Roll over the image to see how the bumps can be removed with liquify.
Fixing Clothing Ripples
Stylists are amazing to have around. They fix almost all the issues that you might Face when dealing with clothing. But even the best stylist can’t keep tightly fitting clothing from slightly bunching up as the model moves from pose to pose.
In real life you will never notice these Ripples because the model is always in Motion but when a scene is frozen into a photograph the ripples become a tremendously annoying visual Distraction. These ripples aren’t caused by a model having a lumpy figure, they are merely caused by the nature of the clothing she is wearing.
Leaving these ripples in an image is by no means an accurate representation of any model’s figure and by removing them with liquify you are able to further increase the accuracy of your final image.
Roll over the image to see how the Ripples can be removed with liquify.

Keep Going
If you want to go deeper into the mechanics of using the Liquify Tool and take your understanding of it to a new Level I strongly suggest checking out the following fantastic Phlearn tutorials that cover the tool in Depth:
Conclusion
The liquify tool is a fickle device. It has the power to both distort reality and to fix reality that has been distorted. As retouchers we have a responsibility to use the tool in a way that will not only best represent the beautiful model that has stepped in front of the camera but also to ensure that the integrity of the clients brand is effectively maintained.