

Tutorial Description
It was a rainy, evocative, day in Vancouver when I received a rather flustered call from a good friend.
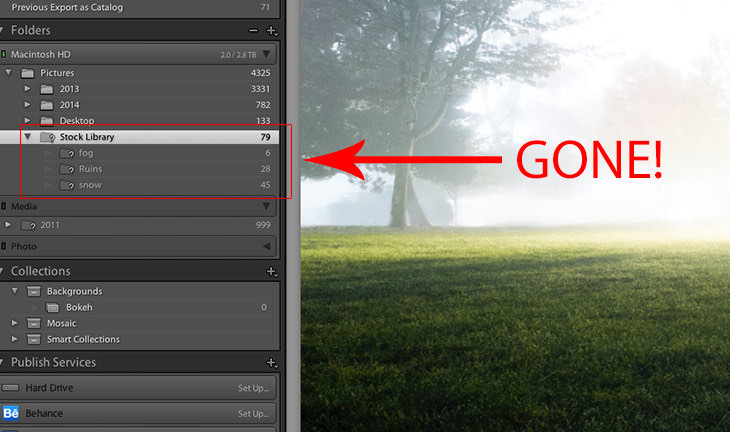
She had recently been shooting on location down south and her laptop had run out of storage space. Knowing that all her files were backed up not once, but twice back home she went into Lightroom and deleted about 4 months worth of images then continued on her merry way.
Upon returning home she went into her backup system to retrieve the files she deleted only to realize that she had accidently blacklisted her laptop’s internal drive in her backup software and none of the photos that she deleted actually had been backed up!
Four months worth of photos gone! Including several client shoots which had YET to be edited or delivered. Needlessly to say she was quickly approaching exasperatingly hysterical by the time she got ahold of me.
Given that she had refilled her hard drive with new photos while shooting data retrieval of the deleted files was pretty unlikely so my initial response was to tell her to start practicing her best “I’m sooooooo sorry” speech but through her teary cries she randomly opened Lightroom and all the previews of her images started popping up.
Initially she was gleeful, she thought the files had magically resurfaced only to realize a few seconds later that all she was seeing was the cached previews that Lightroom likes to store to speed things up for you.
Luckily for her a strangely shaped lightbulb popped up above my head. There was a hint of hope. If Lightroom has those previews displaying it means image files of some sort must be stored somewhere. I had no idea what resolution or quality they might be but there were certainly image files someplace!
After some research and tinkering I was able to recover a huge number of image files for her and while none of the RAW files could be recovered I was pleasantly surprised to discover that Lightroom stored the vast majority of the library as full resolution jpgs! Certainly not ideal but good enough to avoid being sued!
How To Export Lightroom Preview Files To Your Desktop
My initial assumption was that I would have to figure out a way to unpackage the Lightroom catalogue file and manually extract the images that I hoped were stored in a format that I could easily use.
After a quick Google search, however, it turns out that Adobe has already created a fantastic Lightroom script for exporting previews and also includes detailed instructions on how to set it up.
After exporting all your photos you will find a folder filled with jpg image files named according to their resolution. The script will automatically export the highest resolution preview available which ideally will be full resolution.
The only weakness I found with the script is that it doesn’t take into account the folder structure of your library. It merely exports each and every image you selected into a single folder. You can, however, maintain, your organization by exporting images folder by folder instead of all at once.
How To Make Sure Lightroom Caches Full Resolution Previews
Lightroom, by default, only caches the lowest quality image it needs. For example, if you only ever view a set of pictures in Grid view the previews will only be 160×100. I am sure you have also noticed that sometimes when you are culling your images that when you view an image it starts out looking a bit low quality then if you wait lightroom displays a full quality one. This happens because Lightroom first makes a lower resolution preview. (About 1000px on the short edge) and then creates a full resolution preview.
If you skip through your images too quickly while culling Lightroom will not cache the full resolution preview.
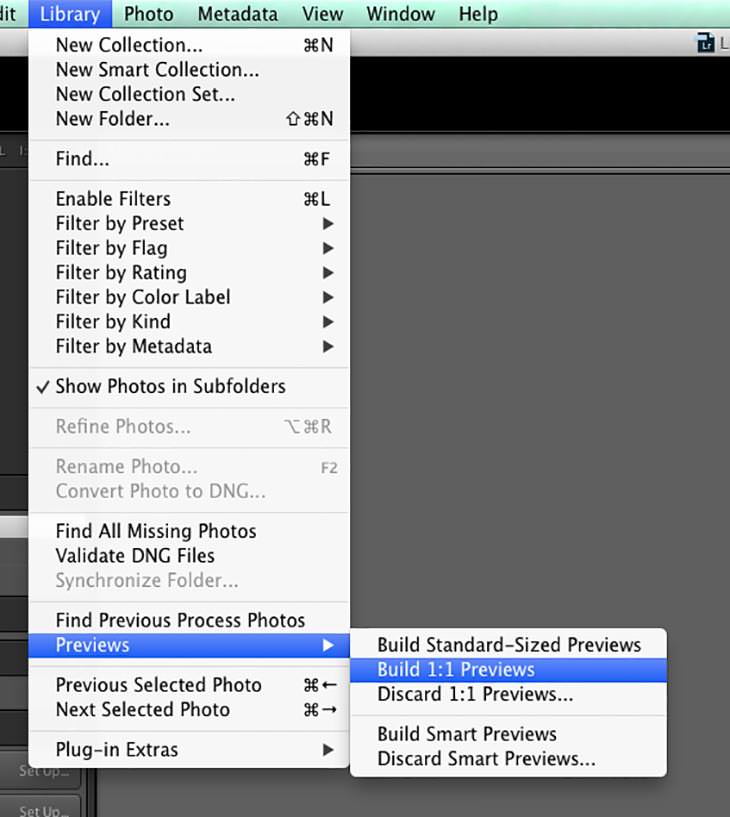
You can also force Lightroom to Render full resolution previews of all your images by going into the “Library” menu and then under “Previews” where you are greeted the the option: “Build 1:1 Previews”. If you have a large library though this can take up a lot of hard drive space. For example my Lightroom catalogue is about 20gb.
Conclusion
This method, is, of course, an absolute last resort. My best advice is to make sure you have a secure, reliable, two tier backup Workflow that includes offsite storage but when all else fails at least Lightroom has one more line of defence for you. I hope you never ever have to use it!