
Download Assets
This tutorial includes 1 sample image, 1 sample PSD and 1 PDF guide. Downloads are free with a PHLEARN account.
- Download the sample images and PSDs from every free tutorial on PHLEARN
- New free tutorials published every week
- One free account — sign up once, then download anything
Free PDF Guide · 3 Pages
This Tutorial as a Step-by-Step PDF
Every step from the video in order: the I key, Point Sample versus a 51 by 51 average, the Ctrl-click menu with Copy as HTML, Alt/Option-click for the background color, Shift-click sample points in the Info panel, Select Subject plus a Solid Color fill, and Alt/Option from the Brush. Keep it next to your keyboard.
description
The Eyedropper tool does more than pick a color. In this tutorial, we’ll show you how to leverage this versatile tool for sampling colors, including creating multiple sample points and changing average sample sizes. Discover how to select foreground and background colors efficiently and even replace your background with colors sampled directly from your image. We’ll also cover useful keyboard shortcuts to streamline your workflow.
Enjoying This Free Tutorial?
We publish a new free tutorial every week, each one with sample images and PSDs you can download and follow along with. Sign up and they land straight in your inbox, along with early word on sales, events and subscriber-only offers.
Image Source
How to Use the Eyedropper Tool in Photoshop
The Eyedropper looks like the simplest tool in Photoshop — click a pixel, get a color. It has more to it than that: it can average an area rather than sampling a single pixel, set the background color as well as the foreground, track several sample points at once, and it is available from inside the Brush without switching tools.
The averaging setting in particular is the difference between colors that work and colors that do not, and it is the thing most people never change.
The Basics
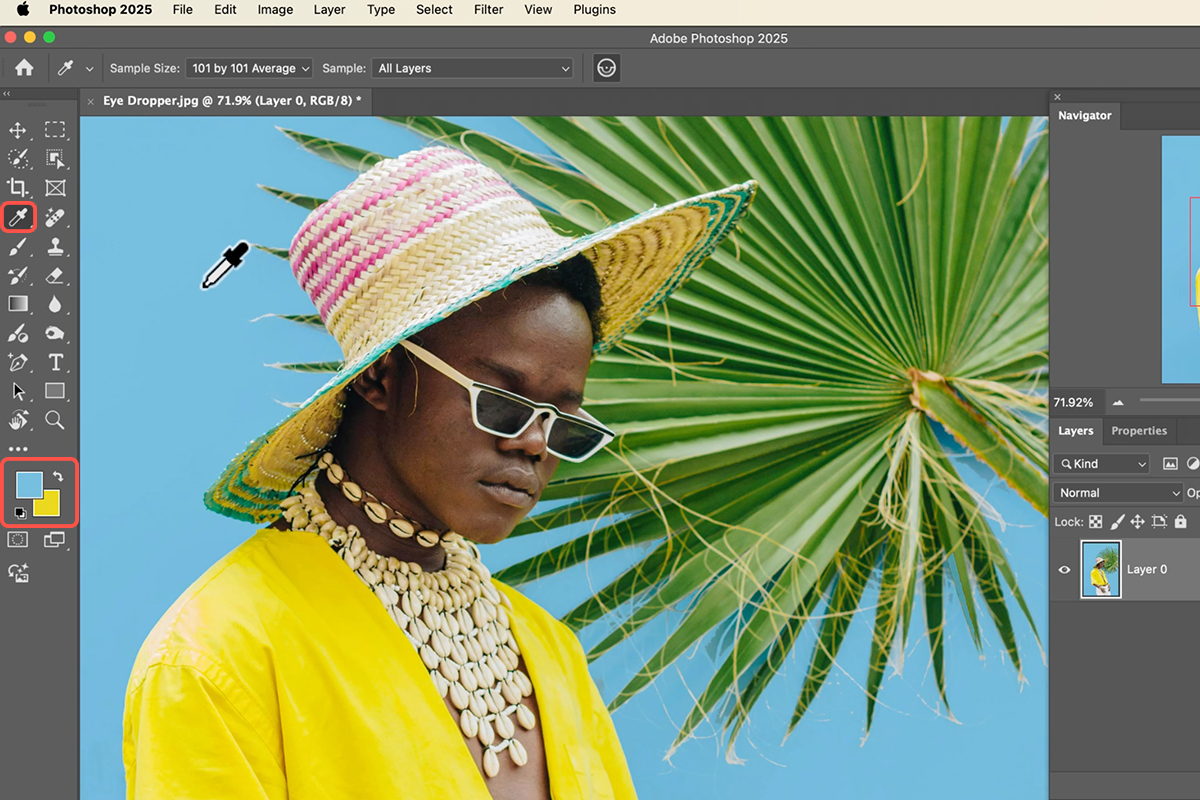
Press I for the Eyedropper, or select it from the toolbar. Click anywhere in your image to set that color as the foreground color.
Grouped with it is the Color Sampler Tool, which comes up later.
Sample Size Is the Setting That Matters
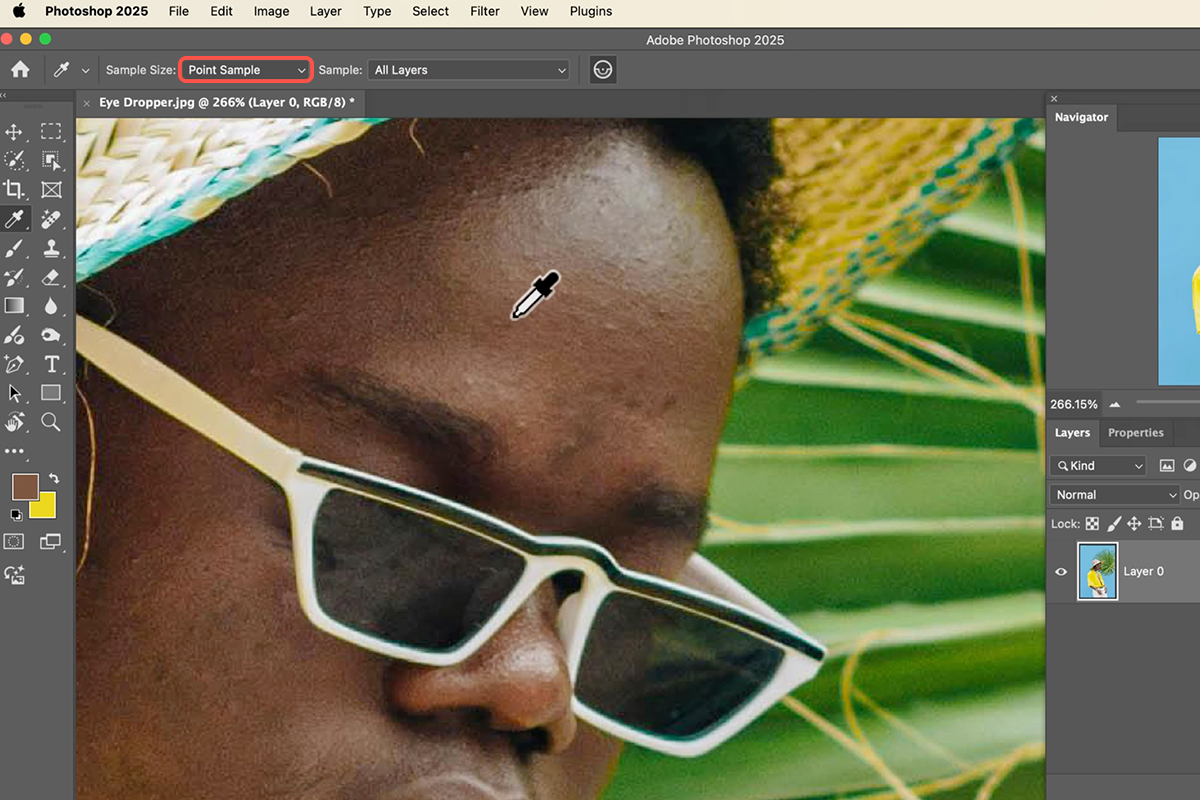
In the options bar, Sample Size defaults to Point Sample — a single pixel.
Zoom in and click a few neighboring pixels and you will see the problem. Every click returns a different color, because photographs contain noise, compression artifacts, and fine texture. A single pixel is rarely representative of the color you think you are picking.
Change it to an average instead. 3 by 3, 5 by 5, up to 101 by 101. Photoshop then averages every pixel in that square and returns the result.
The difference is immediate: colors stop jumping as you move around, and what you sample matches what your eye sees rather than one arbitrary pixel.
Which Size to Use
Small samples like 3×3 or 5×5 suit precise work — picking a specific color from a small area. Large samples like 51×51 or 101×101 suit judging the overall color of a region, which is what you want for skin tones, backgrounds, and anything you plan to use as a fill.
As a default, 5×5 is a better starting point than Point Sample for almost all photographic work.
Right-Click for Fast Access
Rather than going to the options bar, right-click (or Ctrl-click) on the canvas with the Eyedropper active. The sample sizes appear in a context menu, along with Copy Color as HTML and Copy Color’s Hex Code.
Those two are worth remembering if you do any web work — sampling a color from a photograph straight to a hex code is much faster than going through the Color Picker to read the value.
Set the Background Color
Click sets the foreground color. Alt-click or Option-click sets the background color.
That means you can pull a complete two-color scheme out of a photograph without ever opening the Color Picker — useful for gradients, which run foreground to background by default, and for any tool that uses both.
Track Several Colors at Once
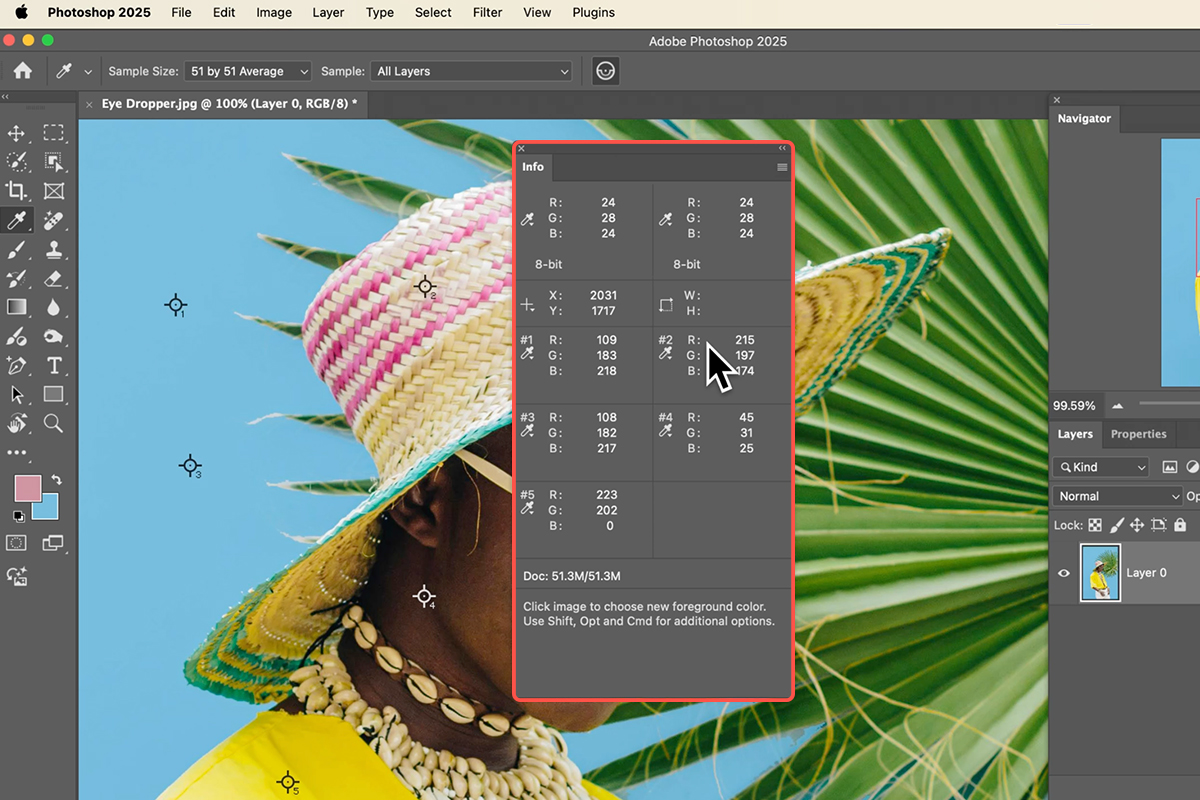
Hold Shift and click to place a persistent sample point. Each one appears in the Info panel with live RGB values.
Unlike a normal click, these points stay put and keep reading. They also update as you edit — add an adjustment layer and every sample point shows the new values, which is how you check that a correction did what you intended in several places at once rather than judging by eye.
Hold Ctrl or Cmd and drag to reposition a point. To remove them, switch to the Color Sampler Tool and click Clear All.
Replace a Background With a Color From the Photo
Here is where sample size stops being theory. The technique: cut out the subject, put a solid color behind, and pick that color from the image itself so it belongs.
-
Select the subject
Take the Object Selection Tool and click Select Subject. Choosing the cloud processing option gives noticeably better edges than device processing.
-
Add anything the selection missed
Hold Shift and select additional elements — a hat, a prop, anything that should stay with the subject.
-
Add a layer mask
Click the layer mask icon to hide the background.
-
Add a Solid Color fill layer
Layer ? New Fill Layer ? Solid Color, and drag it below the subject layer.
-
Sample the color from the photograph
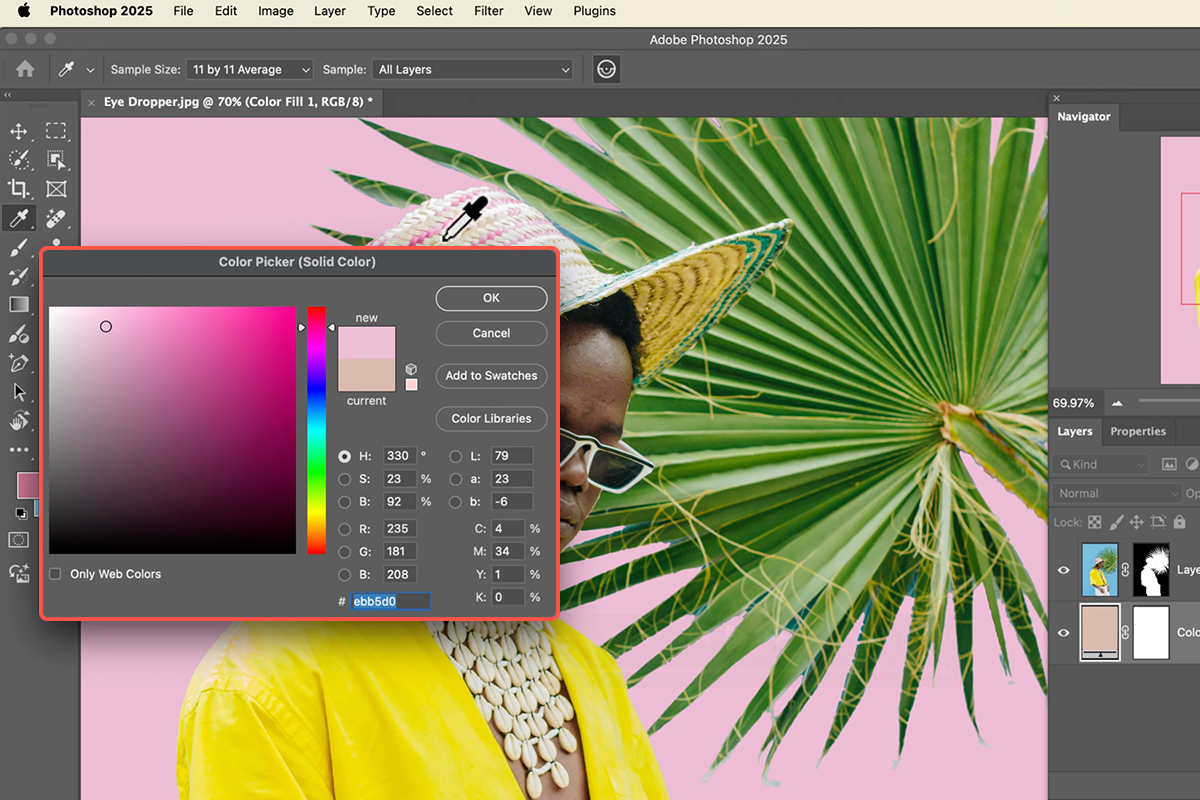
Click the fill layer’s swatch to open the Color Picker, then click anywhere on your image — the cursor becomes an eyedropper, and the background updates live as you move.
Why the Sample Size Decides the Result
With Point Sample, every small movement produces a wildly different background — you are catching individual pixels of noise, and the results are erratic.
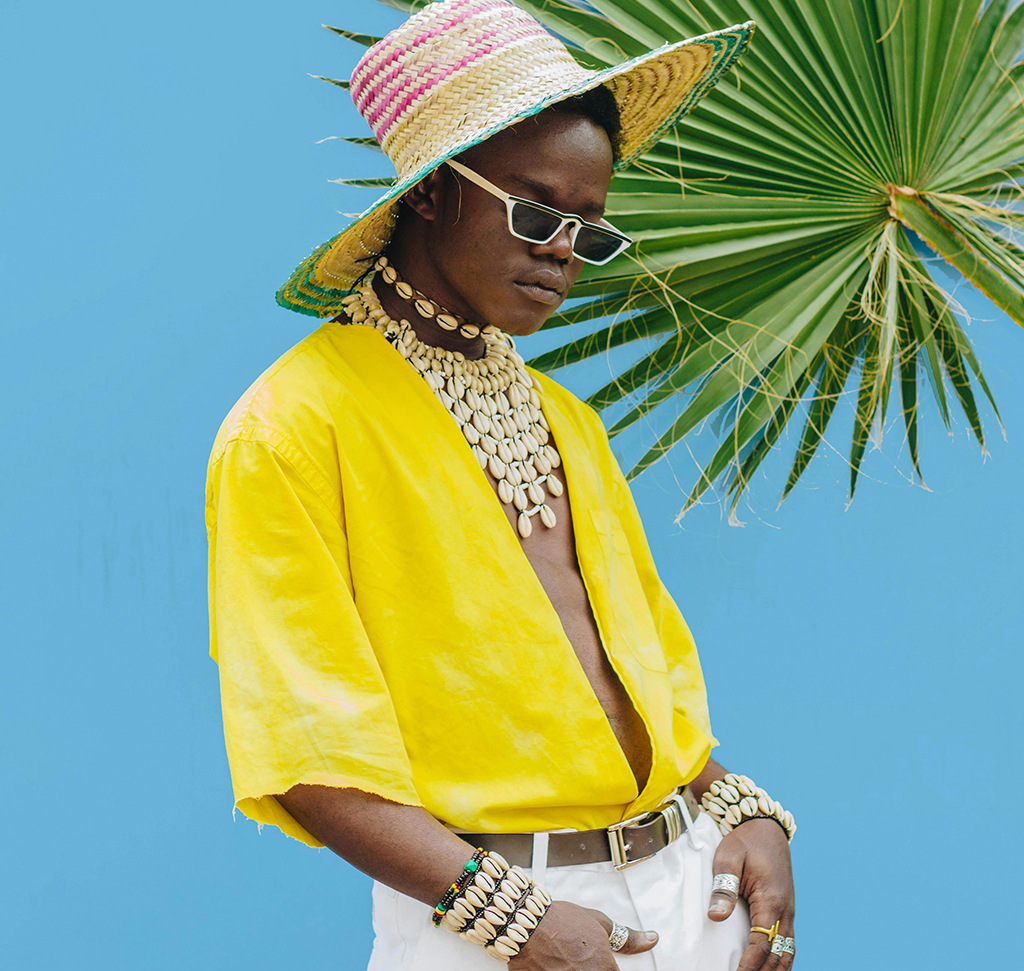
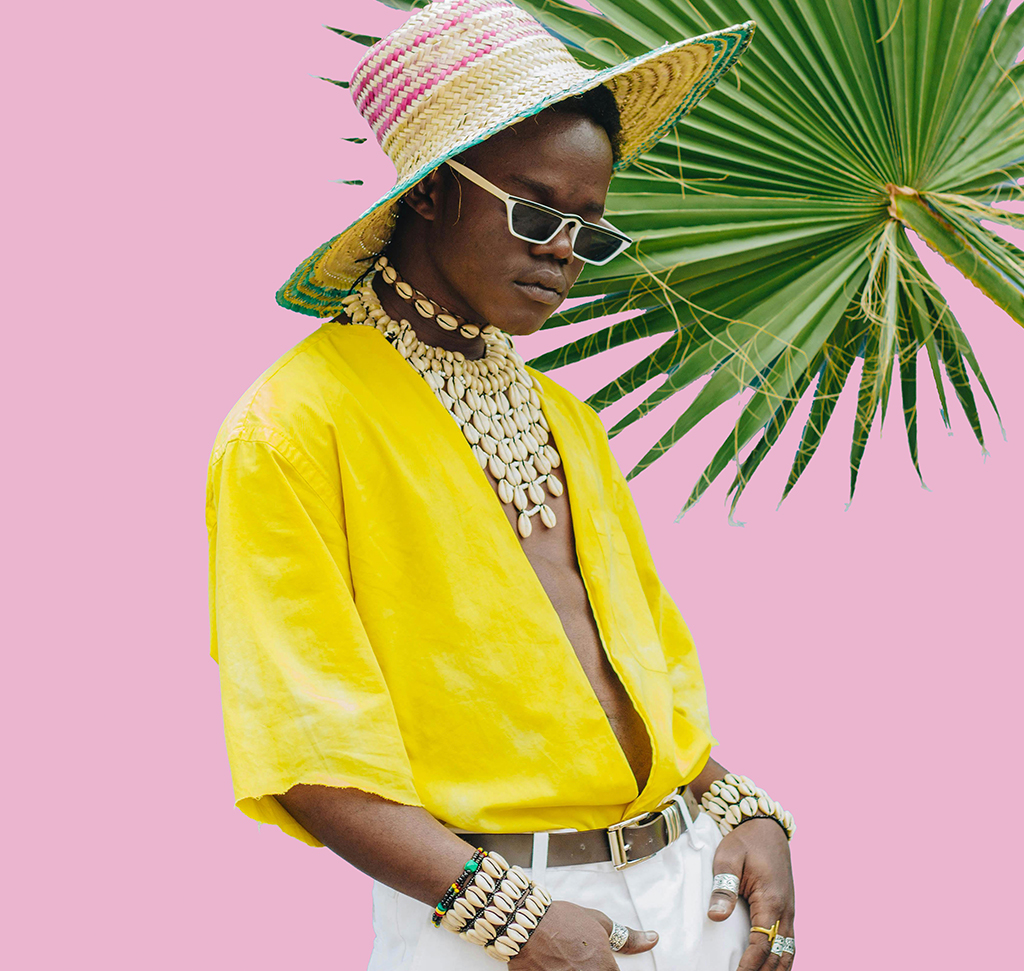
With a large sample, you get the average color of a region. Sampling across a pink hat returns the hat’s actual color rather than one bright pixel from a highlight on it, and the background sits with the subject because it is genuinely derived from colors already in the frame.
That is why a background sampled this way looks intentional where one picked from the Color Picker often looks pasted on.
Use It Without Leaving the Brush
The shortcut worth building into your habits: with the Brush Tool active (B), hold Alt or Option and the cursor temporarily becomes the Eyedropper. Click to sample, release, and you are painting again.
No tool switching, no interruption — which matters when you are painting and sampling repeatedly, as in frequency separation or any clone-and-blend work.
One thing to know: it uses whatever Sample Size the Eyedropper is set to. If sampling from inside the Brush behaves unexpectedly, press I, check the setting, and go back to the Brush.
Worth Remembering
Change Sample Size away from Point Sample — it is the single change that improves every color you pick. Alt-click for the background color. Shift-click to leave sample points that track your edits live. Right-click for quick access to sizes and hex codes. And Alt-click inside the Brush to sample without switching tools.
Quick Reference: Keys, Menus and Settings
- The toolI; click to set the foreground color
- Sample SizeOptions bar: Point Sample reads one pixel; 51 by 51 Average gives a steadier color. Ctrl-click (right-click) for the same menu plus Copy Color as HTML / Hex
- Background colorAlt/Option-click
- Track several colorsShift-click to drop sample points; RGB values show in the Info panel; Cmd/Ctrl-drag to move a point; Color Sampler tool > Clear All
- New background from the photoSelect Subject (Shift-click to add), Add Layer Mask, Layer > New Fill Layer > Solid Color below it; with the picker open, click anywhere in the photo
- From the BrushB, hold Alt/Option to sample (it keeps the eyedropper’s sample size)
No AI, no generative credits.

Free Downloads
Follow Along on the Same Photo
Get the portrait from the video, the PSD with the masked subject and the Solid Color fill, and the PDF guide. Free with a PHLEARN account.
Eyedropper Tool: Common Questions
What does the Eyedropper do?
Press I and click anywhere in the image to make that color your foreground color. Alt/Option-click sets the background color instead.
Why does the color jump around as I click?
Sample Size is on Point Sample, so each click reads a single pixel. Switch to an average like 51 by 51 in the options bar and the color settles. Ctrl-click on the image opens the same menu.
Can I get the hex code for a color?
Yes. Ctrl-click (or right-click) with the Eyedropper and choose Copy Color as HTML or as Hex Code.
How do I keep track of several colors at once?
Shift-click to place sample points; their RGB values appear in the Info panel. Cmd/Ctrl-drag a point to move it. That switches you to the Color Sampler tool, which has a Clear All button.
How do I pick a background color that matches the photo?
Mask the subject with Select Subject, add a Solid Color fill layer beneath it, and with the color picker open click around the photo. A large sample size averages a few colors and usually suits the image better.
Do I have to leave the Brush to sample a color?
No. With the Brush active, hold Alt/Option and click. It uses whatever sample size the Eyedropper is set to, so change that first if you need a tighter sample.
Does any of this use AI or credits?
Select Subject uses AI to find the person but spends no credits. The Eyedropper itself is a plain tool.
Are the sample files free?
Yes, with a free PHLEARN account. You get the portrait, the PSD with the mask and fill layer, and the PDF guide.
New Free Tutorials View All »






Enjoying This Free Tutorial? Go Further with PRO.
200+ PRO courses. 1,000+ practice files. One membership.

Unlimited access to every PRO course
New PRO courses every month
Layered PSDs and RAW files to follow along
100+ Lightroom Presets, LUTs, Actions and Brushes
Stream in up to 4K, with captions and chapters
Watch on any device: desktop, tablet or phone
4.93 average from 3,900+ reviews · 2M+ students