Download Sample Images
description
Blurs are some of the most often used tools in Photoshop, but also some of the least talked about. We’re here to change that! Learn how to use blurs and the Blur Gallery to add some amazing effects to your images. Add soft sunset coloring to a portrait, add dynamic motion blur to an action shot, create a tilt-shift miniature effect, recreate depth of field, and much more!
You’ll see the following blur tools in action, each for specific use cases:
- Gaussian Blur
- Spin Blur
- Path Blur
- Field Blur
- Motion Blur
- Tilt-Shift Blur
Share
ADD MOTION BLUR TO ACTIONS SHOTS
From Soft Lighting to Dynamic Motion
Adding Sunset Coloring with Gaussian Blur
There are countless ways to color a photo, but we want to show you a method that is as effective as it is unique. We’re going to add some sunset coloring and glow to a portrait by using a separate photograph of a sunset. How? By transforming the sunset photograph into soft lighting using blurs and some specialized tools.
Advanced Lighting & Coloring is one of our most popular PRO courses on the art of beautiful light and color effects. If color is your jam, check it out!
Preparing the Sunset Image
Before we can turn the sunset image into a color effect, we need a way to make it less defined–we don’t want any shapes to be visible, just color and gradients. Click on the Filter Menu, Distort, and then Polar Coordinates.
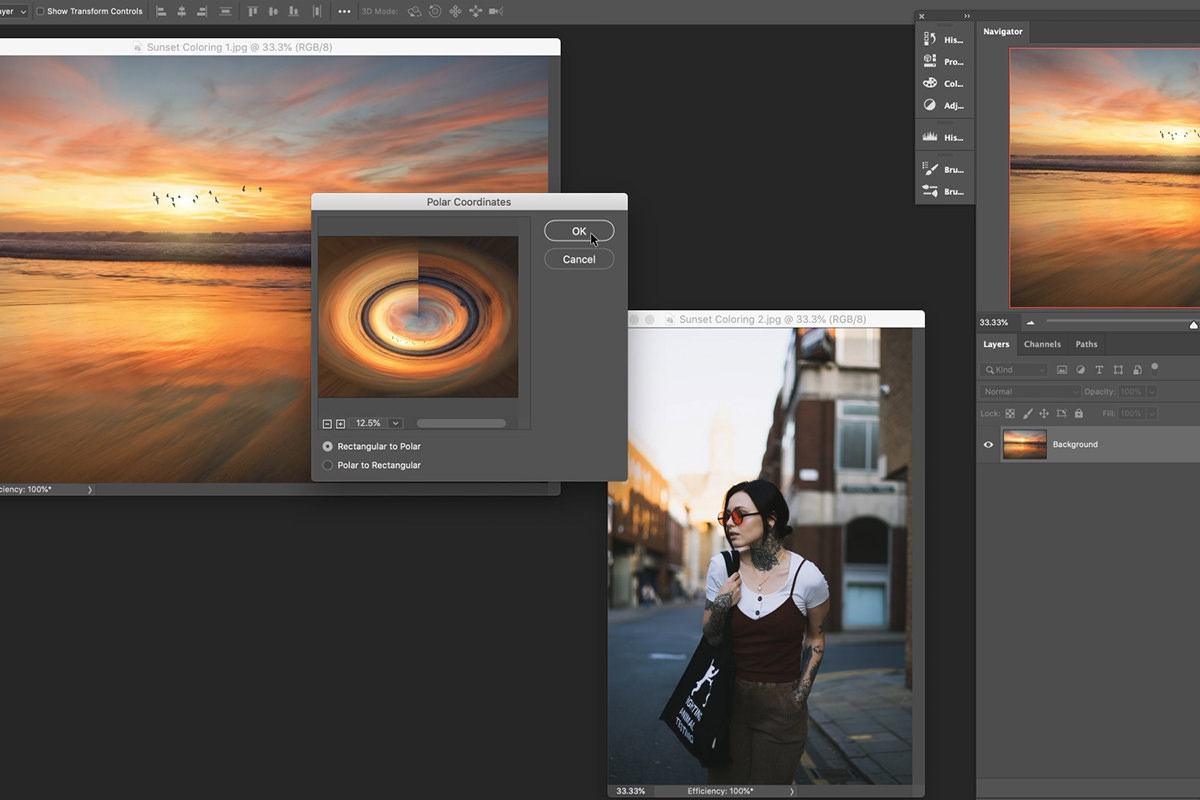
If you’ve never used or heard of this tool before, don’t worry! We find that it’s only useful under very specific circumstances like this. Notice that it warps the sunset image into an ellipse, giving us a nice radial effect. But it still doesn’t look like soft lighting and coloring, so let’s keep going!
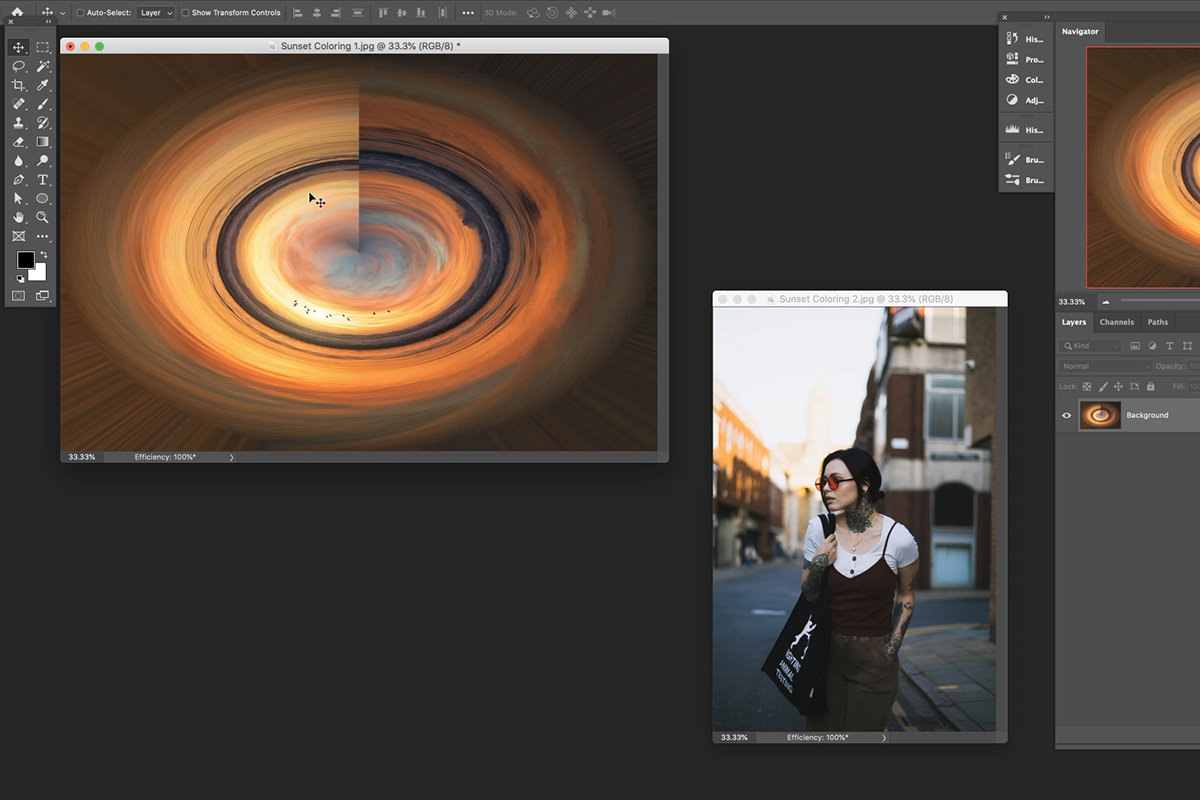
Drag the sunset image into the same canvas as the portrait. Before going any further, there’s an important step we need to take that we’ll need to take whenever we use Blurs or the Blur Gallery. Right click on the sunset Layer and select Convert to Smart Object. As a Smart Object, we can use Filters as much as we want, but we can also go back and change the effect or completely remove the effect without damaging the image itself. Always try to work non-destructively! It’ll save you time and help you avoid headaches along the way.
Now that the sunset Layer is a Smart Object, set the Blending Mode to Screen. This will hide the darker areas while leaving the brighter areas (the lighting that we want) visible. Move and Transform the sunset Layer around the portrait until you find a position that you like.
We chose the top left corner as that’s where the main light source is in the photo.
Where are the Blurs?
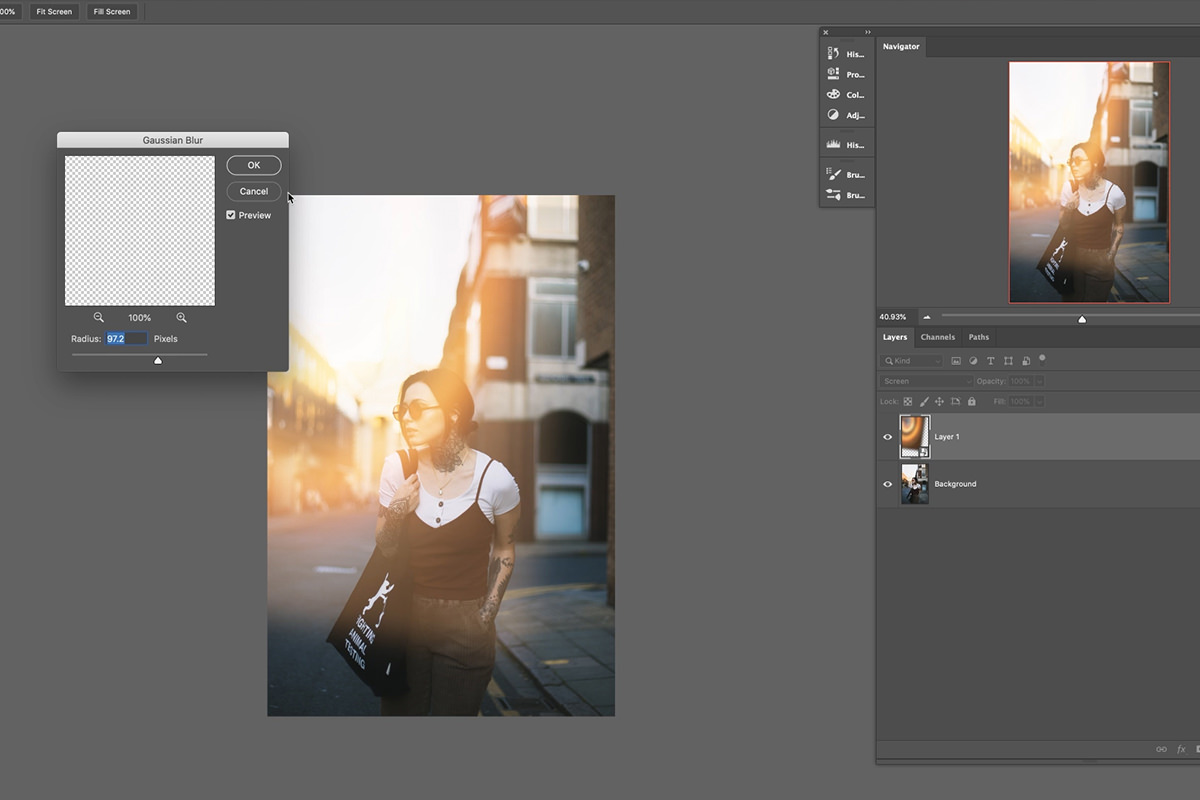
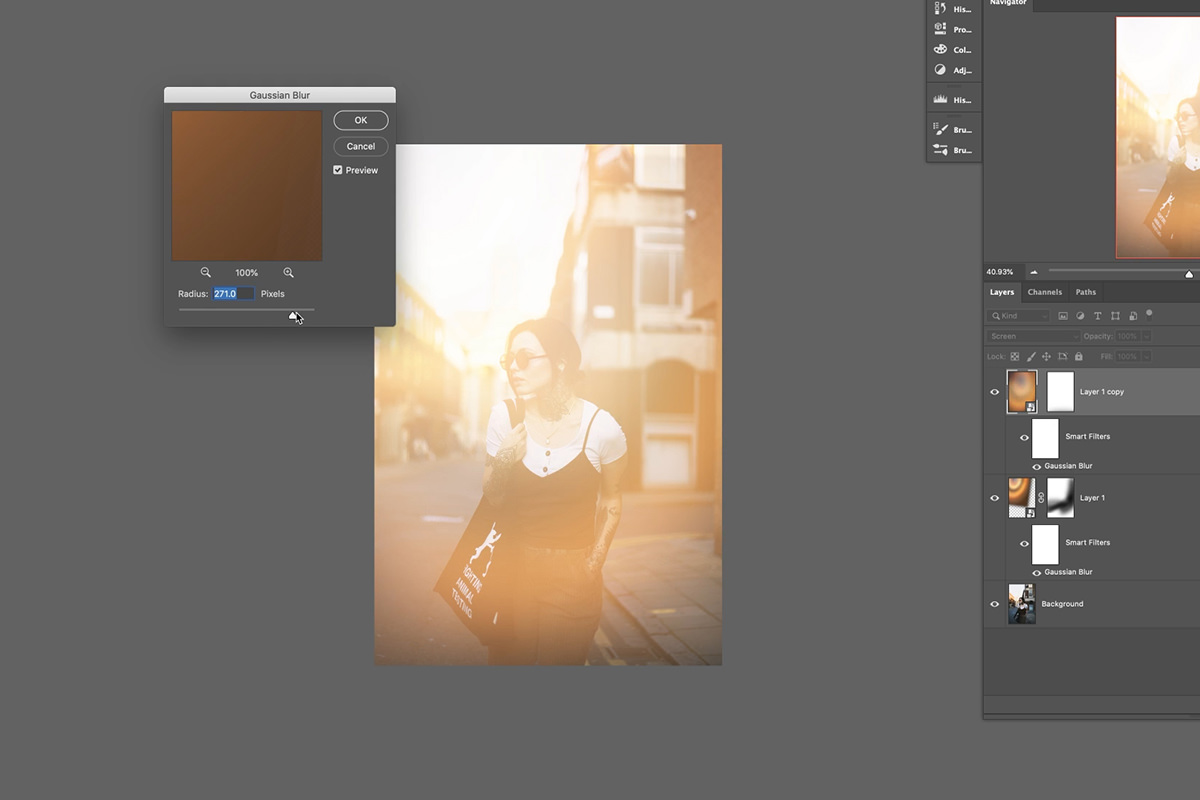
All this talk about blurs and we haven’t used one yet. But the wait is over. We have the highlights from our sunset image, but it doesn’t look very good. We need to soften it up quite a bit if we want it to look realistic. Select the sunset Layer, go to the Filter Menu, then the Blur Menu, and select Gaussian Blur.
Gaussian Blur is the blur tool that we used most often, as it’s the quickest way to evenly soften a layer with a lot of control. Use the slider to soften the sunset Layer until you get a nice and even effect. When you’re done, hit OK.
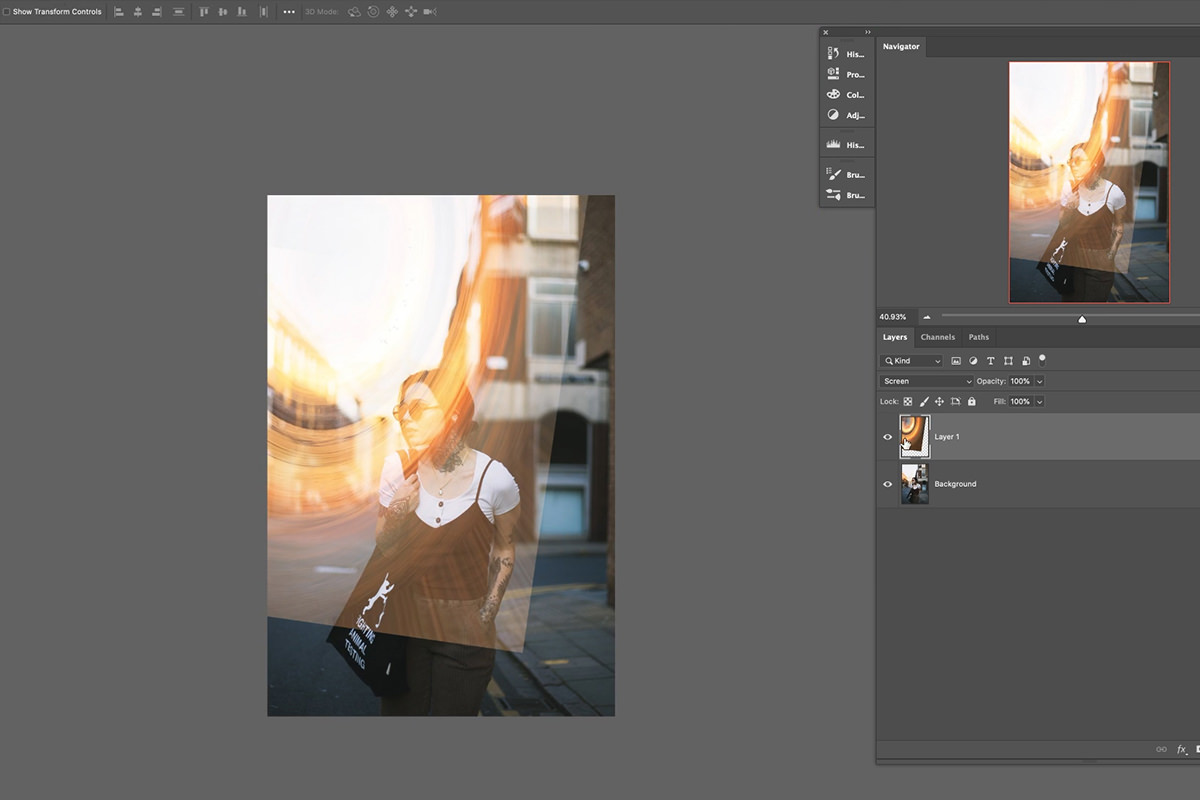
It’s looking better, but we want the effect to cover more area and have a little more variation. Fortunately, this is easy! Simply duplicate the sunset Layer and then Move it, Transform it, and adjust the Gaussian Blur to add some variety. Do this is as many times as you want. The goal is to have a nice and even glow across the entire portrait.
We’re pretty close but the effect is too strong. We can control the visibility in two ways: with Opacity and with Layer Masks.
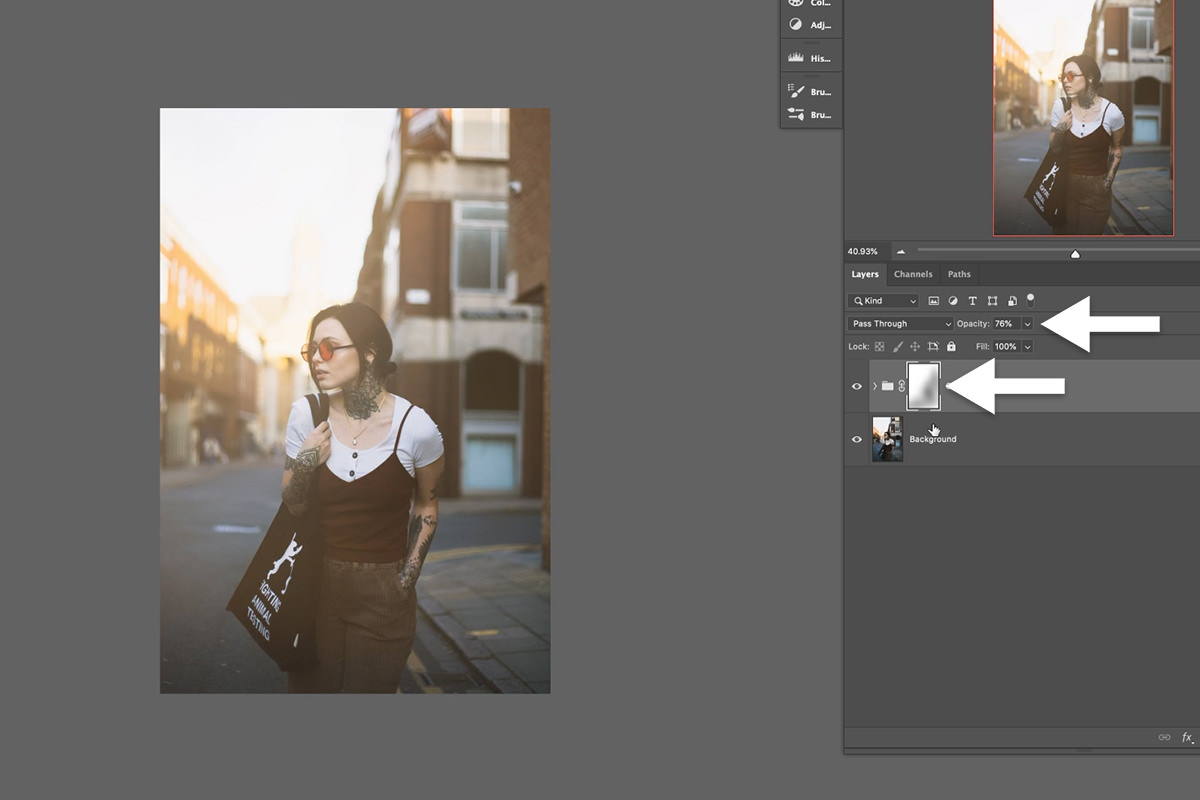
Group all of the sunset Layers together and lower the Opacity, located near the top of the Layers Panel. Then add a Layer Mask to the Group and use the Brush Tool to Paint with black over any areas you want to reduce the effect. Be sure to use a large, soft Brush with a low Flow for the best blending results.
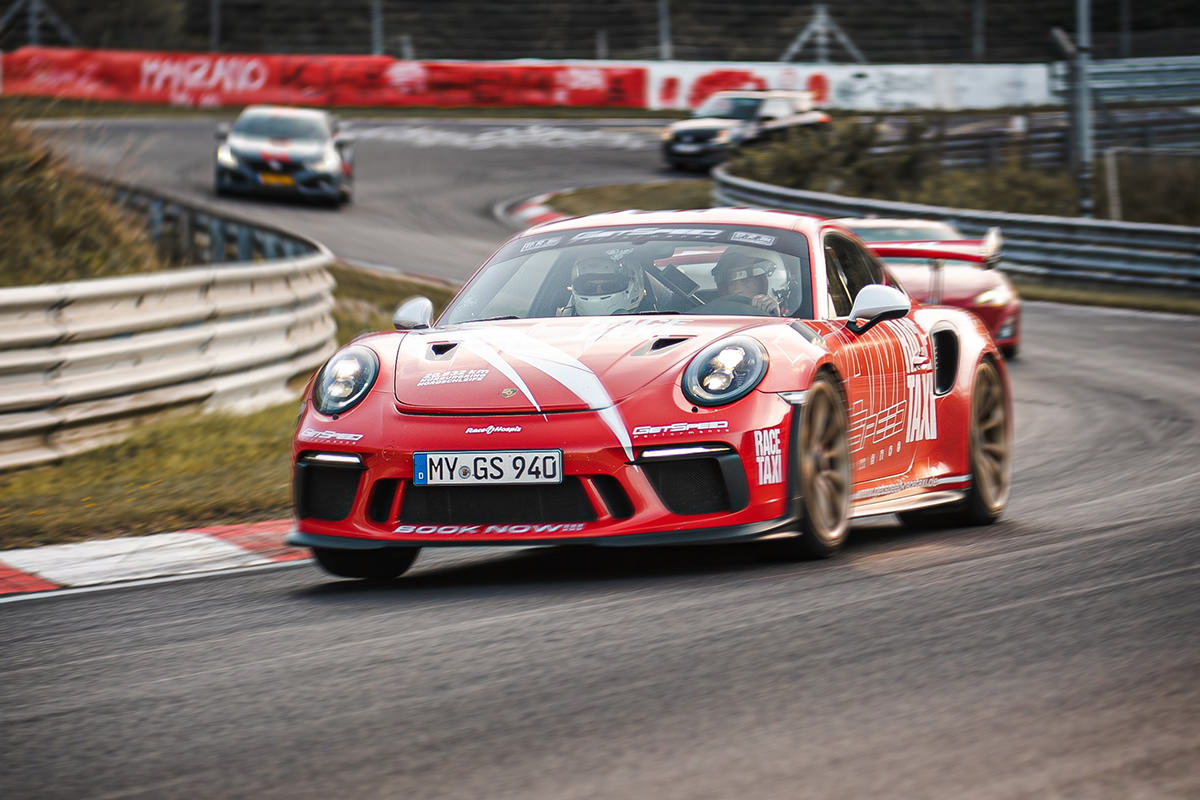
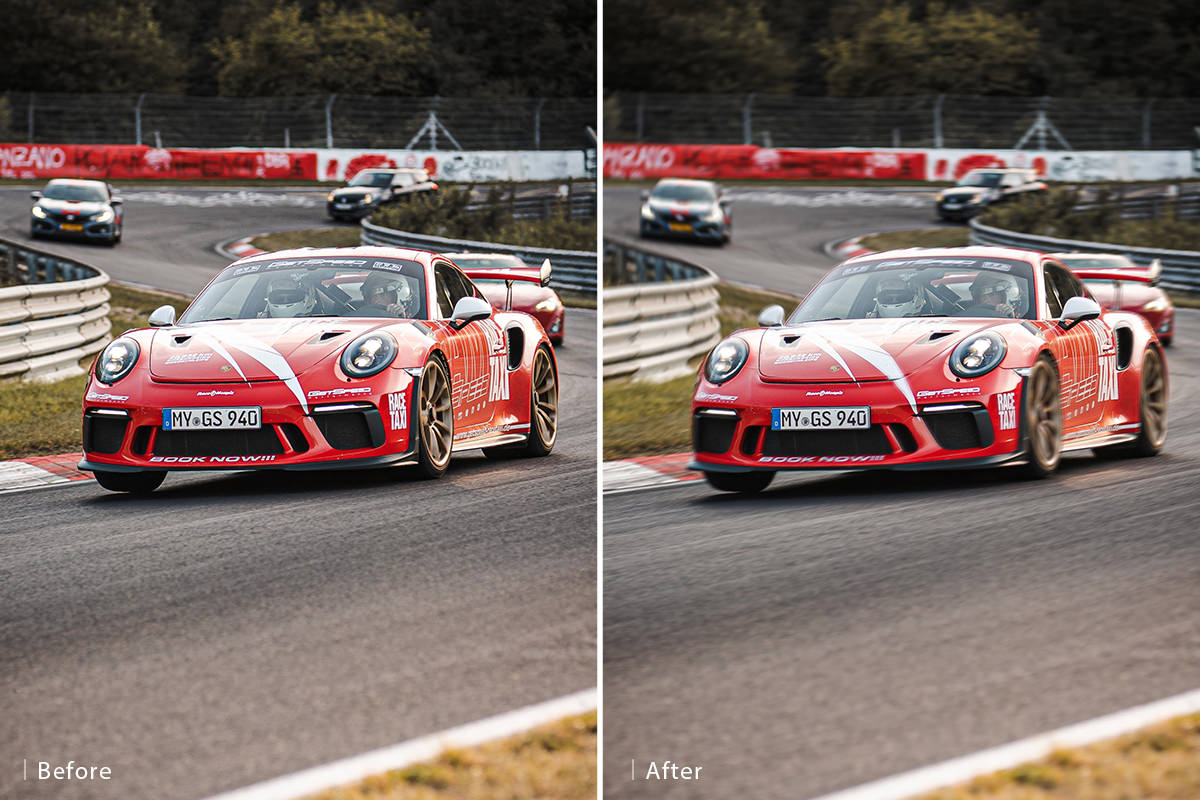
Adding Dynamic Motion with Spin Blur & Path Blur
Adding motion blur is another common use of the many blur tools in Photoshop. But for our example, we’re going to add motion blur without using the Motion Blur tool! Instead, we’re going to use a combination of the Spin Blur and Path Blur tools to add some contextual motion to an image of a race car.
Using Spin Blur
Tires spin, so the Spin Blur sounds appropriate here. Navigate to the Filter Menu, to the Filter Gallery, and select Spin Blur (Don’t forget to convert the image into a Smart Object first!)
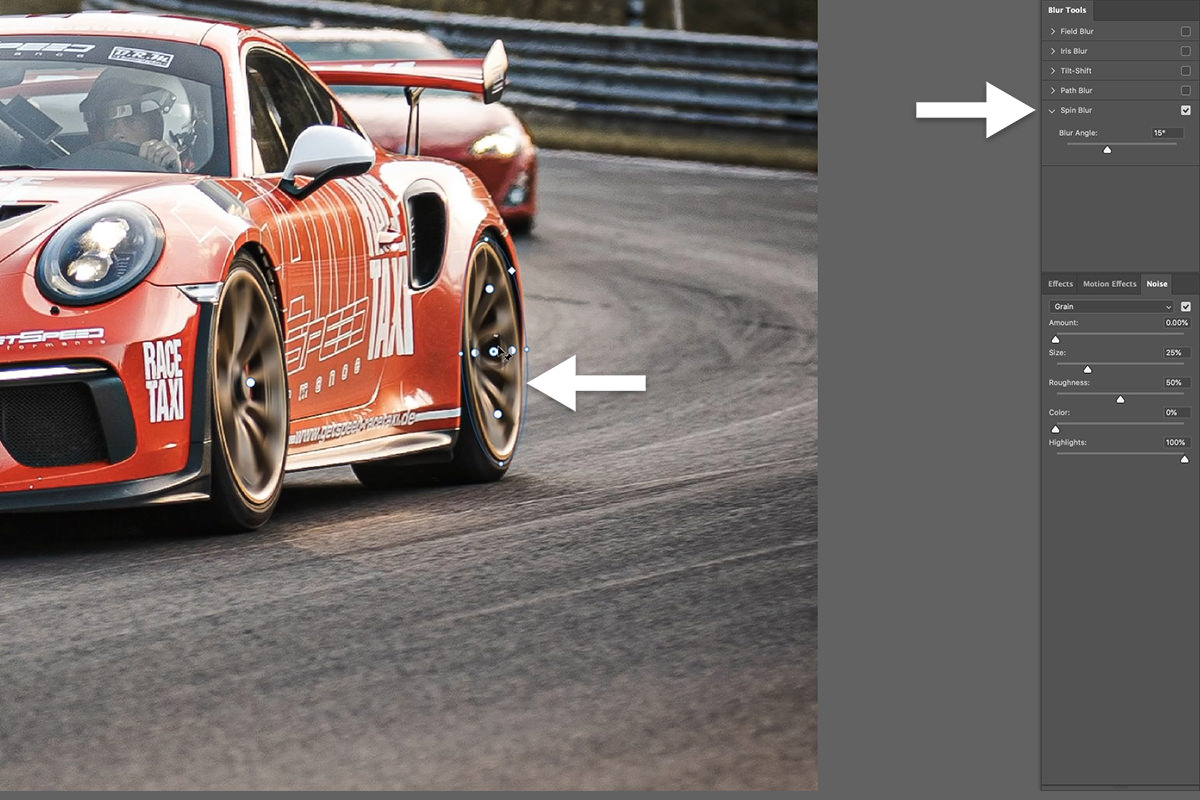
Adjust the blurs so that they cover each of the car’s tires and change the settings to taste. This is a quick and easy method to get a realistic effect of tires spinning!
Using Path Blur
A relative newcomer to the suite of Photoshop blur options, Path Blur allows us to apply blurs across any number of custom paths we create. You can find it in the Blur Gallery like we did the Spin Blur.
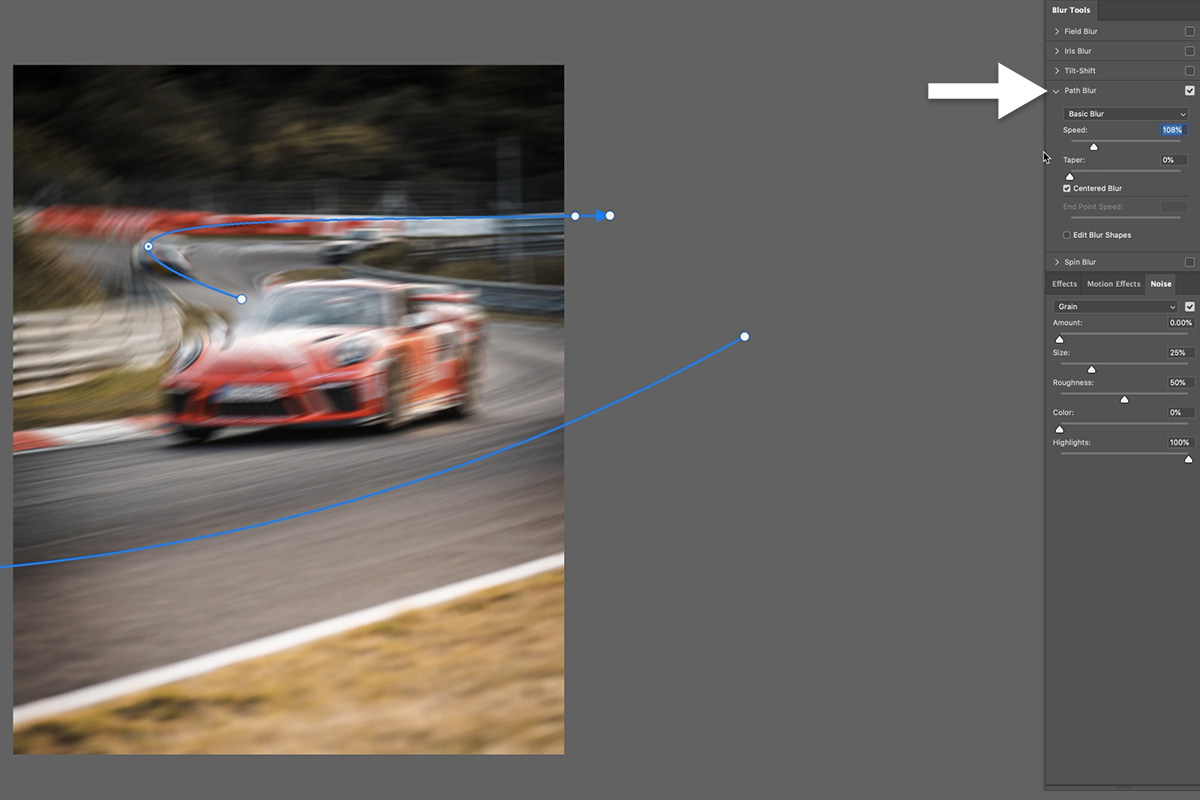
This tool requires a bit more patience (and computer power!), so take your time with it. We created a couple of paths using visual cues from the image to simulate natural motion. You’ll notice that the effect is visible over the entire photograph, but we can take care of this once the Path Blur settings are dialed in.
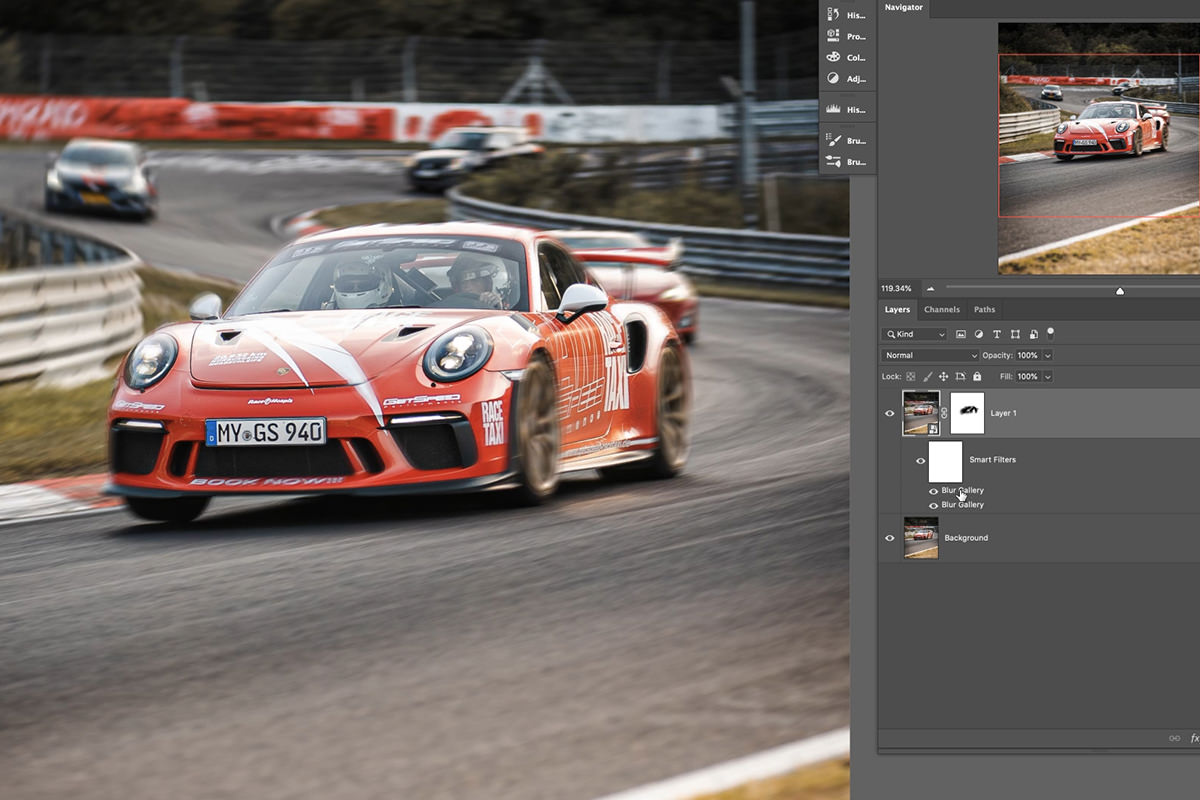
Using the magic of Layer Masks, we choose where we want each effect to be visible. We want most of the car to be sharp, since that is the focal point of the photograph. We want the tires to be blurred, but mostly from the Spin Blur effect we applied. The Path Blur is best when visible mostly in the background and along some edges of the car. Since you have full control with the brush tool to hide and show where the effect is visible, and since you’re working non-destructively, take your time and adjust everything until you think it looks good.
Create a Tilt-Shift Miniature Effect with Tilt-Shift Blur
A tilt-shift lens allows a photographer to control the focal plane when taking a photograph, often to create the illusion that the objects in the image are miniature. We can create that same effect in Photoshop using the Tilt-Shift Blur, and it’s surprisingly easy to pull off.
Just make sure you’re using a photo that is from a top-down perspective and taken from an angle. If you were capturing miniature objects on a tabletop, this is the perspective you would normally use, so it’s necessary when you want to recreate the effect in Photoshop.
Remember to convert the Layer into a Smart Object before applying any blurs or Filters! Then, go to the Filter Menu, then to the Blur Gallery, and select Tilt-Shift Blur.
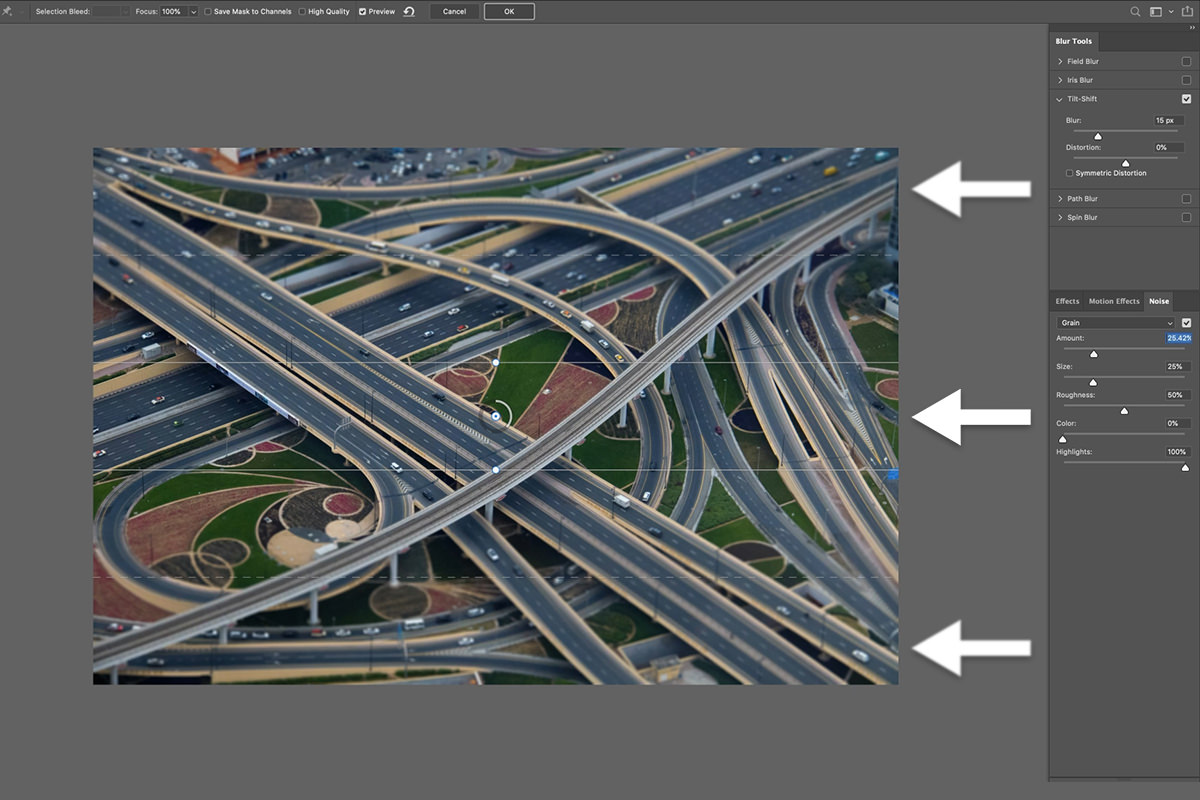
With the right image, this effect is extremely easy to pull off with only a few minor adjustments to the Tilt-Shift Blur settings. Adjust until the image is sharp in a line along the center, and gradually becomes more blurry towards the top and bottom edges.
Create a Realistic Depth of Field Effect with Field Blur
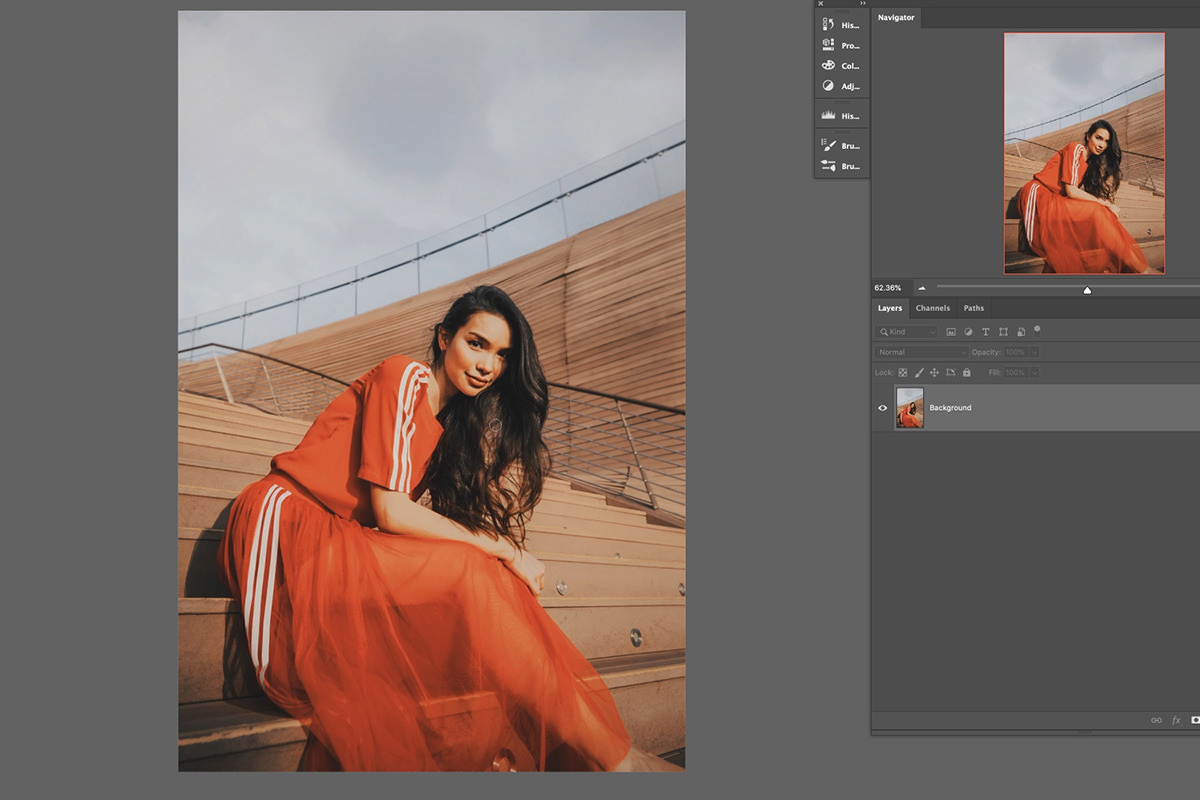
We all love a creamy, shallow depth of field. While it’s best done in-camera using the right lens, we can get something close in Photoshop when the circumstance is right. In this example, we’re going to recreate a shallow depth of field using a simple portrait photo. Now, as with the other examples, choosing the right image for this effect is paramount, otherwise it will look unrealistic. Here we chose a portrait with some foreground, midground, and background elements.
This gives us different areas to add a blur effect to while keeping the subject nice and sharp. But what blur tool should we use? Field Blur! Go to the Filter Menu, then the Blur Gallery, and select Field Blur.

Field Blur gives us the ability to add nodes to an image, with each node creating a different blur effect that we can adjust. We’ve added a node in the bottom right corner to add some blur to the foreground, the top left to add blur to the background, and one in the center to keep the subject sharp and in-focus.
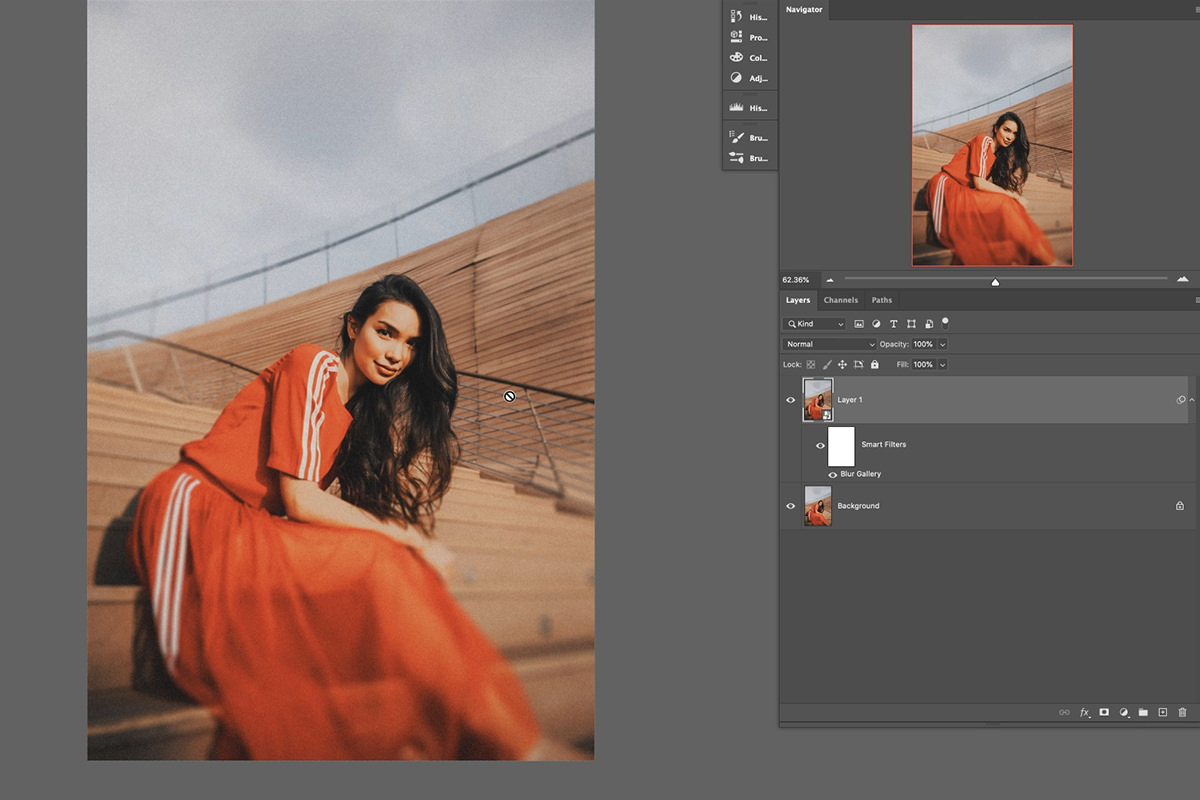
The final result is a convincing depth of field effect that can be applied in just a couple of minutes!
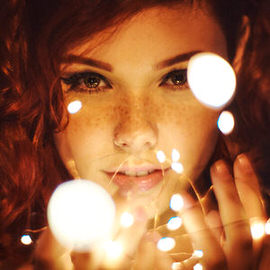
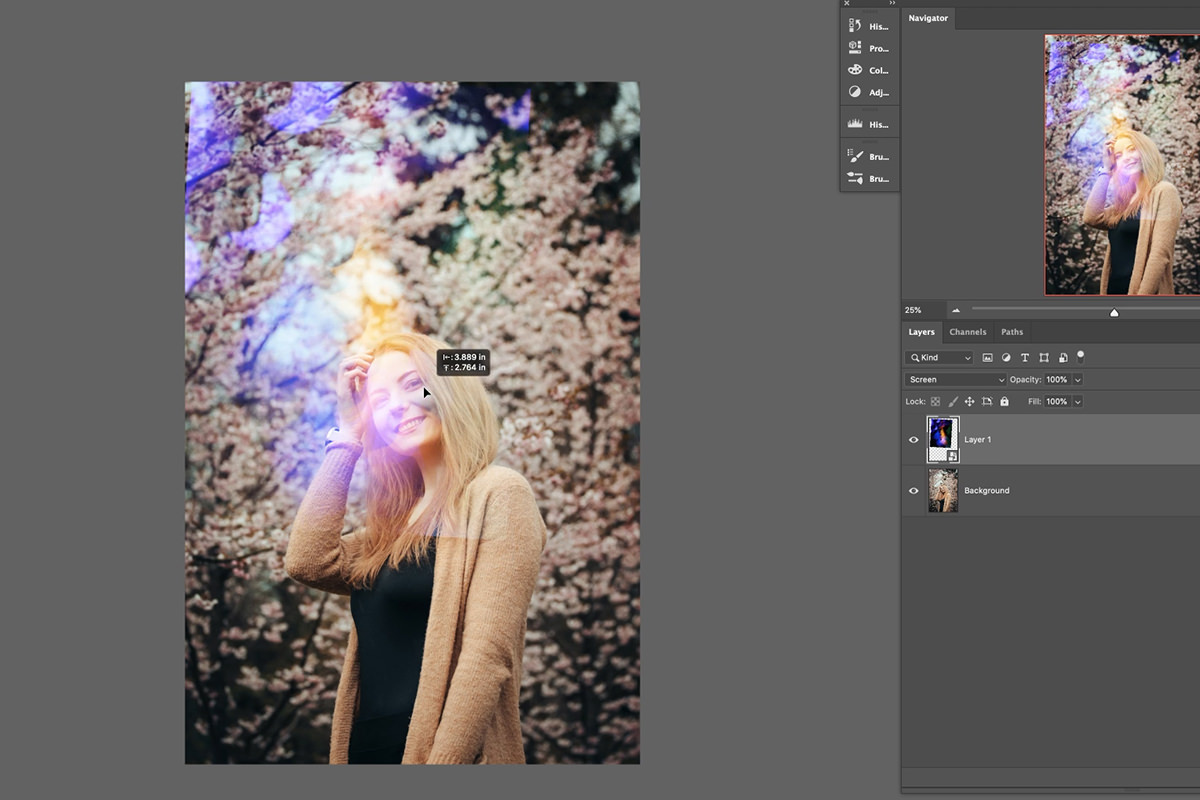
Adding Creative Lighting Effects with Gaussian Blur & Motion Blur
Blurs are great for creative coloring and lighting effects. Soft lighting aesthetics are popular, and blur tools make it easy to turn almost any light source or image of light into an amazing color grade. In this last example, we’re going to turn a simple image of bokeh lights into a beautiful coloring effect for a portait.
Bokeh-licious
Drag the image of the bokeh lights into the same document as the portrait. You may recall from our first example that when we want to hide the darks of a layer while preserving the bright highlights, the Screen Blending Mode is the way to go. Set the Blending Mode of the bokeh Layer to Screen.
Great! Now we just need to soften up the lighting effect with–you guessed it–blurs.
Softening with Blurs
You might be thinking that Gaussian Blur is the the go-to for this sort of thing and you’re not wrong, we’ll get to that shortly, but let’s try something a little different. We skipped over Motion Blur earlier, so let’s give it a chance here. Motion Blur is fantastic for adding a little bit of directionality to an effect. Let’s use Motion Blur to give the lighting a different shape and feel.
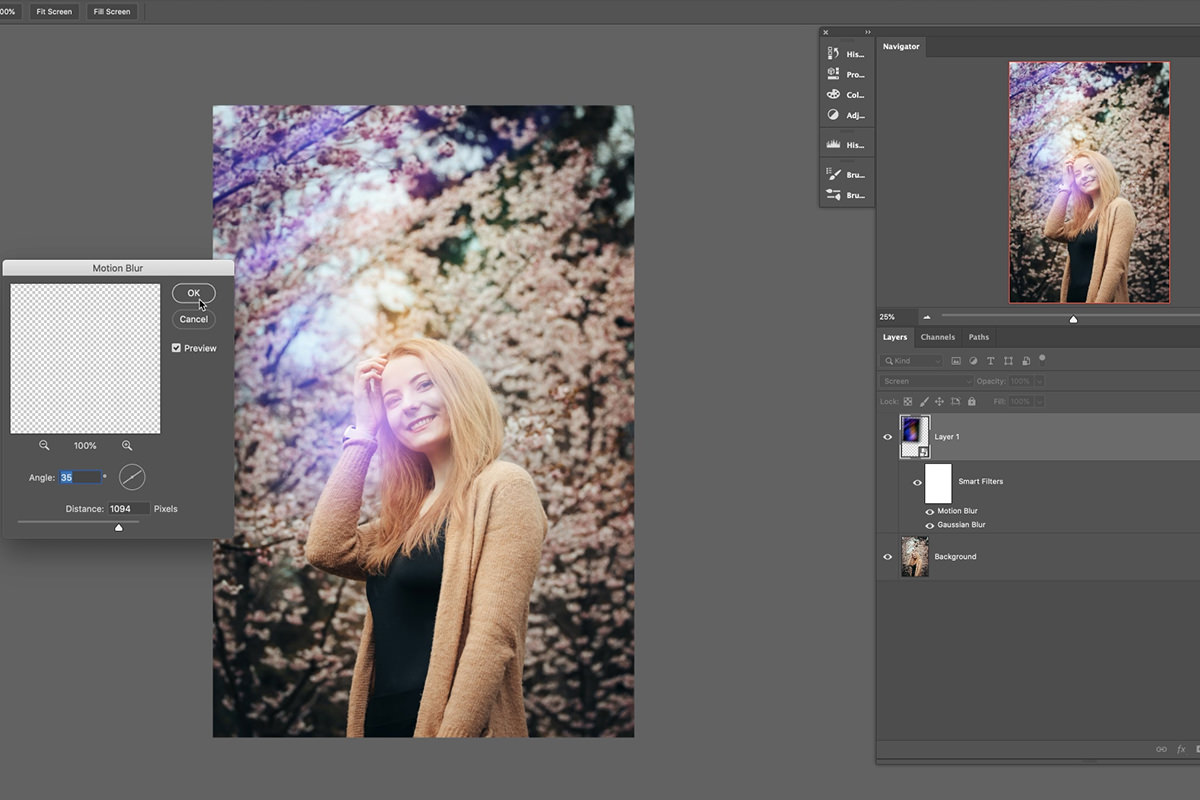
Great! With that out of the way, now we can go back to our tried-and-true Gaussian Blur to get just the right amount of softness. The best part about blurs and Filters is that with Smart Objects, each effect can be added, stacked, changed, or removed at any time. This allows us to play and experiment with different combinations without having to worry about ruining the original image.
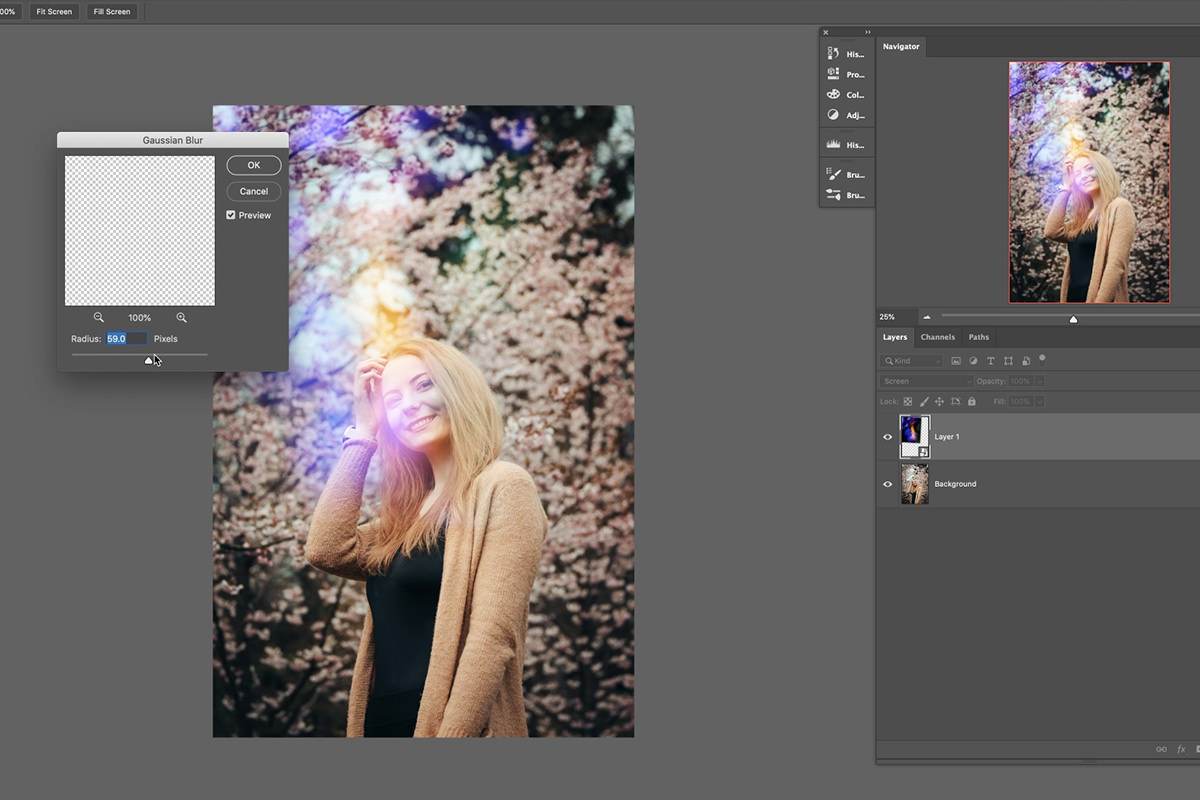
Go ahead and add some Gaussian Blur!
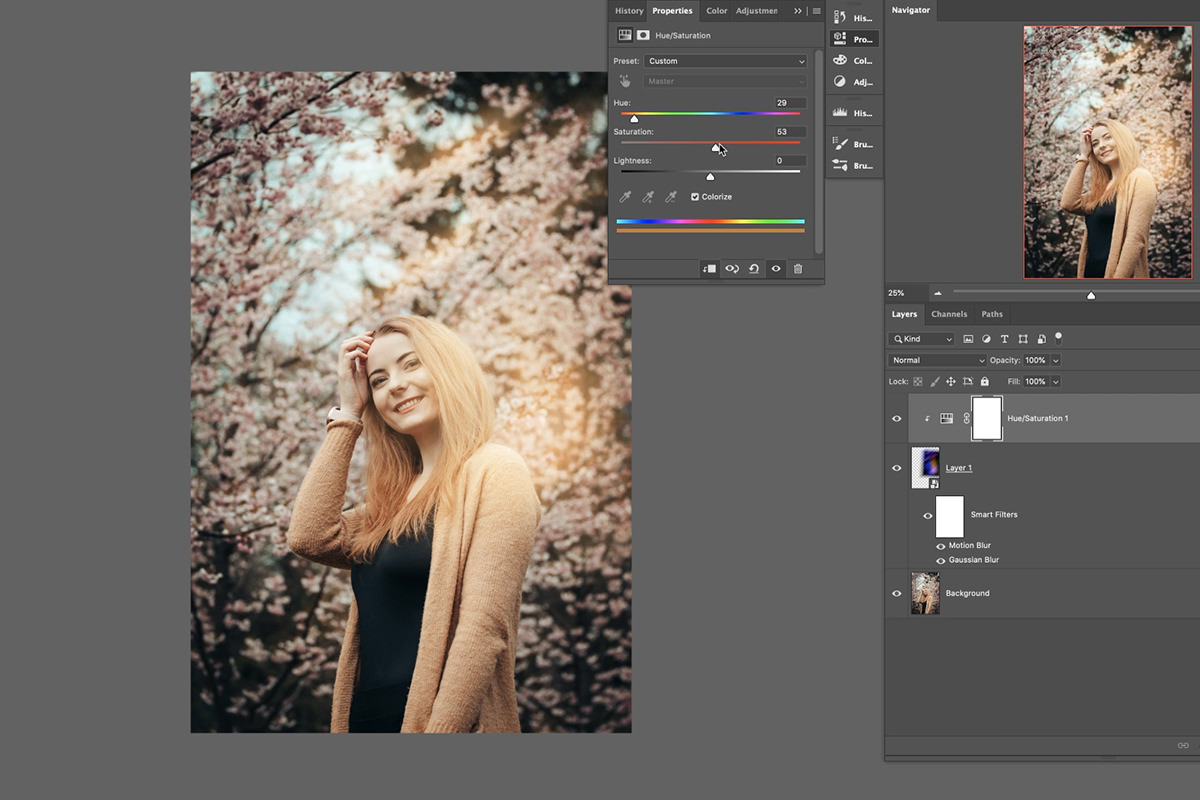
Changing Colors with Hue/Saturation Adjustment Layers
We’re looking good, but the colors don’t quite match the colors in the portrait photo. Add a Hue/Saturation Adjustment Layer above the lighting Layer and create a Clipping Mask so that it only affects that Layer. Now you’re free to adjust the color of the lighting effect to whatever you want. Since we want to match the colors in portrait, we went for something similar to the trees in the background.
We use Hue/Saturation Adjustment Layers (among many other Adjustment Layers) a lot! If you want to learn more, watch How to Master a Adjustment Layers, our PRO course that covers every single Adjustment Layer in Photoshop.
Beautiful, right? And like before, we can Duplicate the lighting Layer and then use Move and Transform to create additional effects around the subject to fill out the image. Remember to play around and find a look that you like! These effects are entirely subjective and are only limited by your vision and imagination!
And that’s it for blurs. Photoshop has hundreds of tools, some of which aren’t used as often as others, but can come in handy in key situations. This is true for blurs and many more! If you want to take a look at almost every tool Photoshop has to offer, check out The Beginner’s Guide to Photoshop where we take a look at almost every tool, menu and option.