
Download Assets
description
Learn how to apply graphics to your images and use colors to create a more impactful and engaging final product.
Go PRO:
New to Photoshop and not sure where to begin? Explore our latest PRO tutorial Photoshop Fundamentals: Aaron’s Top 10 Essential Tools & Techniques . Discover mind-blowing tricks for selecting, removing, retouching, and more!.
Share


AFTER
BEFORE
Enhance Your Images
Imagine seamlessly blending graphics into your photos, extracting text to use in your designs, or even making text appear to be part of the underlying image texture. This guide makes the process easy and accessible, even for beginners!
Transferring Graphics
1. Choose the graphic you want to move.
2. Use the Move Tool (Keyboard Shortcut “V”) to click and drag the graphic onto the target image.
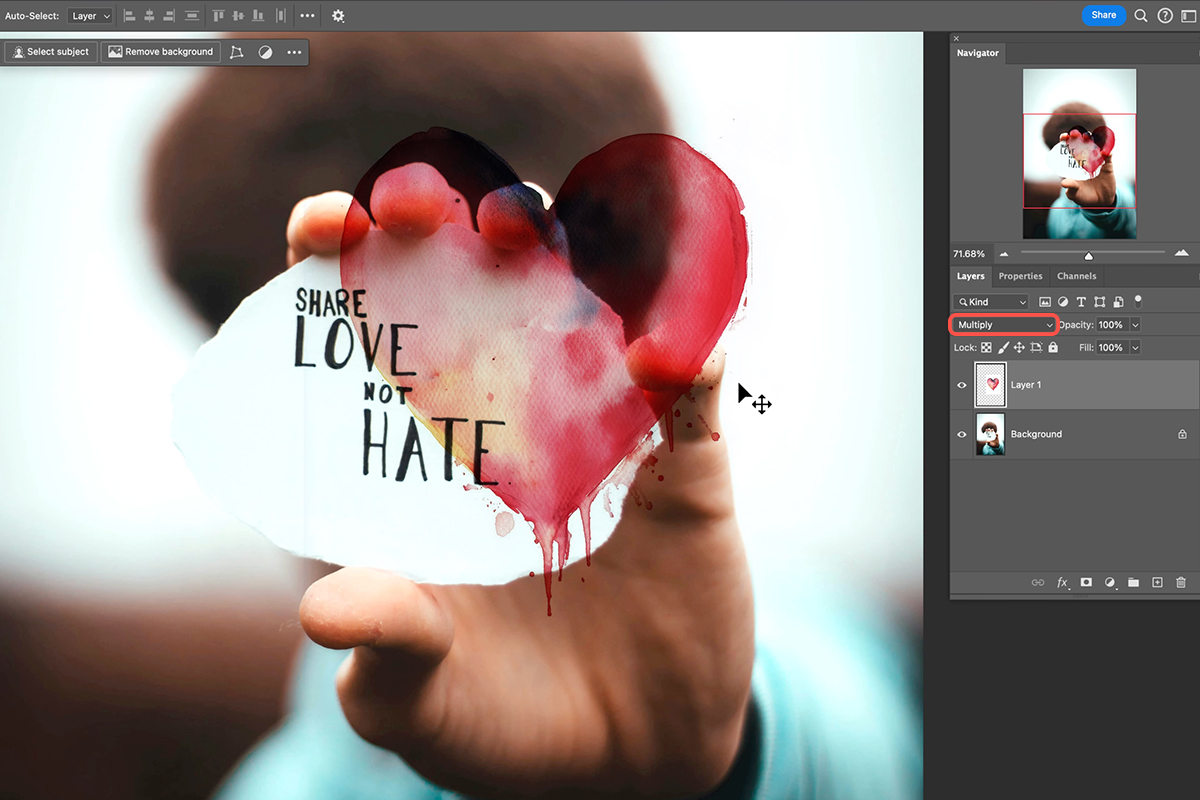
3. If the graphic has a white background, change its layer blend mode to Multiply. If some white background persists, you can open Levels (Keyboard Shortcut “Ctrl/Cmd + L”), and use the white eyedropper to click on the remaining white area or adjust the white point slider to remove it completely.
Extracting and Coloring Text
4. Make the graphic layer invisible temporarily.
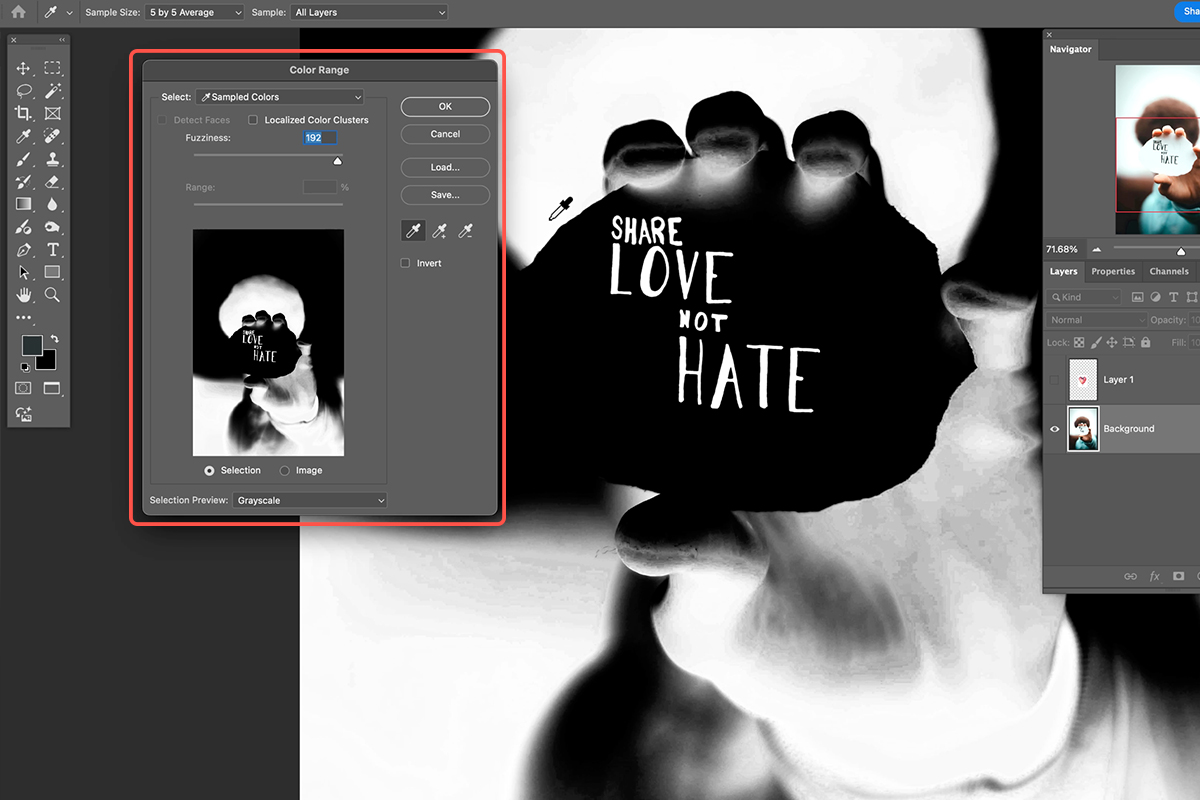
5. Select the background layer. Go to Select > Color Range.
6. Adjust the fuzziness slider in the Color Range dialog to select the text. Light areas in the preview are selected.
7. Create a new layer for the extracted text.
8. Use the Brush Tool (Keyboard Shortcut “B”) with white color and 100% opacity and flow to paint over the selected text on the new layer.
9. Use the Move Tool (Keyboard Shortcut “V”) to reposition the extracted text as needed.
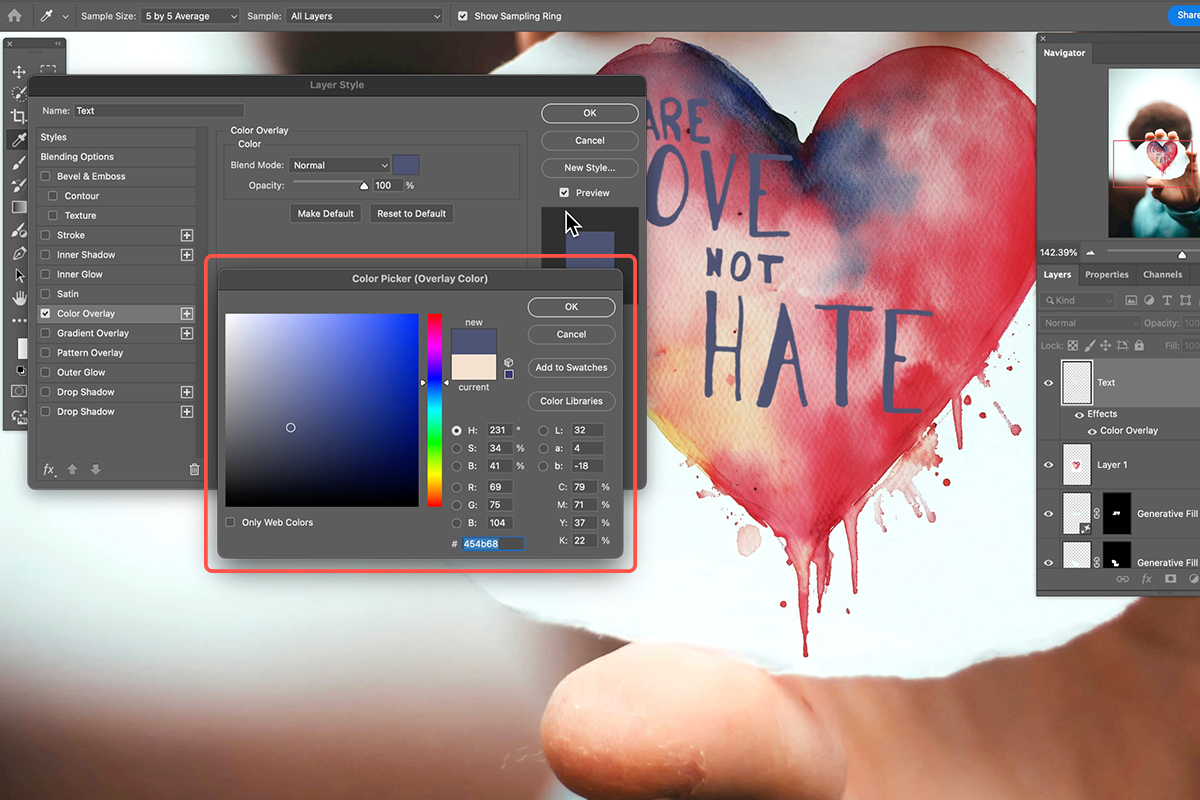
10. Double-click the text layer to open Layer Style. Apply a Color Overlay and choose the desired color.
Advanced Techniques
For a more realistic effect, use a layer mask instead of simply painting the text white.
11. Ctrl/Cmd-click the text layer to select its contents.
12. Select the layer containing the graphic you want to affect.
13. Hold Alt/Option and click the Layer Mask icon on the graphic layer. This creates an inverted mask, making the graphic invisible where the text was selected.
You can unlink the graphic and its mask to move them independently. This technique is particularly useful for creating composite images where you want the text to appear as part of the underlying texture.


