


Download Assets
This tutorial includes 5 sample images and 1 PDF guide. Downloads are free with a PHLEARN account.
- Download the sample images and PSDs from every free tutorial on PHLEARN
- New free tutorials published every week
- One free account — sign up once, then download anything
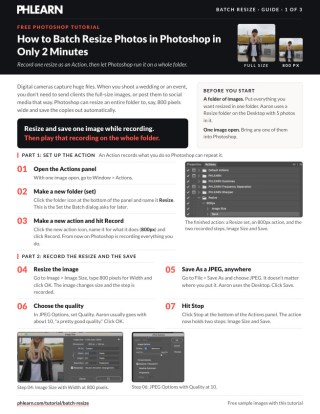
Free PDF Guide · 3 Pages
This Tutorial as a Step-by-Step PDF
The guide walks through recording a Resize set and an 800px action from Window > Actions, Image > Image Size at 800 pixels wide, File > Save As JPEG at Quality 10, then File > Automate > Batch with both Suppress options, a new destination folder, _800 file names and Override Action Save As Commands. Keep it next to your keyboard.
description
Resizing two hundred proofs one at a time is an afternoon of work Photoshop can do unattended. Record yourself resizing and saving a single image as an Action, then point it at a folder with File > Automate > Batch. The detail that makes it work is Override Action Save As Commands — it keeps the file type and quality from the recording but takes the destination and naming from the batch dialog.
Enjoying This Free Tutorial?
We publish a new free tutorial every week, each one with sample images and PSDs you can download and follow along with. Sign up and they land straight in your inbox, along with early word on sales, events and subscriber-only offers.
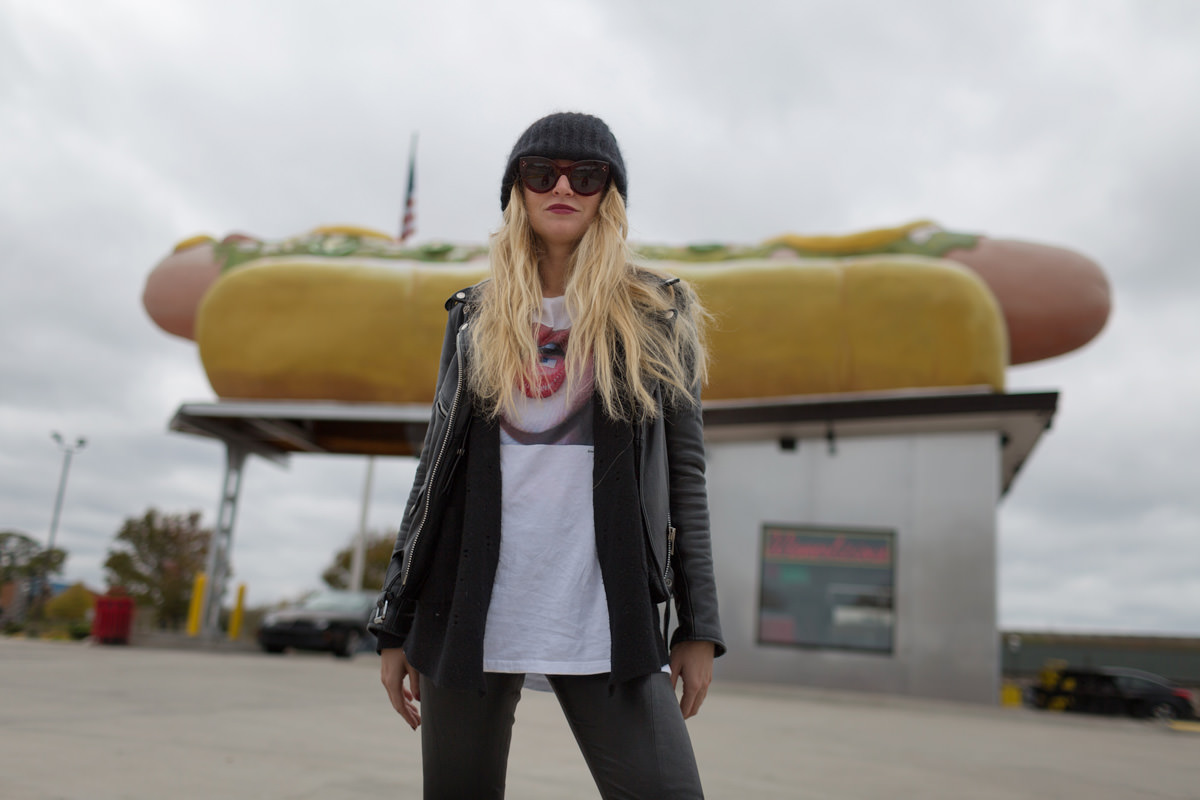

How to Batch Resize Photos in Photoshop
Modern cameras produce enormous files, and most of the time nobody needs them at full size. A client wants proofs. Something is going to social media. A gallery needs 800-pixel-wide previews. Doing that one image at a time for a wedding or an event is an afternoon of work for a task the computer should be handling by itself.
Photoshop can process an entire folder unattended. You record yourself resizing and saving a single image once, then point that recording at a folder and walk away. It is one of the more useful features in the application and one of the least known.
Record an Action Once
An action is a recording of the steps you take. Everything from the moment you press record is captured and can be replayed on any other file.
-
Open one image from the set
Any of them. This is the file you will demonstrate the process on.
-
Open Window > Actions
-
Create a new folder in the Actions panel
Name it something you will recognize later — Resize works. This is the “set” the batch dialog will ask for.
-
Click the new action icon and name the action
Name it for what it does, such as 800px. Being specific matters once you have several of these.
-
Press Record
Everything You Do Now Is Being Captured
From this point every step is written into the action, so work deliberately. Stray adjustments get recorded too and will be replayed on every file in the folder.
Resize and Save the One Image
-
Go to Image > Image Size and set the width
800 pixels for this example. The action stores the instruction, not the result, so it will apply the same width to every file it processes.
-
Go to File > Save As
The location genuinely does not matter — the desktop is fine. It is being overridden later, which is the part most people miss.
-
Choose JPEG and set the quality
Around 10 gives a good balance for previews and client proofs.
-
Press Stop in the Actions panel
Point the Action at a Folder
-
Go to File > Automate > Batch
-
Choose your Set and Action
The folder and action you just created — Resize and 800px.
-
Set Source to Folder and choose the images
You can also run it on files already open, but a folder is the usual case.
-
Tick the suppress options
Suppress File Open Options Dialogs, and Suppress Color Profile Warnings.
Why the Suppress Options Matter
Without them, Photoshop stops and asks a question every time it hits a file that raises one — which defeats the entire purpose of leaving it running. Ticking both is what makes the batch genuinely unattended.
Set the Destination and File Naming
-
Set Destination to Folder and choose where the results go
Create a new folder for them — something like 800 px — so the resized copies never mix with the originals.
-
Build the file name
Set the first field to Document Name, then add an underscore and a label such as 800. Set the remaining fields to None, and make sure the extension is included.
-
Tick Override Action Save As Commands
-
Press OK
Override Action Save As Commands Is the One That Matters
Your action contains a Save As pointing at wherever you saved that first test file. Left alone, the batch would obediently write every image to that same place with that same name. Ticking this box tells Photoshop to keep the file type and quality from the recording but take the destination and naming from the batch dialog instead. It is the reason the location you chose while recording was irrelevant — and forgetting it is the single most common way this goes wrong.
What Trips People Up
Leaving Override Action Save As Commands unticked is the big one, and the symptom is confusing: the batch appears to run correctly but the output folder is empty or holds a single file. After that it is forgetting the suppress options and returning to find Photoshop waiting on a dialog it hit two minutes in. And recording stray steps — a crop, an adjustment, a stray brush stroke — which then get faithfully applied to every image in the folder.
Why Recording Beats Repeating
The value here is not the resize itself — resizing a single image is trivial. It is that the work of deciding how to resize happens exactly once and is then applied identically to every file. Consistency is the real product: every proof in the set comes out at the same dimensions, the same quality and the same naming convention, which is precisely what falls apart when the same job is done by hand across two hundred images.
Build the Ones You Use Repeatedly
Once the pattern is clear, the same approach covers anything you find yourself doing to whole shoots — a different pixel width for a different client, a watermark, a particular export quality. Each one is a couple of minutes to record and saves that time back on the very first folder you run it against. Start with the size you send out most often and build from there.
Quick Reference: Menus and Settings
- Start the actionWindow > Actions; new set (Resize), new action (800px), Record
- ResizeImage > Image Size, Width 800 pixels
- SaveFile > Save As, JPEG, Quality about 10; then Stop
- Run the batchFile > Automate > Batch; pick the Set and Action, Source: Folder
- Run unattendedSuppress File Open Options Dialogs and Suppress Color Profile Warnings
- Destination and namesDestination: a new Folder; Document Name, then _800, then extension
- The last thingCheck Override Action “Save As” Commands, then OK
Free Downloads
Follow Along on the Same Photos
Get the five sample photos to batch resize and the 3-page PDF guide to the action and Batch settings. Free with a PHLEARN account.
Batch Resize in Photoshop: Common Questions
What is a Photoshop action?
A recording of the steps you take. Go to Window > Actions, make a new folder (set), click the new action icon, name it and hit Record. Everything you do from then on is recorded.
What steps go into the resize action?
Image > Image Size with Width at 800 pixels, then File > Save As a JPEG with Quality at about 10. Click Stop when you are done.
Does it matter where I save the test file while recording?
No. Aaron saves it to the desktop. Override Action Save As Commands in the Batch dialog replaces that location later.
How do I run the action on a whole folder?
Go to File > Automate > Batch, choose your Set and Action, set Source to Folder and click Choose to pick the folder of images.
Why check the Suppress options?
Suppress File Open Options Dialogs and Suppress Color Profile Warnings stop Photoshop from pausing on a question partway through, so the batch runs unattended.
How do I name the resized files?
In File Naming, set the first field to Document Name, add an underscore and a label such as 800, set the next field to None and add the extension.
How do I keep the resized copies apart from the originals?
Set Destination to Folder and create a new folder for the results. Aaron makes one called 800 px inside his Resize folder.
Why is my output folder empty or holding one file?
Override Action Save As Commands was left unchecked, so every image was saved to the place and name used while recording. Check it, then run the batch again.
Can I batch resize to a different size?
Yes. Record another action with a different width and name it for what it does, then pick it in the Batch dialog.
Are the sample files free?
Yes, with a free PHLEARN account. You get 5 sample images and 1 PDF guide: five photos to batch resize and a 3-page guide to the action and Batch settings.
From the Magazine View all
Stories, interviews and guides for photographers, new every week.
 EditingHow to Color Grade Photos in Photoshop and LightroomCorrect the photo first, then put color in the shadows, midtones and highlights. Aaron Nace on the order, the tools and skin.
 BusinessHow to Compete With AI: Give Your Clients MoreEveryone has the same tools now, and your clients know it. The way to compete is to give them more.
 EditingLightCraft vs Lightroom: I Edited the Same RAW Files in BothThe free clone on the same RAW files: what matches, what breaks and who should switch.
Master Photoshop, Lightroom and Photography
Join PHLEARN PRO for $12.99 a month, or $99.99 a year (save 36%). Cancel anytime, with a 100% money-back guarantee.





