Step-by-Step Tutorial
Open Image In Photoshop
First, place the blank card image into Photoshop by locating the top of the workspace.
Select File and within the drop-down tab select Open…
A window will appear which will allow the blank card image to be selected.
Simply select the image and hit Open in the right bottom corner of the window.
The image should appear in the workspace.
Now, select File and Open… to import the image of the wedding couple.
Both images will appear in two different tabs in the workspace.
Duplicate Image
Select the wedding couple tab located at the top of the workspace.
Once selected, locate the right side of the workspace where the Layers Panel is located.
Within the Layers Panel is a layer called Background with a small thumbnail preview of the wedding couple.
With the mouse positioned over the layer, right click with the mouse.
A side tab will appear.
Within the side tab, select Duplicate Layer…

The Duplicate Layer window will appear.
Within the window, locate the Document indicator. This box specifies where the current image should be moved.
Select the Document drop-down tab, and select the blank card background file name.
Once selected, hit OK.
Now, select the tab at the top of the workspace where the blank card is located.
The wedding couple image should appear in the same document as the blank card.
Close the original wedding couple image tab by selecting the X next to the file name at the top of the workspace.
Another way to import an image is by dragging and dropping the files into the workspace.
Scale Image Down With Free Transform
The Free Transform command allows an item to freely be customized in size and shape. In this case, the image will be scaled down while in the Free Transform mode.
Notice how the wedding couple image is placed over the blank card image.
To resize an image in a layer to make a layer smaller, locate the top of the workspace.
Select Edit and within the drop-down window, select Free Transform or try the shortcut CMD + T or CTRL + T on the keyboard.
Points will appear around the wedding couple image and custom-measuring options will appear at the top of the workspace.
Different options to place and customize the image are located at the top of the workspace.
The first section with small boxes with one filled in represents the Reference Point Location, which indicates the central point of the image.
Next is the X and Y-axis points, which represent where the image is located. The triangle in the center allows previous positioned images to be referenced for in the future.
The Width and Height options are located beside the X and Y option. This allows an image to be resized to any number.
The chain shaped symbol between the Width and Height represents the Maintain Aspect Ratio. If selected, the ratio of the image will be kept as the image is scaled larger and smaller. This allows the image to not become stretched out of proportion.
In this case, select the Maintain Aspect Ratio symbol.
Next is the Rotation option, which will allow the angle of the image to be adjusted.
The last two letters H and V represent the horizontal skew and the vertical skew. This allows the image to be shifted vertically or horizontally.
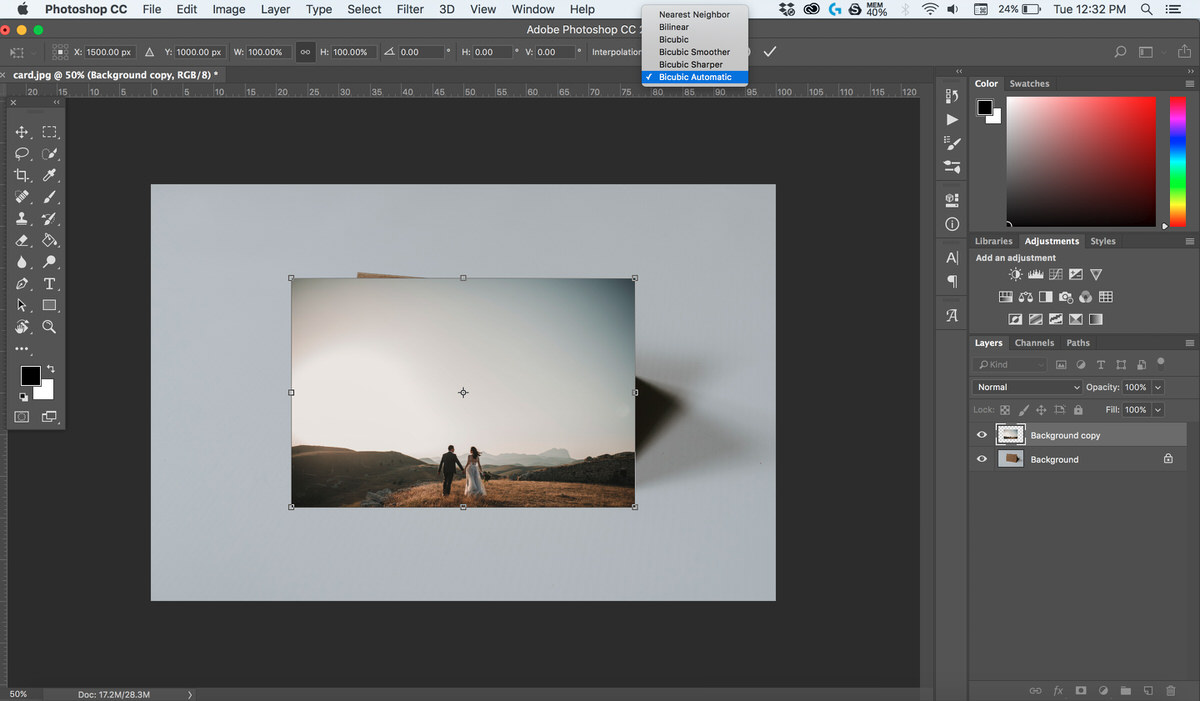
Now, the Interpolation option is important because the purpose of the transformation needs to be indicated. The option selected indicates to Photoshop what will be done with the image and how the pixels modified.
Open the Interpolation drop-down tab.
Notice all of the transforming options.
Nearest Neighbor preserves the hard edges of the transformation and does not add more pixel information to the image. When upscaling, this option is not advisable unless a pixelated style is desired.
Bilinear automatically softens the images, which is beneficial for upscaling images. This option is a mix between Nearest Neighbor and Bicubic.
Bicubic softens and blends neighboring pixels more then Bilinear.
Bicubic Smoother the pixel color is much smoother which is beneficial when upscaling.
Bicubic Sharper is beneficial for resizing to retain the quality, especially when scaling down an image.
Bicubic Automatic will automatically decide which option is the best while transforming. This option is best when undecided on how the current image will be interacting with the document.
In this case select, Bicubic Automatic.
The very last customizing option is the skewed window with a curved line beneath it symbol located next to Interpolation. This allows an individual to switch between Free Transform and Warp Modes.
By selecting the symbol, the workspace will transform along with the points on the image.
A Warp drop-down option will appear.
By opening the Warp drop-down tab, multiple shapes will be presented to customize the image. Selecting any shape will automatically transform the image into that shape. For example, if Fisheye was selected, the image would become more rounded as if the image were taken with a Fisheye lens.
Now, reselect the Free Transform and Warp Modes button to switch back to the Free Transform mode.
Position the mouse over the top right corner of the image and notice that the mouse has changed into a slanted double-sided arrow. This represents that the image can go in the directions that the two arrows are pointing in.
If the mouse is moved around the image, the mouse will change indicating which way the crop can go based on where the mouse is currently located.
With the mouse positioned, simply click and drag the mouse down to around the same size as the front of the card.
Notice that the ratio of the image is kept while the mouse is dragged. If the Aspect Ratio selection was not selected, simply hold Shift while dragging the corner to preserve the ratio of the image. By preserving the ratio of the image, this allows an image to be resized without losing quality.
Once the area is properly sized, click and drag the wedding couple image so the two top left corners to line up.
When the image is positioned, select the check mark shaped symbol at the top of the workspace or hit Return or Enter button on the keyboard.
The image will appear with the applied crop.
Adjust Opacity
When overlaying the image, it might be difficult to align the corners with an Opacity of 100%. Opacity indicates how transparent the item in the document will appear. If the image is set with an Opacity of 25%, this indicates that the image will only be 25% viewed but if the image is set at 100%, then the full capacity of the image is present with no transparency.
To change the Opacity, locate the Layers Panel on the right side of the workspace.
Within the Layers Panel is the Opacity percentage, which is currently set at 100%.
While the wedding couple image is selected in the Layers Panel, select the Opacity drop-down arrow.
A line with a slider will appear beneath Opacity.
Select and drag the slider left and right to view how the image is affected.
Notice how the number above adjusts as the slider is moved. This number indicates how transparent the image is.
Set the Opacity to 75%.
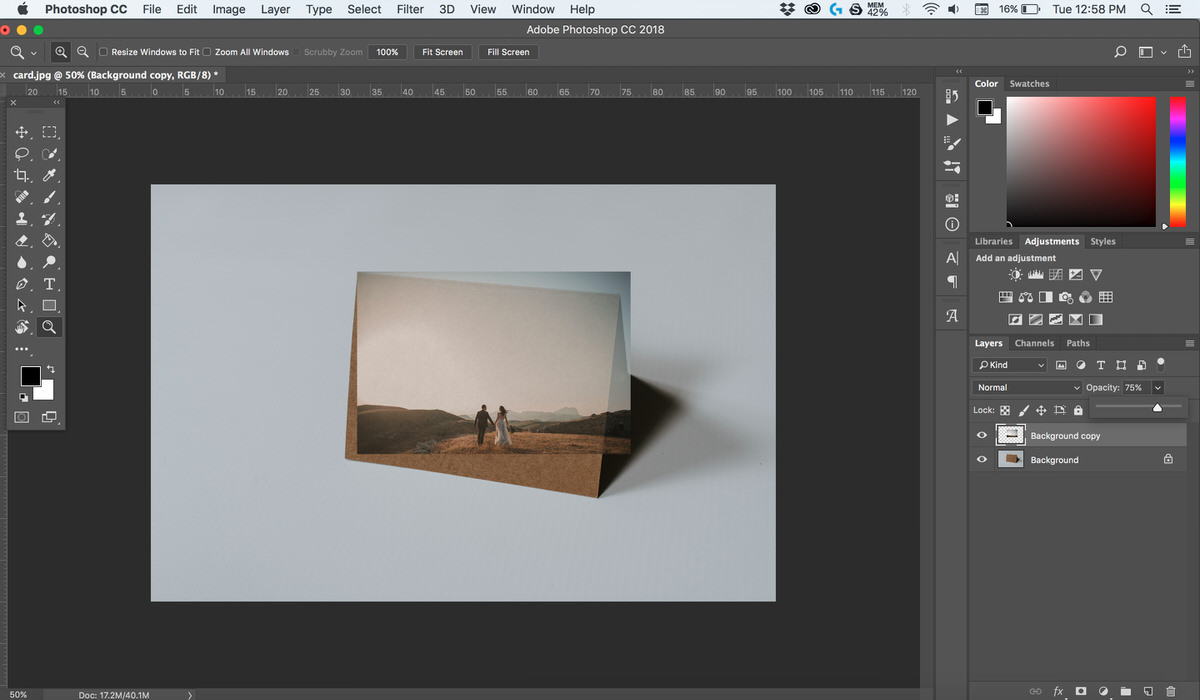
Now the image will be semi-transparent so the blank card can be viewed while positioned beneath the wedding couple image.
Transform Tool
The Transform Tool allows an image to be stretched, wrapped, and pulled into any direction desired and allows any difficult style of placing possible.
Locate the top of the workspace and select Edit.
Within the Edit drop-down tab, locate Transform with the side arrow indicating an additional tab.
Position the mouse over Transform.
The Transform side tab will appear.
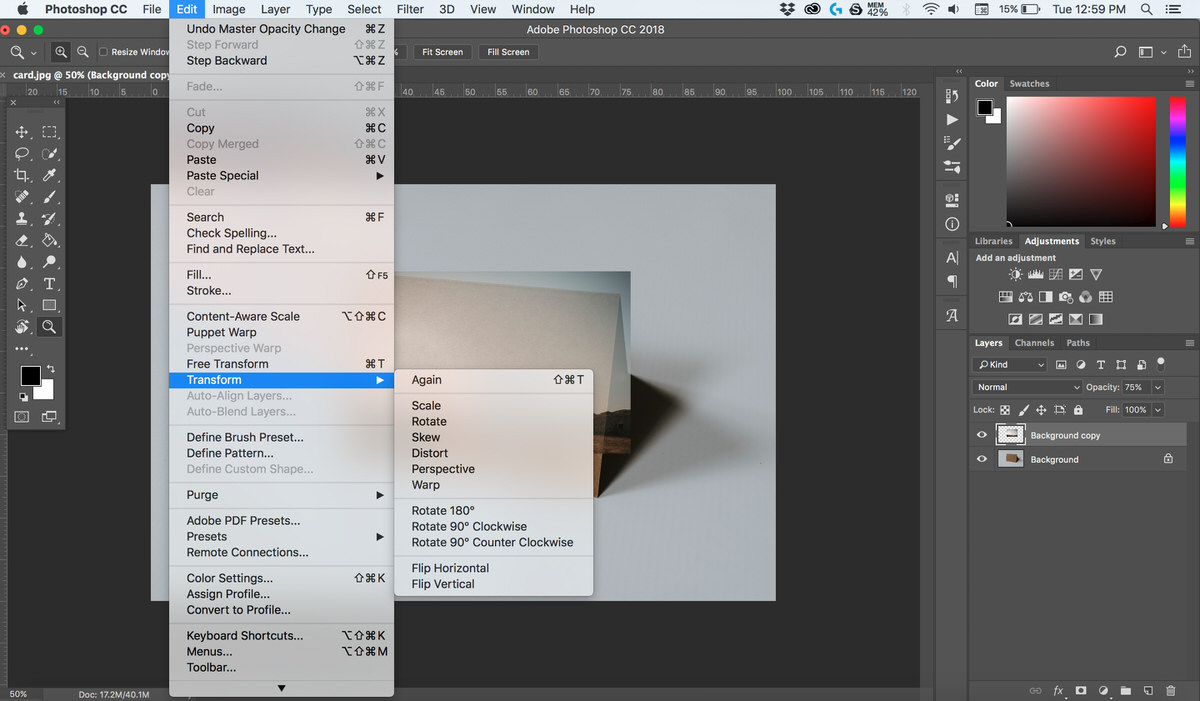
Within the tab are different ways to select and resize a layer.
At the bottom are options such as rotating or flipping an image, which is for positioning an image. The commands above allow images to be distorted in various ways.
The first command, Scale, allows an image to be resized vertically or horizontally or larger and smaller.
Rotate allows the image to only be rotated.
Skew allows an image to be slanted either vertically or horizontally.
Distort allows an item to be distorted in any direction which can be helpful when positioning an item at different angles.
Perspective is similar to Distort but is the most effective when changing the perspective of an item on a horizon line.
Warp manipulates the image in any direction desired which can be helpful when adding a logo on a bottle.
All of these tools can be used to overlay the wedding couple image over the blank card.
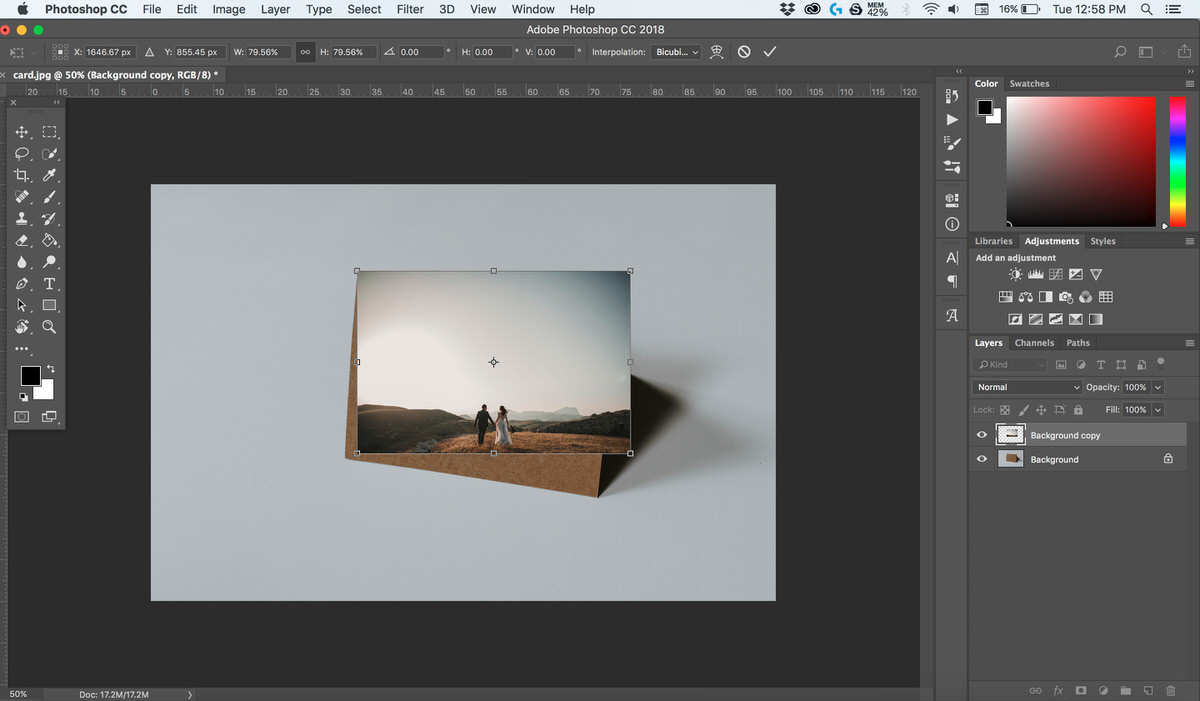
Distort And Warp Tool
For this image, since the card perspective is slightly slanted, select Distort.
Points will automatically appear around the image. These points indicate that they can be repositioned.
Position the mouse over the top right corner point.
While holding Shift on the keyboard, click and drag the corner to align with the top right corner of the blank card. By holding Shift, this allows the quality of the image to be preserved and prevents the image from becoming stretched.

Now, adjust each corner point of the entire image until the image is lined up with the blank card.
Notice a slight sliver of the image that the image does not cover because the blank card has a slight roundness.

View the areas missed by using the Zoom Tool, which is located on the left side of the workspace within the Tool Bar. The Zoom Tool allows an area of the image to be viewed larger or smaller. This tool is located at the bottom of the workspace and is recognizable by the magnifying glass shaped symbol.
Select the Zoom Tool or try the Zoom Tool shortcut by hitting Z on the keyboard.
When using the Zoom Tool shortcut, simply click the image to zoom in and hold Option or Alt and click to zoom out.
Once the correct symbol is selected, locate the top of the workspace where the magnifying glass with the plus and minus is located. The plus represents zoom in and the minus symbol represents zoom out.
Now select the magnifying glass with the plus sign to zoom in.
With the mouse positioned over the image, select the image to zoom in to the missed areas.
Locate the top of the workspace and select Edit.
Within the Edit drop-down tab, locate Transform with a side arrow indicating an additional drop-down tab.
Position the mouse over Transform.
The Transform side tab will appear.
Select Warp.
Once selected, points will automatically appear around the image. These points indicate that they can be repositioned.
Warp is very flexible compared to the other transformation tools. This tool allows corners to look as though they are curved and can overall transform an image.
For this image, a small curve needs to be applied to the wedding couple image on the left and right side to align with the slight curve of the blank card.
Simply, select the left side of the image and slightly adjust the image by dragging the side of the image and adjusting slightly.
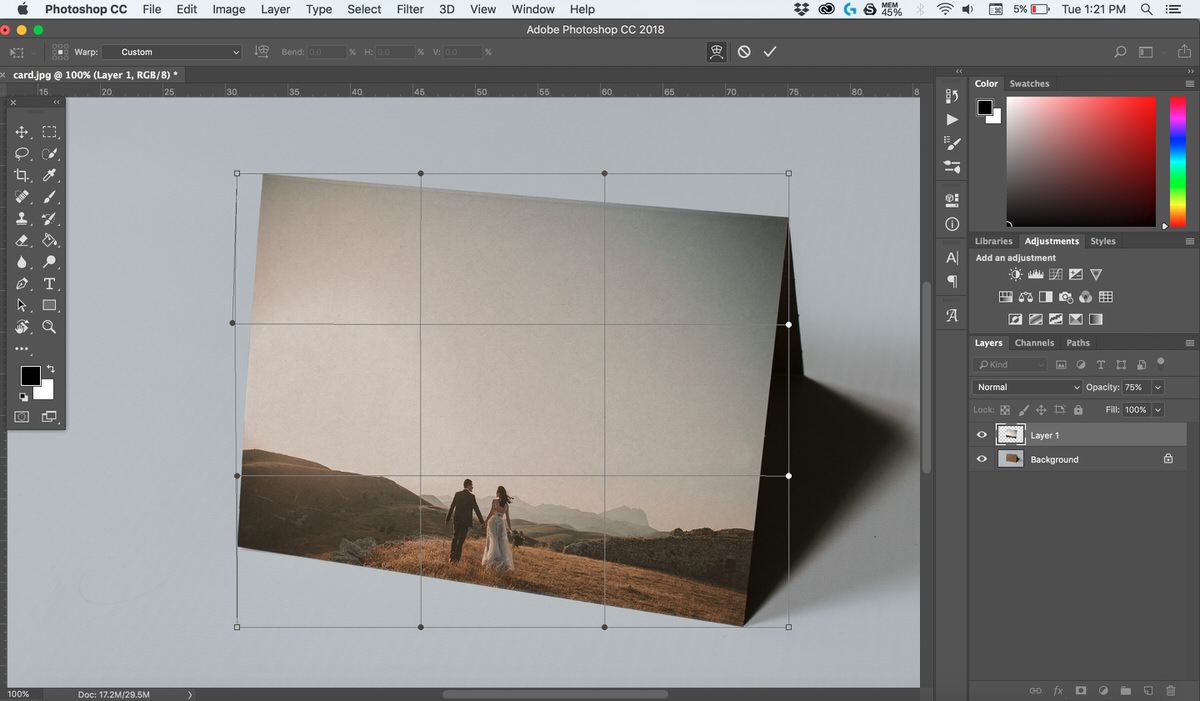
Once aligned, locate the right side of the image that needs to be adjusted and line up the lines with the blank card.
When the image is lined up, select the check mark symbol at the top of the workspace or hit Return or Enter on the keyboard.
Now, reselect the Zoom Tool on the left side in the Tool Bar.
Once selected, locate the top of the workspace where the magnifying glass with the plus and minus are located.
To zoom out, select the magnifying glass with the minus symbol.
Simply click on the image to zoom out to see the finished product.