

Download Assets
This tutorial includes 2 sample images and 1 sample PSD. Downloads are free with a PHLEARN account.
- Download the sample images and PSDs from every free tutorial on PHLEARN
- New free tutorials published every week
- One free account — sign up once, then download anything
description
Layer masks in Photoshop hide and reveal without deleting a pixel. This tutorial covers building a mask from a selection, refining the edge by painting, copying a mask to another layer, unlinking it so the artwork can move independently, and masking a whole group at once.
Enjoying This Free Tutorial?
We publish a new free tutorial every week, each one with sample images and PSDs you can download and follow along with. Sign up and they land straight in your inbox, along with early word on sales, events and subscriber-only offers.
Image Source

How to Create and Use Layer Masks in Photoshop
A layer mask controls which parts of a layer are visible, without deleting anything. Paint white to reveal, paint black to hide, and change your mind as many times as you like — the pixels underneath are never touched.
That reversibility is why layer masks sit at the center of almost every serious Photoshop workflow. An eraser makes a decision permanent; a mask keeps it open forever.
This tutorial covers creating one, refining it, moving it independently of its layer, copying it between layers, and masking a whole group at once.
Create a Mask From a Selection
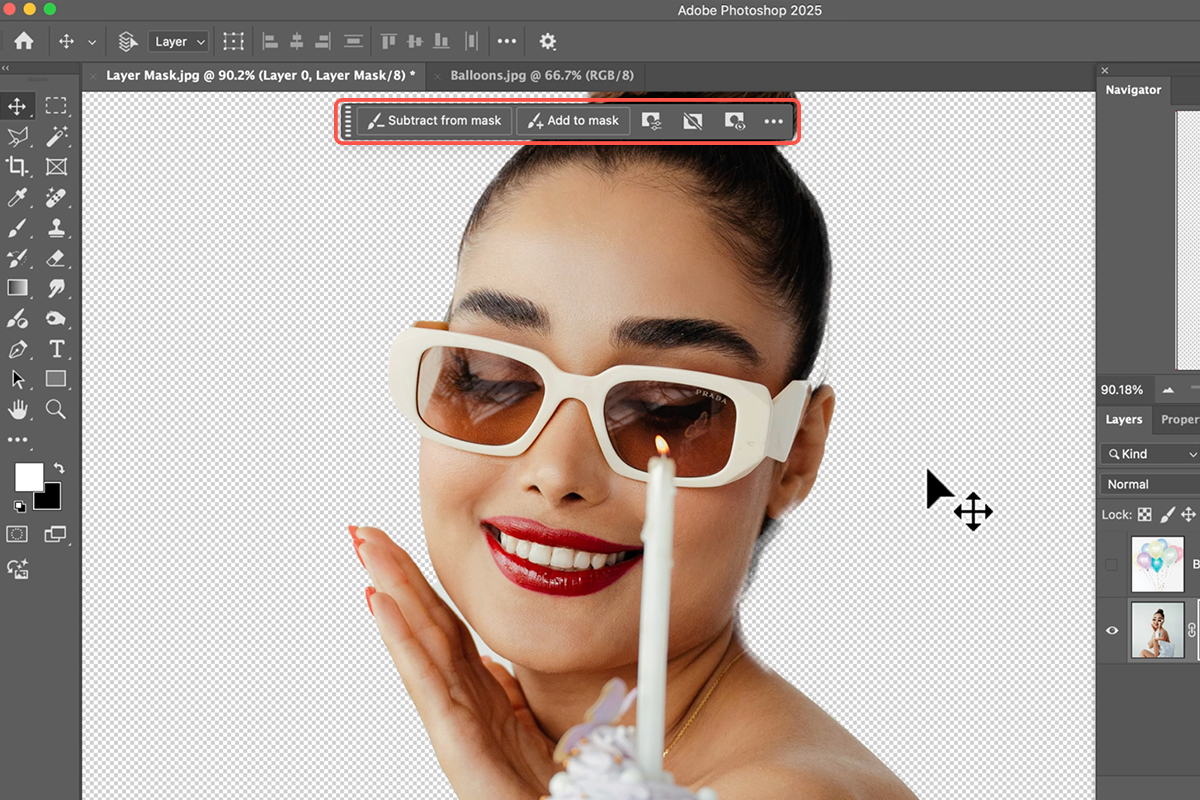
Select your subject layer and click Select Subject. With the selection active, click the layer mask icon — in the Contextual Task Bar or at the bottom of the Layers panel.
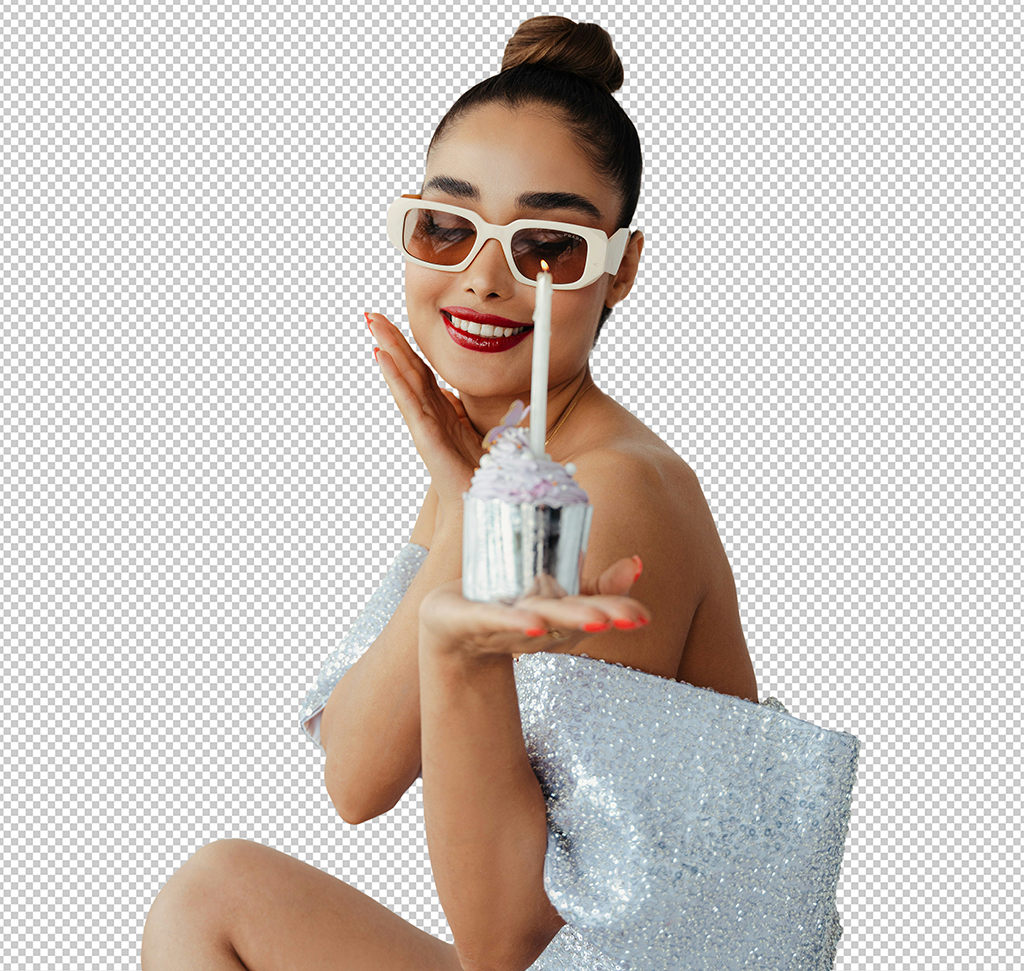
The background disappears. Put another image on a layer beneath and it shows through where the mask is black.
White Reveals, Black Conceals
The one rule that governs everything: white areas of a mask are visible, black areas are invisible, and grays are partially transparent.
Look at the mask thumbnail and you will see your subject in white against a black background. That is the whole mechanism.
Layer or Mask — Check Which Is Selected
A layer and its mask are separate targets. Whichever has the white border around its thumbnail is the one receiving your next action.
This trips people up constantly — painting on the layer when you meant the mask damages your image instead of adjusting visibility. The Contextual Task Bar changes to match, so if it is offering Select Subject and Remove Background you are on the layer; mask options mean you are on the mask.

Ways to View and Disable a Mask
With the mask selected, the View menu in its properties offers three modes. On Layers is the normal composited view. Black & White shows the mask itself, which is the clearest way to spot gaps. Overlay shows the image with masked areas in red.
To disable a mask temporarily, Shift-click its thumbnail — a red X appears and the full layer returns. Shift-click again to re-enable. Useful for checking what the mask is actually hiding.
Density and Feather
Two sliders in the mask properties. Density reduces how strongly the mask hides — lowering it lets some of the hidden content show through, turning black into gray. Feather softens the mask edge, which quickly smooths a selection that is slightly too crisp.
Refine It by Painting
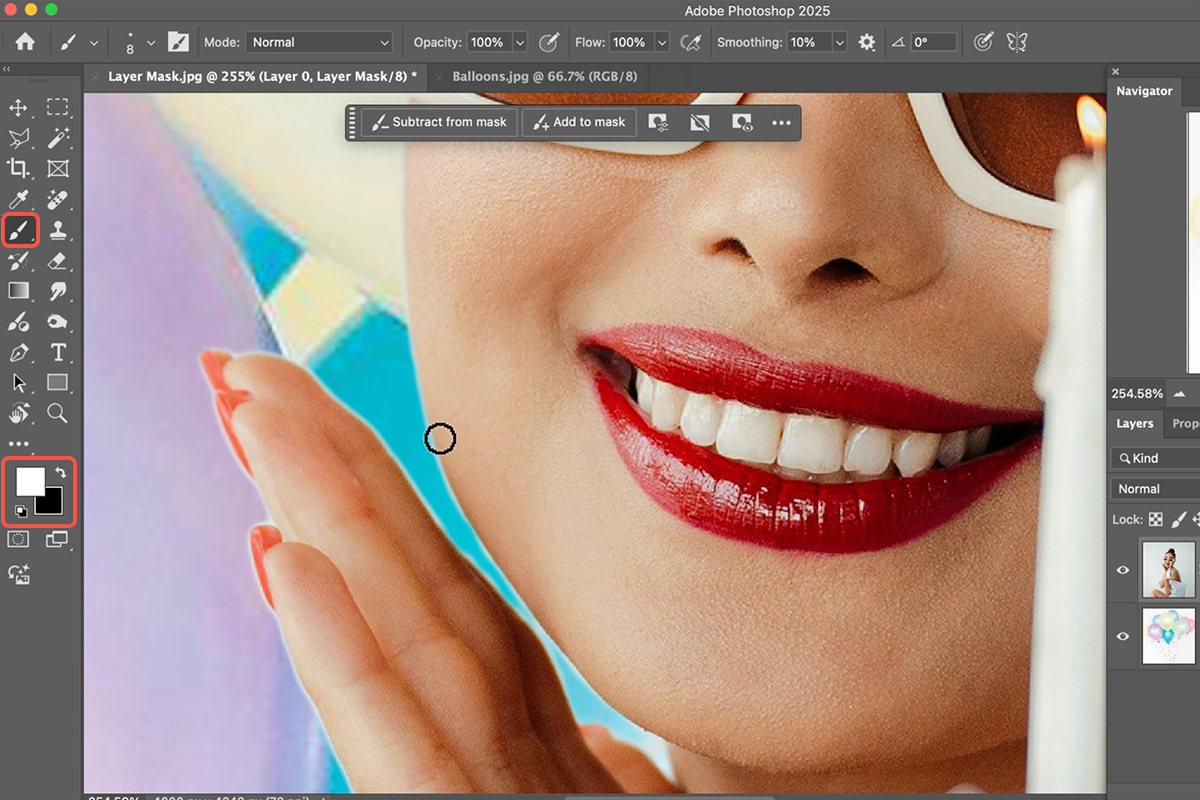
A mask is never finished. Take the Brush Tool with the mask selected and paint.
Black hides more. White brings content back. Press X to swap the foreground and background colors, which makes switching between hiding and revealing instant.
Zoom in and look for background still showing at the edges, or parts of the subject wrongly hidden. Paint them in or out. If you overshoot, swap colors and paint back — nothing is destroyed, so there is no wrong move you cannot reverse.
This is worth internalizing: masks are meant to be improved over time, not perfected in one pass. Get it roughly right, keep working, refine when you notice a problem.
Select and Mask for Difficult Edges
For hair and other fine edges, double-click the layer mask to open the Select and Mask workspace.
Under Global Refinements, Feather softens the edge, Contrast sharpens the transition, and Shift Edge moves the boundary inward or outward.
The Fix for a White Fringe
A pale halo around a cut-out subject is the most common flaw in a composite, and it comes from the selection sitting fractionally outside the true edge.
Shift Edge inward slightly and it disappears. A little feather and contrast alongside it usually finishes the job. This one combination solves most edge problems.
The Refine Edge Brush
For hair specifically, take the Refine Edge Brush Tool and paint over the messy boundary. Photoshop recalculates that region for fine detail and picks up individual strands. Do not try to be precise — paint across the whole edge and let it work.
Copy a Mask to Another Layer
Once you have a good mask, reuse it. Hold Alt or Option and drag the mask thumbnail onto another layer.
Add a text layer, copy the subject mask onto it, and the text is confined the same way — no need to reselect anything.
Invert When It Comes Out Backwards
Frequently the copied mask hides exactly what you wanted to show. Press Ctrl+I or Cmd+I, or use Invert Mask in the Contextual Task Bar.
For text meant to sit behind a subject, inverting the subject mask is precisely what makes it work — the text is hidden where the person is and visible everywhere else.
Unlink to Move the Layer Independently
By default a layer and its mask are chained together, so moving one moves both — and text sliding behind a subject immediately breaks the illusion, because the mask travels with it.
Click the chain icon between the two thumbnails to unlink them.
Now select the layer thumbnail and drag: the text moves while the mask stays locked to where the subject actually is. The text passes behind the person as it travels. Select the mask thumbnail instead and you move the mask while the layer stays put.
Watch which thumbnail has the border — moving the wrong one is easy and the result is confusing until you notice.
Mask a Whole Group
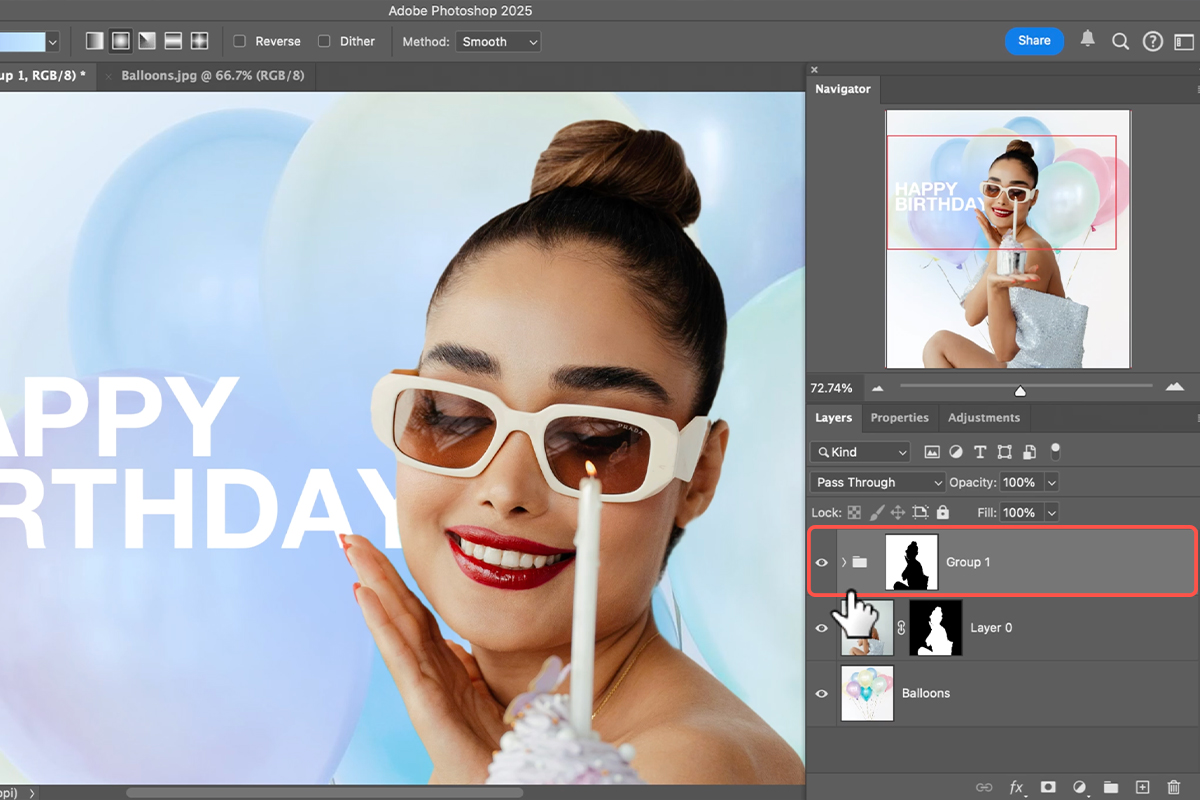
When several layers need the same mask, mask the group rather than each layer.
Select the layers and press Ctrl+G or Cmd+G to group them. Alt/Option-drag the mask onto the group itself, then delete the individual masks from the layers inside — drag each to the trash.
Everything in the group is now masked together. Better still, anything you add later inherits it. Drop a gradient fill layer into the group and it sits behind the subject automatically, with no masking work at all.
This is the technique for building a composite where multiple elements all need to sit behind one subject.
Masks Work on Everything
Regular layers, Smart Objects, text layers, adjustment layers, gradient fills and groups all accept masks, and they behave identically on each. Learning masks once means understanding local control across all of Photoshop.
Worth Remembering
White reveals, black conceals. Check whether the layer or the mask is selected before you paint. Press X to swap colors while refining. Double-click a mask for Select and Mask, and use Shift Edge inward to kill a white fringe. Alt/Option-drag to copy a mask, Ctrl/Cmd+I to invert it. Unlink the chain to move a layer while its mask stays put. Mask the group when several layers need the same treatment.
And nothing here is permanent. That is the entire point.
Download the Practice Files
The practice files for this tutorial include 2 sample images and 1 sample PSD, so you have the photograph to cut out, the background to place it against, and the finished masked document to compare against. Downloads are free with a PHLEARN account.
More Free Photoshop Tutorials
If this was useful, these go further in the same direction:
- How to Retouch a Portrait in Photoshop — the full portrait workflow this sits inside.
- Advanced Skin Retouching in Photoshop — matching skin texture across an edit.
- Eliminate Dark Circles and Brighten Eyes — a targeted fix worth knowing.
- How to Remove Redness from Skin — correcting tone without touching texture.
- Generative Fill vs Clone Stamp vs Spot Healing Brush — which removal tool suits which job.
- How to Use the Clone Stamp Tool — the manual option when AI overreaches.
New Free Tutorials View All »











Enjoying This Free Tutorial? Go Further with PRO.
Unlock Full Sample Files, PSDs, and Hundreds of Masterclasses!

Download full project assets, original PSDs, and RAW images for every lesson
Unlimited access to our complete library of PRO Photoshop & Lightroom courses
Instant 4K Ultra HD streaming on all devices, anytime, anywhere
Full access to our entire library of Photoshop Actions, Presets, and LUTs
Flexible monthly and annual membership plans
Cancel anytime with zero hassle or commitments