
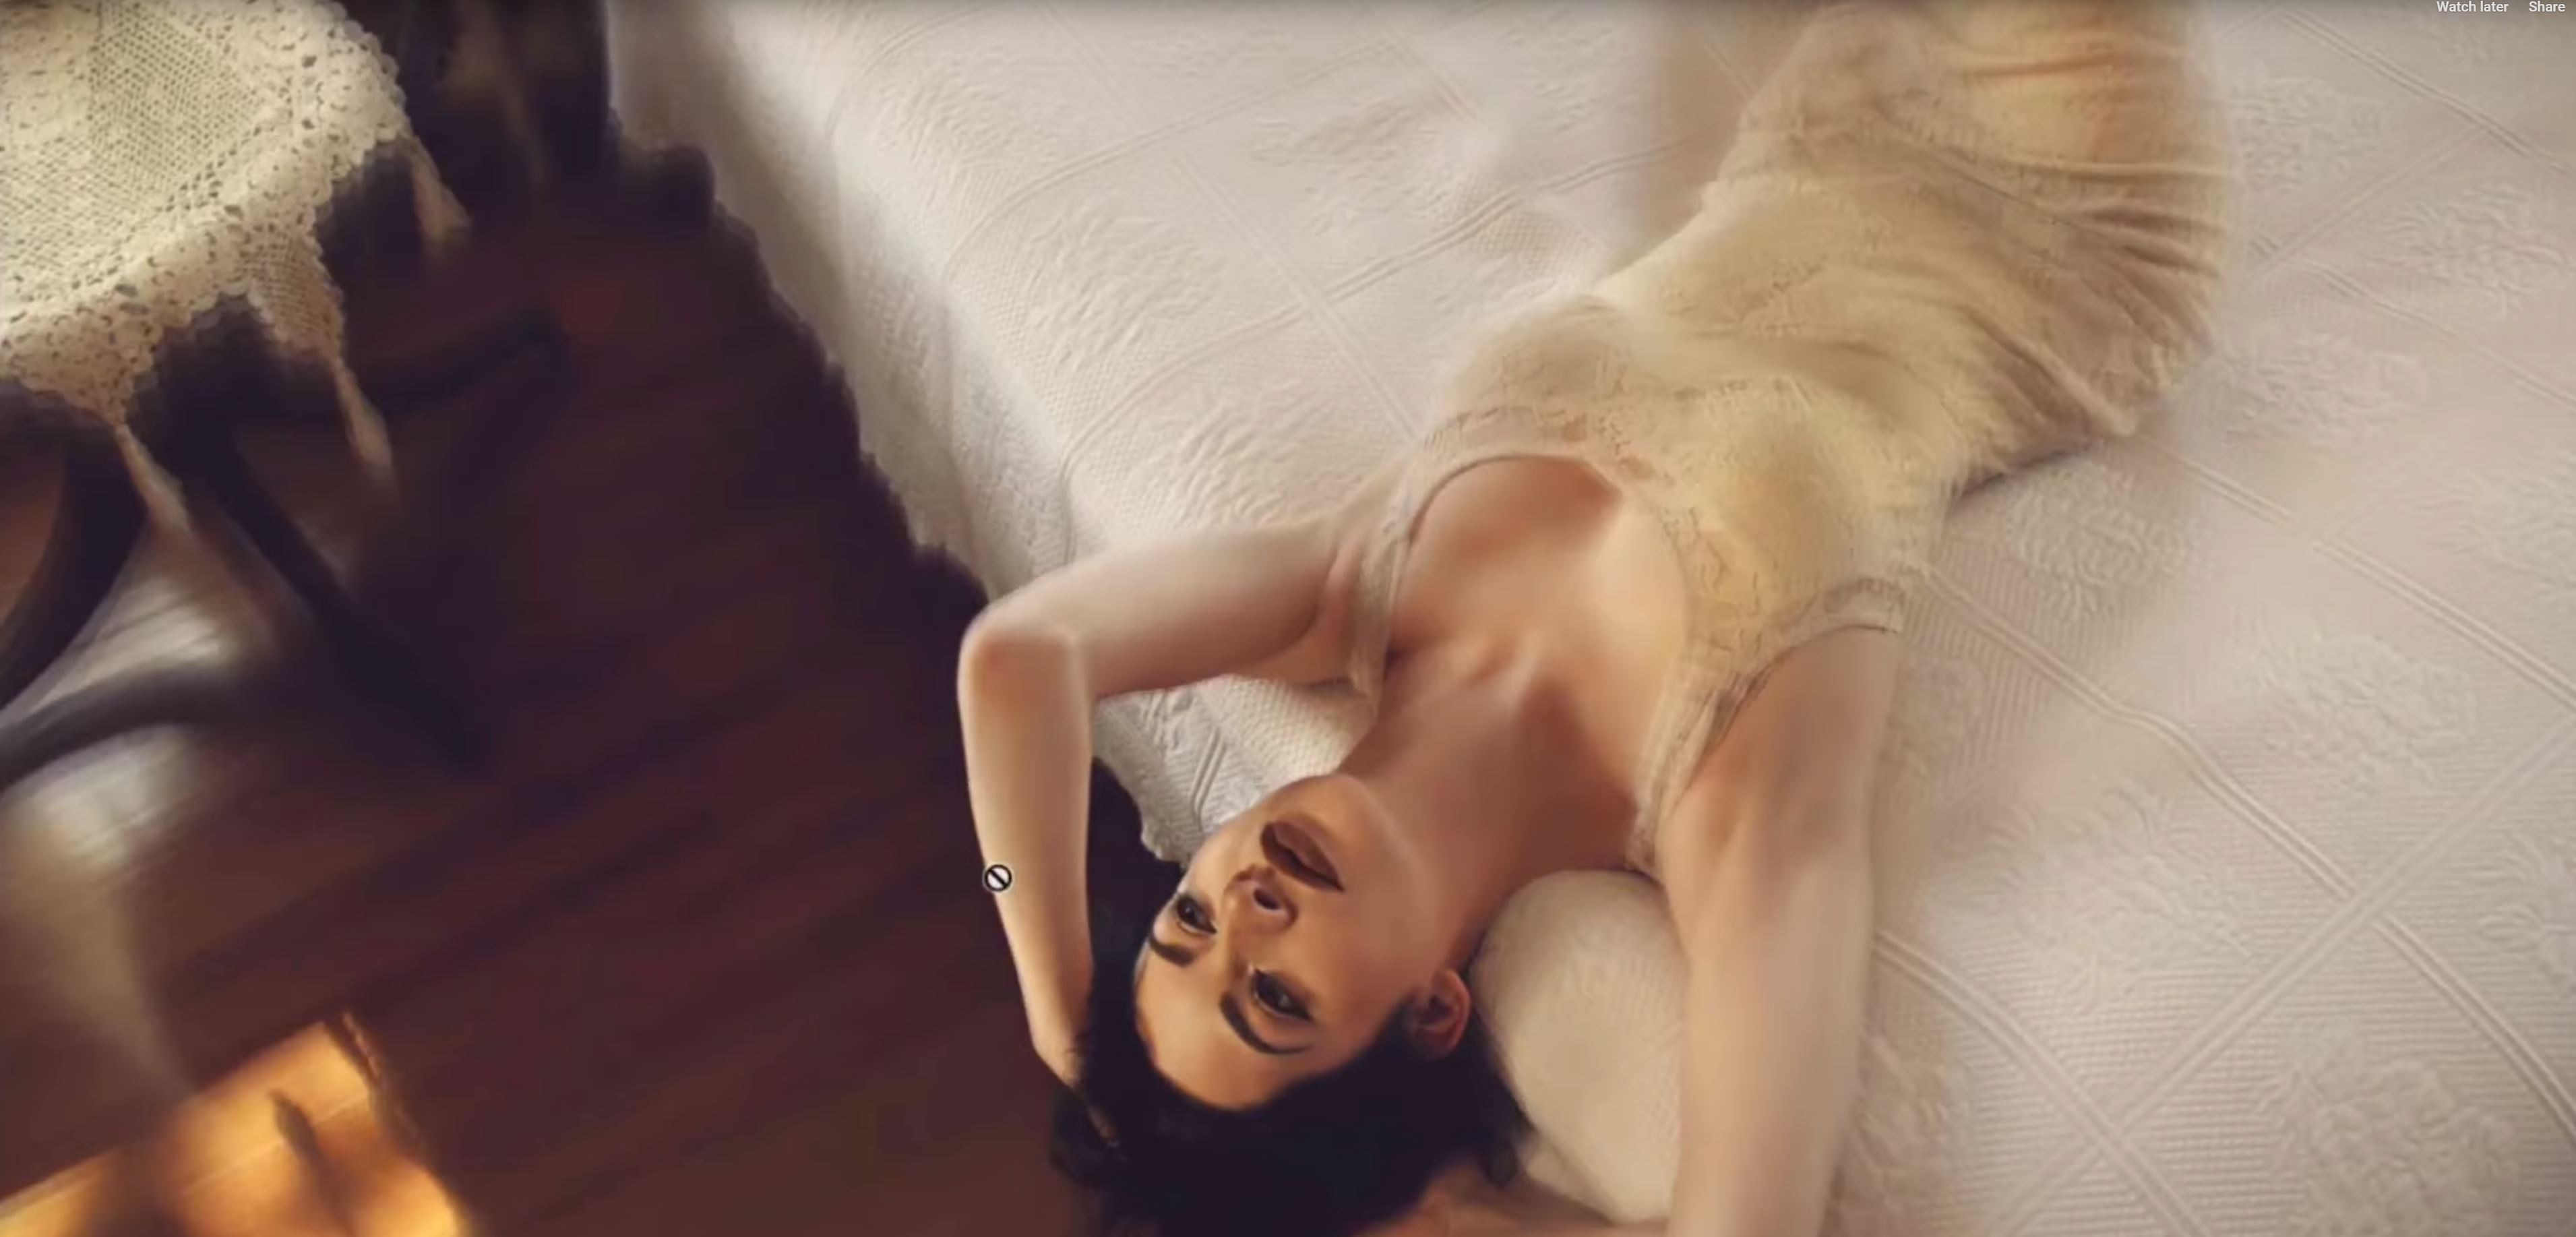

description
Learn how to draw attention to your subject with a radial focus blur, an effect Photoshop has no single filter for. Step and repeat does the work: move the transform reference point onto the face, scale up about 1% and rotate a few degrees, then repeat that same transformation until a stack of copies builds up. Dropping the whole stack’s opacity at once turns it into a spin that blurs outward, and a masked High Pass pass sharpens the face.
Enjoying This Free Tutorial?
We publish a new free tutorial every week, each one with sample images and PSDs you can download and follow along with. Sign up and they land straight in your inbox, along with early word on sales, events and subscriber-only offers.

Drawing Attention to Your Subject Using Radial Focus Blur
A radial focus blur keeps a subject’s face perfectly sharp while the rest of the image spins and blurs outward toward the edges, almost like several photographs stacked together. This effect doesn’t exist as a built-in Photoshop command, but it’s entirely achievable by mastering the step and repeat technique and stacking transparent, slightly transformed copies of the same layer.
Duplicating the Background to Start
A duplicated background layer becomes the first copy in what will grow into a whole stack of slightly scaled and rotated versions of the image.
-
Duplicate the Background Layer
Press Cmd/Ctrl+J to duplicate the background layer.
Positioning the Reference Point on the Subject
Moving the transform reference point onto the subject’s face before starting the step is what keeps that exact spot sharp throughout the entire effect.
-
Start the Step
Hold Option/Alt+Cmd/Ctrl and press T to begin the step.
-
Move the Reference Point to the Subject
Click and drag the small reference point that appears in the center of the layer over to the subject, roughly between the eyes.
Why the Reference Point’s Placement Matters So Much
Every scale and rotation in a step and repeat happens around that reference point, which means whatever sits exactly on it barely moves at all between copies. Placing that point directly on the subject’s face is what keeps the face looking sharp and stable while everything farther from that point shifts more with each repeated transformation.
Scaling and Rotating for the Step
A small scale increase combined with a slight rotation, applied around that reference point, defines exactly how each repeated copy will shift.
-
Scale the Layer Up Slightly
Hold Shift and Option/Alt while dragging a corner handle to scale the layer up by a small amount, such as 101%, with width and height locked together.
-
Rotate the Layer Slightly
Rotate the layer a small amount, such as around 6 degrees.
-
Confirm the Step
Press Enter to confirm and complete the step.
Repeating the Transformation to Build the Stack
Repeating that same small scale and rotation over and over builds up a large stack of layers, each slightly larger and more rotated than the last.
-
Repeat the Transformation
Hold Shift+Option/Alt+Cmd/Ctrl and press T to repeat the exact same scale and rotation again.
-
Continue Repeating Several Times
Press the same shortcut repeatedly to build up a whole stack of progressively scaled and rotated layers.
Lowering Opacity Across All the Stacked Layers
Selecting every layer in the stack and adjusting opacity all at once reveals the spinning blur effect toward the edges while keeping the center readable.
-
Select All the Stacked Layers
Shift-click to select every layer created during the step and repeat.
-
Switch to the Move Tool
Press V to switch to the Move tool while those layers are still selected.
-
Lower Opacity With a Number Key
Press a number key, such as 5 for 50%, to set the opacity of all the selected layers at once.
Why the Number-Key Opacity Shortcut Is So Useful Here
With dozens of stacked layers from the step and repeat, adjusting each one’s opacity individually would take far too long. Selecting them all and using the Move tool’s number-key shortcut sets every layer’s opacity at once, making it fast to preview and fine-tune exactly how strong the blur effect should be.
Grouping the Effect Layers
Grouping the finished stack keeps the entire radial blur effect organized as a single manageable unit.
-
Group the Stacked Layers
Press Cmd/Ctrl+G to group all the stacked, opacity-adjusted layers together.
Adjusting the Effect’s Strength With Scale and Rotation Amount
Using smaller scale and rotation increments for each step produces a smoother, less obviously stepped version of the same effect.
-
Duplicate the Background Again
Press Cmd/Ctrl+J to duplicate the background layer for a second attempt.
-
Use Smaller Scale and Rotation Values
Start the step again, move the reference point onto the subject, and use a smaller scale increase and a smaller rotation angle than before.
-
Repeat and Adjust Opacity Again
Repeat the transformation several times, then select all the resulting layers and adjust their opacity together.
Why Smaller Increments Produce a Smoother Blur
Larger scale and rotation jumps between each step create more visible, distinct rings in the final effect, since each copy differs noticeably from the last. Using smaller increments instead makes the transition between copies subtler, which reads more like a smooth blur and less like a series of individual repeated steps.
Enhancing Focus With a High Pass Sharpening Layer
A final High Pass sharpening pass, masked to just the face, reinforces the sense of sharp focus that the radial blur is already drawing attention to.
-
Stamp a Visible Layer
Press Shift+Option/Alt+Cmd/Ctrl+E to stamp a new combined layer.
-
Change the Blend Mode to Overlay
Change the stamped layer’s blend mode to Overlay.
-
Apply the High Pass Filter
Go to Filter > Other > High Pass and choose a radius that gives a noticeable sharpening effect.
-
Mask the Sharpening to the Face
Add a black layer mask and paint white over just the subject’s face to bring the sharpening into view there.
Why This Approach Works
Placing the transform reference point directly on the subject’s face is what keeps that one spot visually stable while every repeated step scales and rotates the rest of the image around it. Lowering the opacity of the entire stacked group at once, rather than one layer at a time, is what turns a rigid series of duplicated steps into a soft, spinning blur toward the edges. Adding a masked High Pass sharpening pass on top reinforces exactly where the eye is already being drawn, tying the whole effect together.
Final Thoughts
This effect doesn’t exist as a single filter in Photoshop, but step and repeat combined with careful opacity control recreates it convincingly from scratch. Trying different scale and rotation amounts on the same image is worth experimenting with, since even small changes to those two values noticeably change how the final spin and blur feels.
Quick Reference: Keys, Menus and Settings
- DuplicateCmd/Ctrl + J
- StepAlt/Option + Cmd/Ctrl + T, reference point between the eyes, 101% width and height, about 6 degrees, Enter
- RepeatShift + Alt/Option + Cmd/Ctrl + T, several times
- See through the stackShift-click the copies, V, then a number key: 5 = 50%
- GroupCmd/Ctrl + G
- Sharpen the faceShift + Alt/Option + Cmd/Ctrl + E, Overlay, Filter > Other > High Pass, black mask, paint white
No AI, no generative credits.
Radial Focus Blur: Common Questions
Is radial focus blur a Photoshop filter?
No. It’s a technique made up at PHLEARN: stacked copies of the photo, each scaled and rotated a little around the face, so the subject stays sharp while the edges blur and spin.
How do I start the step?
Press Cmd/Ctrl + J, then Alt/Option + Cmd/Ctrl + T. Drag the reference point onto the subject, roughly between the eyes, scale the layer to 101% width and height, rotate it about 6 degrees and press Enter.
How do I repeat the transformation?
Press Shift + Alt/Option + Cmd/Ctrl + T. Each press adds another copy that is a little larger and more rotated than the last.
I made all the copies but see no blur. What’s missing?
The top copy covers everything. Shift-click all the copies, press V for the Move tool and press a number key to lower their opacity together: 3 for 30%, 5 for 50%.
What opacity should the copies have?
Lower opacity shows more of the effect. At 70 or 80% you see little of it, at 40 or 50% a lot more; Aaron settled on about 50% and grouped the copies with Cmd/Ctrl + G.
Why is my subject’s face blurry too?
The reference point wasn’t moved onto the face. Everything scales and rotates around that point, so whatever sits on it stays in place and sharp.
I can see the separate copies. How do I get a smoother blur?
Use a smaller scale and a smaller rotation for the step. Each copy then differs less from the last, so you see fewer steps and more blur.
How do I make the face stand out even more?
Stamp a visible layer with Shift + Alt/Option + Cmd/Ctrl + E, set it to Overlay and run Filter > Other > High Pass. Add a black layer mask and paint white over the face.
From the Magazine View all
Stories, interviews and guides for photographers, new every week.
 BusinessHow to Compete With AI: Give Your Clients MoreEveryone has the same tools now, and your clients know it. The way to compete is to give them more.
 EditingLightCraft vs Lightroom: Is the Free Clone Any Good?The free clone on the same RAW files: what matches, what breaks and who should switch.
 EditingHow to Tell If a Photo Is AI, and Prove Yours Is RealThe tells that still work in 2026, why detectors disagree, and how to prove your own photos.
Master Photoshop, Lightroom and Photography
Join PHLEARN PRO for $12.99 a month, or $99.99 a year (save 36%). Cancel anytime, with a 100% money-back guarantee.





