Download Sample Images
description
When we’ve needed to make precise color changes in the past, Photoshop has been our go-to software for both its accuracy and flexibility. But with the latest updates to Lightroom Classic, Adobe’s photographer-friendly program has a brand new tool that makes it possible to change the color of almost anything in a photo.
Learn how to use the new Hue Slider in Lightroom Classic alongside Graduated Filters, Radial Filters, and the Adjustment Brush to precisely target and change colors in just a few easy steps!
Share
CHANGE COLORS IN LIGHTROOM
Change the Color of Anything in Lightroom
New Tools in Lightroom Classic 2020
The latest round of updates to Adobe’s Creative Cloud suite has brought some new, powerful tools to their flagship programs. Lightroom Classic continues to see major improvements and overhauls, making this photographer-friendly software even more versatile and robust. While Photoshop certainly has its place in a Lightroom-centric workflow, we always get excited to see tools that help us get the job done without leaving Lightroom.
Changing colors is a relatively common request for photo editors. You might be working on product photos where the products come in a wide range of colors. As a photographer, you don’t want to have to photograph each and every color option from each and every angle. It’s often much more effective and efficient to photographer one of the neutral color options and then create the color variety in post-production. It’s relatively easy to use color change tools to carefully match the color options to their real-life counterparts.
Until now, this has mostly been the sort of job best handled in Photoshop. With precise selection tools, Adjustment Layers, and Layer Masks, targeting colors and changing colors is extremely precise, flexible, and non-destructive. But wouldn’t it be great if we could tackle color changes in Lightroom Classic?
Enter the new Hue Slider!
The New Hue Slider in Lightroom Classic
At first glance, the new Hue Slider could be an easily overlooked edition to Lightroom. Located under the Develop Tap in the right-side tool panel, and only with a local adjustment filter applied, it appears below all of the basic adjustments options. Move the slider to the left or right, and all of the hues in the selected are will change.
Great! Now we just need a way to make it as precise as the process would be in Photoshop. So let’s take a deep dive into Lightroom Classic’s tools for making changes to smaller, specific parts of a photo.
Local Adjustments vs. Global Adjustments
Let’s quickly talk about what local adjustments are. When we first described the Hue Slider as being able to change the hue of everything in a photo, we described a global adjustments. That is to say, an adjustment that effects every single pixel in an image. Sometimes we want global adjustments to make subtle shifts in exposure and light levels, and maybe color temperature, but the art of photo editing usually happens in the local adjustments. And some adjustments, like color changes, are just not helpful as global adjustments.
So what are local adjustments? If global is about editing the whole shebang, local editing is about the individual elements and smaller pieces that make a up a photo. If you want a subject’s face to be brighter and then use tools to lift the shadows and exposure of only their face, then you’re editing locally.
Local adjustments are how we can separate different elements in our photos, create clear focal points and subjects, and add depth and definition. And when you have a photo where you need to change the color, of let’s say a small product, local adjustments allow us to do that without damaging the colors in the rest of the image.
Local Adjustment Tools
In order to make local adjustments, you need a set of tools that allow you to select precise areas of an image. If you want to make adjustments to a subject’s face, you need a tool that will let you select and work on only their face. If you want to change the color of a product or object, you need a tool that will let you select or the object or product (or even just parts of the object or product) to change the colors.
Luckily, Lightroom comes equipped with some flexible selection tools that help you to break your images up and adjust different areas separately. They are:
- The Graduated Filter
- The Radial Filter
- The Adjustment Brush
- Range Masks
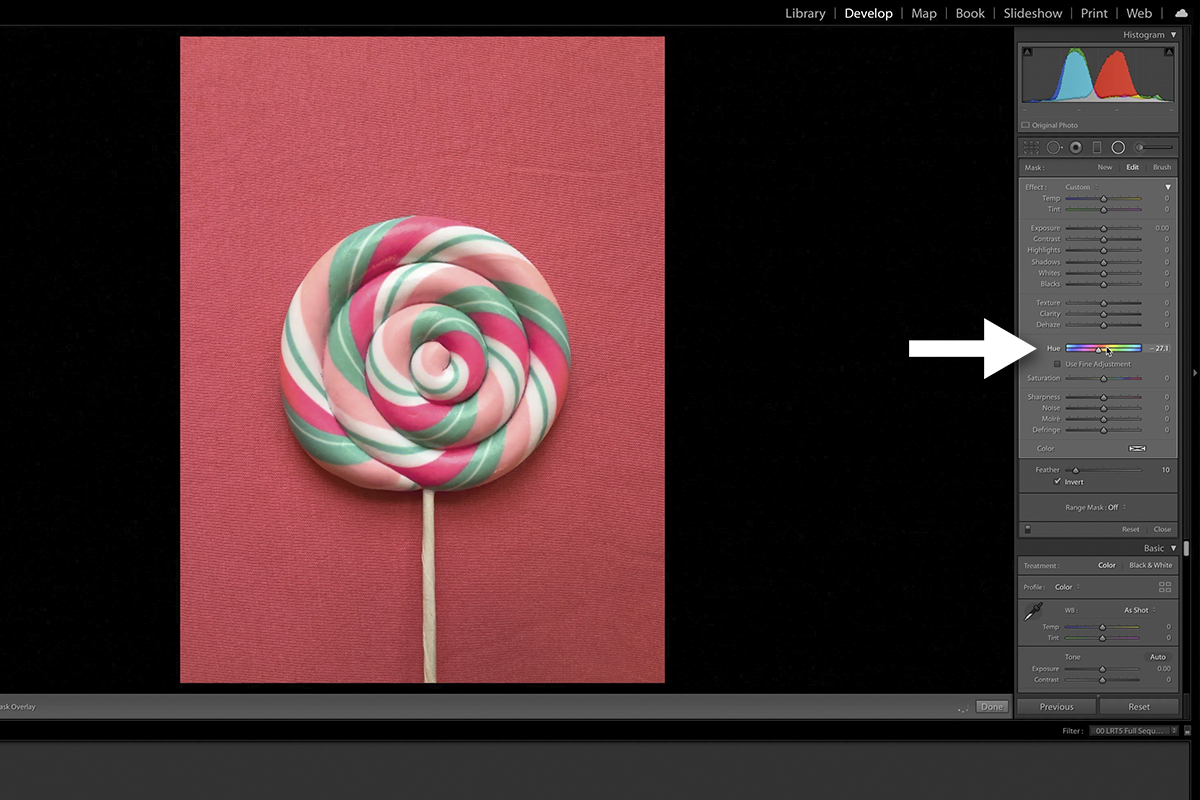
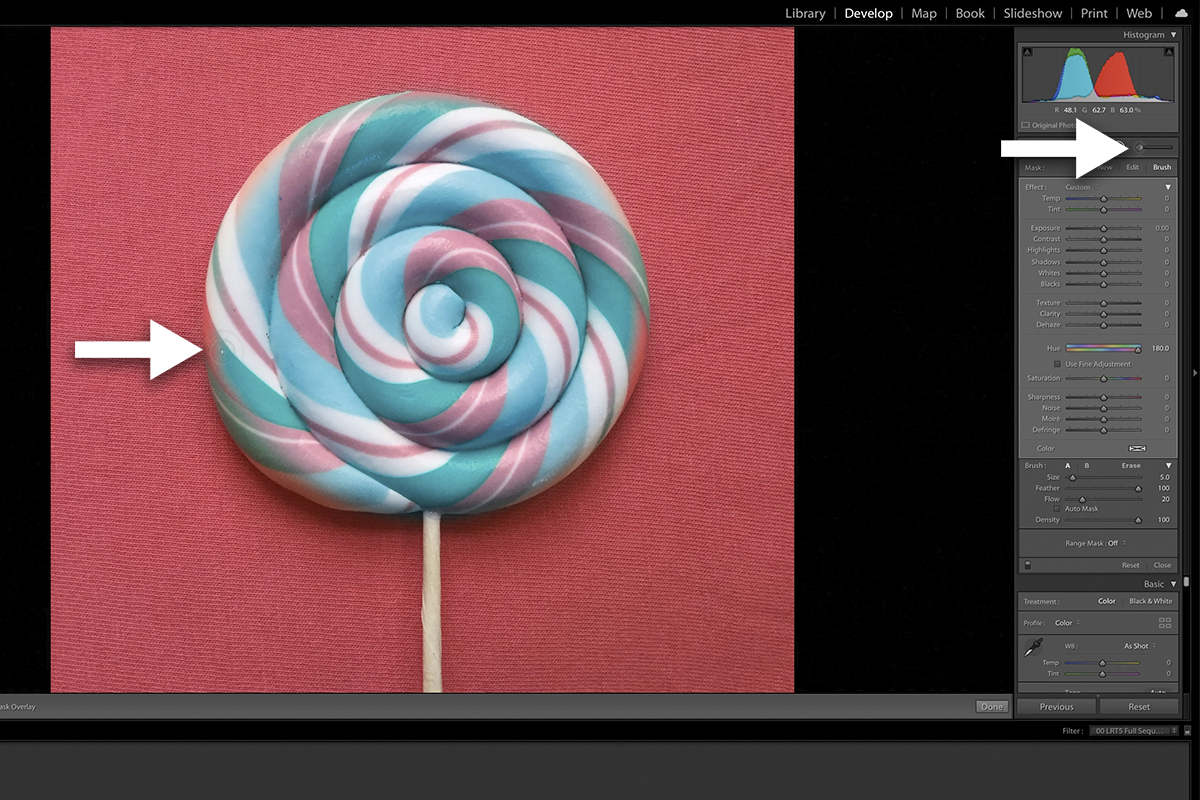
The names may sound a little cryptic, but they’re pretty easy to understand once you try them out. The Graduated Filter and Radial Filter allow you to adjust areas either along straight lines (graduated) or within elliptical areas (radial). You simply create your line or ellipse, add some feathering to help blend the effect, and then apply your adjustments. In one of our color change examples, we have a relatively circular piece of candy that we want to change the colors of. This is the perfect time to use a Radial Filter since we can create an adjustment area in almost the exact same shape as the item we’re trying to adjust.
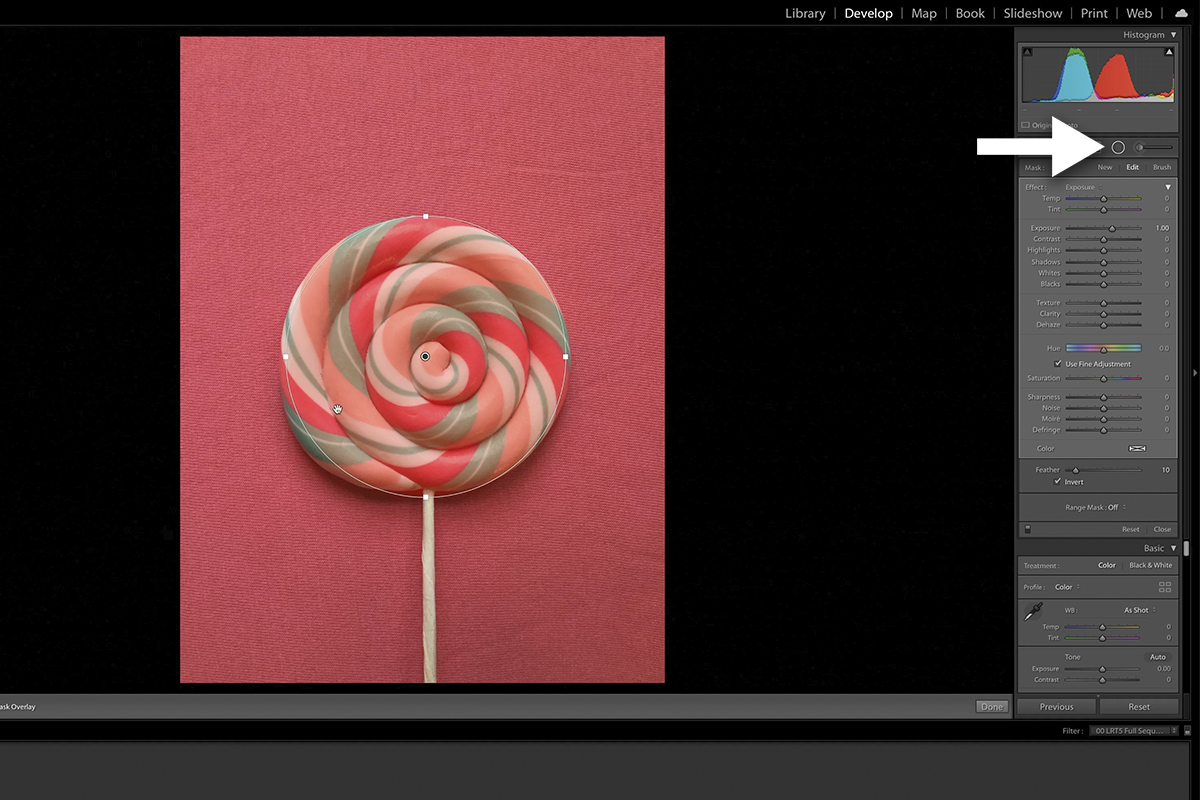
When the Graduated Filter and Radial Filter aren’t precise enough, you can always turn to the Adjustment Brush. Whereas the Graduated and Radial Filters are constrained by using lines and ellipses, the Adjustment Brush simply allows you to paint over anything you want to apply adjustments to. In our candy example, the Radial Filter got us most of the way there, but not entirely since the candy is not a perfect circle or ellipse.
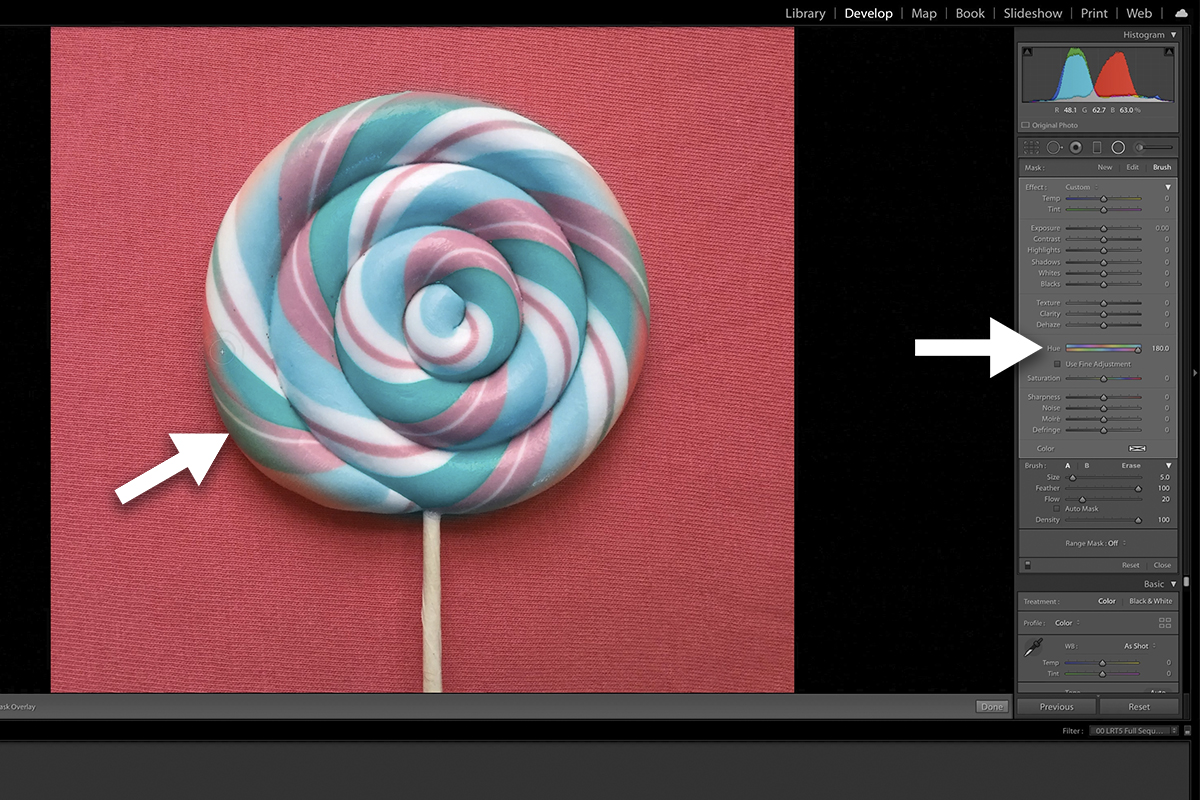
Fortunately, we can add to the selected area using the Adjustment Brush to paint over any areas of the candy that were missed. In the image below, we’re painting over areas of the candy that were missed by the Radial Filter. This will apply the color adjustments we made to those areas.
And when you need maximum precision, look no further than the Range Masking Tool. Range Masking allows you to only apply adjustments to certain areas within a selection, determined by light and color values that you can set.
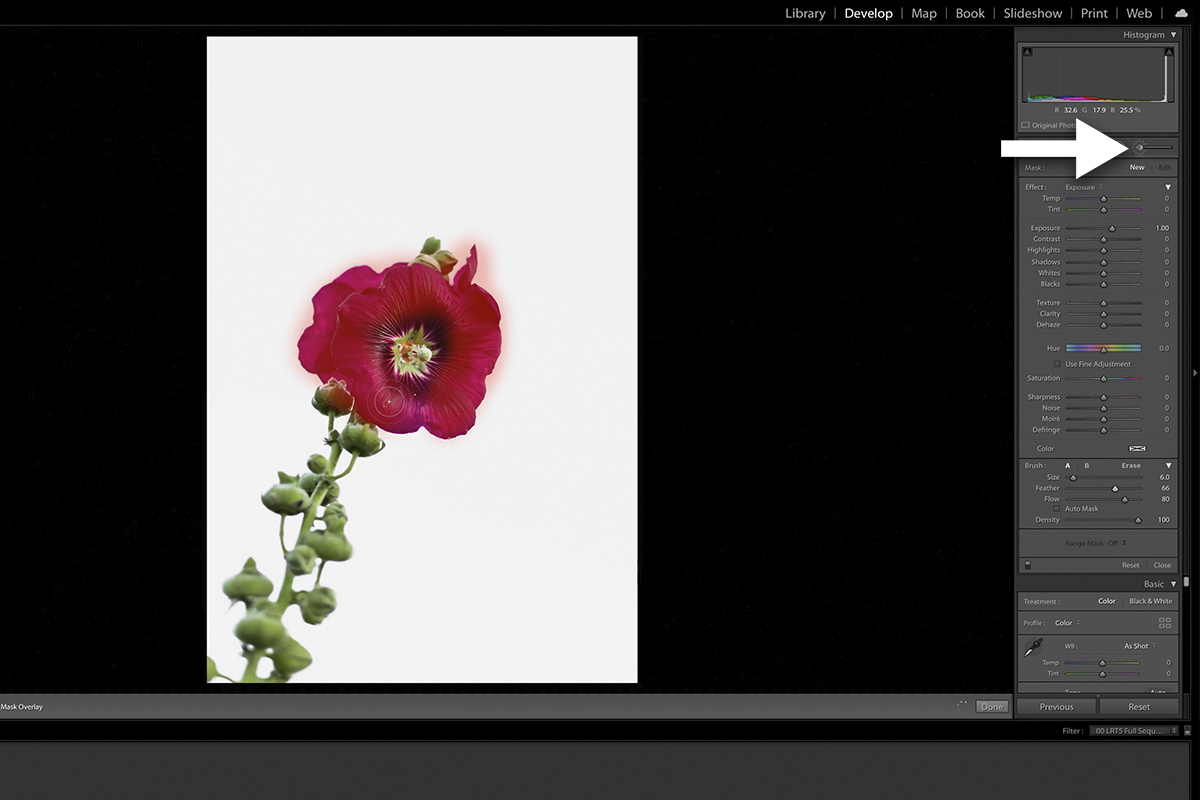
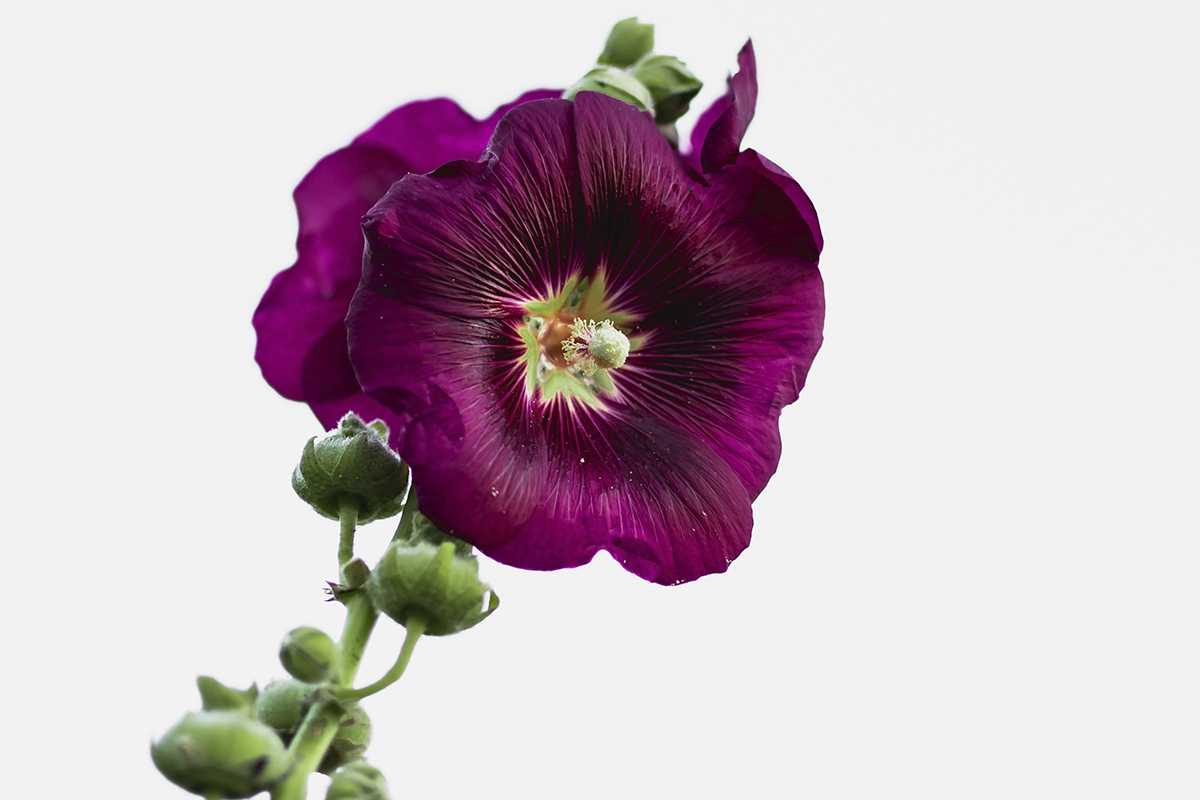
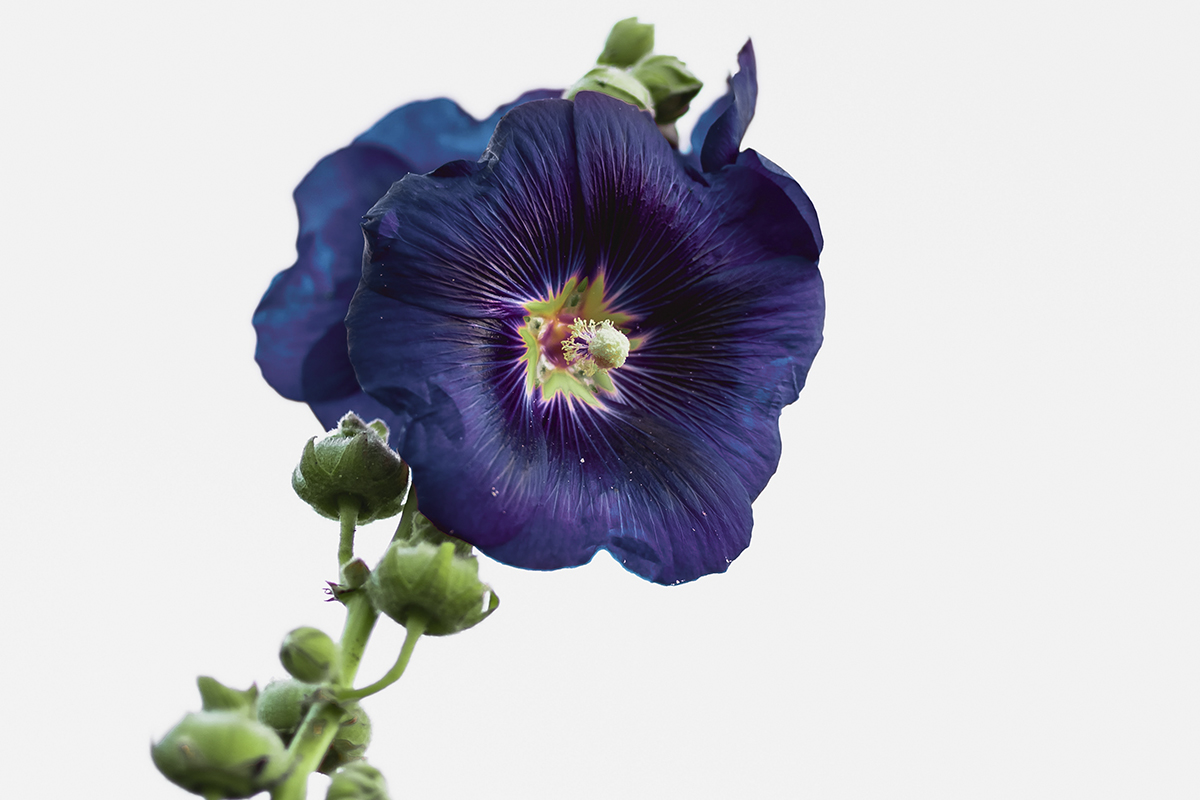
In this example, we want to change the color of a flower, so we made a quick selection of the area we want to change by painting over it with the
Adjustment Brush. Now we can use the Hue Slider to shift the color to anything we want.
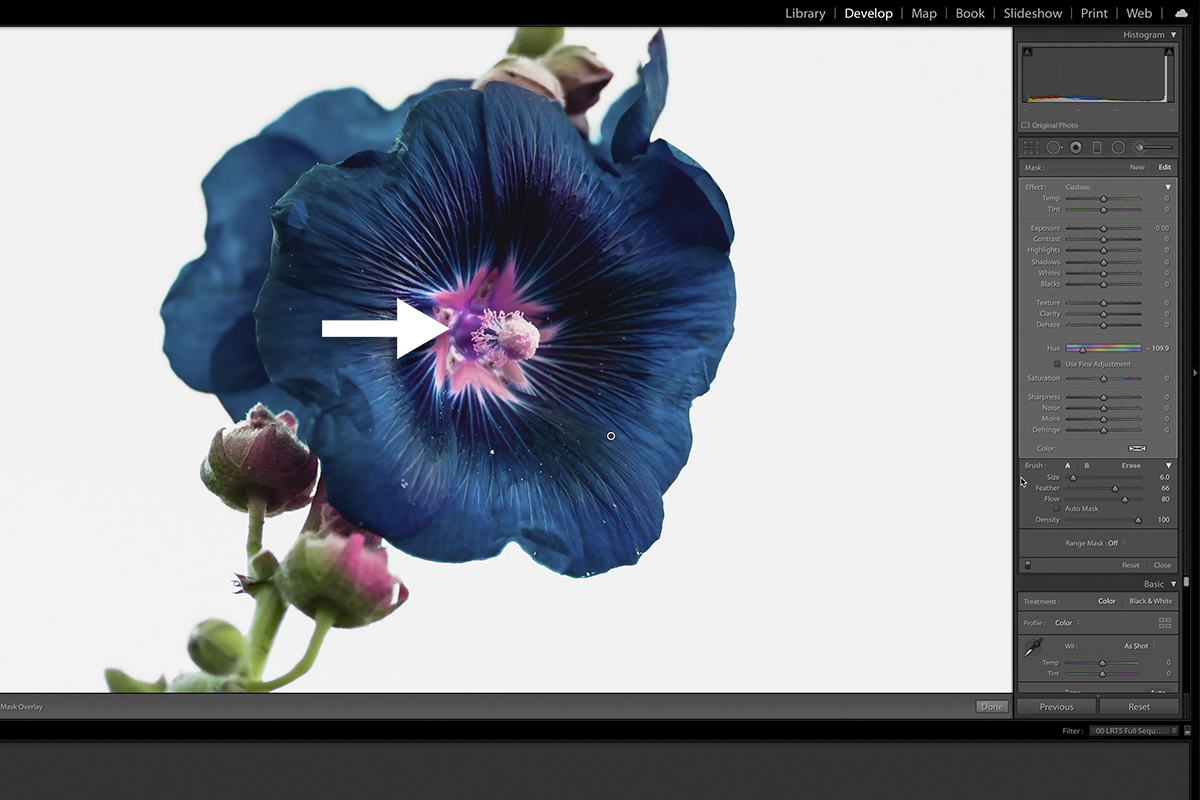
We’ve turned the red into a deep blue, but there’s a small problem. Notice that the center of the flower has also changed color. We could take the time to carefully paint around the areas we don’t want to affect, but Lightroom offers a much faster and more precise tool: Range Masking!
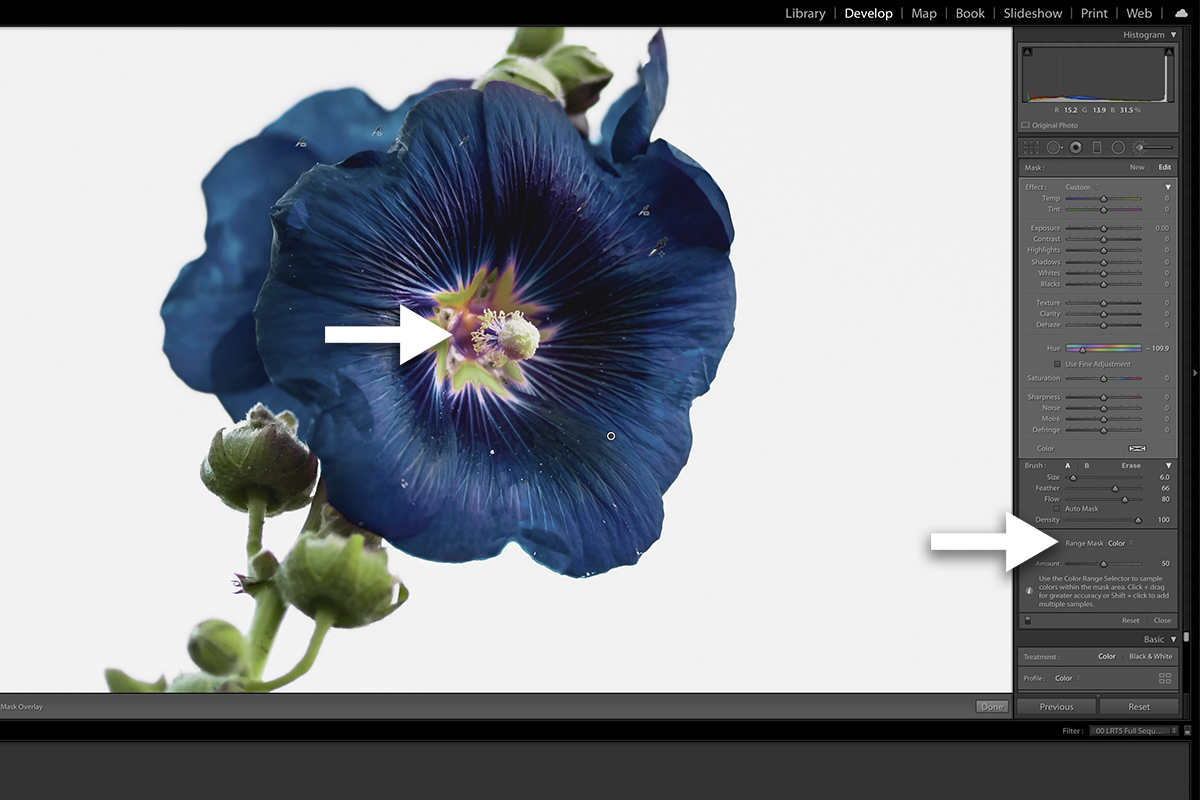
The Range Masking option allows us to set a specific color range that we want to adjust. So not only will our adjustment only appear within the area painted by the Adjustment Brush, it will also only affect the selected reds of the flower pedals. Now we have a perfect color change that only affects the specific areas we want.
You can mix, match, and combine these three tools to select almost anything in a photograph, making it easy to isolate and edit different elements as you need to. They also are the the tools that make changing colors with the new Hue Slider so effect!
Using the Hue Slider
So you’ve used the selection tools to define the areas in a photo you want to change the color of. So how do you do it? Well, the Hue Slider couldn’t be easier to use. Simply drag the slider to the left or the right and watch the colors change. Magic!
There is a checkbox below the slider labeled Fine Adjustments. If the area you’re working with has a lot of tiny details, checking this box will help Lightroom make more nuanced color changes. Otherwise, the default adjustments should work great for you.
And that’s it! It’s now possible to quickly and easily change the color of almost anything in a photo using Lightroom Classic! Will we still use Photoshop for this on occasion? Of course. But we’ve found this tool to be capable of handling a lot of the most common color change work that we come across. So if Lightroom Classic is where you spend most of your time, we recommend getting to know the brand new Hue Slider!