

Download Assets
Download Assets
This tutorial includes 4 sample images and 1 PDF guide. Downloads are free with a PHLEARN account.
- Free sample files with every tutorial on PHLEARN
- New tutorials published every week
- Unlimited downloads with your free PHLEARN account
Free PDF Guide · 3 Pages
This Tutorial as a Step-by-Step PDF
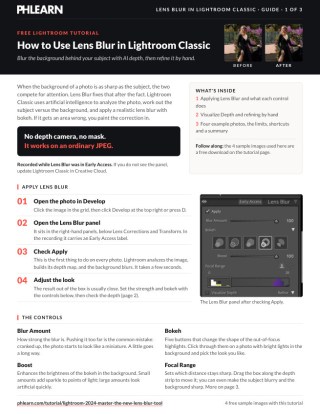
Walks through Develop > Lens Blur > Apply, what Blur Amount, Bokeh, Boost and Focal Range do, reading Visualize Depth (yellow sharp, purple blurred), painting fixes with the Blur and Focus brushes in Refine, and lowering Blur Amount when hair gives the effect away, across four example photos. Keep it next to your keyboard.
description
Lens Blur in Lightroom Classic reads the depth of a scene and blurs behind your subject without a mask to create beautiful out-of-focus effects in your photos! This new tool uses artificial intelligence to automatically analyze the depth of your image and apply a realistic blur effect.
Note:
If you want to learn more about Lightroom 2024 and all the new features, check out our in depth PRO tutorial Master Lightroom in 2024: Essential Tools & Techniques.
Enjoying This Free Tutorial?
We publish a new free tutorial every week, each one with sample images and PSDs you can download and follow along with. Sign up and they land straight in your inbox, along with early word on sales, events and subscriber-only offers.
Artist Credit

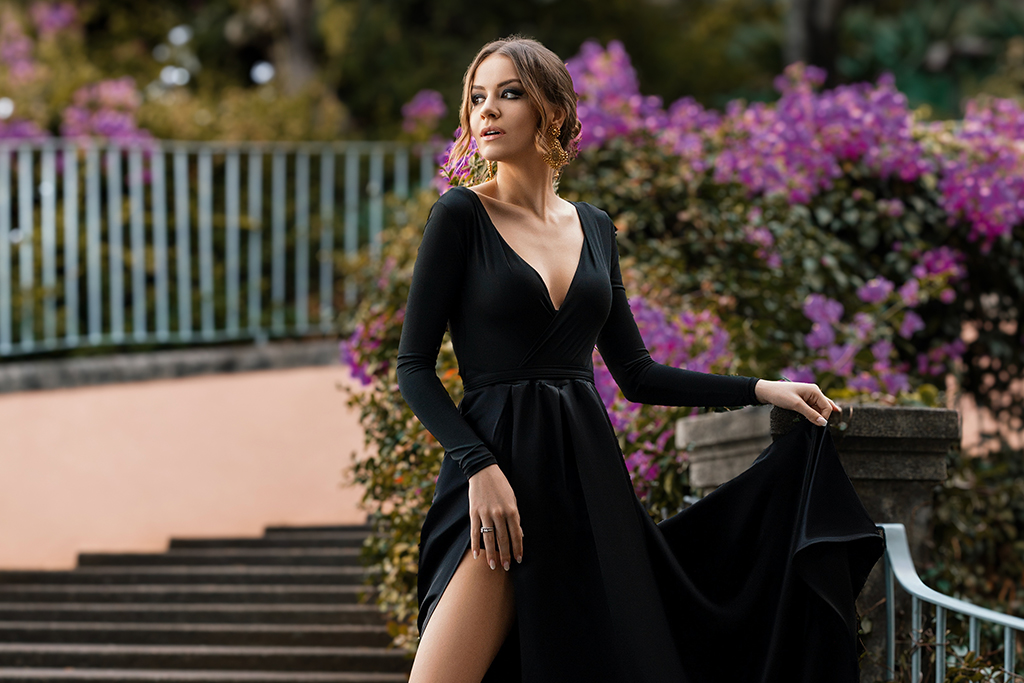
How to Use Lens Blur in Lightroom Classic
A blurred background does a lot of work in a photograph. It isolates the subject, creates a sense of depth, pushes distractions out of the way, and sets a mood — which is why fast lenses cost what they do. When the background in a shot competes with the subject for attention, that separation is usually what the image is missing.
Lens Blur adds it after the fact. Lightroom Classic analyzes the photograph with AI, works out what is near and what is far, and applies a blur that falls off with distance the way a real lens would. It is convincing in a way that earlier background-blur tools were not, and it works on an ordinary JPEG — no depth data from the camera required.
A note on versions: this was recorded while Lens Blur was in Early Access. It may be a standard feature in your version of Lightroom Classic now, and the panel may look slightly different. The workflow is unchanged.
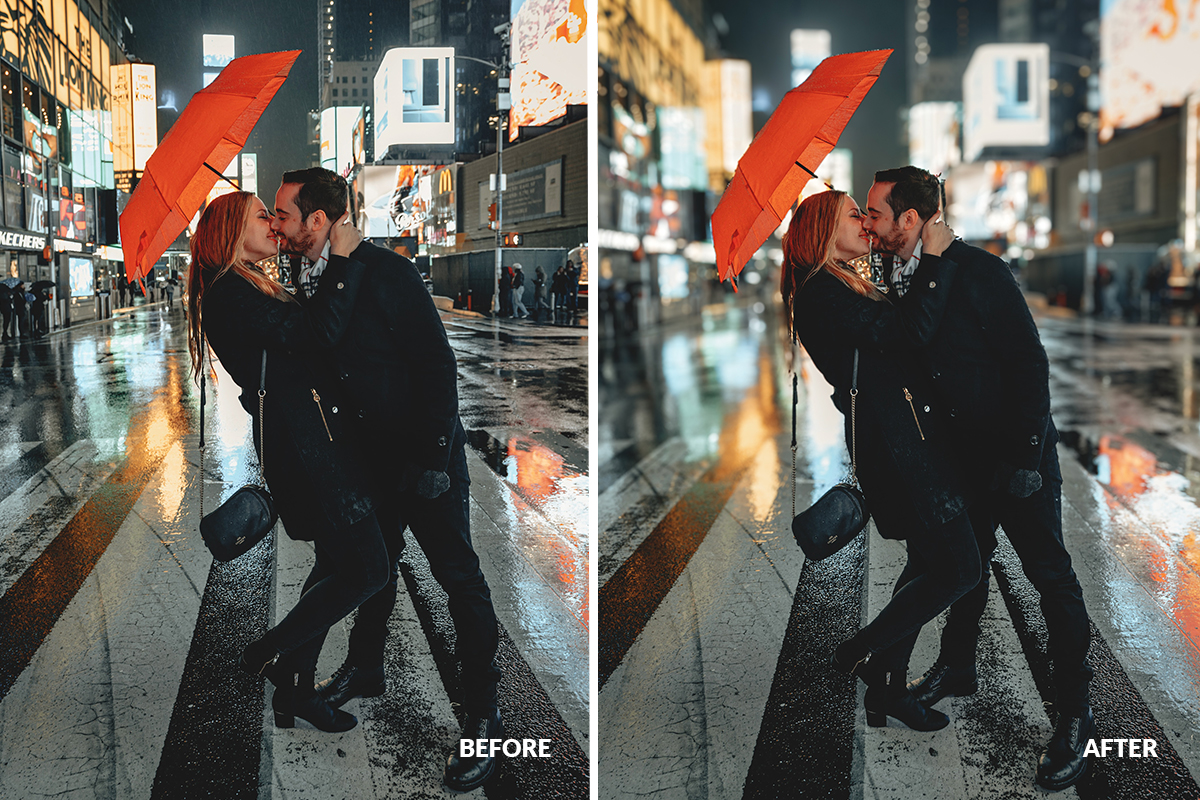
Applying Lens Blur in Lightroom Classic
-
Open the image in the Develop module
Press D, or click Develop at the top right.
-
Find the Lens Blur panel on the right
If it is not there, update Lightroom Classic through Creative Cloud.
-
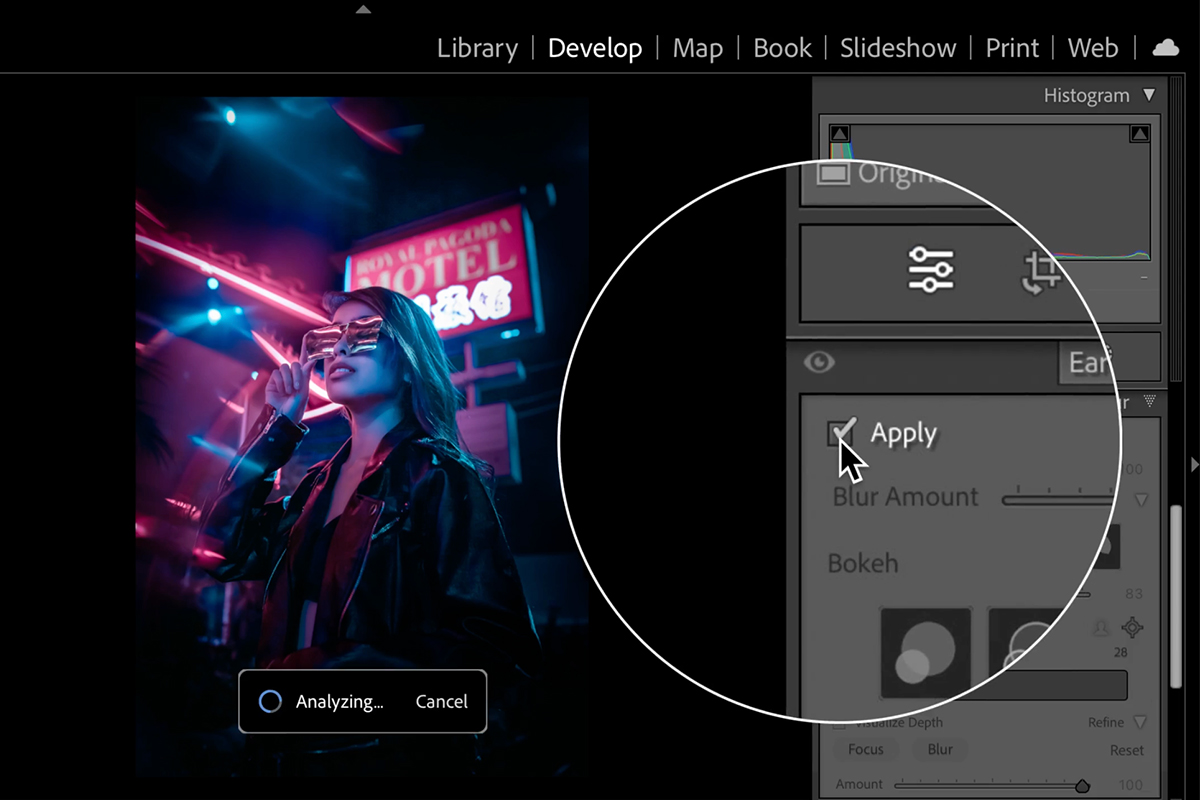
Click Apply
Lightroom analyzes the photograph and builds a depth map. It takes a few seconds.
That is the whole basic operation. The result straight out of the box is usually close to right, and everything below is refinement.
The Controls
Amount
How strong the blur is. The most common mistake is pushing this too far — a background blurred harder than any real lens would produce reads as an effect rather than as depth. If you are unsure, back it off until you are not quite certain it is there.
Focal range
Sets which distance stays sharp. Normally the subject is in focus and the background blurs, but you can invert it so the foreground softens and something behind comes forward. Rarely what you want on a portrait, occasionally exactly right for a more abstract shot.
Bokeh type
Several options for the shape of the out-of-focus highlights. Different lenses render highlights differently — circular, polygonal, cat’s-eye toward the frame edges — and these presets approximate those looks. Click through them on an image with bright points in the background, where the difference is obvious.
Boost
Increases the brightness of the bokeh highlights. Small amounts add sparkle to a background with points of light in it. Large amounts look artificial quickly.
Visualize Depth
This checkbox is the most useful thing in the panel and it is easy to scroll past.
Turn it on and Lightroom shows you its depth map — its interpretation of what is near and what is far. Rather than judging the blur and guessing why an area looks wrong, you can see directly what the AI believes about your scene.
Common misreads show up immediately. A gap between an arm and a body that should be background but was classified as subject. A foreground object the analysis missed entirely. Hair edges where near and far meet ambiguously.
Check this on every image before refining. It turns a guessing game into a straightforward correction.
Refining by Hand
Open the Refine panel — it is often collapsed by default. Inside are two brushes, Blur and Focus, and between them you can correct anything the automatic pass got wrong.
-
Choose Blur or Focus
Blur pushes an area out of focus. Focus brings it back sharp.
-
Zoom in
Ctrl or Cmd and the plus key, a couple of presses. Refinement work needs to be seen properly.
-
Size the brush with the square bracket keys
Left bracket smaller, right bracket larger — much faster than a slider while you work.
-
Paint over the areas that were misread
The result updates live as you paint, so you can see whether a correction is helping.
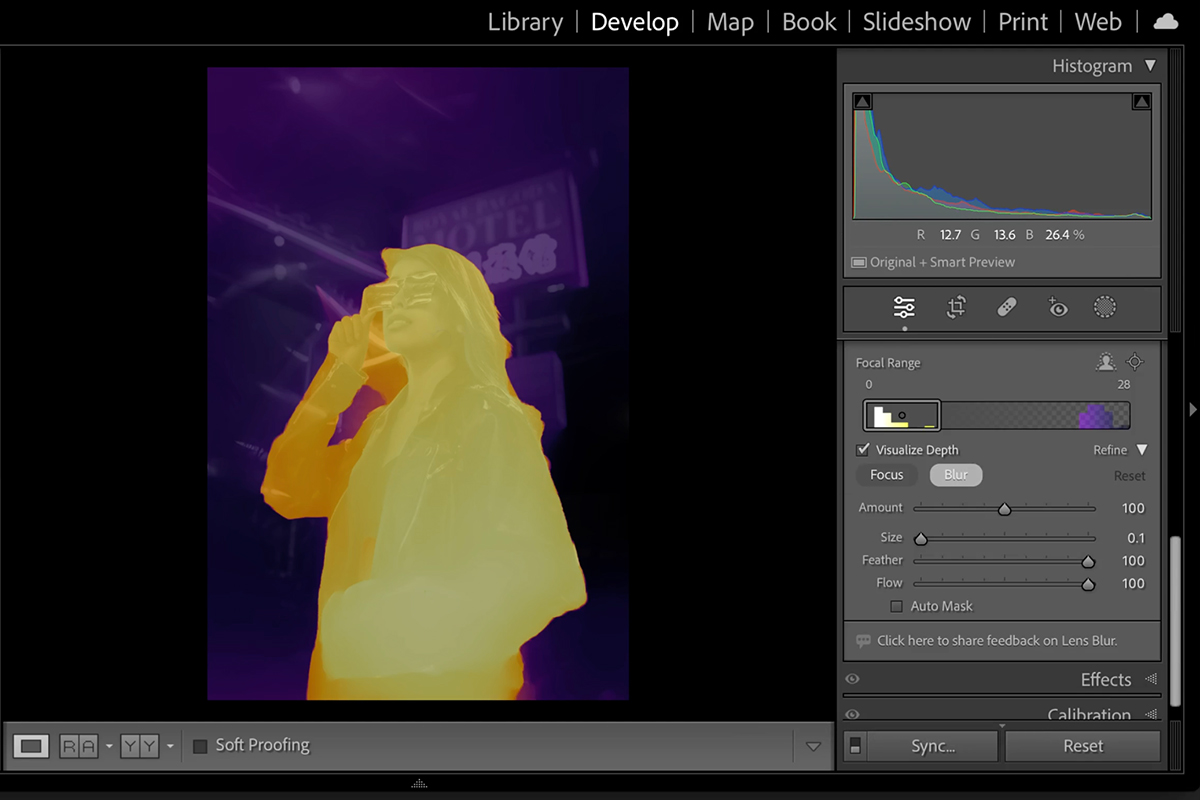
Turn Visualize Depth off while painting
Use it to find the problem, then switch it off to fix it. Painting against the depth map means judging an abstract representation; painting against the real image means judging the actual result. Find, then fix.
Overspill is easy to undo
Catch part of a face while brushing blur into a background gap? Switch to Focus and paint it back. The two brushes are exact opposites, so nothing you do here is difficult to reverse — which means you can work quickly rather than carefully.
Where It Struggles
The underlying technology is the same subject-detection used elsewhere in Adobe’s tools, and it has the same weak points.
Gaps and enclosed spaces. The area between an arm and a torso, or between strands of hair, is where misreads cluster — these are background regions surrounded by subject, and they are the hardest case.
Objects at similar distances. When subject and background are close together, there is less depth separation to work with and the boundary gets soft.
Transparent and reflective things. Glass, water and shiny surfaces confuse depth estimation, since what is visible through or in them sits at a different distance from the surface itself.
None of these break the tool — they just mean the refine brushes get more use.
Getting Believable Results
Two habits matter more than any slider.
Match the blur to a plausible lens. Think about what an actual lens would do at that distance and aperture. Backgrounds a few feet behind a subject do not dissolve completely, and when they do in an edit, it reads as fake even to someone who could not explain why.
Check the edges at 100%. The blur itself is convincing; the boundary between sharp and soft is where problems live. Zoom in along the subject’s outline — particularly around hair and any gaps — before calling it done.
Used with restraint, this is the closest software has come to genuinely replicating what a fast lens does. Used heavily, it looks like exactly what it is.
Quick Reference: Keys, Menus and Settings
- StartD for Develop, Lens Blur panel, check Apply
- Set the lookBlur Amount (keep it subtle), the Bokeh buttons, Boost
- Choose what stays sharpFocal Range: drag the box, or the person icon
- See the depth mapVisualize Depth: yellow sharp, orange to purple blurred
- RefineRefine panel, Blur or Focus brush; [ and ] size it
- Zoom and moveCmd/Ctrl + + and -; hold Space to move around
- Next photoG back to Grid view
Free Downloads
Follow Along on the Same Photos
Get the four photos of people from the video, from the neon portrait to the couple at night, and the 3-page PDF guide. Free with a PHLEARN account.
Lens Blur in Lightroom Classic: Common Questions
Where is Lens Blur in Lightroom Classic?
In the Develop module (press D), in the right-hand panels below Lens Corrections and Transform. The video was recorded while it was in Early Access; if you do not see it, update Lightroom Classic in Creative Cloud.
How do I blur the background of a photo?
Open the Lens Blur panel and check Apply. Lightroom analyzes the photo with AI, works out the subject versus the background and blurs the background. It works on an ordinary JPEG, no depth camera needed.
How much blur should I use?
Keep Blur Amount subtle. Cranked up, the photo starts to look like a miniature, while even a little blur makes a huge difference on a photo where everything is in focus.
What do Bokeh and Boost do?
The Bokeh buttons change the shape of the out-of-focus highlights; click through them and pick the look you like. Boost enhances the brightness of the bokeh in the background.
What do the colors in Visualize Depth mean?
Yellow is the plane that stays in focus. The further the color moves through orange to purple, the further back Lightroom thinks it is and the more it blurs.
Lens Blur missed a spot next to my subject. How do I fix it?
Open the Refine panel, click Blur and paint over the area, sizing the brush with [ and ]. Turn Visualize Depth off to watch the blur update on the real photo as you paint.
I painted blur onto my subject’s face. How do I undo it?
Click Focus, make the brush smaller and paint the face back in. Focus is the exact opposite of Blur.
Why does the blur look wrong around hair?
Fine detail such as hair is where the tool falls short, and brushing Blur between strands mostly cuts the hair off. Lower Blur Amount instead; with just a little blur the edge stops giving it away.
How do I change what stays sharp?
Use Focal Range. Drag its box along the depth strip, click the person icon to find the person, or use the target icon to select an area to keep in focus. The person icon usually does the better job.
Are the sample files free?
Yes, with a free PHLEARN account. You get 4 sample images and 1 PDF guide: the four photos from the video and a 3-page step-by-step guide.
Master Photoshop, Lightroom and Photography
Join PHLEARN PRO for $12.99 a month or $99.99 a year. Cancel anytime, with a 100% money-back guarantee.





