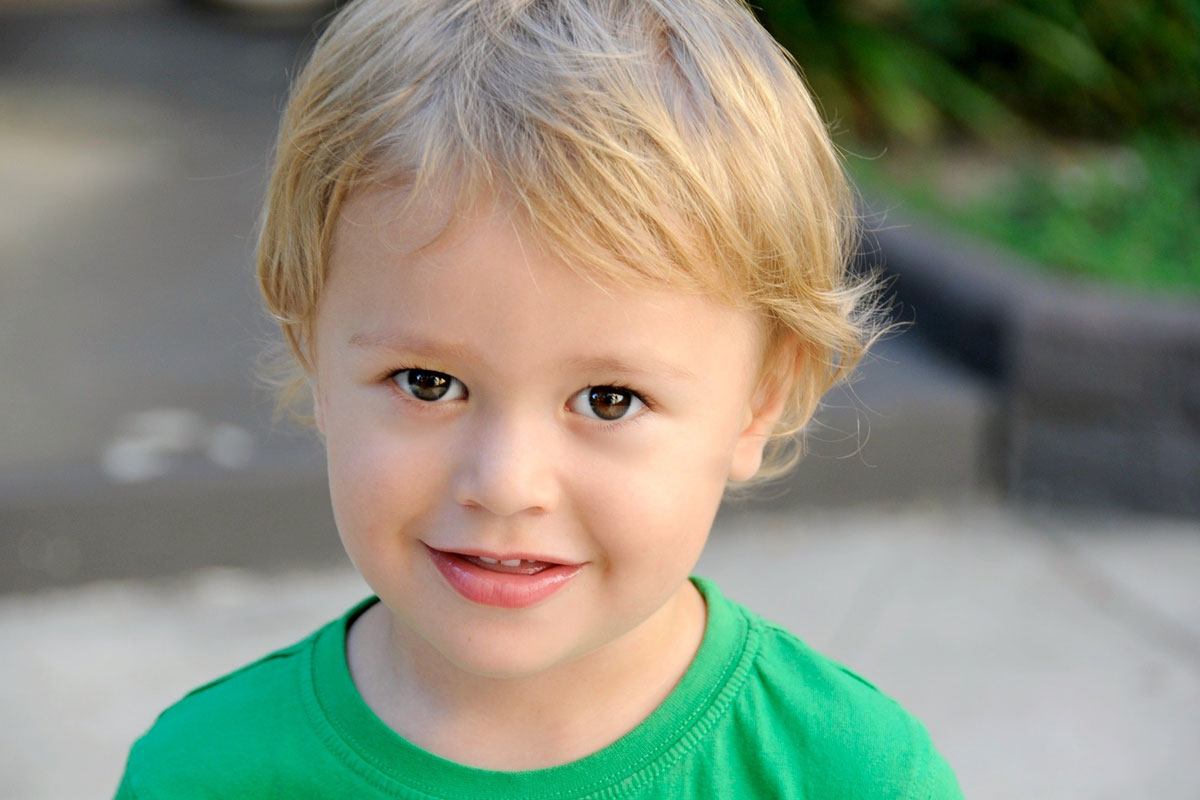
ORIGINAL
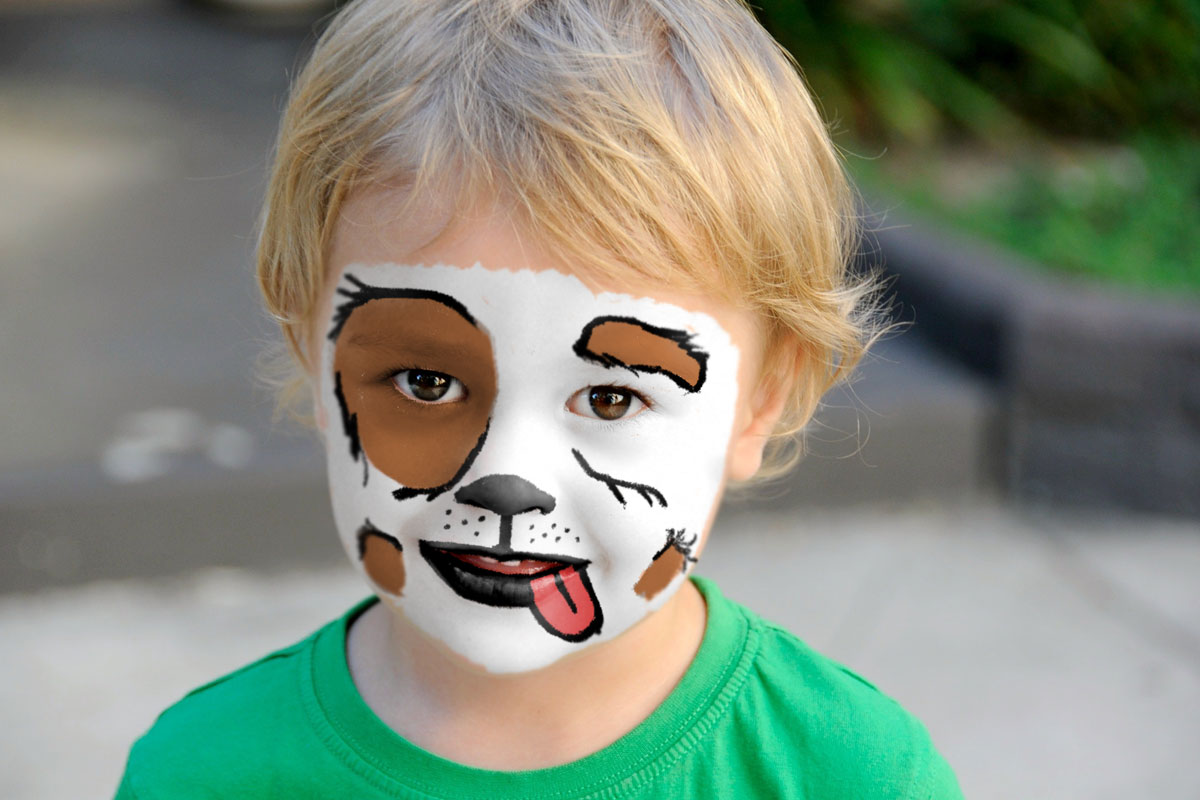
AFTER FACE PAINT EFFECT
Tutorial Description
Holidays like Halloween are the perfect time to get creative with Photoshop. Learn how to add realistic face paint mask to a portrait using Adjustment Layers, Channels, and a free custom Photoshop Brush!
The Face Paint Brush
We’ve created a Photoshop Brush that will make creating realistic paint strokes a breeze. You can get it using the download link above! To load the brush into Photoshop, click on the Window Menu and then select Brushes. Click on the Menu icon at the top right of the Brushes dialog and select Import Brushes. Navigate to the folder where you saved the download and select the file PHLEARN Facepaint.abr.
This brush is yours to keep and use forever! Follow along with the tutorial to see it in action and then try it on your own photos and effects.
Add Color with Hue/Saturation
For our face painting effect, we recommend starting with a base using light colors (Darker colors, like black, will require an extra step which we’ll cover next.)
The main tools we’ll be using are Hue/Saturation Adjustments Layers and the Brush Tool with our custom brush. Create a Hue/Saturation Adjustment Layer over top of the image and then adjust the hue, saturation, and lightness sliders until the skin matches the ‘paint’ color you want. And remember, you can change these settings at any time so don’t worry about getting the colors perfect right off the bat.
Once the color is close to what you want, Invert the Layer Mask of the Hue/Saturation Adjustment Layer (making it completely invisible). Next, select the Brush Tool and load the custom face paint brush. Using the brush, paint with white on the Layer Mask of the Hue/Saturation Adjustment Layer. This will make the color change visible only where you paint!
Continue this process by creating new Hue/Saturation Adjustment Layers for each new color that you want to use. And for an even more realistic effect, use Blend If to make the color effect less visible in the shadows of the image!
Add Highlights to Dark Colors
So what if you want to paint with a dark color like black? In order to get a realistic look, we’ll need to capture the original highlights from the image to place on top of any areas that we paint with a dark color.
To do this, go to the Channels tab. Look at each Channel and choose the one with the most contrast between light and dark. Duplicate the Channel and then use a Levels Adjustment to increase the contrast even further. Click the dotted circle icon at the bottom of the Channels Panel to turn this new Channel into a selection (the lighter areas of the Channel will get selected).
Back in the Layers Panel, create a new Layer and load this selection into the Layer Mask. Then grab the Brush Tool, with a soft round brush and a low Flow, and paint with white over any areas of the image where you added dark colored paint effects. This will recreate the natural highlights from the image over top of the ‘paint’ for a much more detailed and realistic effect.
That’s all! Now try it out on your own photos and make your own cute (or spooky) Halloween effects!
And a big Happy Halloween from the PHLEARN PHAMILY!